- Android. Вывод изображений, различные способы
- Handling and Displaying Images in Android
- Using the Image View to Display Images.
- Using the Image Switcher View in Android.
- Downloading and Setting Images on ImageView from Internet.
- Implementing a Gallery Using the Horizontal Scroll View.
- Conclusion
- Android TextView and Image loading from URL — Part 1
- Super Power 1: Displaying tag from remote URL.
- Image Display and Interaction with Android WebViews
- Step 1: Create an Android Project
- Step 2: Create the App Layout
- Step 3: Prepare for Loading Images
- Step 4: Load an Image from the Gallery
- Step 5: Load an Image from the Web
- Step 6: Load an Image From the App Directory Structure
- Step 7: Configure WebView Image Interaction
- Conclusion
Android. Вывод изображений, различные способы
Эта статья будет полезна начинающим разработчикам, здесь я предложу несколько вариантов вывода изображений на Android. Будут описаны следующие способы:
Обычный метод – стандартный способ, используя ImageView. Рассмотрены варианты загрузки картинки из ресурса, а также из файла на SD карте устройства.
Продвинутый вариант — вывод изображения, используя WebView. Добавляется поддержка масштабирования и прокрутки картинки при помощи жестов.
“Джедайский” способ – улучшенный предыдущий вариант. Добавлен полноэкранный просмотр с автоматическим масштабированием изображения при показе и поддержкой смены ориентации устройства.
Исходники тестового проекта на GitHub github.com/Voldemar123/andriod-image-habrahabr-example
В этой статье я не рассматриваю вопросы загрузки изображений из Интернета, кеширования, работы с файлами и необходимых для работы приложения permissions – только вывод картинок.
Итак, задача — предположим, в нашем приложении необходимо вывести изображение на экран.
Картинка может размерами превышать разрешение экрана и иметь различное соотношение сторон.
Хранится она либо в ресурсах приложения, либо на External Storage — SD карте.
Также допустим, мы уже записали на карту памяти несколько изображений (в тестовом проекте – загружаем из сети). Храним их в каталоге данных нашего приложения, в кеше.
public static final String APP_PREFS_NAME = Constants.class.getPackage().getName();
public static final String APP_CACHE_PATH =
Environment.getExternalStorageDirectory().getAbsolutePath() +
«/Android/data/» + APP_PREFS_NAME + «/cache/»;
Layout, где выводится картинка
android:layout_width=»match_parent»
android:layout_height=»match_parent»
android:orientation=»vertical» >
Масштабирование по умолчанию, по меньшей стoроне экрана.
В Activity, где загружаем содержимое картинки
private ImageView mImageView;
mImageView = (ImageView) findViewById(R.id.imageView1);
Из ресурсов приложения (файл из res/drawable/img3.jpg)
Задавая Bitmap изображения
FileInputStream fis = new FileInputStream(Constants.APP_CACHE_PATH + this.image);
BufferedInputStream bis = new BufferedInputStream(fis);
Bitmap img = BitmapFactory.decodeStream(bis);
Или передать URI на изображение (может хранится на карте или быть загружено из сети)
mImageView.setImageURI( imageUtil.getImageURI() );
Uri.fromFile( new File( Constants.APP_CACHE_PATH + this.image ) );
Этот способ стандартный, описан во множестве примеров и поэтому нам не особо интересен. Переходим к следующему варианту.
Предположим, мы хотим показать большое изображение (например фотографию), которое размерами превышает разрешение нашего устройства. Необходимо добавить прокрутку и масштабирование картинки на экране.
android:layout_width=»match_parent»
android:layout_height=»match_parent»
android:orientation=»vertical» >
В Activity, где загружаем содержимое
protected WebView webView;
webView = (WebView) findViewById(R.id.webView1);
установка черного цвета фона для комфортной работы (по умолчанию – белый)
включаем поддержку масштабирования
больше места для нашей картинки
webView.setPadding(0, 0, 0, 0);
полосы прокрутки – внутри изображения, увеличение места для просмотра
загружаем изображение как ссылку на файл хранящийся на карте памяти
webView.loadUrl(imageUtil.getImageFileLink() );
«file:///» + Constants.APP_CACHE_PATH + this.image;
Теперь мы хотим сделать так, чтобы картинка при показе автоматически масштабировалась по одной из сторон, при этом прокрутка остается только в одном направлении.
Например, для просмотра фотографий более удобна ландшафтная ориентация устройства.
Также при смене ориентации телефона масштаб изображения должен автоматически меняться.
Дополнительно расширим место для просмотра изображения на полный экран.
В AndroidManifest.xml для нашей Activity добавляем
В код Activity добавлен метод, который вызыватся при каждом повороте нашего устройства.
@Override
public void onConfigurationChanged(Configuration newConfig) <
super.onConfigurationChanged(newConfig);
changeContent();
>
В приватном методе описана логика пересчета масштаба для картинки
Получаем информацию о размерах дисплея. Из-за того, что мы изменили тему Activity, теперь WebView раскрыт на полный экран, никакие другие элементы интерфейса не видны. Видимый размер дисплея равен разрешению экрана нашего Android устройства.
Display display = ((WindowManager) getSystemService(Context.WINDOW_SERVICE)).getDefaultDisplay();
int width = display.getWidth();
int height = display.getHeight();
Размеры изображения, выбранного для показа
Bitmap img = imageUtil.getImageBitmap();
int picWidth = img.getWidth();
int picHeight = img.getHeight();
Меняем масштаб изображения если его высота больше высоты экрана. Прокрутка теперь будет только по горизонтали.
if (picHeight > height)
val = new Double(height) / new Double(picHeight);
Подбрасываем в WebView специально сформированный HTML файл, содержащий изображение.
webView.loadDataWithBaseURL(«/»,
imageUtil.getImageHtml(picWidth, picHeight),
«text/html»,
«UTF-8»,
null);
StringBuffer html = new StringBuffer();
Такой способ я применил из-того, что после загрузки изображения в WebView через метод loadUrl, как в прошлом варианте, setInitialScale после поворота устройства не изменяет масштаб картинки. Другими словами, показали картинку, повернули телефон, масштаб остался старый. Очень похоже на то, что изображение как-то кешируется.
Я не нашел в документации упоминания об этом странном поведении. Может быть местные специалисты скажут, что я делаю не так?
Источник
Handling and Displaying Images in Android
Android provides many views which we can use to define a user interface for our apps. Amongst these it provides a large number to display information and take input from the user, these include text and image views.
Android provides views which can be used to display images from various sources and provide transitions between them. Some of these views are the ImageView and the ImageSwitcher . These views provide a high level of functionality to display images in a user interface so that we can concentrate on the images we want to display rather than taking care of rendering.
In this article we are going to see how we can use these views effectively in a user interface.
Using the Image View to Display Images.
To render images Android provides us with the ImageView class. Let’s start by creating a program that will use an ImageView to display some images and a button which when clicked will change the image in the ImageView . You can find the code for this section on GitHub.
Create a basic Android project with an Activity that sets the main view from a layout file and does nothing else. Then open the layout file and add the ImageView and a button as shown below:
In the code above we created a LinearLayout and added an ImageView to display an image and a button which will rotate the images in the imageView .
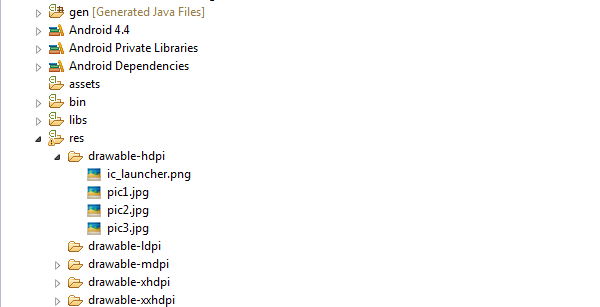
Add some images to the resource folder depending on the screen sizes you are planning to support as shown below:
Now update your Activity code as follows, using appropriate names for your project:
Above we created an Array of the resource IDs for the images stored in our resources folder. In the OnCreate method we set the content view to the layout created. In the setImageRotateListener function we set up a listener to the onClick event of the button which changes the currentImage counter and sets the new image in the ImageView .
The setCurrentImage function gets the ImageView object using the findViewById function, then sets the resource id of the current image using the setImageResource function on the ImageView which will display the image in the image view.
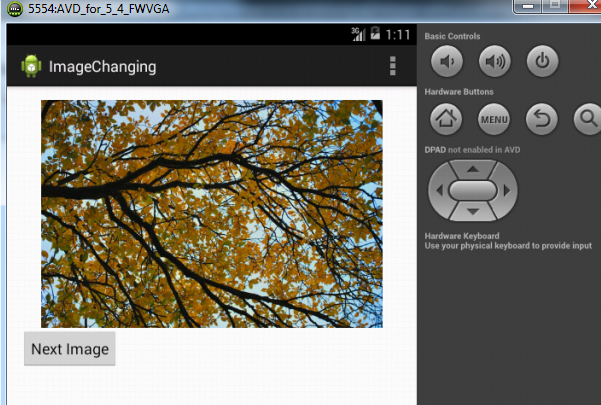
If you run the program you should see the image in the image view and clicking it should change the image to the next one:
Using the Image Switcher View in Android.
In the above example we switched the image in the image view. This switching of images does not happen in a very smooth way and you might want to use a transition when the image changes. For this we use the ImageSwitcher View.
First add an image switcher view to the layout as follows:
Then add the following code to our Activity which will initialise the ImageSwitcher and setup the button to change the image with a transition.
In the code above we get the ImageSwitcher object and then set the ViewFactory which creates a plain ImageView . Then we set the animation to fade in and fade out. We update the setCurrentImage function to set the images in the ImageSwitcher.
Now the image will change with an animation.

Downloading and Setting Images on ImageView from Internet.
You might not always have images available to you locally and may instead want to display them from the internet.
You should not undertake any network operations in the UI thread, instead the download should happen in a different background thread. We will do this in an Async Task. First set the permission to use the Internet in our AndroidManifest.xml as follows:
The layout of your project should have one ImageView and a Button as shown:
Then we create an AsyncTask which takes the ImageView and URL to download, downloads the image and sets the image in the ImageView .
The ImageDownloader async task downloads the image data and sets the ImageView . The complete activity code should now be as follows:
In the above code we stored the URLs of the images in the imageUrls array. In the setCurrentImage function we pass the ImageView to the ImageDownloader Async task and pass the URL of the image to download and set in the ImageView . The ImageDownloader Async task will download the image and set it in the ImageView .
Implementing a Gallery Using the Horizontal Scroll View.
In the above examples we saw how to display one image at a time using an ImageView . Sometimes we might want to display a variable number of images and let the user scroll through them. This we can achieve by putting a LinearLayout inside a horizontal scrollView and then dynamically add ImageViews to that linear layout. For this we create a new activity called ImageGalleryActivity and update the layout file accordingly:
And code of the Activity:
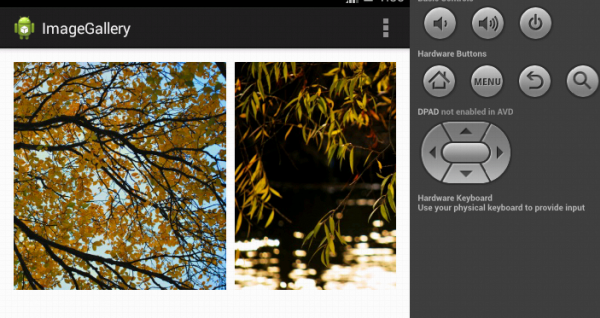
In the code above we dynamically create the ImageViews and add margins to them. The LinerLayout has the orientation set to horizontal. Now if we run the program, we will be able to see the images in a Horizontally scrollable gallery as seen below.
Conclusion
Images are a big part of modern mobile interfaces and hopefully this tutorial has shown you some of the tools Android provides to make this easy. What are you waiting for? Get visual!
Источник
Android TextView and Image loading from URL — Part 1

Muhammed Rajeef M K
Apr 29, 2017 · 2 min read
If you’ve ended up in a situation where you need to give super powers to your humble TextView and this super power includes :
Search no more, this article is for you.
Super Power 1: Displaying tag from remote URL.
By default, TextView does provide a way to display HTML.
Let’s say the html content you want to display is this :
You can do something like this :
But, say this html content contains an tag, you’re textview would end up looking like this :

From documentation it clearly says that tag will be replaced with a placeholder image like above. Which clearly doesn’t serve our purpose.
Now, the solution for how to display this is all over stackoverflow but surprisingly mixed up. Eg: Most of the solutions involve displaying image from the drawable using an ImageGetter Or others suggested going for WebView. ( We all know how that story will end up. Planning to write about my personal love-affair with WebView soon !).
My requirement was to load the image from a URL. Since I use Picasso to load remote images, I tried checking stackoverflow for solutions related to this and was thankful to find couple of them.
Given below is my implementation of ImageGetter based on couple of stackoverflow answers :
Источник
Image Display and Interaction with Android WebViews
In this tutorial, we will work through the basics of using a WebView to display images within your app, configuring the automated interaction controls from within your Java code. We will also explore various options for importing images into a WebView, including loading images from Web locations, from the device Gallery, and from within the app’s directory structure.
Step 1: Create an Android Project
If you do not already have an app you are working with, start a new Android project in Eclipse. In your app’s main Activity class, or whatever Activity you want to display images within, add the following import statements before your class declaration opening line:
You may not need all of these depending on how you plan on loading your images. If you plan on loading your images over the Web, you need to add Internet permission to your project Manifest. Open the Manifest and add the following line anywhere inside the parent «manifest» element:
Step 2: Create the App Layout
We are going to use a single WebView inside a Linear Layout to explore displaying images. Inside your project’s main XML layout file, or whichever one you want to use for the Activity in question, add the following layout outline:
Inside this main Linear Layout, first add your WebView as follows:
We will use the ID attribute to identify the WebView in Java. Since the layout is going to include other elements, we specify a weight along with the general layout properties. To demonstrate loading the images from three different locations, we are also going to add three buttons. If you only plan on using one of the loading methods, feel free to alter this. After the WebView, still inside the main Linear Layout, add the following additional Linear Layout:
Here we include three buttons inside a second Linear Layout, with ID attributes so that we can implement button clicks in Java. You will also need to add the following to your Strings XML file, which you should find in the app’s «res/values» directory:
Step 3: Prepare for Loading Images
In your app Activity class, alter your opening class declaration line to implement click listeners as follows:
Alter the class name to suit your own. Now add the following inside the class declaration, before the «onCreate» method:
Your «onCreate» method should already be there, but if not add it as follows:
This is standard code to create the Activity. Inside this method, after the existing code, retrieve a reference to your WebView and alter its display color as follows:
This will allow us to load images into the WebView while the app runs. The WebView displays with a white background by default, which we are overriding here. After the «onCreate» method, still inside the class declaration, add the outline of your «onClick» method as follows:
We will add code to handle each button click inside this method.
Step 4: Load an Image from the Gallery
Let’s start by allowing the user to load an image from the Gallery on their own device. First, add an instance variable inside your class declaration, but before the «onCreate» method:
This will allow us to respond to the user returning from the Gallery after choosing an image. Inside the «onCreate» method, after the existing code, add the following to retrieve a reference to the «pick» button and assign a click listener to it:
Now we can respond to button clicks. Inside the «onClick» method, add the following:
This will take the user to another application to select an image. Depending on which apps they have installed, they may need to select an app from a list. For example, on my device I receive two choices on pressing the «pick» button:


When the user chooses an image, they will return to the app and the «onActivityResult» method will fire. Add it to your class declaration as follows:
Inside the «if» statement, add the following to check that the user is returning from the Intent we started for them to choose an image:
Inside this «if» statement, we can retrieve the data returned from the Gallery app, which will be the URI of the image the user picked:
We will build a String representing the path for the image, which we need to load the image into the WebView. We are using the same technique explored in more detail in Displaying Images with an Enhanced Gallery. Add the following code:
Now we have a reference to the image location and can load it into the WebView:
You can run your app now to test it loading the Gallery image — you may need to run it on an actual device as the emulator does not normally have images stored on it.


Next we will handle loading from the Web and the app directory, before exploring configuration options for the WebView.
Step 5: Load an Image from the Web
Now for a simpler option. To load an image from the Web, we simply need the URL. First, back in the «onCreate» method, implement button clicks on your «load» button as follows:
In the «onClick» method, after the «if» statement in which we handled the «pick» button, add the following, altering it to suit your own image URL:
Here we are simply loading one of the Android Google Play image resources for demonstration, but you can of course alter it to reflect an image of your choice. If you want the user to enter their chosen image you can add an editable text-field to capture this. The image will load providing the device has a functioning Internet connection:


Step 6: Load an Image From the App Directory Structure
You may have images within your application package that you wish to display in a WebView. We will explore two possible ways to achieve this. First, back in your «onCreate» method, handle button clicks:
Add another branch to the «if» and «else» statements in your «onClick» method as follows:
To display only an image in the WebView, you can simply specify its URL:
This loads a JPEG image file stored in the app’s «assets» folder and named «mypicture.jpg».
The WebView is naturally designed to display HTML content, so you may wish to display the image as an HTML «img» element along with other Web markup. To do so, you can save an HTML file in the app’s «assets» folder with an «img» element inside it, for example:
You may include other HTML content in this file if you want it to display in your WebView along with the image. To load the HTML, alter the «loadURL» line as follows:
This works for an HTML file saved as «imagepage.html» in the «assets» folder, so alter it to suit the name of your own file. This code is all you need to load the image within the HTML file.
Step 7: Configure WebView Image Interaction
You can set some of the details of how the user interacts with your image inside the WebView from your Java Activity code. In the «onCreate» method, after your button listener code, add the following:
This instructs the app to use the standard zoom controls and wide View Port for your WebView. There are other options you can explore here, such as setting the default zoom level. Now when the user interacts with your WebView, they can double-tap and pinch to zoom, as well as using the buttons and sliding to scroll/ pan:


Conclusion
Making use of default Android resources such as the WebView allows you to quickly exploit interaction models your users will already be familiar with, as well as letting you focus on the unique aspects of your applications. The WebView renders HTML pages, so you can also enhance your apps by using Web technologies such as CSS and JavaScript. As you can see from the above example, you can effectively integrate the WebView with other Android UI items.
Источник


