- Файл iTunesMetadata.plist в приложениях Xamarin.iOS
- Содержимое файла iTunesMetadata.plist
- UIRequiredDeviceCapabilities
- artistName и playlistArtistName
- bundleDisplayName, itemName и playlistName
- bundleShortVersionString и bundleVersion
- softwareVersionBundleId
- авторские права
- releaseDate
- softwareIconNeedsShine
- gameCenterEnabled и gameCenterEverEnabled
- genre, genreId и subgenres
- softwareSupportedDeviceIds
- Стандартные ключи
- Создание файла iTunesMetadata.plist
- Использование визуального редактора файлов plist
- How To: Working with Plist in Swift
- Table of Contents
- What’s a Plist?
- Reading a Plist with Swift
- Reading a Plist with Codable
- Writing Data to a Plist
- Further Reading
Файл iTunesMetadata.plist в приложениях Xamarin.iOS
В статье описывается файл iTunesMetadata.plist, который предоставляет в iTunes информацию о приложении при прямом распространении для тестирования или корпоративного развертывания.
При создании приложения в iTunes Connect (для продажи или для бесплатного распространения через iTunes App Store) разработчик может указать сведения, такие как жанр приложения, поджанр, уведомление об авторских правах, поддерживаемые устройства iOS и требуемые параметры устройства. В распространяемых напрямую приложениях iOS, предназначенных для тестировщиков или корпоративных пользователей, эта информация отсутствует.
Для предоставления этой информации при распространении напрямую можно создать и включить в IPA необязательный файл iTunesMetadata.plist . PLIST-файл представляет собой XML-файл со специальным форматированием (подробные сведения см. в разделе Руководство по программированию списка свойств Apple), который содержит пары «ключ-значение», задающие сведения об этом приложении iOS.
Содержимое файла iTunesMetadata.plist
Ниже представлен типовой пример файла iTunesMetadata.plist , используемого для предоставления iTunes сведений при прямом распространении:
Значения каждого ключа будут подробно рассмотрены ниже.
UIRequiredDeviceCapabilities
Ключ UIRequiredDeviceCapabilities сообщает iTunes, какие функции должно поддерживать конкретное устройство для установки приложения на это устройство iOS. Ключ состоит из словаря ( . ) функций ( . ), а также логического значения для каждой функции. Если значение для функции true , то наличие этой функции необходимо. Если false , то эта функция должна отсутствовать в устройстве. Пример:
Указывает на то, что для установки данного приложения на устройство это устройство iOS должно поддерживать набор инструкций ARM7 и иметь фронтальную камеру. Полный список допустимых значений см. в разделе UIRequiredDeviceCapabilities документации корпорации Apple.
artistName и playlistArtistName
В ключах artistName и playlistArtistName указывается название компании, создавшей приложение. Название будет отображаться в iTunes. Пример.
bundleDisplayName, itemName и playlistName
В ключах bundleDisplayName , itemName и playlistName указывается имя приложения iOS, которое будет отображаться в iTunes. Пример.
bundleShortVersionString и bundleVersion
В ключах bundleShortVersionString и bundleVersion указывается номер версии приложения iOS, который отображается в iTunes. Пример.
softwareVersionBundleId
В ключе softwareVersionBundleId указывается идентификатор пакета приложения. Пример.
авторские права
В ключе copyright указывается уведомление об авторских правах, которое отображается в iTunes. Пример.
releaseDate
В ключе releaseDate указывается дата выпуска приложения iOS. Дата выпуска отображается в iTunes. Пример.
softwareIconNeedsShine
Используйте softwareIconNeedsShine ключ, чтобы сообщить iTunes, если для значка приложения iOS требуется softwareIconNeedsShine для iOS 6 (и более ранних версий). Пример.
gameCenterEnabled и gameCenterEverEnabled
Ключи gameCenterEnabled и gameCenterEverEnabled сообщают iTunes, поддерживает ли это приложение Apple Game Center. Пример.
genre, genreId и subgenres
Ключи genre и genreId сообщают iTunes, к какому жанру относится приложение. Пример.
Дополнительно можно использовать ключ subgenres для определения до двух поджанров приложения iOS. Пример.
Apple определяет следующие жанры и идентификаторы жанров для приложений iOS:
| Идентификатор жанра | Название жанра |
|---|---|
| 6000 | бизнеса |
| 6001 | Weather |
| 6002 | Служебные программы |
| 6003 | Командировки |
| 6004 | Спорт |
| 6005 | Социальные сети |
| 6006 | Справочник |
| 6007 | Производительность |
| 6008 | Фото & видео |
| 6009 | Новости |
| 6010 | Навигация |
| 6011 | Музыка |
| 6012 | Образ жизни |
| 6013 | Пригодность к работоспособности & |
| 6014 | Игры |
| 6015 | Finance |
| 6016 | Entertainment |
| 6017 | Образование |
| 6018 | Книги |
| 6020 | Медицина |
| 6021 | Киоск |
| 6022 | Каталоги |
Поджанры игр (6014):
| Идентификатор жанра | Название жанра |
|---|---|
| 7001 | Действие |
| 7002 | Adventure |
| 7003 | Аркады |
| 7004 | Доска |
| 7005 | Карточка |
| 7006 | Казино |
| 7007 | Кости |
| 7008 | Образование |
| 7009 | Семейство |
| 7010 | Дети |
| 7011 | Музыка |
| 7012 | Puzzle |
| 7013 | Гонки |
| 7014 | Ролевые игры |
| 7015 | Simulation |
| 7016 | Спорт |
| 7017 | Стратегия |
| 7018 | Викторины |
| 7019 | Word |
Поджанры новостей (6021):
| Идентификатор жанра | Название жанра |
|---|---|
| 13001 | &Политики новостей |
| 13002 | &Стиль стиля |
| 13003 | Домашний & Сад |
| 13004 | &Природа туризм |
| 13005 | &Свободное Спорт |
| 13006 | Автомобилестроение |
| 13007 | &Фотофотография |
| 13008 | Свадьбы & молодоженам |
| 13009 | Бизнес- & инвестиции |
| 13010 | Журналы для детей |
| 13011 | Компьютеры в & Интернете |
| 13012 | Приготовление, еда — & напитки |
| 13013 | Ремесла & хобби |
| 13014 | Звук бытовой электроники & |
| 13015 | Entertainment |
| 13017 | Работоспособность, & текст Распомните |
| 13018 | История |
| 13019 | &Журналы журналов литературного |
| 13020 | Мужчины |
| 13021 | Фильмы & музыка |
| 13023 | Семейство родителей & |
| 13024 | Домашние животные |
| 13025 | Professional & торговля |
| 13026 | Региональные новости |
| 13027 | Наука |
| 13028 | Подростки |
| 13029 | &Региональный выезд |
| 13030 | Женщины |
softwareSupportedDeviceIds
Ключ softwareSupportedDeviceIds сообщает iTunes, какие устройства с iOS поддерживает это приложение. Пример.
Допустимы следующие значения:
- 1 — классические iPhone
- 2 — iPod Touch
- 4 — iPad
- 9 — современные iPhone
Стандартные ключи
Следующие ключи содержатся во всех файлах iTunesMetadata.plist всех приложений iOS и всегда имеют одни и те же значения:
Создание файла iTunesMetadata.plist
При работе с файлом iTunesMetadata.plist в Visual Studio для Mac возможны два варианта:
- Создать и настроить файл а визуальном редакторе файлов plist Visual Studio для Mac.
- Создать и настроить файл в текстовом редакторе.
Ниже описываются оба способа.
Использование визуального редактора файлов plist
Выполните следующие действия:
В Обозреватель решенийщелкните правой кнопкой мыши файл проекта Xamarin. iOS и выберите Добавить новый файл.
В диалоговом окне Создание файла выберите список свойствiOS:

Введите iTunesMetadata для iTunesMetadata и нажмите кнопку создать .
Дважды щелкните iTunesMetadata.plist файл в iTunesMetadata.plist , чтобы открыть его для редактирования:
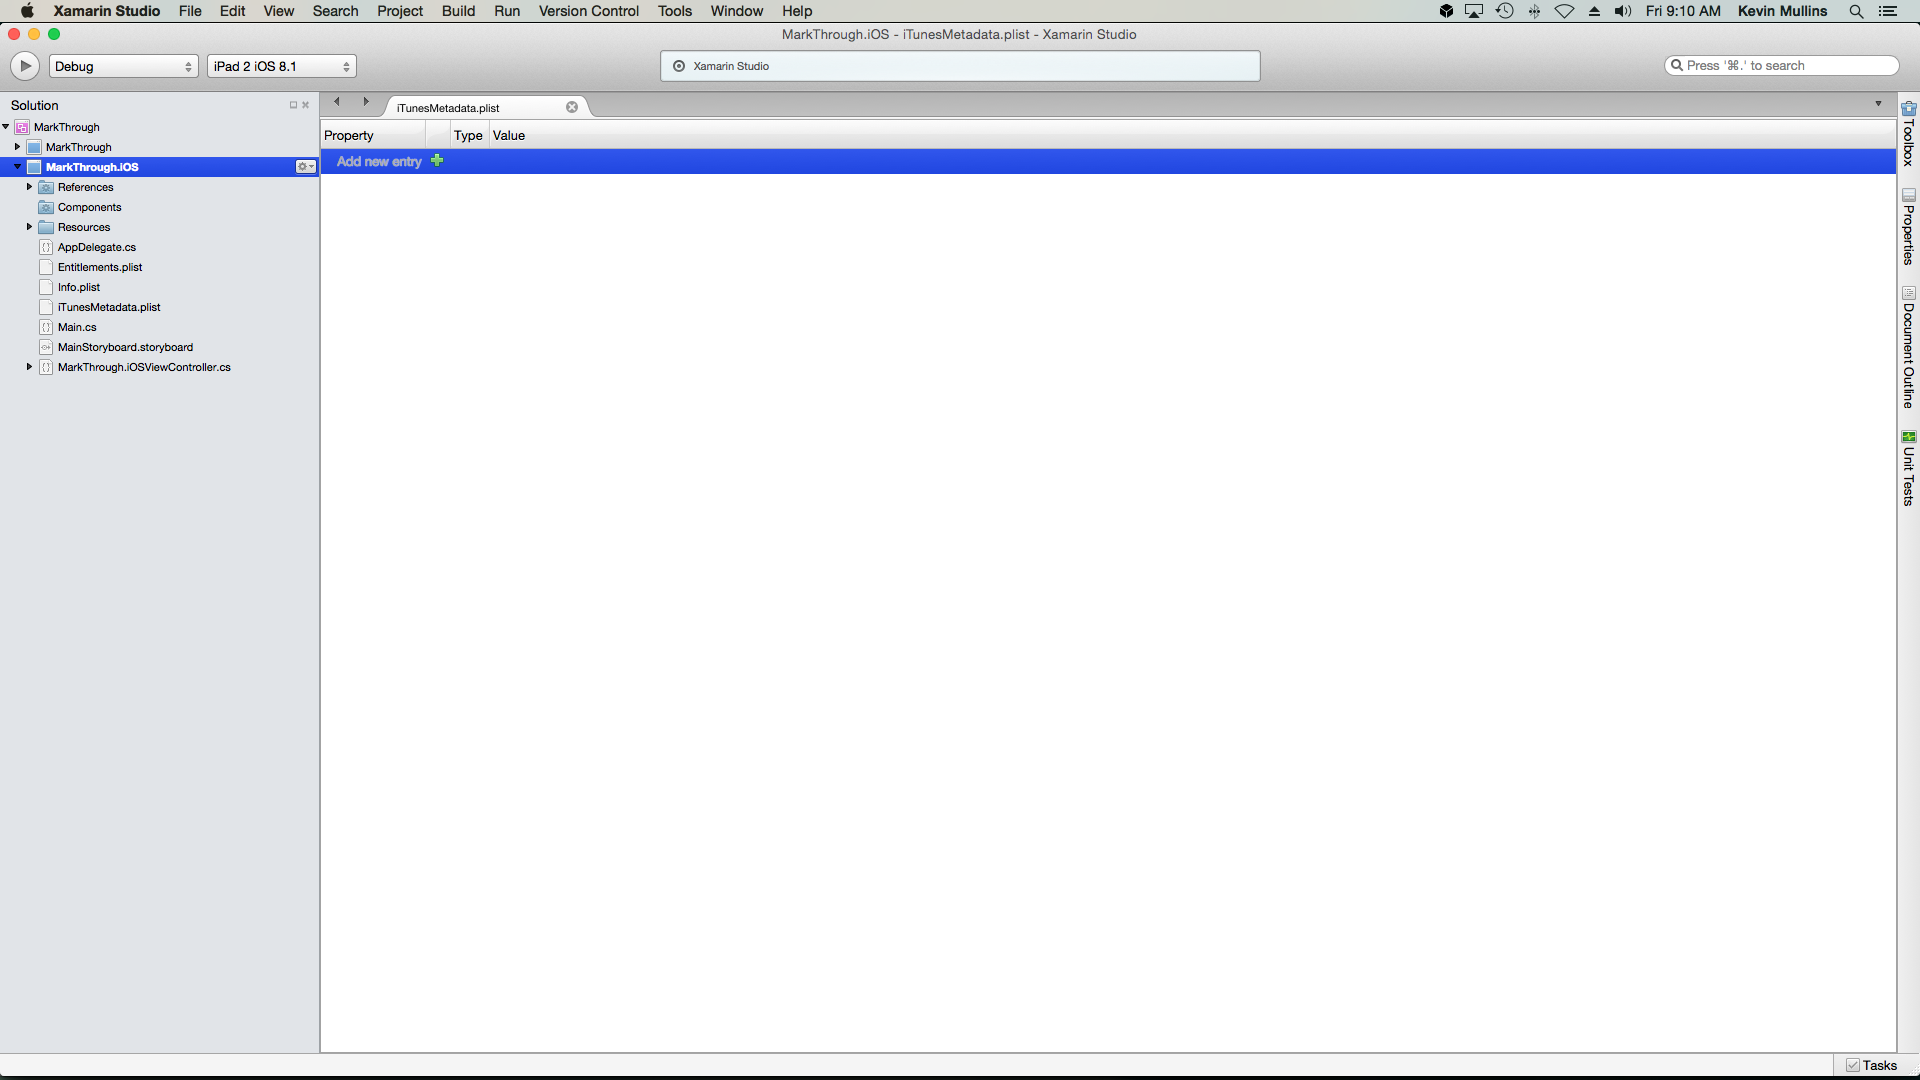
Нажмите зеленый + для создания новой записи и введите UIRequiredDeviceCapabilities в качестве имени ключа:

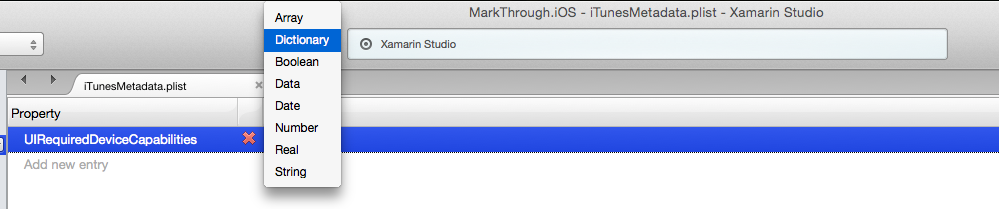
Нажмите на тип значение Строка и выберите Словарь в раскрывающемся списке:
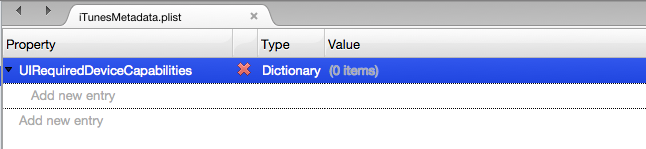
Нажмите стрелку вниз слева от имени свойства, чтобы показать элементы словаря:
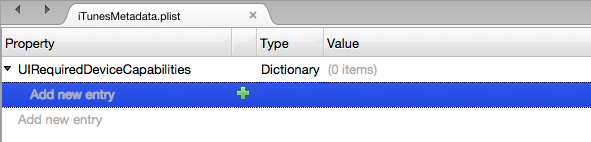
Щелкните Добавить новый текст записи , а затем щелкните зеленый, чтобы добавить запись в словарь:
Введите armv7 для имени ключа, выберите тип armv7 типа и введите Yes в качестве значения:
Источник
How To: Working with Plist in Swift

A property list, commonly abbreviated as plist, is an XML file that contains basic key-value data. You can use a plist in your iOS apps as a simple key-value data store. Let’s find out how that works!
In this tutorial we’ll dive into:
- What a property list is, and how you can use it
- How to read from and write to a property list
- What Info.plist is, and why it’s useful
- How to encode and decode property lists with Codable
Table of Contents
What’s a Plist?
A property list, or plist, is an XML file that contains key-value data. It’s easiest to compare with a dictionary in Swift, so it’s a list of values associated with keys. Here’s an example:
In the above screenshot you see a property list file called Fruit.plist. It has a top-level array, with a few items of type String. Here’s the same file, but as XML:
In Xcode you can see a plist’s XML structure by right-clicking on a .plist file, and choosing Open As → Source Code.
If you look closely, you can spot the different values and structures in the XML. Here’s a brief overview from top to bottom:
lines are boilerplate code that give information about the XML itself. A typical XML file has a so-called DTD, which contains information about the structure of XML.
The top level element of a plist, called the root, is always an array or a dictionary.
A property list can contain a few types of elements, including arrays, dictionaries, booleans, dates, Data, and numbers, such as integers. Every one of these types correspond to native Swift types, such as Array and Bool. You can also nest arrays and dictionaries, i.e. adding an array inside another array etc., to create more complex data structures.
Dictionary key-value pairs in plists aren’t wrapped in a container element. Instead, they’re written on 2 separate lines. Like this:
You don’t have to edit a property list as XML. That’s what’s so convenient about them! Simply open them with the property list editor, with Open As → Property List, and directly edit the rows.
A common property list in iOS projects is the Info.plist file. This plist contains information about your iOS project. It’s distributed as part of your app’s binary package, and iOS uses it for example to display your app’s name on an iPhone’s home screen.
See how there’s a ton of information about your app in Info.plist? As you build your app, you sometimes have to add more information to this property list. For example, if your app wants to access an iPhones photo library, the app plist needs to contain a key that explains the reason for accessing the photo library.
You can edit a property list as follows:
- To add a new row, right-click on the editor and choose Add Row
- To change a value’s type, click on the select button for a row, in the Type column.
- To change a row’s value, double-click on a value for a row, in the Value column.
- To remove a row, select it and press the Backspace key.
Some property lists will use a custom format, such as the Info.plist. When a property list has a custom format, you can’t just add any value to them. For instance, the Info.plist file can only contain dictionary elements with preset keys.
Let’s move on to find out how you can use property lists with Swift.
Reading a Plist with Swift
Property lists are perfect for saving simple, static key-value data in your app. Here’s how you can read a plist with Swift:
func getPlist(withName name: String) -> [String]?
<
if let path = Bundle.main.path(forResource: name, ofType: “plist”),
let xml = FileManager.default.contents(atPath: path)
<
return (try? PropertyListSerialization.propertyList(from: xml, options: .mutableContainersAndLeaves, format: nil)) as? [String]
>
return nil
>
Here’s how we can use the above function:
if let fruits = getPlist(withName: “Fruit”) <
print(fruits) // Output: [“Orange”, “Pineapple”, “Raspberry”, ]
>
What happens in the code?
- First, we’re using optional binding to get the path of the Fruit.plist file, and read the data from that file into the xml constant. If any of these two lines fails, path or xml are nil, and the conditional won’t execute.
- Then, inside the conditional, we’re deserializing the data from xml as a property list. The property list is returned as an array, but we’ll have to cast it to [String] because propertyList(from:options:format:) returns Any.
- When the conditional fails, or the type casting fails, or the propertyList(from:options:format:) call throws an error, the function returns nil. Otherwise it returns an array of type [String]?, so when we call getPlist(withName:) we’re using optional binding again to get the non-optional array fruits.
It’s important to point out that the type of fruit, and the return type of getPlist(withName:) is the same type as the data in our plist. The plist contains an array of strings, so the type of fruit is also [String]. You’ll always want to use the strictest possible type, such as [String: Any].
Warning: For the sake of simplicitly, the above code has no error handling. It’ll simply silence errors and return nil. This is a bad practice in production apps. You’ll want to include error handling code in case the file path doesn’t exist, or if the plist is invalid and an error is thrown.
Reading a Plist with Codable
The previous approach to read a property list is far from ideal. It’s too verbose and doesn’t use strict type checking. Any change in the plist structure could potentially break your code.
Since iOS 11 you can use the Codable protocol to directly decode different data types, such as JSON, to native Swift classes and structs. And you can also use Codable with plists!
Here’s the Preferences.plist we’ll use:
It contains a few simple user preferences for our app, similar to what you’d put in UserDefaults.
We now need a Preferences struct, that conforms to the Codable protocol. Like this:
struct Preferences: Codable <
var webserviceURL:String
var itemsPerPage:Int
var backupEnabled:Bool
>
It’s important that the structs properties exactly match the keys in the plist dictionary. And note that we’re adopting the Codable protocol.
The Preferences struct contains some arbitrary information about backups, about a webservice URL, and how many items we want to show per page. You can put anything in your own plist, of course.
What we’ll now do is turn the Preferences.plist file into an instance of the Preferences struct. That’s the power of Codable! Here’s how:
if let path = Bundle.main.path(forResource: “Preferences”, ofType: “plist”),
let xml = FileManager.default.contents(atPath: path),
let preferences = try? PropertyListDecoder().decode(Preferences.self, from: xml)
<
print(preferences.webserviceURL)
>
We’re using the same boilerplate code as before. First, we’re getting the path of the plist, and then getting the Data from the file, and assigning that to xml.
This line is the most relevant:
let preferences = try? PropertyListDecoder().decode(Preferences.self, from: xml)
By calling the decode(_:from:) function on an instance of PropertyListDecoder(), the property list file gets decoded to an instance of Preferences. We’re instructing the decoder to use that struct, with the first argument Preferences.self. Decoding and encoding a property list uses the exact same syntax as decoding/encoding JSON, but it uses a different decoder instance.
When the decoding succeeds, we can use the preferences object as any other ordinary Swift type:
Important: Again, we’re silencing any errors. Make sure you properly handle errors in your own apps.
Writing Data to a Plist
Can you also write a dictionary or array back to a property list file? Of course! Let’s say that the user doesn’t have a Preferences property list yet, so we’ll create a default for them. Here’s how:
let preferences = Preferences(webserviceURL: “https://api.twitter.com”, itemsPerPage: 10, backupEnabled: false)
With the above code we’re creating a new instance of Preferences that’s not yet stored as a property list. And here’s how we save it:
let encoder = PropertyListEncoder()
encoder.outputFormat = .xml
let path = FileManager.default.urls(for: .documentDirectory, in: .userDomainMask)[0].appendingPathComponent(“Preferences.plist”)
do <
let data = try encoder.encode(preferences)
try data.write(to: path)
> catch <
print(error)
>
This is what happens in the above code:
- First, we’re creating a PropertyListEncoder object and setting the output format to .xml. (Other options are .binary and the ancient .openStep.)
- Then, we’re creating a URL object with a reference to a Preferences.plist file in the app’s document directory. This is a directory in the app’s container that we’re allowed to put files in.
- Then, in the do-try-catch block, we’re first using the encoder to encode the preferences object to a Data object. After that, we simply write the data to the file referenced by path.
Easy-peasy! The encoder turns the Preferences object into data that uses the XML property list format, and writes that to a file. And later on, we can read that same file URL to get the Preferences object back again.
The iOS SDK has a few helpful component for encoding and decoding data formats, such as PropertyListEncoder, NSKeyedArchiver, NSCoding and JSONEncoder. They’re worth checking out!
Further Reading
And that’s all there is to it! Property lists are useful for reading and writing user settings to a file, and they’re easy to edit in Xcode.
Quick Tip: MacOS has a command-line tool called plutil that you can use to edit property lists. Type plutil -help in Terminal to read how you can use it.
Источник


