- Exploring Android Canvas Drawing— For Shapes, Bitmaps andCustom views.
- So what exactly is Android Canvas ?
- Your mobile screen is your canvas
- Create your own custom view class
- The magic methods : onDraw() and invalidate()
- Drawing basics
- Draw Line
- Draw Circle
- Draw Rectangle
- Draw Square
- Getting tougher : Draw Triangle ()
- Update Canvas
- View or SurfaceView ?
- How To : Draw on Top of Any Screen on Your Android Device
- Step 1: Install «Draw on Screen»
- Step 2: Get Familiar with the Controls
- Step 3: Draw on Top of Any Screen
- Getting Started with Android Canvas Drawing 🖼
- Learn the basics of drawing with the Android Canvas Class
- What is a Canvas?
- Canvas Coordinate System
- How do I use a Canvas?
- Get access to a Canvas instance
- What can I draw on a Canvas? ✏️
- Paint 🎨
- Next up…
Exploring Android Canvas Drawing— For Shapes, Bitmaps andCustom views.

Jan 9, 2019 · 6 min read
Would you like to
- Create your own drawing (UI) on the screen OR create custom views ?
- Modify existing views and customize their look and feel ?
- Draw any shape, view or just bitmaps ?
- Create something which isn’t already available ?
The power of Android for free hand drawing on pen and paper !
Android Canvas gives you exactly that. Just dive in and create your own magic.

If you know the basics and directly want to view the code, find the entire source code here on GitHub.
So what exactly is Android Canvas ?
The Android framework APIs provides a set of 2D d r awing APIs that allow you to render your own custom graphics onto a canvas or to modify existing Views to customize their look and feel. Basically, Canvas is a class in Android that performs 2D drawing onto the screen of different objects.
Your mobile screen is your canvas
Just consider you mobile screen as a blank paper and draw on it. You need to define anchor points and shapes so as to draw on the screen. Remember the school level graphs ? Something very similar.
Define X & Y coordinates and the shape you want.

Create your own custom view class
Just create custom view class. Since you want to draw your own UI , extend View class to get the lifecycle of the basic view hierarchy.
Define a paint object with default colors and styling
Create and initialise the paint object in your constructor only. Most of the times, our basic settings don’t change. We can then use this paint object every where else in the code and only change properties we want.
The magic methods : onDraw() and invalidate()
All of canvas drawing will happen in onDraw method. Whenever you want to draw any custom objects , you set the paint styling, call default draw.. API methods. All these internally call onDraw.
Get your canvas instance in onDraw and save it for drawing.
Every time, you draw something new on the canvas , you need to refresh it. Your entire canvas is re-drawn. And hence you need to perform minimal operations in onDraw().
To tell the view, that is has to refresh use invalidate() method.
Remember our paint object is initialised in constructor so that we don’t create it again and again on draw. OnDraw gets called every single time you want to change anything on the UI. So it’s an expensive call. We don’t want to do anything extra than required on onDraw method.
Drawing basics
A variety of basic draw API’s are available on the canvas object. We can use these basic API;s to create our own custom shapes and figures. some common ones are :

- drawCircle
- drawLine
- drawOval
- drawPoints
- drawText
- drawRect
- drawPath
Draw Line
You define the two points with their x, y coordinates and draw path between them.
Draw Circle
The simplest shape. You just need to specify the x coordinate, y coordinate on the screen and the radius. Also set any paint color if you want.
Draw Rectangle
Create a rectangle with x, y, height, width.
Draw Square
Create a rectangle object, with the required coordinates, with the same width and height.
Getting tougher : Draw Triangle ()
Triangle is basically three vertices connected with a line. You need to find those three vertices and draw a line between them.
Below we draw an equilateral triangle

Update Canvas
If you follow the MVP / MVVM / etc other architectural pattern, you might want to refresh your canvas from other layers. Just get the canvas object , do all your business logic for drawing, and then run invalidate.
View or SurfaceView ?
If you want to know more about multi-threading
[Use View : If your application does not require a significant amount of processing or frame-rate speed (perhaps for a chess game, a snake game, or another slowly-animated application). In the same thread as your UI Activity, wherein you create a custom View component in your layout, call invalidate() and then handle the onDraw() callback.
Use SurfaceView — If you have high computation or so the application doesn’t to wait until the system’s View hierarchy is ready to draw and want to run in a separate thread, wherein you manage a SurfaceView and perform draws to the Canvas as fast as your thread is capable (you do not need to request invalidate() )]
You can deep dive into the code here on GitHub and check out details there.

In the next article, we will learn more on handling touch events on Canvas like touch, click, long press, etc.
Thats’ it. Thank you for reading. Please let me know what you liked in the article and what would you like to know more.
Источник
How To : Draw on Top of Any Screen on Your Android Device
Android has a permission that allows apps to draw on top of other apps, but as fun as that may sound, it has mostly been used to create floating multitasking utilities. While these can certainly be useful, it would still be nice if this permission were taken literally and we could actually draw on top of apps.
Well, if you’ve ever felt like channeling your inner John Madden and turning your Android device into a telestrator, a new app from developer Daniel Tan has your name written all over it. Capable of taking quick notes or simply drawing on top of any screen, this app is both useful and fun.
Step 1: Install «Draw on Screen»
Whether you’re in it for the fun of using your finger to draw on any screen, or you’re planning on taking quick notes, head to the Google Play Store and search Draw on Screen to get the app installed.
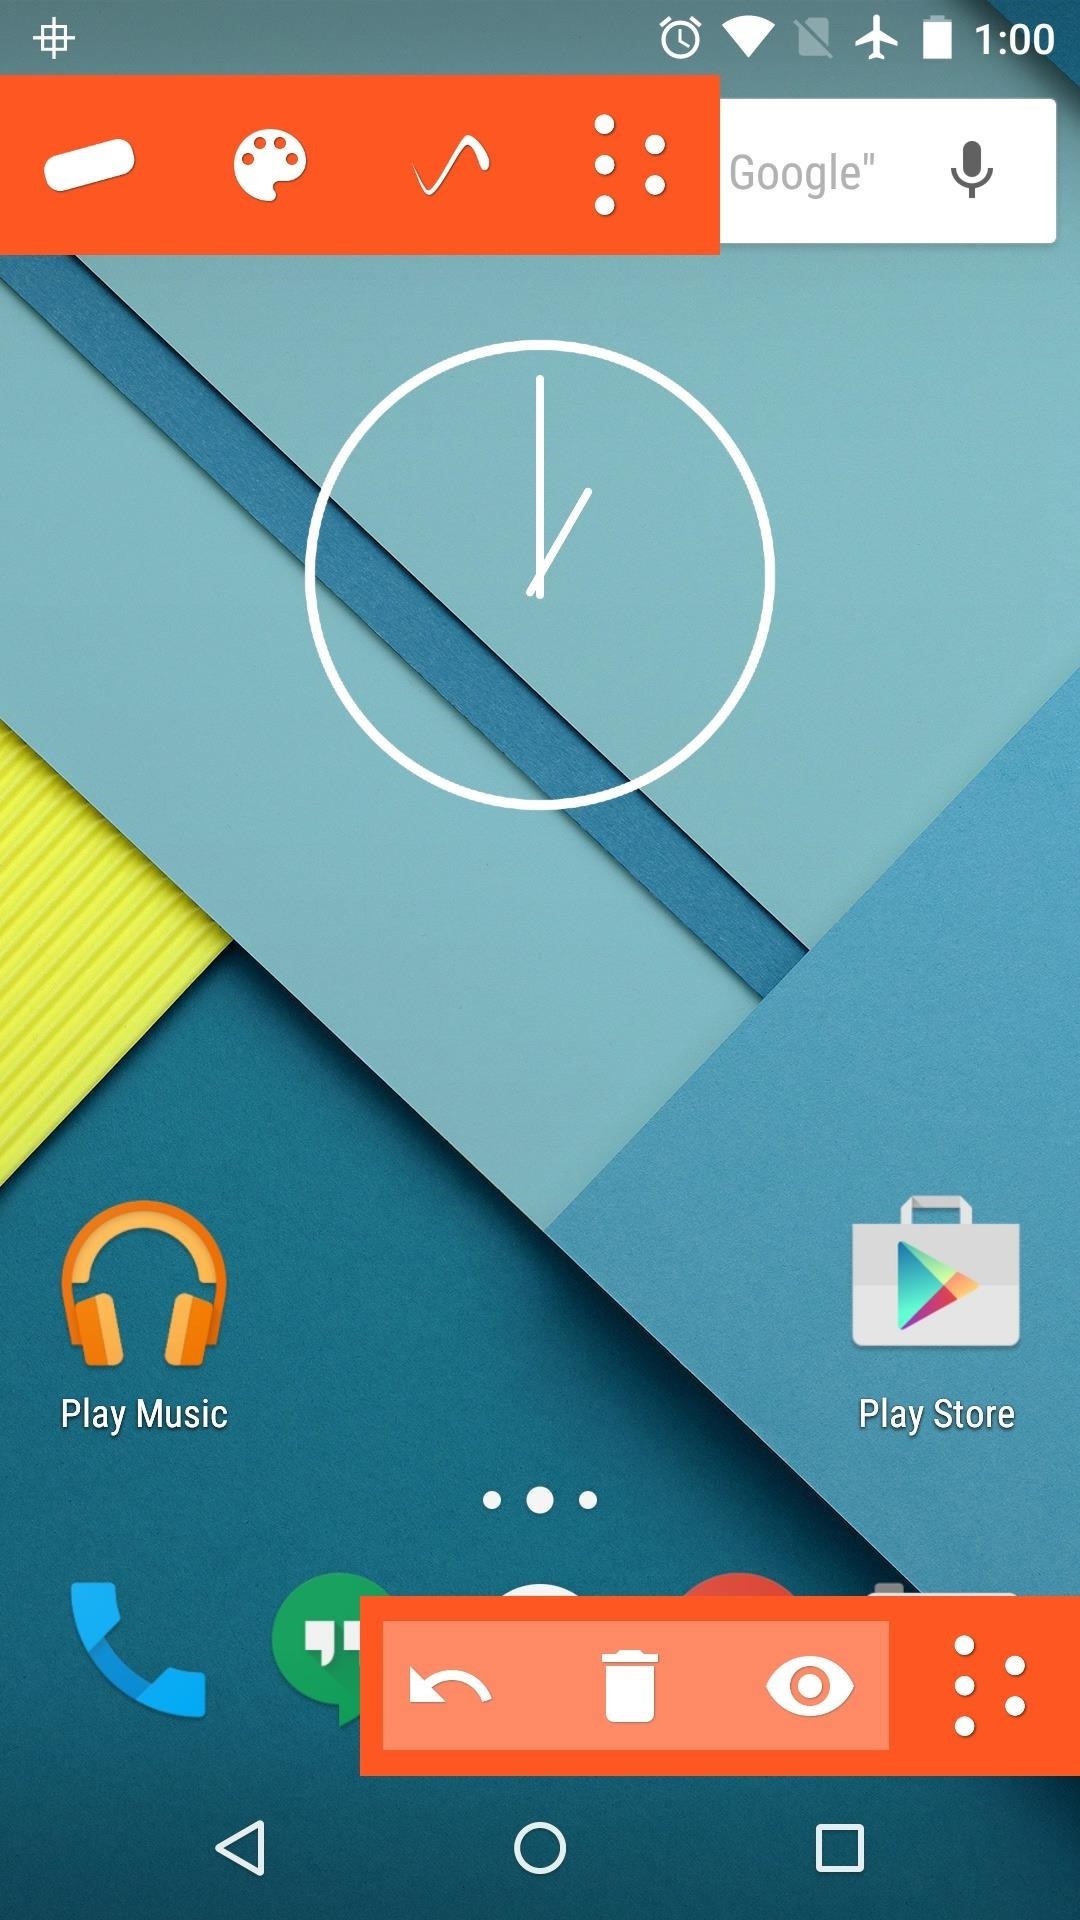
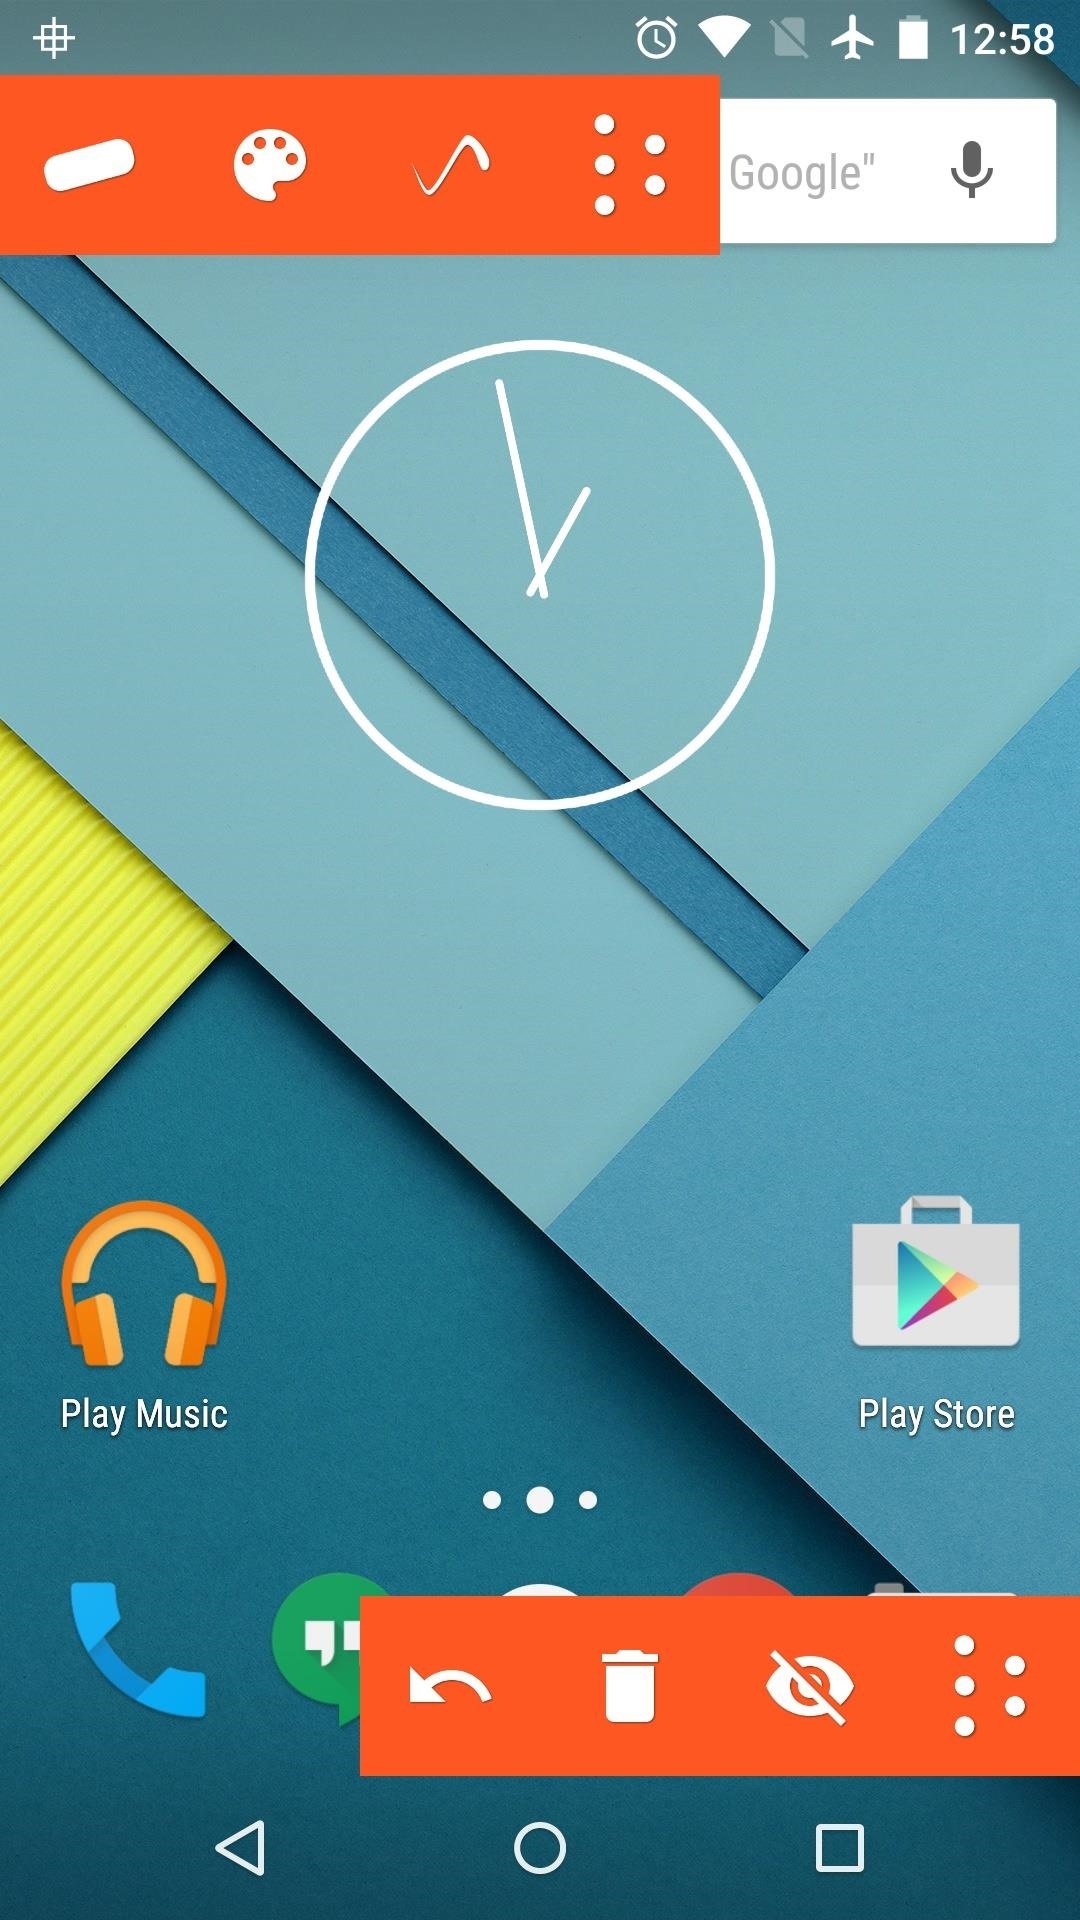
Step 2: Get Familiar with the Controls
As soon as you launch Draw on Screen, you’ll see a set of on-screen controls. The controls at the bottom will allow you to undo, delete, and hide the drawings you’ve made. The upper control bar lets you change brush size and color, but these functions require an in-app purchase of $1.69.
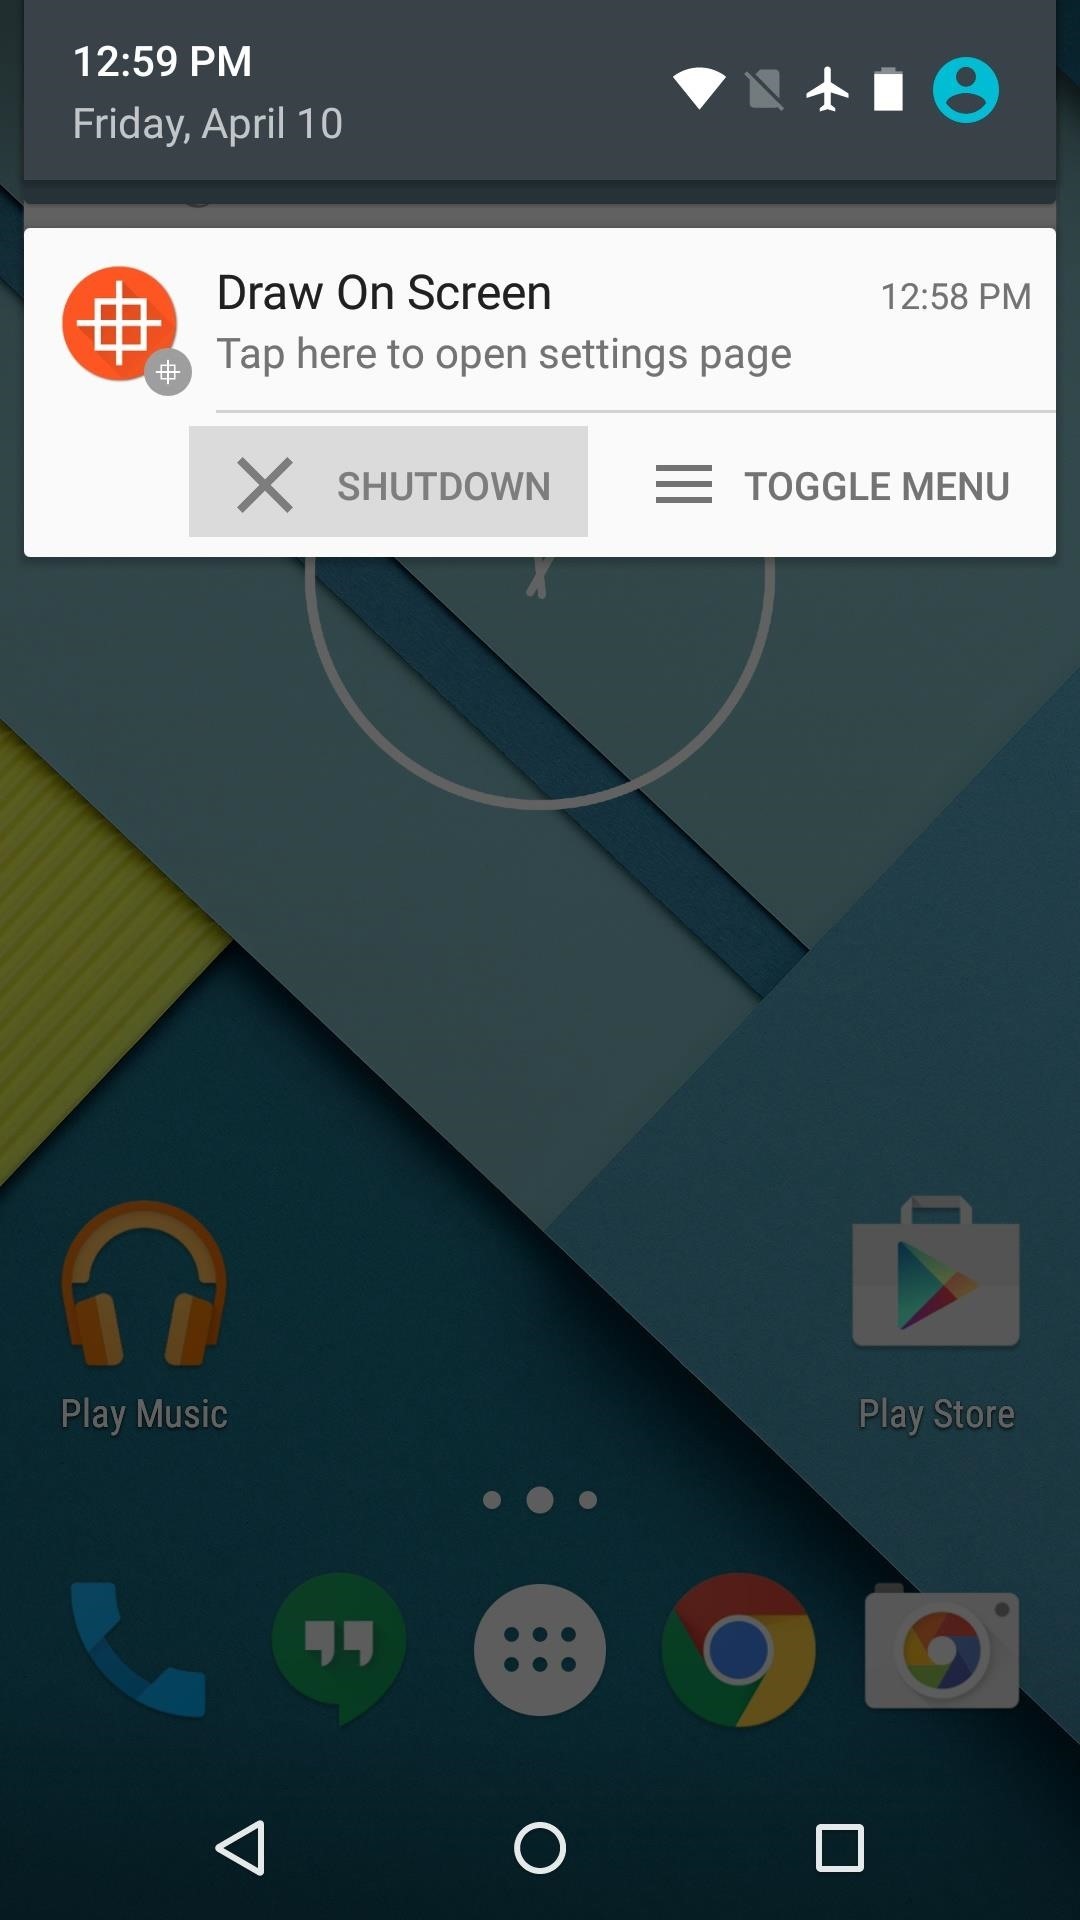
You’ll also find an ongoing notification with options for disabling the overlay and turning off the Draw on Screen service. These are handy if you’d like to keep Draw on Screen running in the background and only bring the controls to the forefront when it’s convenient.

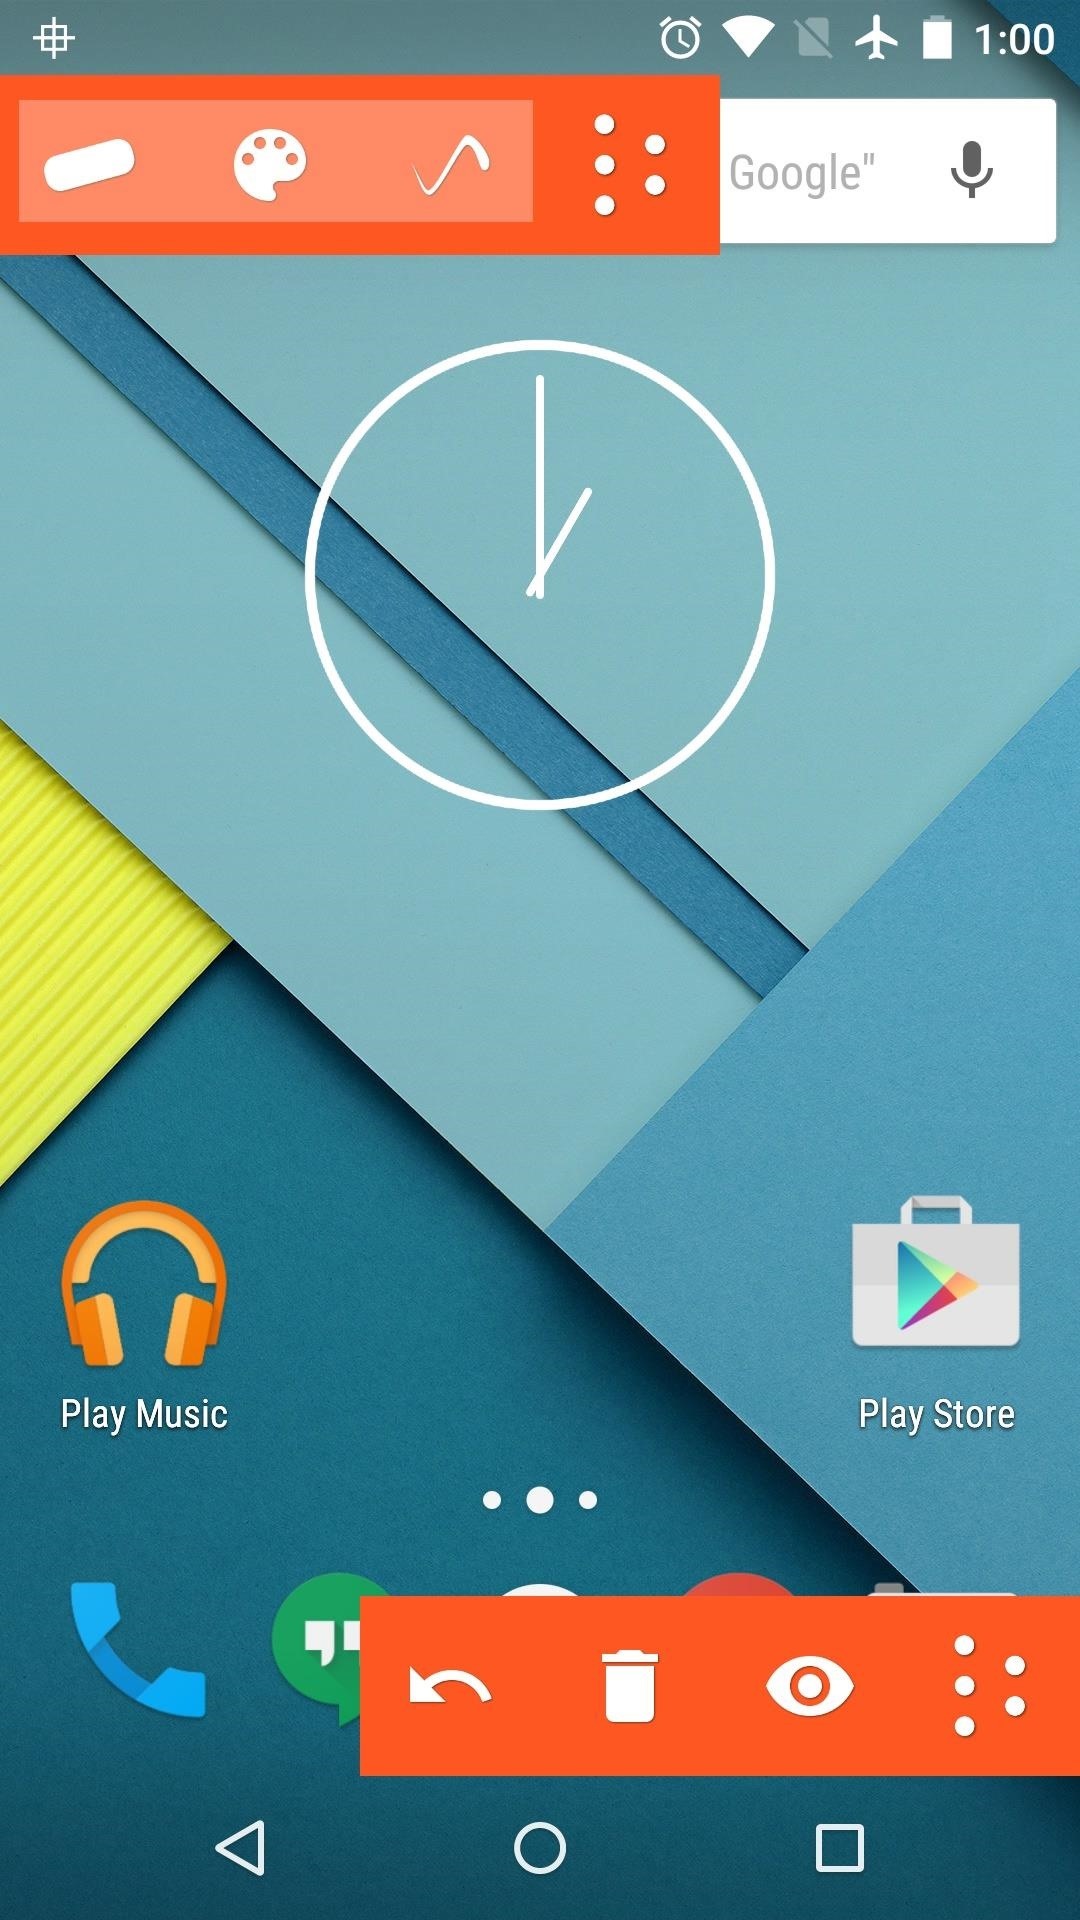
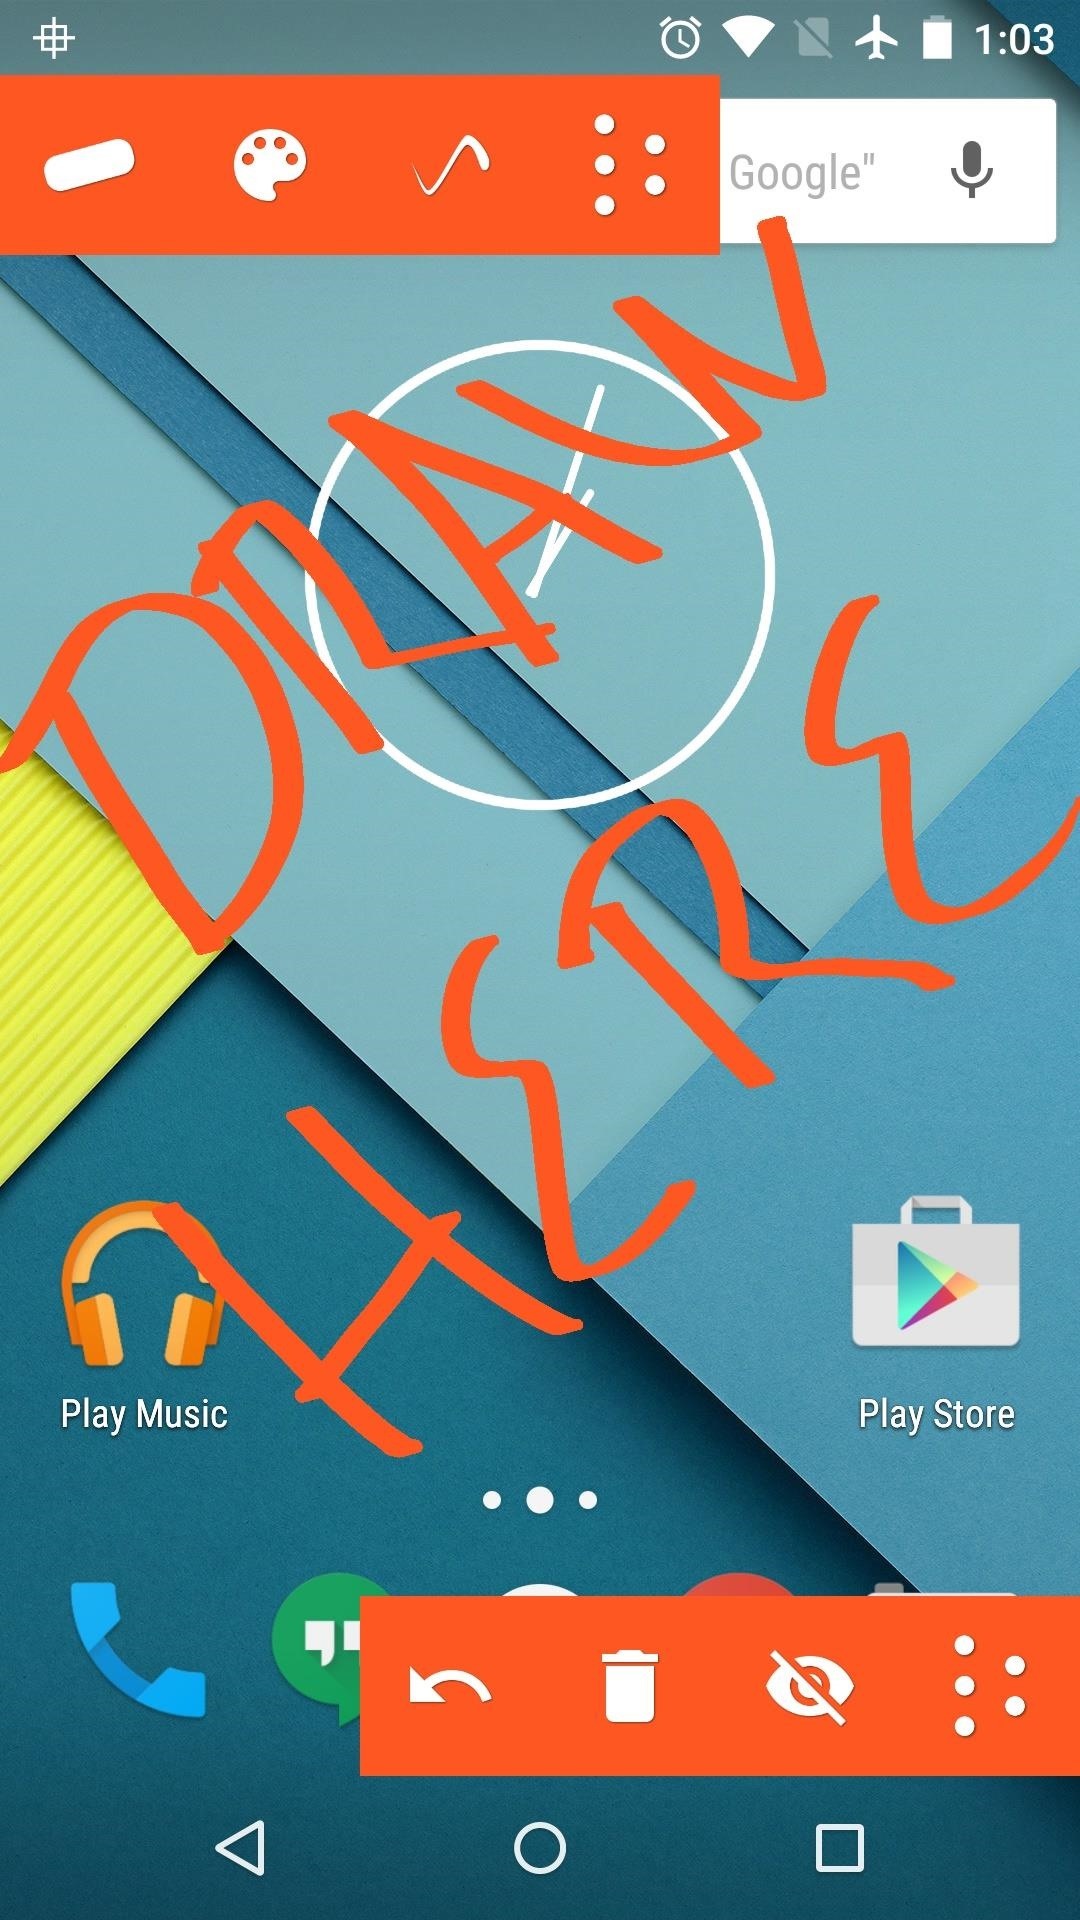
Step 3: Draw on Top of Any Screen
Any time the on-screen controls are visible, your finger can be used as a paintbrush. This means any app is a suitable canvas—just drag your finger around the screen to sketch your masterpiece or take a quick note.
Have you been using Draw on Screen primarily to take notes, or are you just in it for the fun? Let us know in the comment section below, or drop us a line on Android Hacks’ Facebook or Twitter, or Gadget Hacks’ Facebook, Google+, or Twitter.
Keep Your Connection Secure Without a Monthly Bill. Get a lifetime subscription to VPN Unlimited for all your devices with a one-time purchase from the new Gadget Hacks Shop, and watch Hulu or Netflix without regional restrictions, increase security when browsing on public networks, and more.
Источник
Getting Started with Android Canvas Drawing 🖼
Learn the basics of drawing with the Android Canvas Class

Diving into using the Android Canvas class can unlock magical super powers you never knew you had 🤯. Imagine being able to draw anything* your heart desires just with some basic shapes, paths and bitmaps? Well, the Android Canvas gives you just that ability.
What is a Canvas?
Canvas is a class in Android that performs 2D drawing of different objects onto the screen. The saying “a blank canvas” is very similar to what a Canvas object is on Android. It is basically, an empty space to draw onto.
The Canvas class is not a new concept, this class is actually wrapping a SKCanvas under the hood. The SKCanvas comes from SKIA, which is a 2D Graphics Library that is used on many different platforms. SKIA is used on platforms such as Google Chrome, Firefox OS, Flutter, Fuschia etc. Once you understand how the Canvas works on Android, the same drawing concepts apply to many other different platforms.
Tip: Check out the SKIA source code for a deeper understanding of the Canvas implementation.
It is useful to know that SKIA is used in the underlying code for Android, so when you get stuck trying to understand how a certain API works, you can look at the source for SKIA to gain a deeper understanding.
Canvas Coordinate System

The coordinate system of the Android canvas starts in the top left corner, where [0,0] represents that point. The y axis is positive downwards, and x axis positive towards the right.
All elements drawn on a canvas are placed relative to the [0,0] point.
When working with the Canvas, you are working with px and not dp, so any methods such as translating, or resizing will be done in pixel sizes. This means you need to translate any dp values into px before calling any canvas operations. This will ensure that your drawing looks consistent across devices with different pixel densities.
Canvas draw commands will draw over previously drawn items. The last draw command will be the topmost item drawn onto your canvas. It is up to you to ensure that your items are laid out correctly (Alternatively, you might want to use some of the built-in layout mechanisms for this — such as LinearLayout ).
How do I use a Canvas?
To draw onto a canvas in Android, you will need four things:
- A bitmap or a view — to hold the pixels where the canvas will be drawn.
- Canvas — to run the drawing commands on.
- Drawing commands — to indicate to the canvas what to draw.
- Paint — to describe how to draw the commands.
Get access to a Canvas instance
In order to get access to a Canvas instance, you will need to create a class that extends from View . This will then allow you to override the onDraw method, which has a Canvas as a parameter.
You can then include this view inside your layout XML and this will then automatically invoke the onDraw method of the Custom View.
You can also get access to a Canvas object by programatically creating one in code, like this:
It’s worth noting at this point that any Canvas created programmatically without using a View , will be software rendered and not hardware rendered. This can affect the appearance of some of the drawing commands. For instance, some commands are just not supported with hardware rendering, or only supported from a certain API level. For more information about the differences between hardware rendering and software rendering, read this post.
What can I draw on a Canvas? ✏️
There are many different things you can draw onto a Canvas . One of the most common drawing operations is to draw a bitmap (image) onto the canvas. The method for doing this is just called drawBitmap and it takes in the bitmap object that is loaded up either with Android’s built-in mechanisms, or with Glide.
The second parameter here allows us to pass in the portion of the bitmap that you want to render, when passing in null the whole bitmap will be rendered. The third parameter is a RectF object which represents the scale and translation of the bitmap that you want to draw on screen.
Tip: Make sure your RectF object that you pass into the drawBitmap function is scaled with the correct aspect ratio otherwise your output may be stretched
You need to be careful with this, since it can quite easily stretch the bitmap, as the Canvas calls don’t take into account the aspect ratio of the provided image. You need to ensure the rect that is passed in is properly scaled. The fourth parameter is the paint object, we will cover the purpose of this parameter soon.
There are many other Canvas drawing methods that can give you some great looking views. We won’t be covering them all here, but here are two other examples of drawing methods on the Canvas class:
To draw a circle onto the view, give it a center point x,y , its size and a paint object:
Another one is the drawRect() method. This draws a rectangle on screen:
This is not the full list of drawing methods but just a small highlight of some of them to get you more comfortable with the concepts, feel free to browse the Canvas documentation for a comprehensive list of all of them.
Paint 🎨
In my opinion, the Paint class is possibly the most interesting graphics class and it is also my favourite, for that very reason. There is so much that a Paint object can do that can really make your drawing operations shine. ✨
The Paint class typically holds colour and style information. The Paint object is then used for drawing objects (i.e. bitmap, text, paths etc) onto a Canvas .
To create a Paint object:
This object should be created before using it in Canvas#onDraw() . It is not recommended to create it in onDraw() since you shouldn’t be doing object allocations in that method.
Tip: Use the isAntiAlias flag to ensure your drawing has smooth edges.
The isAntiAlias flag is quite an important one. If you are drawing objects to your canvas and you notice that the edges of your objects have jagged edges, it is likely that you haven’t set this flag to true. This flag indicates to the paint to smooth out the edges of the object you are drawing to the canvas.
The Paint class has more than just those three properties, there are many more things you can do with it. For instance, you can also set properties related to text rendering, such as the typeface , letterSpacing (kerning) and textSize .
Tip: Check that the Canvas/Paint APIs you are using work across different API versions. See this site for more information.
It is worth noting that the Paint#setShadowlayer() method doesn’t work consistently across API levels and drawing commands. It works when drawing text on a Canvas, but applying the shadow to other commands such as drawBitmap doesn’t yield the same results across API levels.
The reason for the inconsistency between API levels is because the Canvas APIs are bundled with the Android Platform and therefore are not updated until the OS is updated. See the list on this page for more information about which APIs work on which Android versions.
Once you’ve created the Paint object, pass that object into your Canvas#draw*() calls and the drawing will then take on the properties you’ve specified in the paint.
Next up…
In the next few articles, we will be diving into other parts of working with Canvas and drawing on Android. Be sure to subscribe to updates and follow me on Twitter for more tips.
If you prefer watching this content — be sure to check out my talk from Mobile Matters London for a summary of this content.
Источник


