- 990x.top
- Простой компьютерный блог для души)
- Sync All Cores — что это такое в биосе?
- Sync All Cores — что это в биосе?
- Заключение
- How To Enable All Cores in Windows
- What Are Processor Cores?
- Enabling CPU Cores In Windows
- Core Settings In Windows 10
- Core Settings In Windows Vista, 7 and 8
- Should I Enable All Cores in Windows 10?
- Sparrow_AW2.0 enabling all cores + GPU boost
- Breadcrumb
- ZestyTS
- Razielwow
- Mike3009
- TempleOfShiva
- rezadentevil
- rezadentevil
- aceohyame
- rashidhabib
- Similar threads
- Breadcrumb
- Top Liked Posts
990x.top
Простой компьютерный блог для души)
Sync All Cores — что это такое в биосе?
 Данная заметка расскажет об одном пункте BIOS, который может повлиять на производительность персонального компьютера.
Sync All Cores — что это в биосе?
Пункт опции CPU Core Ratio, позволяющий задать один множитель сразу всем процессорным ядрам.
- Auto — будут стандартные значения, как предусмотрено производителем.
- Per Core — индивидуальная настройках каждого ядра.
Если выбрать Sync All Cores, то множитель можно будет задать только в первом ядре, это автоматически установит его и во всех остальные:
 Функция в BIOS материнки ASUS Rog.
Некоторые пользователи отмечают, что при выборе пункта Sync All Cores — компьютер ведет себя нестабильно, могут быть зависания, специфические глюки, подтормаживания. Причина может быть в механизме синхронизации ядер, когда процессор пытается раскидать данные для обработки на несколько ядер.
Заключение
Важно понимать, что увеличивая множитель всех ядер — вы увеличиваете тактовую частоту, другими словами разгоняете проц. Это разумеется приведет к повышенному нагреву, повышенному потреблению, особенно касается топовых процессоров. Материнская плата должна иметь качественный питальник VRM, чтобы обеспечить процессор стабильной энергией даже при высоком значении множителя.
Поэтому выставляйте значение данной функции осторожно и следите за температурой (советую использовать AIDA64).
Надеюсь данный материал оказался полезным. Удачи.
Источник
How To Enable All Cores in Windows
Robert Hayes Robert is a freelance editor and writer living in Colorado. Read more February 1, 2021
The evolution of Central Processing Units, or CPUs, is a fascinating and complex topic to study. From the release of the Intel 4004 back in 1971 to the modern day Intel 10th Series Processors, these chips have seen an astonishing increase in speed and computing power in just five short decades. Computing tasks that were once unimaginable for even the biggest mainframe computers are now able to be handled by the cheapest budget smartphone, with even the most basic of laptops possessing hundreds of times the power of the computers running the Apollo missions. However, even with the astronomically fast advancement of computing power, one development that still puzzles people is the concept of multi-core processors. Manufacturers like Intel and AMD tout their ever-increasing core counts on newer processors – 4 cores, 8 cores, 16 cores, even 32 cores – and their usefulness for heavy computing loads. But what does any of that even mean?
What Are Processor Cores?
A processor core is an independent processing unit on the overall physical processor chip. Each core has its own processing hardware and cache, and is connected to the rest of the CPU through the chip’s shared memory and the system bus. A core is essentially an entire CPU, so a multi-core processor is like putting several CPUs together and having them work in tandem. The reasoning behind having more cores on a CPU is that it can often be advantageous to split computing tasks between multiple cores rather than one massive one in order to allow it to finish more quickly and efficiently.
However, the effectiveness of this technique depends on the operating system you’re running as well as the specific application you’re running; many operating systems and applications used to not be able to take advantage of multiple cores and would, as a result, not see any measurable advantage from the extra cores. However, fortunately, almost all modern operating systems and many resource-heavy programs such as Adobe Premiere are able to take advantage of the extra cores, and as a result, run more quickly and efficiently than they would otherwise.

Multi-core processors got their start back in 1996, with the IBM Power4 processor running two cores on a single chip, which was revolutionary for the time. However, software support for this new innovation did not immediately appear. However, starting with Windows XP in 2001, Windows began supporting multi-core operations and many application developers followed suit. As a result, pretty much any resource-intensive software you use today will fully utilize the power of the multi-core processor that you almost certainly have running under the hood.
(Check out this detailed article about multi-core processing for more information. If you’re building or buying a new PC, then a review of this article on what to look for in a CPU might also be helpful. And if you’re interested in the history of processors, of course we have you covered!)
Enabling CPU Cores In Windows
One question we’re commonly asked at TechJunkie is whether you need to do anything in order to make full use of multi-core CPUs on your computer. The answer is that it really depends on the version of Windows you are running. For older versions of Windows, such as Windows XP, you might need to change a system setting in your BIOS in order to get multi-core functionality working. In any newer version of Windows, however, multi-core support is automatically turned on; you can adjust your settings to use fewer cores if necessary to fix a software compatibility reason, but this is exceptionally rare.
Core Settings In Windows 10
If you’re using Windows 10, all of your processor cores will be fully utilized by default if your BIOS/UEFI is set correctly. The only time you would use this technique is to limit cores, whether for software compatibility reasons or otherwise.
- Type ‘msconfig’ into the Windows Search Box and hit Enter.

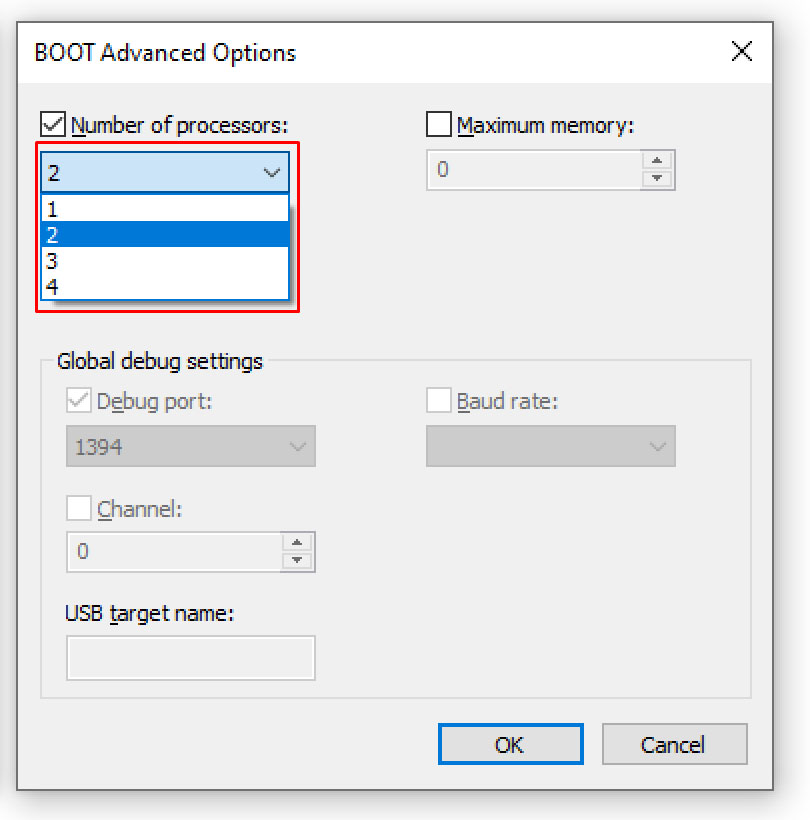
- Select the Boot tab and then Advanced options.
- Check the box next to Number of processors and select the number of cores you want to use (probably 1, if you are having compatibility issues) from the menu.
- Select OK and then Apply.
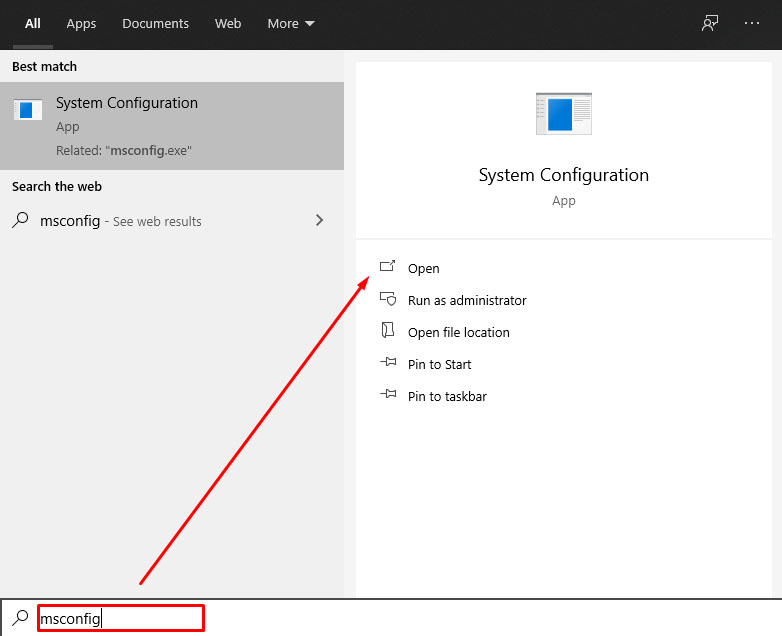


If you are using Windows 10, the box next to “Number of processors” will normally be unchecked. This is because Windows is configured to utilize all cores whenever a program has the ability to use them.

Core Settings In Windows Vista, 7 and 8
In Windows Vista, 7 and 8, the multi-core setting is accessed through the same msconfig process as described above for Windows 10. It is also possible in Windows 7 and 8 to set processor affinity, that is, to tell the operating system to use a particular core for a particular program. This was useful for a number of things; you could set a certain program to always run on one core so that it wouldn’t interfere with other system operations, or you could set a program that had difficulty running on any core other than the first logical core to use the core where it ran best.
It isn’t strictly necessary to set core affinities in Windows 7 or 8 but if you want to it is simple.
- Select Ctrl + Shift + Esc to bring up Task Manager.
- Right click the program whose core use you want to modify and select Details.
- Select that program again in the Details window.
- Right click and select Set Affinity.
- Choose one or more cores and check the box to select, uncheck to deselect.


You may notice that twice as many cores are listed than you have. For example, if you are running an Intel i7 CPU with 4 cores, you’ll have 8 listed in the Affinity window. This is because hyperthreading effectively doubles your cores, with four real and four virtual. If you want to know how many physical cores your processor has try this:
- Select Ctrl + Shift + Esc to bring up Task Manager.
- Select Performance and highlight CPU.
- Check the lower right of the panel under Cores.


There is a useful batch file you can create that can force processor affinity for particular programs. You shouldn’t need to use it but if you do…
- Open Notepad or Notepad++.
- Type ‘Start /affinity 1 PROGRAM.exe’. Type without quotes and change PROGRAM to the name of the specific program you’re trying to control.
- Save the file with a meaningful name and add “.bat” to the end. This creates it as a batch file.
- Save it to the program install location you specified in Step 2.
- Run the Batch file you just made to launch the program.

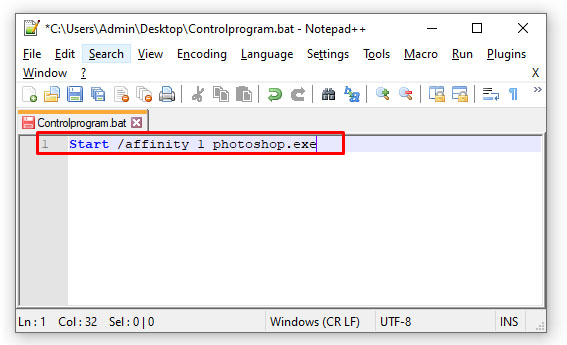


Where you see ‘affinity 1’, this tells Windows to use CPU0. You can change this depending on how many cores you have – ‘affinity 3’ for CPU1 and so on. This page on the Microsoft Developer website has a full list of affinities.
Should I Enable All Cores in Windows 10?
There is actually some argument about this, although there is a pretty strong consensus among experts that you should use all your cores. There are essentially two points the anti-corers hit on. One is that reducing the power consumption from laptops and PCs would reduce electrical usage elsewhere. The other argument makes a little more sense, and has to do with laptop battery life. I’m going to look at both of these arguments.
The power consumption angle is pretty hard to credit. The reality is that a modern PC’s power consumption can be high over burst periods of time. But it’s also true that those bursts of power still aren’t using that much juice. Even at top power consumption, a Core i7 (currently the winner of the power hog competition among mainstream CPUs) uses only 130 watts. Compare that to a refrigerator at 250 watts. a window AC unit at 1400, and central air at 3500 watts. If you want to save power, turn the AC down a notch and leave your PC running at full blast.
The argument for reducing core usage in order to save notebook battery life (less energy used = fewer charge cycles = that Macbook lasting a few years longer) has some superficial appeal. I’ll admit that given what a high-end laptop can cost, it might make sense to coddle the machine by turning off some cores. However, that goal can be achieved far more effectively and more conveniently by underclocking the CPU a bit. Underclocking means setting the machine’s clock to run slower than normal, which in turn will reduce performance and drastically cut the drain on the batteries. Cores, when they aren’t in use, just don’t burn much power so the savings would be minimal. Underclocking the CPU directly cuts electrical use across the machine, and can actually achieve the goal of longer laptop life.
The processor is the most important part of your computer, so it makes sense to want to push all the cores to their limit. Of course, if you’re still having trouble pushing your device to the performance level you want out of it, you might want to consider upgrading your processor (if you own a desktop) or looking into picking up a new laptop with cutting-edge hardware. Or, if you’d rather attempt to make Windows 10 even faster on your current hardware, check out our definitive guide here.
Источник
Sparrow_AW2.0 enabling all cores + GPU boost
Breadcrumb
ZestyTS
New member
Razielwow
New member
32h with daily usage.
Mike3009
Senior Member
TempleOfShiva
New member
rezadentevil
Senior Member
Hi
I am really appreciate for what U did my friend, its soooooo Good On Stock Rom ,with the normal script not either full power or original, battery is good, speed is soooooo much better.
Thanx soooo much
rezadentevil
Senior Member
hi
after i used this script, my watch doesnt show calls.
and i have to ask, if i factore reset my watch , the script will remove. or i dont need to do anything??
aceohyame
Member
Updated the script. As others noted, with Nougat it stopped working as device locations changed. Other aspects changed as well and I haven’t figured them out yet. In any case, I was able to online the cores and set the governor to performance. The below script will do that. If you want ondemand just change the «performance» line to «ondemand». I used a tool to verify all 4 cores are online with the performance governor set to the 787 or w/e mhz
Follow the same instructions to apply this. It’s just an updated script.
rashidhabib
Member
Similar threads


Breadcrumb
Top Liked Posts
32h with daily usage.
Some theory:
Sparrow is sold with Qualcomm Snapdragon 400 1.2GHz, which is 4 core CPU. ASUS AW2.0 official kernel though supports only 600MHz and 787MHz, as Asus probably thinks this is good balance between battery life and performance.
GPU is Adreno 302/305, which is capable running up to 450MHz, which is also supported by ASUS AW2.0 kernel.
Where is the catch?
During boot there are all four CPU cores enabled, however there is post-init script, disabling two of those and setting frequency as fixed 738MHz with performance governor (no frequency scaling). GPU is set to fix 200MHz:
It is indeed required just to alter this script and you can enable all 4 cores with «ondemand» governor, scaling 600-738MHz and GPU scaling 200-450MHz using «msm-adreno-tz» governor:
(and this requires root of course)
(both files also attached to this post)
To exchange files in your watch, you can easily use following bash script in linux:
First push desired file into sdcard and go to ADB shell:
Источник


