- APKDom
- Скачать End Call APK
- End Call jp.gr.java_conf.toytech.endcall Сведения о приложении
- End Call Снимки экрана
- End Call Описание
- APKDom
- Скачать End Call APK
- End Call jp.gr.java_conf.toytech.endcall Сведения о приложении
- End Call Снимки экрана
- End Call Описание
- Sample VoIP Calling App in Android
- Key Components & Libraries Used
- Prerequisites
- PushNotificationService
- CallConnectionService
- CallConnection
- CallHandler
- Add a Contacts Shortcut and an End Call Button to the Nav Bar during Phone Calls in Android O
- Custom Nav Bar Keys while in a Phone Call
- Setting up ADB
- Granting WRITE_SECURE_SETTINGS to SecureTask
- Setting up the Tasker Profiles
- Download and Import
APKDom
Скачать End Call APK
Загрузки: 91 (Play Store установок: 5 000+)
End Call jp.gr.java_conf.toytech.endcall Сведения о приложении
- Цена: Бесплатно
- Дата Последней версии : 11 февраля 2017
- Версия Андроид: 4.0
- Разработчик: toytech
- Размер последней версии: 8Mb
- Категория: Tools
- Журнал версий: только одна версия найдена
- Последняя версия: 1.6.0
(Запрос обновления) [Запрос отправлен]
End Call Снимки экрана
End Call Описание
This application simply terminates phone call.
Execute this application and touch endcall icon,current call will be terminated.
What situation this application will be useful?
While you are calling and you use multi tasking with browser,mail,and other applications, it sometimes happens that you need many touch operation to back to phone application’s UI to terminate current call.
In such case, if you place this application’s shortcut on HOME screen, you can terminate your call by backing home and executing this application.
[Option]
If you make «Instand End» option enabled, this application automatically terminates call immediately after this application is started without pressing «EndCall» icon on this app’s main UI.
If you make «Auto Finish» option enabled,this application is automatically finished after 5 second after terminating call.
From 1.1.0, you can execute this application from notification bar.»EndCall» icon automatically appears when phone call begins.
This behavior is enabled/disabled by «Notification» option.
[About Permission]
-full network access
Used for displaying ads.
-directly call phone numbers
Used for terminating phone call.
-read phone status and identity
Used for checking call status. Скачать и установить Play Store APK файл или загрузить и установить obb от GooglePlay AppStore.
Источник
Sample VoIP Calling App in Android

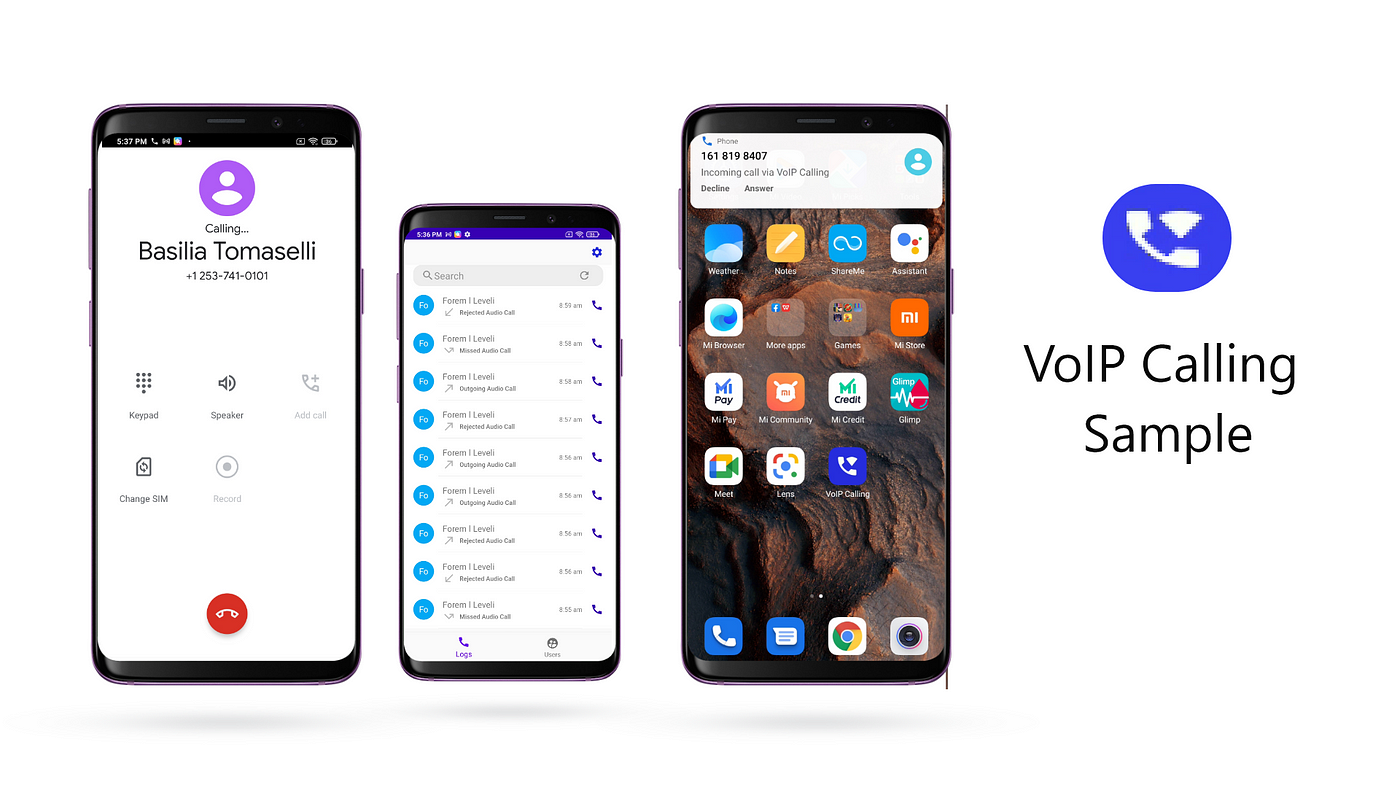
This article describes the designing & implementation of a sample VoIP calling app using CometChat Pro. CometChat Pro is Messaging & Call SDK that provides enormous features for developers to integrate chat. Using CometChat Pro UI Kit, developers can easily integrate real-time messaging & calling support in their app. By the end of this article, you will create a fully functioning Sample VoIP Calling App.
Key Components & Libraries Used
CometChat Android UI Kit — An ready to use UI Kit library which will help us to develop real-time messaging & call support in our sample app within a few minutes.
Firebase — To receive an event when the app is not in the foreground we will use Firebase Push Notification.
ConnectionService — An abstract class that will help you to build VoIP Calls in a sample app. It uses a built-in System UI to manage a call which is also called System Managed. If you wish to use your own UI to manage calls you can use Self-Managed Service.
Prerequisites
Before diving into more details please ensure that you have checked the below points.
— Android studio installed in your system.
— Android Device or Emulator to run your app.
- We will begin by fetching the code from GitHub.
You can clone the project from the Sample VoIP Calling repository.
- It’s necessary to have CometChat Account to run the app.
You can create your account in CometChat and replace the credentials with yours.

Also, please make sure to setup Push Notification Extension in CometChat.
Please click here to know How to setup Push Notification in CometChat.
- Next step is to setup Firebase Account and create a new project. Once the project is created, setup an Android App in the Firebase Project and add google-services.jsonfile in your “ app” folder
- Once the above mentioned configurations are done you can open the project in Android Studio. You will find the project contains two packages ‘ app’ which is our sample app and ‘ uiKit’ is a library provided by CometChat.
- In ‘ app’ you will find the ‘ utils’ package under which we have files to handle Push Notification and VoIP calls.
PushNotificationService
It extends FirebaseMessageService which is used to handle Push Notification received from Firebase. We are using it to notify the message sent to a user when they are not active. We are also handling incoming & outgoing calls through it.
onMessageReceived() : This method gets triggered whenever you receive a push notification from firebase.
CometChatHelper.processMessage() : This method is provided by CometChat SDK to get BaseMessage from “ data” received as JSON Object in Remote Message.
initiateCallService(call : Call) : This method is used to initiate a call through ConnectionService whenever a Call type message is received.
showMessageNotification(baseMessage: BaseMessage, title: String, alert: String) : This method is used to display and handle the notification for the message when is being received by the particular user.
CallConnectionService
CallConnectionService is custom connectionservice class which is binded with the app to handle incoming & outgoing calls. You will find onCreateIncomingConnection(), onCreateOutgoingConnection() methods in it.
onCreateIncomingConnection() : This method get triggered whenever telecomManager.addNewIncomingCall() get success on receiving a call.
onCreateIncomingConnectionFailed() : This method get triggered whenever telecomManager.addNewIncomingCall() fails to receive a call.
onCreateOutgoingConnection() : This method get triggered whenever telecomManager.placeCall() get successfully executed to place outgoing call.
onCreateOutgoingConnectionFailed() : This method get triggered whenever telecomManager.placeCall() get failed to place an outgoing call.
Currently, we are using CALL_PROVIDER as Capability of ConnectionService. So you can see your system’s native calling UI for incoming & outgoing calls.
You can change it SELF_MANAGED if you wan’t to show your own custom UI for incoming & outgoing calls.
CallConnection
It is a Connection class that is used to initiate a connection when a user receives an incoming or outgoing call. It usually helps the ConnectionService class to handle the connection requests and their callbacks. It includes certain methods like onAnswer(), onReject(), onHold(), onDestroy(),etc. Whenever the user receives an incoming call and if the user accepts the call then onAnswer() will be triggered. Similarly, if user rejects the call then onReject() is triggered.
onAnswer() : Whenever this method gets triggered, we use CometChat.acceptCall() which will start the CometChat Call Service and start the call session.
onReject() : Whenever this method gets triggered, we use CometChat.rejectCall() which will reject the CometChat Call Service and end the call session.
onDisconnect() : This method gets triggered whenever the initiator of a call ends the calls before the receiver accepts the call. This will ends the call session and make it a Missed Call.
CallHandler
It is a class that is used to handle and integrate ConnectionService in your app. Below are its methods that are used in your app.
Источник
Add a Contacts Shortcut and an End Call Button to the Nav Bar during Phone Calls in Android O
If you’ve been following our tutorials feed, then you’ll know by now that we love finding ways to take advantage of Android O’s new nav bar customizer. Through the power of the popular automation app known as Tasker, we can contextually change the nav bar to include nav keys that are useful in specific contexts. In this tutorial, we will demonstrate how to add a contacts shortcut and an end call shortcut to the nav bar while you are in the middle of a phone call.
Thanks to Eli Irvin for being my guinea pig and getting this screen capture.
In the video above, my tester initiated a phone call with me which caused Tasker to display two new icons in the navigation bar. The contacts shortcut, when pressed, calls KEYCODE_CONTACTS while the end call button calls KEYCODE_ENDCALL.
The icons that I’m using are not icons normally accessible in Android O’s navigation bar customizer, but are instead custom icons that I am using. You can read my previous tutorial on how to add custom icons to Android O’s nav bar here. For the sake of this tutorial, you’ll need to download two icons from Icons Database based on your device’s DPI. The first is a contacts icon which you should save as /NavIcons/contacts.png and the second is an end call icon which needs to be saved as /NavIcons/endcall.png.
We’ll show you how to replicate this setup on your own device so you can learn how to make your own custom nav bar configurations, but we’ll also provide a download link at the end of the article if you would rather skip to that.
Custom Nav Bar Keys while in a Phone Call
Requirements:
Tasker is necessary because it is the automation app we’re using to detect what application we’re in and send commands through the SecureTask plug-in, which is what will handle changing our navigation bar. Once you’ve installed both applications, we need to set up SecureTask.
We need to grant SecureTask the ability to modify system settings on our device. In order to do so, we have to grant SecureTask a special permission known as WRITE_SECURE_SETTINGS which is normally inaccessible to regular applications, but can be granted manually by a user through the use of ADB. Thus, you’ll need to have ADB up and running on your machine to get this working. Fortunately, granting this permission is only a one-time thing, and we’ll be using SecureTask in future Android O-related tutorials (of which there are a couple more), so it’s definitely worth doing it.
Setting up ADB
The first thing you’ll need to do is download the ADB binary for your particular OS. You can do so here. Once you’ve downloaded them, you need to then make sure you have the proper driver if you’re on Windows.
Once you’ve extracted the binary to a separate folder and have installed the driver, we need to next enable USB Debugging on the smartphone. In order to do so, open up Settings and go to About Phone. Tap on Build Number 7 times until you get a dialog telling you that you’ve unlocked Developer Options. You can access Developer Options in Settings now. Apparently in Android O, you have to enter your pin/password before you can open Developer Options. Do so and look for USB Debugging, then enable it.
Now plug in your phone and open up a command prompt in the same directory where you extracted the ADB binary. (Windows users, hold shift+right-click in that folder and select “open command prompt here.”) Type adb devices into the command prompt. You’ll see a message that the ADB server is being started, then on your phone you’ll see a prompt asking you to grant your computer ADB access. Accept it. Now when you enter adb devices into the command prompt, you should see your device’s serial number, if so then you were successful.
Granting WRITE_SECURE_SETTINGS to SecureTask
With an ADB command prompt opened up, enter the following command to grant SecureTask the requisite permission.
SecureTask will now have the ability to modify system settings without root access! Now we’re ready to move on to Tasker.
Setting up the Tasker Profiles
We will need to set up two different Tasker Profiles. One will trigger when you enter a phone call, the other will trigger when you hang up. The former will show the two nav bar keys, the latter will disable them. Pretty straightforward.

For the first Profile, open up Tasker and press the + button in the bottom right to create it. Choose the Event Context and go to Phone –> Phone Offhook. Press back to return to Tasker’s main screen. Name it “Enable Phone Nav Bar Keys.”


Tasker will ask you to either attach an existing Task or create a new one. Create a new one, and once you’re in the Task editing screen, add the following Actions:
- Plugin –> SecureTask –> Secure Settings. Action: Write. Setting: secure sysui_nav_bar_left . Value: key(207:file:///storage/emulated/0/NavIcons/contacts.png)
- Plugin –> SecureTask –> Secure Settings. Action: Write. Setting: secure sysui_nav_bar_right . Value: key(6:file:///storage/emulated/0/NavIcons/endcall.png)


Exit back to Tasker’s main menu. Create a new Profile and again select the Event context, but this time choose Phone –> Phone Idle. Name it “Disable Phone Nav Bar Keys.”


Again create a new Task, and when you’re in the Task editing screen, add the following two Actions to it:
- Plugin –> SecureTask –> Secure Settings. Action: Write. Setting: secure sysui_nav_bar_left . Value: null
- Plugin –> SecureTask –> Secure Settings. Action: Write. Setting: secure sysui_nav_bar_right . Value: null


Now you’re done. When you accept an incoming call, or connect an outgoing call, Tasker will show a contacts shortcut key as well as an end call key. These keys can be accessed while you’re using any app, so long as the phone call is still ongoing. Once the phone call ends, Tasker will disable these nav bar keys.
Download and Import
As with all Tasker related tutorials, we will be providing the XML files you can download and import. Download the .prf.xml file from AndroidFileHost below and save it to your internal storage. Open up Tasker and long-press on the Profiles tab up top until you see an Import button. Tap on that and look for the XML files you just saved, then select them to import them, one at a time. Make sure you have granted the WRITE_SECURE_SETTINGS to SecureTask as mentioned in my article, otherwise the Profiles will not do anything on your phone!
While we don’t have any more Android O navigation bar related tutorials to share, we do have one more tutorial related to Android O pending. Stay tuned to the portal for more tutorials!
Источник


