- Как создать бесплатный аккаунт разработчика Apple и связать его с Xcode
- Готовимся к релизу в App Store. Инструкция для новичков и лайфхаки
- Готовимся к публикации
- 1. Создаем Apple ID
- 2. Регистрируем аккаунт разработчика
- 3. Оплачиваем аккаунт
- 4. Готовим маркетинговые материалы
- Enrolling and Verifying Your Identity with the Apple Developer App
- Enrolling in the Apple Developer Program as an individual
- Start enrollment
- Enter your personal information
- Complete purchase
- Enrolling in the Apple Developer Program as an organization
- Start enrollment
- Enter your information as the Account Holder
- Enter your organization’s information
- Complete enrollment and purchase
- Verifying your identity
- Verify your identity
- Complete the process
- Renewing your annual membership subscription
- Cancelling and resubscribing
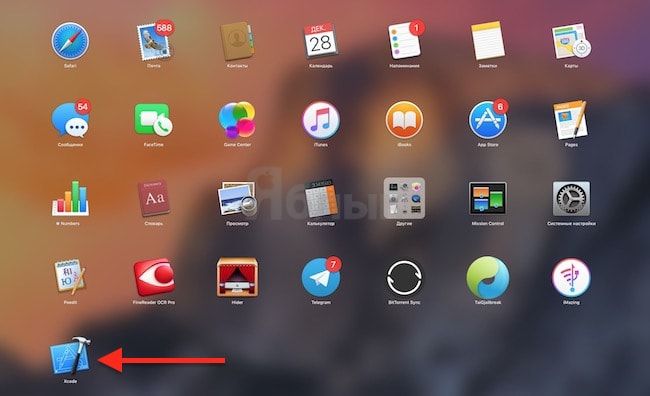
Как создать бесплатный аккаунт разработчика Apple и связать его с Xcode
Нет желания сразу же отдавать Apple $99 каждый год ради участия в Developer Program? Никаких проблем — всегда остается возможность сделать бесплатный аккаунт разработчика Apple и начать разрабатывать (пусть и с некоторыми ограничениями).
Строго говоря, бесплатный аккаунт разработчика — это не то же самое, что платный аккаунт разработчика. Apple просто даёт Apple ID пользователям, которые пока не готовы отдавать деньги, а вместе с ним — и доступ к Xcode Developer Tools, бета-версиям Xcode, форумам девелоперов и тому подобным «плюшкам».
Самый важный плюс бесплатной версии аккаунта — возможность использоваться режим «Test on Device». Иными словами, каждый обладатель такой учетной записи может создавать приложения для iPhone, iPad и Apple TV! При этом не платя Apple никаких денег. Ну, разве не здорово? Теперь расскажем о том, как это сделать.
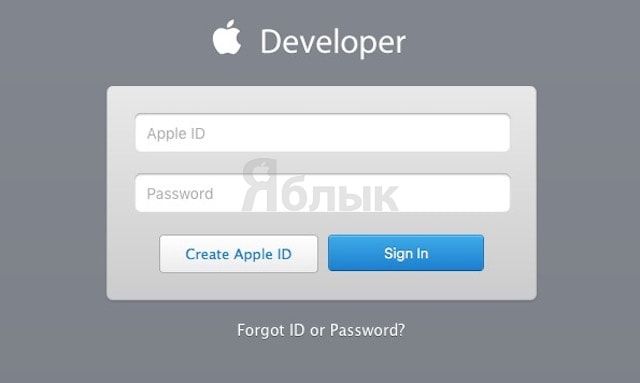
1. Создайте бесплатный Apple ID для страны США по этой инструкции. Если он у вас уже есть, смело переходите сразу к шагу 2.
2. Зарегистрируйтесь в Apple Developer Member Center при помощи своего Apple ID для доступа к некоторым привилегиям для разработчиков.
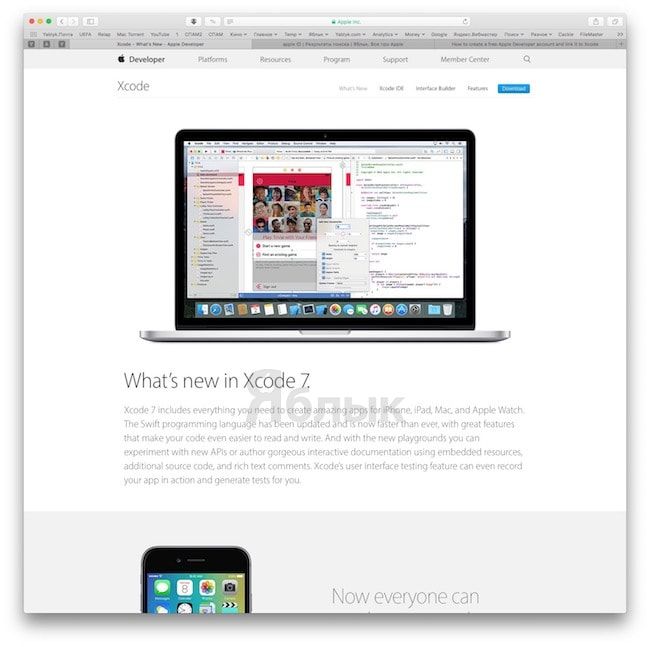
4. Войдите в Developer Center, используя созданный аккаунт разработчика, затем перейдите по пути Developer -> Resources -> Xcode.
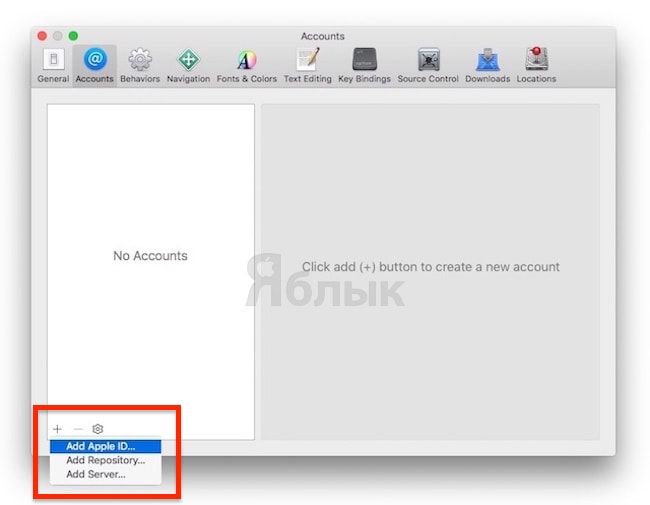
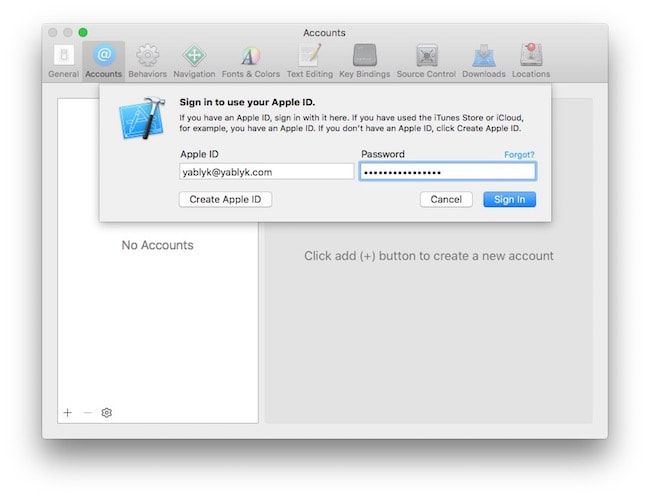
3. Скачайте, установите и запустите Xcode -> Preferences -> Accounts.
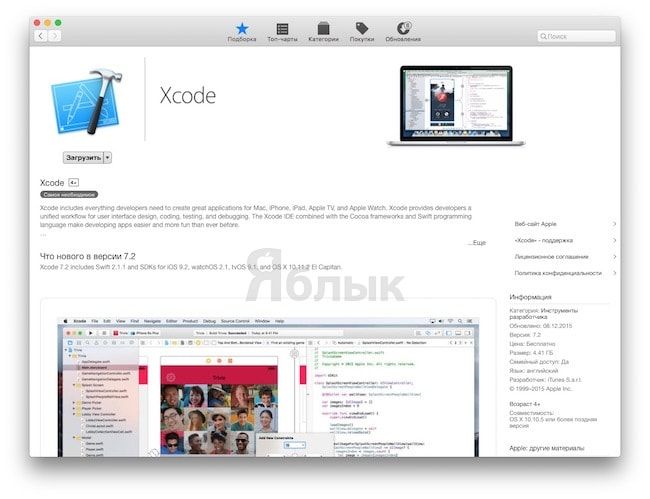
4. Нажмите на «+», выберите «Add Apple ID» и введите учетные данные аккаунта разработчика.
Готово! Теперь вы можете использовать свой Apple ID для бесплатного доступа к инструментам iOS-разработчика. Конечно, «за просто так» Apple не даст вам все привилегии — к примеру, вы не получите доступ к самым ранним версиям Xcode. Понять, от чего именно придется отказаться в бесплатном аккаунте для разработчика, можно из следующей сравнительной таблицы:
Источник
Готовимся к релизу в App Store. Инструкция для новичков и лайфхаки

Подготовили гайд для заказчиков, которые занимаются публикацией приложения самостоятельно. Рассказываем о предрелизных хлопотах: как создать аккаунт разработчика, сколько времени заложить на оформление D-U-N-S number, какие скрины подготовить для стора.
Должны сразу предостеречь: можно сберечь несколько недель и свои нервы, если делегировать публикацию приложения на разработчиков. Разумеется, под должным контролем. У них побольше опыта в релизных делах: сделают все быстрее, корректно заполнят все поля и, скорее всего, не нарвутся на реджект. Не забудьте только поменять пароли от аккаунта, чтобы данные были только у вас.
Готовимся к публикации
В среднем процесс занимает пару недель.
1. Создаем Apple ID (10 минут)
2. Регистрируем аккаунт разработчика (1день как разработчик\19 дней как компания, во всем виноват D-U-N-S number.)
3. Оплачиваем аккаунт (2-3 дня)
4. Готовим маркетинговые материалы (1 день)
1. Создаем Apple ID
Если Apple ID уже есть, переходим к шагу 2. Если нет, создаем.
Заходим на сайт Apple. Нажимаем кнопку Create Your Apple ID.
Открывается форма с личными данными.
Корректно заполняем информацию о владельце аккаунта. Ниже пример заполнения профиля.
Отвечаем на три обязательных вопроса на случай утери пароля, без них не создать аккаунт. Данные лучше куда-нибудь записать, чтобы не забыть вводную информацию через несколько лет.
Заполненный профиль выглядит так.
Соглашаемся с политикой конфиденциальности, разгадываем капчу и нажимаем кнопку «Продолжить». Появляется форма, в которую нужно ввести код подтверждения. Он придет на почту, привязанную к аккаунту. Есть 30 минут, чтобы ввести код. Иначе придется начинать все сначала.
Готово. Apple ID создан.
2. Регистрируем аккаунт разработчика
Заходим на сайт Apple. Вводим Apple ID и пароль, которые у нас уже есть.
Соглашаемся с пользовательским соглашением. Нажимаем на кнопку Submit. Оказываемся на welcome-экране.
Нажимаем Join the Apple Developer Program. Переходим на следующий экран.
Наша цель — синяя кнопка Enroll в правом верхнем углу. Нажимаем её.
Теперь два пути: присоединиться к программе как физическое лицо (individual) или как юридическое (Company/Government Organization). Стоимость одинаковая — 99 долларов, вне зависимости от типа разработчика. Отличие тоже одно — статусность. В графе «продавец» будет значиться либо Ivan Ivanov, либо Touch Instinct, LCC. Если в приложении есть частичка интеллектуальной собственности, лучше перестраховаться и выложить от лица компании. Проще будет подготовить доказательную базу для Apple в случае споров.
Как разработчик
Выбираем individual и жмем кнопку Continue.
На следующем экране предлагают заполнить персональную информацию.
Ставим галку, что соглашаемся с условиями пользовательского соглашения. Жмем кнопку Continue.
Как компания
Если хотите зарегистрироваться как компания, вас ждут похожие поля и немного ада. Чтобы пройти проверку Apple, нужно добыть D-U-N-S number организации.
Duns можно добыть бесплатно на официальном сайте или купить за 12240 рублей. Последнее — наказание для тех, кто не знает английского. Через 14 дней после получения номера информация окажется у Apple. Закладывайте минимум 19 рабочих дней на ожидание. Обратите внимание, что название вашей компании на сайтах Apple и D&B должны полностью совпадать.
3. Оплачиваем аккаунт
Добрались до оплаты! Жмем кнопку Purchase.
Заполняем информацию о плательщике. Стандартная покупка в интернете, ничего необычного. У нас на этом этапе произошла небольшая заминка. Фамилия держателя карты отличалась от фамилии владельца аккаунта — Apple насторожилась. Служба поддержки попросила отправить скан загранпаспорта владельца аккаунта для подтверждения личности. Это отняло еще четыре рабочих дня. С карточки деньги списали моментально, но оплата проходила еще два дня.
Финальный штрих в истории — письмо с подтверждением, которое придет на почту. Как только пришло — порядок, можно выкладывать приложение.
4. Готовим маркетинговые материалы
Заранее готовим материалы, чтобы не терять время во время релиза.
1. Название приложения
Будет отображаться в App Store. До 30 символов.
2. Ключевые слова
Одно или несколько ключевых слов, описывающих приложение. Поиск в App Store по ключевым словам дает более точные результаты. Разделяйте ключевые слова запятыми. До 100 символов.
3. Описание
Описание приложения также будет использовано в приложении для Apple Watch.
Максимум 4000 символов.
4. E-mail службы поддержки
В формате support@touchin.ru.
5. Имя разработчика
Тут все просто.
6. Категория
Нужно выбрать меньшее из зол.
Бизнес, Газеты и журналы, Дети, Еда и напитки, Здоровье и фитнес, Игры, Каталоги, Книги, Медицина, Музыка, Навигация, Новости, Образ жизни, Образование, Погода, Покупки, Производительность, Путешествия, Развлечения, Социальные сети, Спорт, Справочники, Утилиты, Финансы, Фото и видео.
7. Номер версии
Номер версии приложения.
8. URL-адрес рекламного сайта
URL-адрес с рекламной информацией о приложении. Будет отображаться в App Store.
9. Политика конфиденциальности
Если приложение собирает данные пользователей, нужна ссылка на политику конфиденциальности.
10. Снимки экрана
Снимки экрана должны быть в формате JPG или PNG и цветовом пространстве RGB.
Не более пяти снимков для каждого типа устройства. Типов устройств четыре: iPhone 4, 5, 6, 6plus. С подробной информацией о требованиях к графическим данным можно ознакомиться на сайте Apple.
Видео о приложении — по желанию. Требования: формат M4V, MP4 или MOV. Не более 500 MB.
11. Иконка
В формате JPG или PNG, в цветовом пространстве RGB и с разрешением не менее 72 точек на дюйм. Никаких закругленных углов, Apple сам все сделает. Разрешение 1024 x 1024 пикселей.
12. Авторские права
Имя лица или название организации, которые владеют уникальными правами на приложение. Указывается после года получения прав (если применимо). Например, «2008 ИП Иванов И.И.» или «Touch Instinct»..
13. URL-адрес службы поддержки
URL-адрес службы поддержки приложения. Будет отображаться в App Store.
14. Контактная информация
Сотрудник вашей организации, с которым можно связаться в случае возникновения вопросов при публикации. Укажите имя, почту, номер телефона сотрудника.
15. Примечания
Дополнительная информация о приложении, которая может помочь при проверке. До 4000 символов.
16. Пользовательское соглашение
Если отличается от эпловского.
17. Что нового
Предоставьте информацию о том, что нового в этой сборке и что необходимо протестировать. До 3 600 символов.
18. Возрастной лимит
Если есть.
19. Демонстрационная учетная запись
Предоставьте имя пользователя и пароль для учетной записи с полным доступом. Если Apple не сможет залогиниться в приложении для проверки, то отклонит его. Если предусмотрена авторизация через смс, обязательно предоставьте номер телефона для Apple, на который компания может позвонить и запросить код подтверждения для входа в приложение.
20. Описание приложения
Для бета-тестирования. Должно отражать функции и возможности приложения.
До 6 000 символов.
Начиная с iOS 11
21. Рекламный текст
Появится над описанием в App Store. Будет отображаться для пользователей устройств с iOS 11 и новее. До 170 символов.
22. Подзаголовок
Краткое описание приложения, которое появится под его названием в App Store. До 30 символов.
Для приложений с Apple Watch
23. Значок для App Store для Apple Watch
Для приложений, собранных с помощью Xcode 9 и новее, значок должен быть включен в сборку.
24.Снимки экрана Apple Watch
Снимки экрана должны иметь формат JPG или PNG (цветовое пространство RGB) 312 x 390 pixels.
Напомню, какую информацию увидит ваш пользователь. Так будет выглядеть веб-версия.
Источник
Enrolling and Verifying Your Identity with the Apple Developer App
Developers in select regions 1 around the world can use the Apple Developer app to enroll in the Apple Developer Program and to verify their identity for other processes.
Enrolling in the Apple Developer Program as an individual
If you’re an individual or sole proprietor/single-person business, follow these steps to enroll in the Apple Developer Program on your iPhone or iPad. Before you begin, you’ll need:
- An iPhone or an iPad with Touch ID, Face ID, or a passcode enabled. You must use the same device for the entire enrollment process.
- An Apple ID with two-factor authentication turned on. Your Apple ID information must be valid and up to date — including, but not limited to, your first name (given name), last name (family name), address, phone number, trusted phone number, and trusted devices.
- The latest version of the Apple Developer app installed on your device.
- To sign in to iCloud on your device.
Start enrollment
- Launch the Apple Developer app on the device you want to use for enrollment.
- Tap the Account tab.
- Sign in with your Apple ID. This can be different than the Apple ID signed in to your device, but must have two-factor authentication turned on.
- If prompted, review the Apple Developer Agreement and tap Agree.
- Tap Enroll Now.
- Review the program benefits and requirements and tap Continue.
Enter your personal information
- Enter your first name, last name, and phone number. Your personal legal name will be listed as the seller on the App Store. Do not enter an alias, nickname, or company name as your first or last name, as entering your legal name incorrectly will cause a delay in the completion of your enrollment review.
- You’ll be asked to verify your identity using your driver’s license or government-issued photo ID: 2
- Capture the front of your photo ID and tap Confirm.
- Capture the back of your photo ID and tap Confirm.
- Follow the steps on the next few screens:
- Review your submitted information and tap Continue.
- Select Individual as your entity type.
- Review the terms of the Apple Developer Program License Agreement and tap Agree.
Complete purchase
Review your annual membership subscription details and tap the Subscribe button. Membership is provided on an annual basis as an auto-renewable subscription that renews until cancelled. Your purchase will use the payment methods associated with your App Store (iOS 14) or iTunes and App Store (iOS 13.7 or earlier) account. 3 A receipt will be emailed to you, and you can resend the receipt to yourself via email at any time from Purchase History in Settings. You can cancel your subscription in Settings up to one day before your annual renewal date. Membership fees paid for the year during which you cancel are nonrefundable.
Enrolling in the Apple Developer Program as an organization
If you’re an employee at a company, nonprofit organization, joint venture, partnership, or government organization, follow these steps to enroll in the Apple Developer Program on your iPhone or iPad. Note that as the person enrolling your organization in the Apple Developer Program, you must have the legal authority to bind your organization to legal agreements. You must be the organization’s owner/founder, executive team member, senior project lead, or an employee with legal authority granted to you by a senior employee. Before you begin, you’ll need:
- An iPhone or an iPad with Touch ID, Face ID, or a passcode enabled. You must use the same device for the entire enrollment process.
- An Apple ID with two-factor authentication turned on. Your Apple ID information must be valid and up to date — including, but not limited to, your first name (given name), last name (family name), address, phone number, trusted phone number, and trusted devices.
- The latest version of the Apple Developer app installed on your device.
- To sign in to iCloud on your device.
Start enrollment
- Launch the Apple Developer app on the device you want to use for enrollment.
- Tap the Account tab.
- Sign in with your Apple ID. This can be different than the Apple ID signed in to your device, but must have two-factor authentication turned on.
- If prompted, review the Apple Developer Agreement and tap Agree.
- Tap Enroll Now.
- Review the program benefits and requirements and tap Continue.
Enter your information as the Account Holder
- Enter your legal first name, legal last name, and phone number. Do not enter an alias, nickname, or company name as your legal name, as doing so will cause a delay in the completion of your enrollment review.
- You’ll be asked to verify your identity using your driver’s license or government-issued photo ID: 2
- Capture the front of your photo ID and tap Confirm.
- Capture the back of your photo ID and tap Confirm.
- Review the information you submitted and tap Continue Enrollment.
Enter your organization’s information
Follow the steps on the next few screens to provide the following information:
- Entity type.
- Legal entity name. We do not accept DBAs, fictitious businesses, trade names, or branches. The legal entity name will appear as the “seller” for apps you distribute. Example: Seller: ABC Company, Inc.
- D‑U‑N‑S® Number. Your organization must have a D‑U‑N‑S Number so that we can verify its identity and legal entity status. These unique nine-digit numbers are assigned by Dun & Bradstreet and are widely used as standard business identifiers. You can look yours up and request one for free.
- Headquarters address and phone number.
- Website. Your organization’s website must be publicly available and the domain name must be associated with your organization.
- Signing authority confirmation. Confirm that you have the authority to bind your organization to legal agreements and provide the contact information of an employee who can verify your signature authority.
- Optionally, if your organization is a nonprofit, educational, or government organization, you can request a fee waiver.
After you’ve submitted your information, it will be reviewed by Apple. You’ll then receive an email with next steps.
Complete enrollment and purchase
Once your enrollment information has been verified and approved, you’ll receive an email letting you know that you can complete your enrollment.
- Launch the Apple Developer app on the device you used for enrollment.
- Tap the Account tab.
- Sign in with the Apple ID you used for enrollment.
- Tap Continue Your Enrollment.
- Review the terms of the Apple Developer Program License Agreement and tap Agree.
- Review your annual membership subscription details and tap the Subscribe button.
Membership is provided on an annual basis as an auto-renewable subscription that renews until cancelled. Your purchase will use the payment methods associated with your App Store (iOS 14) or iTunes and App Store (iOS 13.7 or earlier) account. 3 If you need to use your organization’s credit card, add it to the Apple ID that’s signed in to your device’s settings in the Media & Purchases section (iOS 14) or the iTunes & App Store section (iOS 13.7 or earlier). This can be a different Apple ID than the one you use to enroll. A receipt will be emailed to you, and you can resend the receipt to yourself via email at any time from Purchase History in Settings. You can cancel your subscription in Settings up to one day before your annual renewal date. Membership fees paid for the year during which you cancel are nonrefundable.
Verifying your identity
Identity verification in the app is required for certain processes, including those that are started and completed on the web (for example, accepting an Account Holder transfer or applying for the Apple Developer Enterprise Program). Once your identity has been verified, it’s associated with your Apple ID and can’t be verified again by signing in with other Apple IDs. Before you begin, you’ll need:
- An iPhone or an iPad with Touch ID, Face ID, or a passcode enabled. You must use the same device for the entire enrollment process.
- An Apple ID with two-factor authentication turned on. Your Apple ID information must be valid and up to date — including, but not limited to, your first name (given name), last name (family name), address, phone number, trusted phone number, and trusted devices.
- The latest version of the Apple Developer app installed on your device.
- To sign in to iCloud on your device.
Verify your identity
- Launch the Apple Developer app.
- Tap the Account tab.
- Sign in with your Apple ID associated with your application or Apple Developer account.
- Tap Verify Your Identity.
- Enter your legal first name, legal last name, and phone number. Do not enter an alias, nickname, or company name as your legal name, as doing so will cause a delay in verification.
- Capture your driver’s license or government-issued photo ID: 2
- Capture the front of your photo ID and tap Confirm.
- Capture the back of your photo ID and tap Confirm.
- Review the information you submitted and tap Continue.
Complete the process
When your identity has been verified, you’ll see a confirmation screen. You can then return to the web to complete the process if needed.
Renewing your annual membership subscription
If you enrolled through the Apple Developer app, your membership will renew as an auto-renewable subscription. The default payment method associated with your App Store account (iOS 14) or iTunes and App Store account (iOS 13.7 and earlier) will be used. 3 If you need to use your organization’s credit card, add it to the Apple ID that’s signed in to your device’s settings in the Media & Purchases section (iOS 14) or the iTunes & App Store section (iOS 13.7 or earlier). This can be a different Apple ID than the one used to enroll.
Cancelling and resubscribing
You can cancel your subscription at any time and retain access to membership benefits until your membership’s expiration date, which you can view in the Account tab in the Apple Developer app. If you cancel your subscription and want to resubscribe, you can do so at any time for up to one year after your membership expiration date.
If you enrolled through the Apple Developer website, renewing your membership through the Apple Developer app is not currently supported.
1 Enrollment through the Apple Developer app is available in all regions supported by the App Store, except India and Kosovo. For information about using the Apple Developer app in China mainland, view this page in Simplified Chinese.
2 Photo ID: Apple will only use this information to verify your identity and prevent fraud. Apple may securely share this information with a third-party identity verification service provider that is prohibited from using this information for purposes other than identity verification and fraud prevention. Apple requires the third-party service provider to delete this information, and any information they obtained from it, as soon as it is no longer needed and retention is not required by law. If you provide an image of your photo ID, Apple will check its authenticity and pull your name and address from the photo, but will not keep the image. If you do not want to provide a photo of your government ID, and it is not required by law, you may contact Apple for an alternative method of identity verification. For details on how your information is used for enrollment and identity verification, read Apple’s Developer Programs and Your Privacy.
3 Store credit is not accepted as a form of payment for Apple Developer Program memberships.
If you experience an issue while using the app, please contact us.
Feedback Assistant
Submit bug reports and request enhancements to APIs and developer tools.
Send us feedback
Developer Forums
Ask questions and find answers by Apple engineers and other developers.
Contact Us
Tell us how we can help and we’ll find a solution by phone or email.
Источник


