- Android — Services
- Example
- Полный список
- Android Services — Tutorial
- 1. Android Services
- 1.1. What are services?
- 1.2. Services and background processing
- 1.3. Platform service and custom services
- 1.4. Starting and defining custom services
- 1.5. Foreground services
- 2. Defining custom services
- 2.1. Implementation and declaration
- 2.2. Start a service
- 2.3. Service start process and execution
- 2.4. Service restart behavior
- 2.5. Stopping a service
- 3. IntentServices for one time tasks
- 4. Communication with services
- 4.1. Options for communication
- 4.2. Using Intent data
- 4.3. Using receiver
- 4.4. Activity binding to local service
- 4.5. Handler and ResultReceiver or Messenger
- 4.6. AIDL for services in a different process
- 5. Scheduling service
- 6. Exercise: Using services and service communication
- 7. Exercise: Define and consume local service
Android — Services
A service is a component that runs in the background to perform long-running operations without needing to interact with the user and it works even if application is destroyed. A service can essentially take two states −
A service is started when an application component, such as an activity, starts it by calling startService(). Once started, a service can run in the background indefinitely, even if the component that started it is destroyed.
A service is bound when an application component binds to it by calling bindService(). A bound service offers a client-server interface that allows components to interact with the service, send requests, get results, and even do so across processes with interprocess communication (IPC).
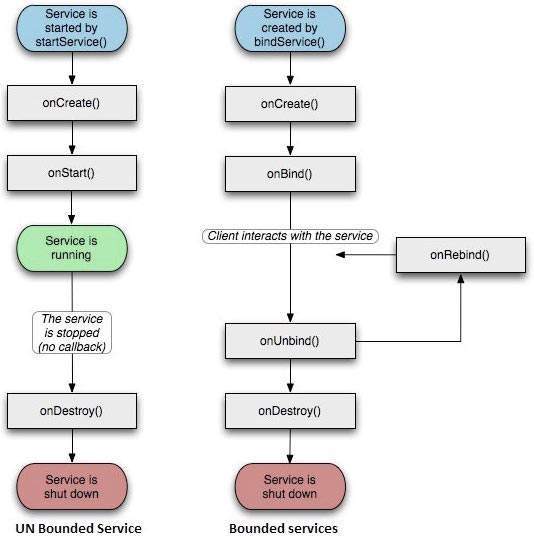
A service has life cycle callback methods that you can implement to monitor changes in the service’s state and you can perform work at the appropriate stage. The following diagram on the left shows the life cycle when the service is created with startService() and the diagram on the right shows the life cycle when the service is created with bindService(): (image courtesy : android.com )
To create an service, you create a Java class that extends the Service base class or one of its existing subclasses. The Service base class defines various callback methods and the most important are given below. You don’t need to implement all the callbacks methods. However, it’s important that you understand each one and implement those that ensure your app behaves the way users expect.
| Sr.No. | Callback & Description | |||||||||||||||||||
|---|---|---|---|---|---|---|---|---|---|---|---|---|---|---|---|---|---|---|---|---|
| 1 |
| Step | Description |
|---|---|
| 1 | You will use Android StudioIDE to create an Android application and name it as My Application under a package com.example.tutorialspoint7.myapplication as explained in the Hello World Example chapter. |
| 2 | Modify main activity file MainActivity.java to add startService() and stopService() methods. |
| 3 | Create a new java file MyService.java under the package com.example.My Application. This file will have implementation of Android service related methods. |
| 4 | Define your service in AndroidManifest.xml file using tag. An application can have one or more services without any restrictions. |
| 5 | Modify the default content of res/layout/activity_main.xml file to include two buttons in linear layout. |
| 6 | No need to change any constants in res/values/strings.xml file. Android studio take care of string values |
| 7 | Run the application to launch Android emulator and verify the result of the changes done in the application. |
Following is the content of the modified main activity file MainActivity.java. This file can include each of the fundamental life cycle methods. We have added startService() and stopService() methods to start and stop the service.
Following is the content of MyService.java. This file can have implementation of one or more methods associated with Service based on requirements. For now we are going to implement only two methods onStartCommand() and onDestroy() −
Following will the modified content of AndroidManifest.xml file. Here we have added tag to include our service −
Following will be the content of res/layout/activity_main.xml file to include two buttons −
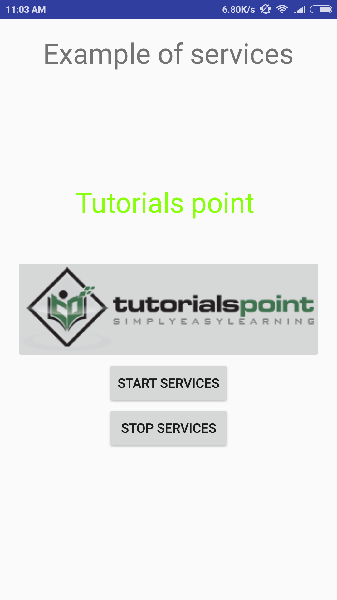
Let’s try to run our modified Hello World! application we just modified. I assume you had created your AVD while doing environment setup. To run the app from Android studio, open one of your project’s activity files and click Run  icon from the tool bar. Android Studio installs the app on your AVD and starts it and if everything is fine with your set-up and application, it will display following Emulator window −
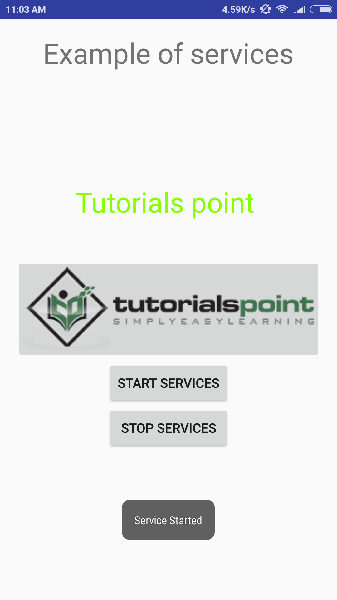
Now to start your service, let’s click on Start Service button, this will start the service and as per our programming in onStartCommand() method, a message Service Started will appear on the bottom of the the simulator as follows −
To stop the service, you can click the Stop Service button.
Источник
Полный список
— создаем, запускаем и останавливаем простой сервис
Для начала надо определиться, как по-русски называть Service. Общепринятый перевод – служба. Наиболее популярный пример – службы в Windows. Но для системы Android мне привычнее использовать слово сервис. Его я и буду использовать в своих уроках для обозначения Service.
И еще один момент надо сразу прояснить. Service прописывается в манифесте рядом с Activity, и получается, что приложение (Application) содержит в себе и Activity и сервис. Предлагаю для упрощения изложения материала под словом приложение понимать все таки только Activity, которые можно запустить и увидеть на экране. Т.е. то, что мы раньше и называли приложением. А сервис считать отдельной от приложения вещью. А если надо будет обозначить приложение, как контейнер для Activity и сервиса, буду использовать слово Application.
Т.е. приложение – это набор Activity, сервис – Service. Приложение + сервис = Application. Как то так.
Итак, сервис – это некая задача, которая работает в фоне и не использует UI. Запускать и останавливать сервис можно из приложений и других сервисов. Также можно подключиться к уже работающему сервису и взаимодействовать с ним.
В качестве примера можно рассмотреть алгоритм почтовой программы. Она состоит из приложения и сервиса. Сервис работает в фоне и периодически проверяет наличие новой почты, скачивает ее и выводит уведомления. А когда вы запускаете приложение, оно отображает вам эти загруженные сервисом письма. Также приложение может подключиться к сервису и поменять в нем, например, период проверки почты или совсем закрыть сервис, если постоянная проверка почты больше не нужна.
Т.е. сервис нужен, чтобы ваша задача продолжала работать, даже когда приложение закрыто. В ближайших уроках мы разберемся, какие способы взаимодействия существуют между приложением и сервисом. В этом же уроке создадим простейший сервис, который будет выводить что-нибудь в лог. А приложение будет запускать и останавливать сервис.
Project name: P0921_ServiceSimple
Build Target: Android 2.3.3
Application name: ServiceSimple
Package name: ru.startandroid.develop.p0921servicesimple
Create Activity: MainActivity
Добавим в strings.xml строки:
Две кнопки – для запуска и остановки сервиса. И ProgressBar.
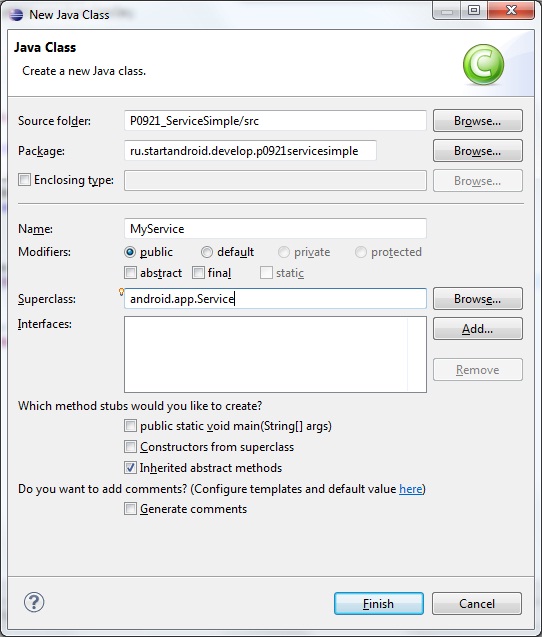
Рядом с MainActivity создайте класс MyService, наследующий android.app.Service
У сервиса так же, как и у Activity есть методы onCreate и onDestroy – которые срабатывают при создании и уничтожении сервиса.
Метод onStartCommand – срабатывает, когда сервис запущен методом startService. В нем мы запускаем наш метод someTask, который пока пуст. У onStartCommand на вход и на выход идут параметры, мы их пока не используем.
Метод onBind нам пока не интересен. Но реализовать его мы обязаны, возвращаем null.
someTask – здесь будем кодить работу для сервиса
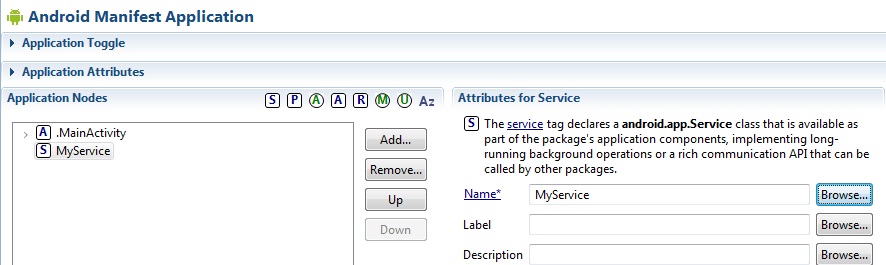
Сервис, как и новые, создаваемые Activity необходимо прописать в манифесте. Делается это полностью аналогично. Жмете Add, выбираете Service. И в поле Name выбираете MyService.
Здесь у нас два метода, которые срабатывают при нажатии на кнопки Start service и Stop service. В них мы соответственно запускаем или останавливаем сервис методами startService и stopService. На вход передаем Intent, указывающий на сервис. Это очень похоже на то, как мы вызываем Activity методом startActivity.
Давайте все сохраним и запустим приложение.
Нажмем Start service и смотрим лог:
Выполнился метод onCreate – сервис создался, и onStartCommand – сервис выполняет содержимое метода onStartCommand.
Если мы теперь еще раз нажмем Start service:
Сервис уже создан, onCreate не вызывается, выполняется только метод onStartCommand.
Жмем Stop service
Убедимся, что сервис не зависит от приложения. Жмем Start service.
Сервис запущен. Закрываем приложение кнопкой Назад. В логах тишина, onDestroy в сервисе не выполнился, сервис продолжает жить. Ему все равно, работает приложение, его запустившее или не работает.
Долгим удержанием клавиши Домой выведем список последних приложений
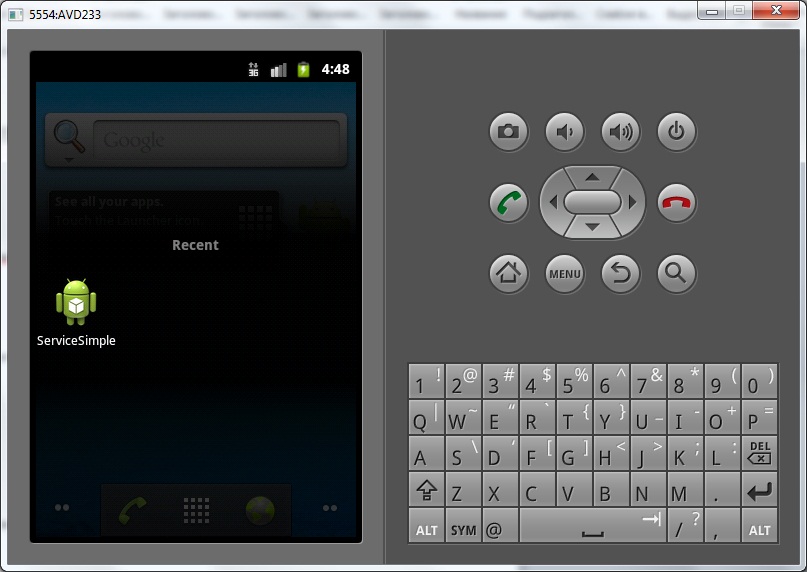
снова откроем наше приложение и нажмем Stop service. В логах:
Теперь попробуем выполнять что-нибудь осмысленное в onStartCommand. Перепишем метод someTask в MyService.java:
Будем с интервалом в 1 секунду выводить в лог записи из сервиса.
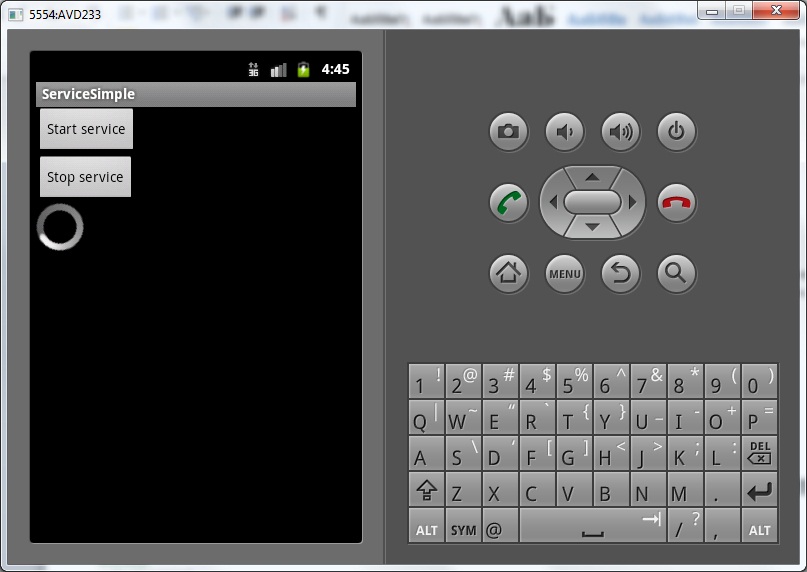
Все сохраним, запустим и нажмем Start service:
ProgressBar замер, экран стал недоступен. А логи идут:
Вывод – сервис работает в основном потоке и блокирует экран.
Вынесем цикл с паузами в отдельный поток. И чтобы два раза не бегать, давайте заодно узнаем, что делает метод stopSelf.
Перепишем метод someTask:
Мы вынесли код в отдельный поток и добавили вызов метода stopSelf – этот метод аналогичен методу stopService, он останавливает сервис, в котором был вызван.
Все сохраняем, запускаем и жмем Start service. ProgressBar крутится, экран не блокирован, логи идут:
Сервис создался, выполнил работу и сам остановился методом stopSelf.
На следующем уроке:
— передаем данные в сервис
— рассматриваем методы остановки сервиса stopSelf и stopSelfResult
Присоединяйтесь к нам в Telegram:
— в канале StartAndroid публикуются ссылки на новые статьи с сайта startandroid.ru и интересные материалы с хабра, medium.com и т.п.
— в чатах решаем возникающие вопросы и проблемы по различным темам: Android, Kotlin, RxJava, Dagger, Тестирование
— ну и если просто хочется поговорить с коллегами по разработке, то есть чат Флудильня
— новый чат Performance для обсуждения проблем производительности и для ваших пожеланий по содержанию курса по этой теме
Источник
Android Services — Tutorial
Using styles and themes in Android. Developing own services and using system services in Android. This tutorial describes how to create and consume Android services.
1. Android Services
1.1. What are services?
A service is a component which runs in the background without direct interaction with the user. As the service has no user interface, it is not bound to the lifecycle of an activity.
Services are used for repetitive and potentially long running operations, i.e., Internet downloads, checking for new data, data processing, updating content providers and the like.
Services run with a higher priority than inactive or invisible activities and therefore it is less likely that the Android system terminates them. Services can also be configured to be restarted if they get terminated by the Android system once sufficient system resources are available again.
It is possible to assign services the same priority as foreground activities. In this case it is required to have a visible notification active for the related service. It is frequently used for services which play videos or music.
1.2. Services and background processing
By default, a service runs in the same process as the main thread of the application.
Therefore, you need to use asynchronous processing in the service to perform resource intensive tasks in the background. A commonly used pattern for a service implementation is to create and run a new Thread in the service to perform the processing in the background and then to terminate the service once it has finished the processing.
Services which run in the process of the application are sometimes called local services .
1.3. Platform service and custom services
The Android platform provides and runs predefined system services and every Android application can use them, given the right permissions. These system services are usually exposed via a specific Manager class. Access to them can be gained via the getSystemService() method. The Context class defines several constants for accessing these services.
An Android application can, in addition to consuming the existing Android platform services, define and use new services. Defining your custom services allows you to design responsive applications. You can fetch the application data via it and once the application is started by the user, it can present fresh data to the user.
1.4. Starting and defining custom services
Custom services are started from other Android components, i.e., activities, broadcast receivers and other services.
1.5. Foreground services
A foreground service is a service that should have the same priority as an active activity and therefore should not be killed by the Android system, even if the system is low on memory. A foreground service must provide a notification for the status bar, which is placed under the «Ongoing» heading, which means that the notification cannot be dismissed unless the service is either stopped or removed from the foreground.
2. Defining custom services
2.1. Implementation and declaration
A service needs to be declared in the AndroidManifest.xml file and the implementing class must extend the Service class or one of its subclasses.
The following code shows an example for a service declaration and its implementation.
2.2. Start a service
An Android component (service, receiver, activity) can trigger the execution of a service via the startService(intent) method.
Alternatively, you can also start a service via the bindService() method call. This allows you to communicate directly with the service. We discuss that later.
2.3. Service start process and execution
If the startService(intent) method is called and the service is not yet running, the service object is created and the onCreate() method of the service is called.
Once the service is started, the onStartCommand(intent) method in the service is called. It passes in the Intent object from the startService(intent) call.
If startService(intent) is called while the service is running, its onStartCommand() is also called. Therefore your service needs to be prepared that onStartCommand() can be called several times.
| What if you call this method twice in your code? Do you have to worry about synchronizing the onStartCommand() method call? No, this method is called by the Android system in the main user interface thread, therefore it cannot be called simultaneously from two different threads. |
A service is only started once, no matter how often you call the startService() method.
2.4. Service restart behavior
In its onStartCommand() method call, the service returns an int which defines its restart behavior in case the service gets terminated by the Android platform. You can use the constants, the most common options are described by the following table.
| Option | Description |
|---|---|
| You can check if the service was restarted via the Intent.getFlags() method. START_FLAG_REDELIVERY (in case the service was started with Service.START_REDELIVER_INTENT) or START_FLAG_RETRY (in case the service was started with Service.START_STICKY) is passed. |
2.5. Stopping a service
You stop a service via the stopService() method. No matter how frequently you called the startService(intent) method, one call to the stopService() method stops the service.
A service can terminate itself by calling the stopSelf() method. This is typically done if the service finishes its work.
3. IntentServices for one time tasks
You can also extend the IntentService class for your service implementation.
The IntentService is used to perform a certain task in the background. Once done, the instance of IntentService terminates itself automatically. An example for its usage would be downloading certain resources from the internet.
The IntentService class offers the onHandleIntent() method which will be asynchronously called by the Android system.
4. Communication with services
4.1. Options for communication
There are several possibilities for a communication between an activity and a service. The following description discusses the possible approaches and provides recommendation which to use.
4.2. Using Intent data
In a simple scenario no direct communication is required. The service receives the intent data from the starting Android component and performs its work. No notification is necessary. For example, in case the service updates a content provider, the activity is notified by the content provider and no extra step in the service is necessary. This approach works for local and services running in their own process.
4.3. Using receiver
You can use broadcasts and registered receivers for the communication. For example, your activity can register a broadcast receiver for an event and the service sends outs corresponding events. This is a very typical scenario, in which the service need to signal to the activity that his processing has finished.
This communication flow is depicted in the following graphic.
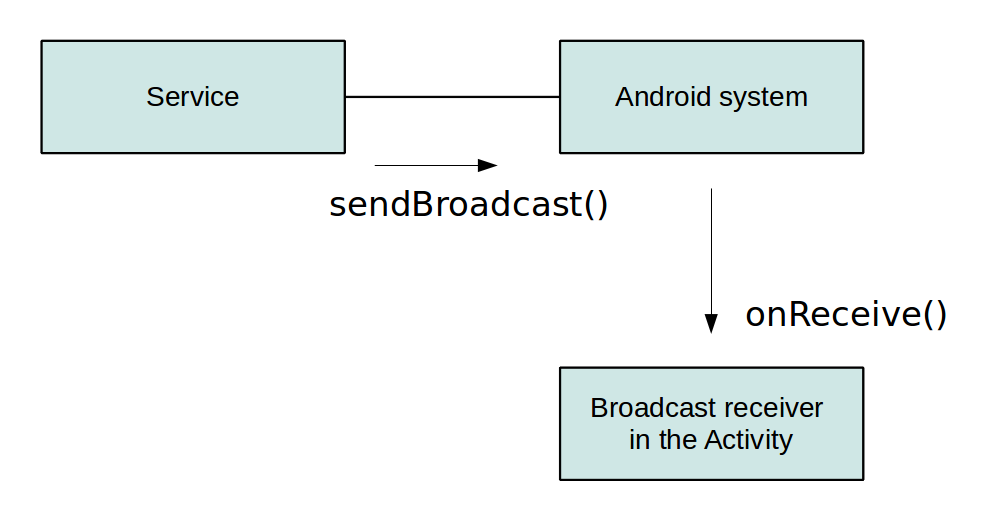
This approach works for local and services running in their own process.
Android provides the LocalBroadcastManager class in the support library v4. This is a helper class to register for and send broadcasts of Intents to local objects within your process. This approach improves security as the broadcast events are only visible within your process and is faster than using standard events.
4.4. Activity binding to local service
If the service is started in the same process as the activity, the activity can directly bind to the service. This is a relatively simple and efficient way to communicate and recommended for activities which need to have a fast communication layer with the service.
This approach works for local services.
4.5. Handler and ResultReceiver or Messenger
If the service should be communicating back to the activity, it can receive an object of type Messenger via the Intent data it receives from the activity. If the Messenger is bound to a Handler in the activity, the service can send objects of type Message to the activity.
A Messenger is parcelable, which means it can be passed to another process and you can use this object to send Messages to the Handler in the activity.
Messenger also provides the method getBinder() which allows passing a Messenger to the activity. The activity can therefore send Messages to the service.
This approach works for local services running in their own process.
4.6. AIDL for services in a different process
To bind to a service which runs in a different process, you need to use Inter Process Communication (IPC) to community your the data. To do so, you need to create a AIDL file which looks similar to a Java interface, but ends with the .aidl file extension and is only allowed to extend other AIDL files.
This approach is required if you need to bind to a service running in another process, i.e., if your service is consumed by other Android applications.
You can find more information about this approach in the Android developer documentation about AIDL.
5. Scheduling service
See https://www.vogella.com/tutorials/AndroidTaskScheduling/article.html — Android task scheduling to learn how to schedule service periodically.
6. Exercise: Using services and service communication
The following example demonstrates how to use a service to download a file from the Internet based on a button click from an activity. Once done, the service notifies the activity via a broadcast receiver that the download is complete.
In this exercise you use the IntentService class, as this class provides automatic background processing.
Create a new project called com.vogella.android.service.receiver with the activity called MainActivity.
Create the following class for the service.
Add this class to the AndroidManifest.xml file. Also add the permission to write to external storage and to access the Internet. The resulting AndroidManifest.xml file should look similar to the following listing.
Change the layout file of your activity to the following.
Change MainActivity to the following.
If you run your example and press the button, the download should be performed by the service. Once done, the user interface is updated and a Toast with the file name is shown.
Change the setting so that the service runs in its own process. Ensure that the application still works, as broadcast receivers are received across process boundaries.
7. Exercise: Define and consume local service
This exercise demonstrates how to bind to a local service from an activity.
The activity binds itself to the service to access its data.
Create a new project called com.vogella.android.localservice with the activity called MainActivity using the Empty Activity template.
Create the following LocalWordService class.
Register your service in the AndroidManifest.xml file.
Change the layout file of the activity similar to the following example.
Change your activity class to the following code.
Run your application. Via your buttons you can update your list or tell the service to fetch more data.
Источник


