- Running A React Native App on an Android Virtual Device with Expo in Windows 10
- ‘Couldn’t start project on Android‘ Message
- Couldn’t adb reverse: device ‘adb’ not found
- DEV SOFT LIFE FREE .
- Что такое React Native?
- Быстрое создание React Native приложения
- Установка NodeJs
- Установка Expo
- Guideline for Running Expo on Android Studio Emulator #1420
- Comments
- leosurwiki commented Feb 13, 2018
- maxh commented Feb 13, 2018 •
- brentvatne commented Feb 13, 2018
- jesseruder commented Feb 16, 2018
- barakcodes commented May 18, 2018
- jesseruder commented May 21, 2018
- barakcodes commented May 21, 2018
- smusa commented Jul 5, 2018
- esamelson commented Jul 9, 2018
- esamelson commented Jul 12, 2018
- Bobby-Lux commented Oct 21, 2018 •
Running A React Native App on an Android Virtual Device with Expo in Windows 10
Jan 4, 2019 · 3 min read
In this tutorial, I will discuss how to launch your React Native mobile application on an Android emulator in Windows 10 using Command Prompt.
As a forewarning, you may encounter problems which are particular to your programming environment and are not covered here.
This tutorial assumes the existence of a project in React Native and some familiarity with the Expo toolchain (https://expo.io/). If not, there’s a lot of material on the internet to get that far, the official React Native documentation website from Facebook for example.
If so, to set up an Android emulator AKA Android Virtual Device (AVD):
( 1 ) Download and install the Android SDK which comes bundled with Android Studio .
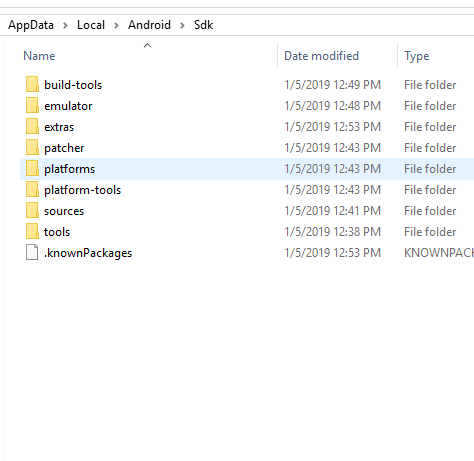
(2) After download and installation, the Android SDK can typically be found at C:\Users\ User\AppData\Local\Android\Sdk\ . You will have to add several sub-folders to your environment PATH variable.
(3) Launch Command Prompt and add these directories to your environment PATH variable with the following commands:
(4) Install the latest SDK tools and system image for API level 28:
( sdkmanager is dependent on the . \tools\bin\ directory we added)
(5) Create an Android Virtual Device (AVD) using the following command:
( avdmanager is also dependent on the .\tools\bin directory we added )
More information on the above command and its parameters at https://developer.android.com/studio/command-line/avdmanager
If you have Hyper-V enabled, you will be required to disable it to run HAXM. This can be achieved by following the instructions available at https://www.nextofwindows.com/how-to-enable-configure-and-use-hyper-v-on-windows-10 . This may call for an elevated user (e.g. Administrator).
NOTE: You may also need to restart your computer which may require repeating the steps involving the PATH variable. You can also set PATH via Control Panel .
(7) Run the following commands in Command Prompt to start your emulator.
(dependent on ./platform-tools )
(dependent on ./emulator)
This will launch your Android emulator in a new window.
(8) Finally, navigate to your React Native project folder in Command Prompt and launch Expo:
(9) On the left side-bar of the Expo window in your default browser, select the Run on Android device/emulator component.
In several moments, your React Native application should appear on the the Android emulator GUI after it asks you to permit some features of Expo.
Источник

React Native Expo – 11 February 2021 15 October 2021

When developing an Expo app on a PC you need to be able to run the app on an Android emulator as you don’t have any iOS simulators to work with like you do on a Mac. I found the Expo instructions a little lacking in some detail, and as a Windows PC user primarily, I struggled to find all the information I needed in one place, to run my Expo app in an Android Emulator.
I’m presuming at this point that you’ve, installed Expo, created an Expo project, and built your Expo app. You’ll need to download Android Studio and install it, and have at least one Android emulator configured.
So, to run your Expo app in an Android emulator :
- Start Expo by typing expo start on the command line.
- Open Android Studio.
- Open your project in Android Studio.
- Open the ‘AVD manager’ from the Android Studio toolbar.
- Run an Android emulator.
- Click ‘run on Android device/emulator‘ in the Expo client.
From Android Studio here is the open AVD Manager button:

To run an Android Emulator, click the play symbol next to the one you want to use from the AVD Manager window:

There’s a few problems you can find with each step, so here’s a few things to bear in mind if any of the above steps don’t work.
‘Couldn’t start project on Android‘ Message
If you see this message:
“Couldn’t start project on Android: No Android connected device found, and no emulators could be started automatically. Please connect a device or create an emulator (https://docs.expo.io/workflow/android-studio-emulator). Then follow the instructions here to enable USB debugging: https://developer.android.com/studio/run/device.html#developer-device-options. If you are using Genymotion go to Settings -> ADB, select “Use custom Android SDK tools”, and point it at your Android SDK directory.”
…it means that steps 2 and 3 probably haven’t been done. It’s not a particularly obvious message and you’d be surprised how easy it is to forget both steps.
Couldn’t adb reverse: device ‘adb’ not found
If you see a message saying:
“Couldn’t adb reverse: device ‘adb’ not found”
… most of the time if I ignore this and click ‘Run in Android Emulator’ again after a few seconds it runs just fine.
Here is a link to React Native and Expo books on Amazon.
Please note some links on this page are affiliate links. As an Amazon Associate I earn from qualifying purchases.
Источник
DEV SOFT LIFE FREE .
Swift, Objective-C, Java, Kotlin – вот список языков программирования, которые вам понадобятся, чтобы создать мобильное приложение для Android и iOS. Внушительный список, на освоение которого может уйти много времени. Но мы то с вами хотим быстро – все и сразу: стать хакером за 2 дня, похудеть на 15 кг за одну неделю и прочие безобразия. Что делать? К счастью ребята из Facebook разделяют наше желание быстрого результата, поэтому они придумали фреймворк, который позволяет создавать мобильные приложения для Android и iOS только благодаря одному языку – JavaScript – и имя ему React Native.
Что такое React Native?
Если вы знакомы с веб-фреймворком React, для вас не составит труда быстро разобраться с тем, как работает React Native. По сути, React Native адаптирует фишки React под разработку мобильных приложений. Давайте рассмотрим несколько особенностей React Native:
- Декларативность. Делает возможным удобное описание и создание компонентов в виде ЧТО мы хотим, а не КАК мы хотим.
- Компонентность. Возможность создавать отдельные независимые компоненты с инкапсульрованным состоянием
- Кроссплатформенность. Вы пишите один код под Android и iOS
Вывод: что такое React Native? Это фреймворк, позволяющий одновременно создавать мобильные приложения под Android и iOS, используя для этого независимые компоненты, и делать это на понятном человеку языке.
Быстрое создание React Native приложения
Вам уже не терпится приступить к любимому делу – написанию кода – я понимаю, и поэтому хватит лирики! Давайте кодить! Но потом 🙂 Все было бы проще, если бы все было проще. Нам необходимо сделать несколько подготовительных шагов и настроить окружение. Вот список действий, которые нам необходимо сделать:
- Установить NodeJs
- Установить Expo
- Создать приложение
- Установить Android Studio и настроить эмулятор
- Установить Xcode и настроить эмулятор (только если у вас MacOS)
- Запустить приложения на эмуляторах или прямо на телефоне
Установка NodeJs
Как установить NodeJs вы можете прочитать в моей статье про Angular.
Установка Expo
Expo – это специальная библиотека, упрощающая разработку React Native приложений. Это альтернатива стандартному созданию приложения с помощью React Native CLI. Рассмотрение его работы выходит за рамки этой статьи. Главными преимуществами Expo являются готовая реализация многих нативных компонентов самого телефона, что позволяет быстрее создавать новые приложения, а также окружение, позволяющее быстро тестировать работу разрабатываемого приложения на своем смартфоне или эмуляторе.
Для того чтобы установить Expo выполните следующую команду в консоли:
Источник
Guideline for Running Expo on Android Studio Emulator #1420
Comments
leosurwiki commented Feb 13, 2018
I think we have successfully run Expo on Android Studio Emulator months ago, but it couldn’t work now. Could you provide a new guideline for running expo on android studio emulator? Really appreciate!
The text was updated successfully, but these errors were encountered:
maxh commented Feb 13, 2018 •
here’s the context from slack discussion a few weeks ago; we just wanted to file an issue to track this over time:

do you recommend using genymotion instead of the default android emulator?
also, when we publish it works, so we aren’t totally blocked on this, but hot reload on android would improve our cycle time.
brentvatne commented Feb 13, 2018
@maxh — indeed we recommend genymotion for now!
jesseruder commented Feb 16, 2018
@leosurwiki can you provide more details about why it didn’t work?
barakcodes commented May 18, 2018
I think the emulator from android studio is way more perfomant than before and might be worth intergrating now
jesseruder commented May 21, 2018
@barakcodes yes it has improved a lot, I think it’s reasonable to switch to suggesting it in the docs. Would you want to send a PR to the docs?
barakcodes commented May 21, 2018
@jesseruder Yes I think PR is what’s needed but emphasis on using the latest version of android studio would be a great addition on it too .
smusa commented Jul 5, 2018
In fact i can not use Genymotion because of enterprise rules enforced by McAfee endpoint security and McAfee blocked the executable because it’s below the trust threshold enforced by McAfee rules. So it will be good to integrate Android simulator.
esamelson commented Jul 9, 2018
Hi @smusa — I’ve not had any issues using the Android Studio emulator. It shouldn’t be too hard to set up but we’ll get something into the docs soon.
esamelson commented Jul 12, 2018
Hi all — the relevant changes have been made to the docs and will go out at the time SDK 29 is released.
Bobby-Lux commented Oct 21, 2018 •
Hello, I followed the instructions in the documentation for running my project on an emulator in Android Studio. I had it working for a while, but after a few hours I started getting this error message: «The Expo SDK requires Expo to run. It appears the native Expo modules are unavailable and this code is not running on Expo. Visit https://docs.expo.io to learn more about developing an Expo project.»
I’m not sure what’s going on, since the project runs fine on the iOS simulator. Does anyone know what I’m doing wrong? I’ve included some details below.
SDK Version: 30.0.0
Dev Environment OS: MacOS High Sierra version 10.13.6
Android Emulator Setup: I’ve followed the Expo documentation to set up Android Studio. I can successfully run adb from the command line. I’ve set up a Google Pixel as my Android Emulator.
Expected Behavior:
Running expo start and launching the project in the Android Emulator should successfully start the app.
Actual Behavior:
I get the error ‘The Expo SDK requires Expo to run. It appears the native Expo modules are unavailable and this code is not running on Expo. Visit https://docs.expo.io to learn more about developing an Expo project.’
I’ve been poking around some of the other issues to see if anyone else is experiencing something similar. I saw some suggestions that I delete the /Users/myuser/.expo/android-apk-cache directory and then run npm run android ; I went ahead and tried that, but still get the same error. Any ideas what I’m doing wrong?
Источник


