- Как использовать Face Unlock на любом Android-смартфоне
- How to Unlock Android with Broken Screen
- Way 1: Unlock Broken Screen Android via Android Control Apps
- Way 2: Unlock Android Phone with Broken Screen Use On the Go Adapter and Mouse
- Way 3: Remove Screen Lock with Android Debug Bridge
- Way 4: Unlock Broken Android Phone with Tenorshare Android Unlocker
- Way 5: Unlock Broken Screen Android Use Google Remote Unlock
- Conclusion
- Dr.Fone — Screen Unlock (Android):
- Part 1. Unlock Android lock screen in standard mode
- Part 2. Unlock Android lock screen in advanced mode
Как использовать Face Unlock на любом Android-смартфоне

Когда вы слышите слова «лицо» и «замок», ваши мысли могут идти в направлении Apple. С тех пор как технологический гигант представил свой новый iPhone, FaceID был в каждом разговоре. Эта функция может просто стать следующей большой тенденцией.
Однако люди забывают, что эта функция присутствовала в Android-смартфонах давным-давно. Растущий, недоразвитый и случайный, этот вариант был более предвзятым к стилю, чем к функциональности. Если Apple подтолкнет эту тенденцию, вы можете ожидать, что Android от Google тоже предпримет шаги в этом направлении. Но сама настраиваемая природа Android позволяет уже сейчас вам воспользоваться Face Unlock.
Приложение от IObit Applock делает именно это. Он добавляет опцию Face Unlock для вашего смартфона Android. Вы можете загрузить это приложение из Play Маркета Google. Установите его, откройте, и как только вы это сделаете, он попросит вас установить шаблон. Выполните следующие действия, чтобы продолжить.
Как только шаблон будет установлен, приложение переместит вас в новое окно. В этом вы найдете приложения, которые вы можете заблокировать, например Whatsapp, Instagram, gallery.
Если ваша версия Android выше 5.0, вам необходимо включить использование доступа. Приложение автоматически перенаправит вас на страницу настроек. Включите переключатель, чтобы продолжить использование приложения.
В левом верхнем углу, рядом с названием приложения, вы увидите три горизонтальные линии. Там вы найдёте несколько параметров, таких как Face Lock, Fake lock, Delay lock. Выберите Face Lock.
Для IObit требуется дополнительная база данных для использования функции разблокировки лица, поэтому нажмите «Face Lock». Начнется загрузка. Она загружает AI, необходимый для анализа вашего лица.
После завершения необходимо сканировать и хранить ваше лицо в своей базе данных. Нажмите на нее, чтобы начать сканирование.
Теперь, как только процесс будет успешно завершен, и приложение узнает ваше лицо, пришло время выбрать приложения для применения функции Face Lock. Выберите приложения, которые вы хотите защитить. У них обычно есть открытый замок как значок, нажмите, чтобы активировать блокировку.
При этом вы успешно включили функцию разблокировки. Чтобы проверить это, откройте приложение, которое вы заблокировали, и укажите камеру в правильном направлении. Приложение будет разблокировано, если оно правильно прочитало ваше лицо. Это стороннее приложение, а не что-то встроенное в Android. До тех пор продолжайте использовать это бесплатное приложение, так как оно работает достаточно хорошо и работает плавно.
Источник
How to Unlock Android with Broken Screen
While we are enjoying the full view display on Android phone or tablet, it could turn out to be a nightmare if the touch screen is broken or cracked. The device is locked and will not respond when you enter the pattern or passcode. No matter you decide to replace the screen, or buy a new Android phone, the first thing is to is to unlock your phone and make a backup of all files.
In this article, we are going to share 5 ways to unlock Android phone with broken screen, the most recommend way is Tenorshare Android Unlocker. Keep reading and go through them.


Way 1: Unlock Broken Screen Android via Android Control Apps
Android control apps allow you to gain access to locked Android phone on a PC. When the screen is smashed, it’s a great choice to proceed. Currently, there are many controlling apps on the App Store, if you are interested in them, just search on the Internet and you can find tons of answers.

However, this method also has its disadvantage, which is you must enable ADB on computer and USB Debugging on your Android. If you didn’t turn on USB debugging before screen was broken, go to next solution.
Way 2: Unlock Android Phone with Broken Screen Use On the Go Adapter and Mouse
An OTG adapter allows a USB mouse to control and access on your Android device without PC, which is like turning your device into a USB host. It definitely can save a lot of trouble to help you unlock android phone with broken screen.
First of all, you should check whether your phone supports with OTG adapter. Connecting to a USB mouse doesn’t work for every model of Android devices. Then go to Amazon or local shop to buy an OTG, and connect it to the charge port. You then can use the mouse to enter and password and unlock Android.
Way 3: Remove Screen Lock with Android Debug Bridge
Android Debug Bridge supports to send ADB commands from your computer to Android device so as to execute developer-like changes. However, as the name suggests, you should also enable USB debugging on your phone before it’s locked. If you did that before, follow below steps to remove Android lock screen.
- Find Android SDK package on Internet and download to your PC. Extract the ZIP file.
Download Android USB drivers from your device manufacturer’s website. For example, Samsung users can find the USB driver here.
Keep typing adb device and press Enter.
adb shell input text «your code»
shell input keyevent 66
For pattern lock, you may need to use this command instead:
adb shell rm /data/system/gesture.key.
Way 4: Unlock Broken Android Phone with Tenorshare Android Unlocker
While above methods all have its limitations, I shall recommend you to take Tenorshare Android Unlocker into consideration. It supports to remove password from Android 8 to 7/6/5 devices without turning on USB debugging. Now follow me to learn how to unlock Android device when the screen is cracked or broken.
- Get Tenorshare Android Unlocker downloaded on your computer and connect your device.
On the home interface, please click on «Remove Screen Lock» function.
Then, click on Start button and confirm it with Yes to reset your Android phone.
Once the removing process done, you need to enter recovery mode. Follow the steps on interface to go on.
In the end, Tenorshare 4uKey for Android will auto unlock your device.
Note: All the data on your Android device will be erased after password removal. Do think twice before you using the software.
Way 5: Unlock Broken Screen Android Use Google Remote Unlock
Android Device Manager is mainly used to locate and find your phone if lost, however, it can also be used for unlocking when Android touch screen broken. This is achieved by restoring your device to factory settings. Also, to make this method applicable, you should have turned on Android Device Manger with your Google account before.
First of all, you should go to Device Manager from your computer. Sign in with same Google account used on your phone and let it search for your device. Click on Erase button to wipe out everything including your PIN, Patter or fingerprint lock.
Conclusion
After reading this post, I am sure you won’t have problems with Android screen cracked and can’t unlock. Again, each method has its own pros and cons, feel free to decide which one suits you best and give it a try.
Updated on 2020-11-10 / Update for Unlock Android
Источник
Dr.Fone — Screen Unlock (Android):
«I’ve forgotten my Android phone’s lock. Is there a way to remove the lock and don’t lose my data? «
Have you encountered the same situation? Don’t worry. You can try Dr.Fone to unlock the screen lock without losing your data on Samsung/LG Android devices. It supports to remove Android phone password, PIN, pattern, and fingerprint.
Part 1. Unlock Android lock screen in standard mode
Let’s see how it works to remove the Android lock screen in standard mode.
Step 1. Connect your Android phone
Launch Dr.Fone on your computer and select «Screen Unlock» among all the tools.
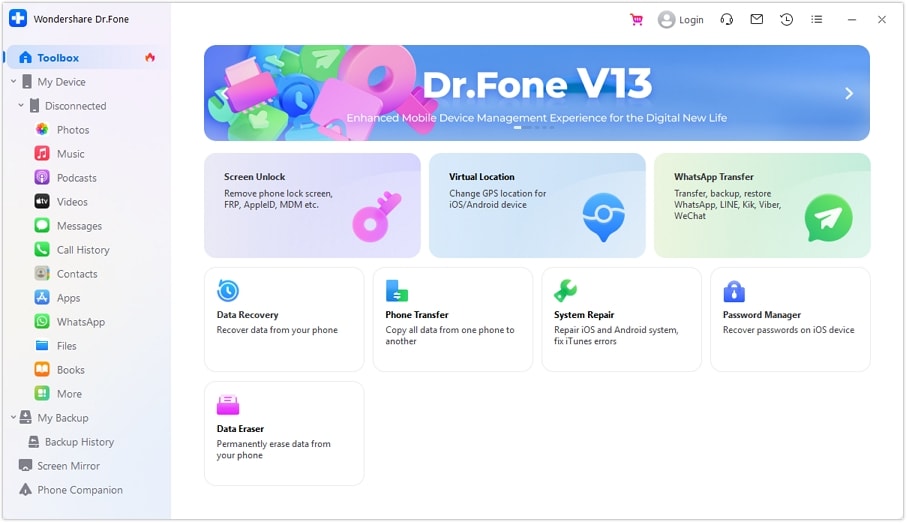
* Dr.Fone Mac version still has the old interface, but it does not affect the use of Dr.Fone function, we will update it as soon as possible.
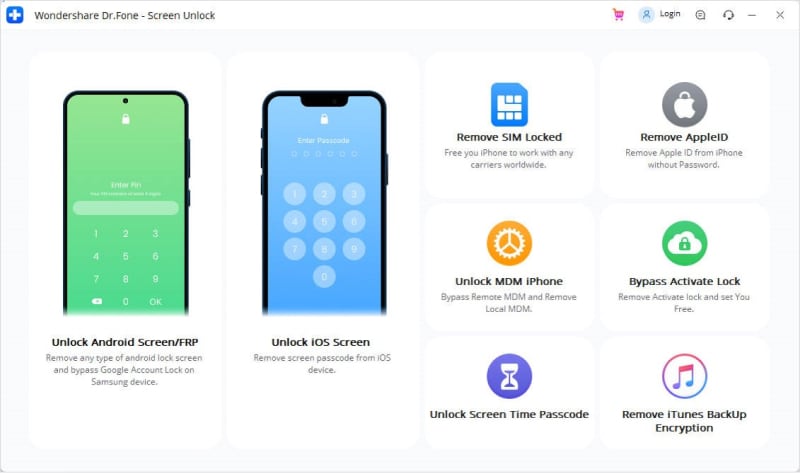
Connect your Android phone to the computer using a USB cable. Then click the «Unlock Android Screen» on the program.
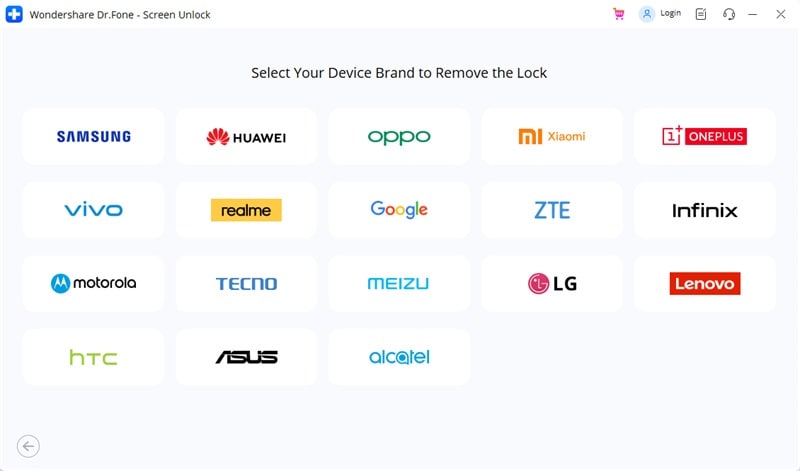
Step 2. Select device model
Since the recovery package for different phone models is different, it’s very important to select the correct phone model. You can find all the supported device models on the list.
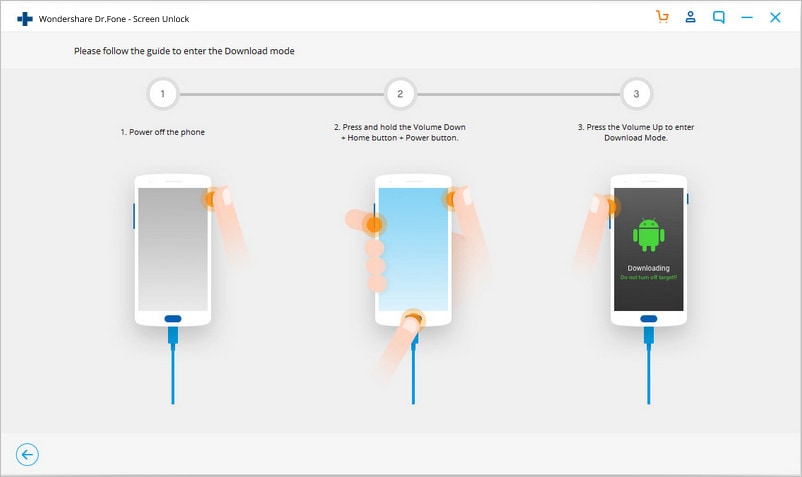
Step 3. Enter into Download Mode
Then follow the instructions on the program to get the Android phone into Download Mode.
- Power off the phone.
- Press and hold Volume Down + Home button + Power button at the same time.
- Press the Volume Up to enter Download Mode.
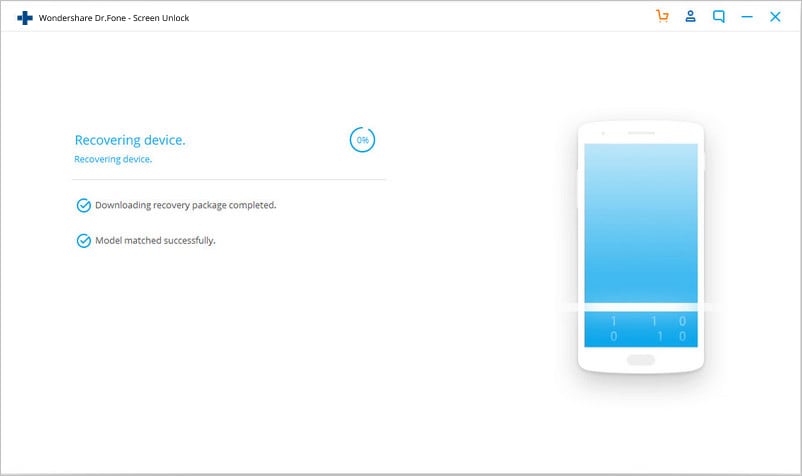
Step 4. Download recovery package
After you get your device into the download mode, it will begin downloading the recovery package. Just wait until it’s completed.
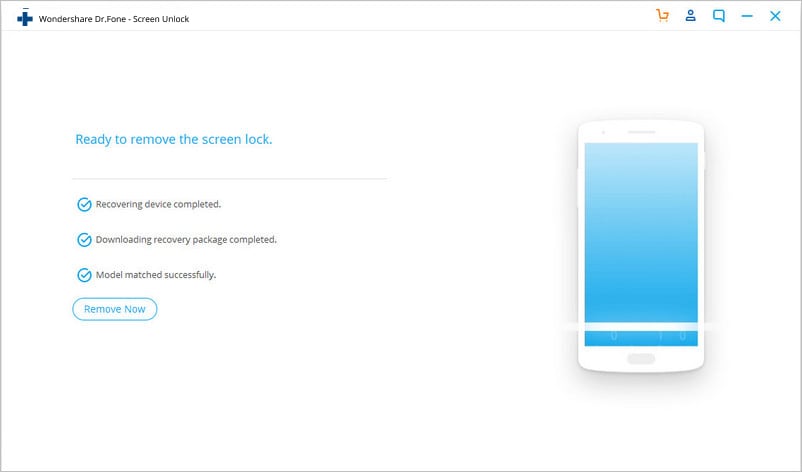
Step 5. Remove Android lock screen without losing data
When the recovery package downloading is completed, click «Remove Now». This process won’t hurt any data on your Android device.
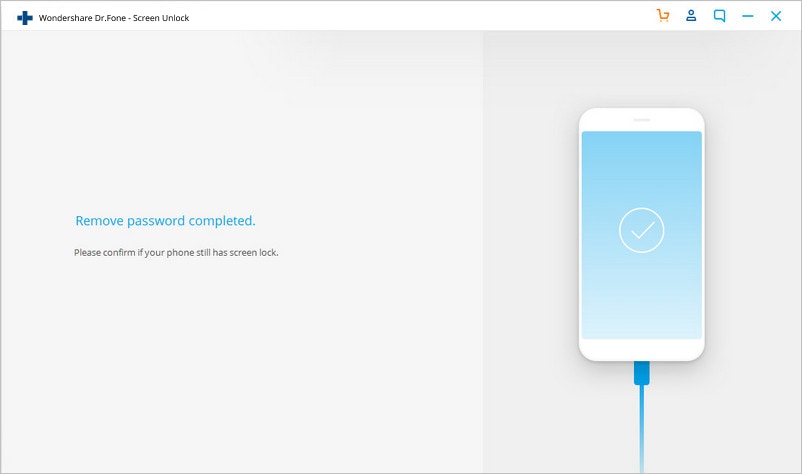
Once the whole progress is over, you can access your Android device without entering any password and view all your data on the device with no limits.
Still haven’t figured out how to remove the Android lock screen? Here is the video tutorial to help you.
Note: Only for devices in this list, this tool can remove the Android lock screen without losing data. For other devices, you have to use the advanced mode, which will remove the lock screen by erasing data.
Part 2. Unlock Android lock screen in advanced mode
If you cannot find your Android model in the device list, then you need to choose the advanced mode to remove your Android lock screen. Here is how:
Note that this mode may erase device data.
Step 1. Select the second option (advanced mode).
Select the second option «I can’t find my device model from the list above».
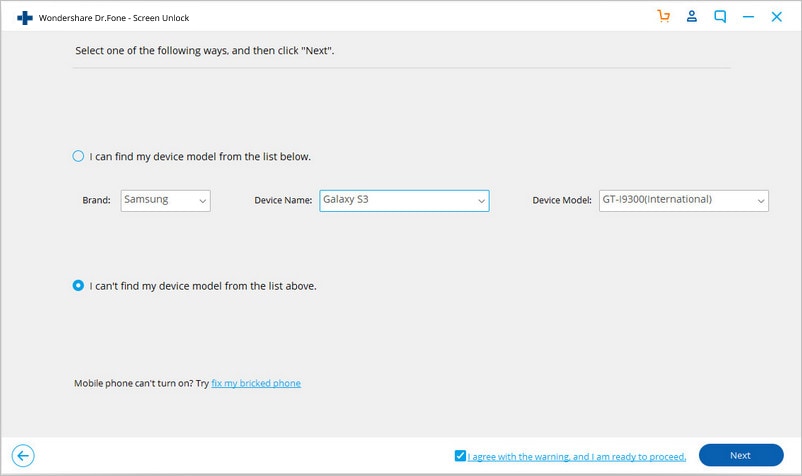
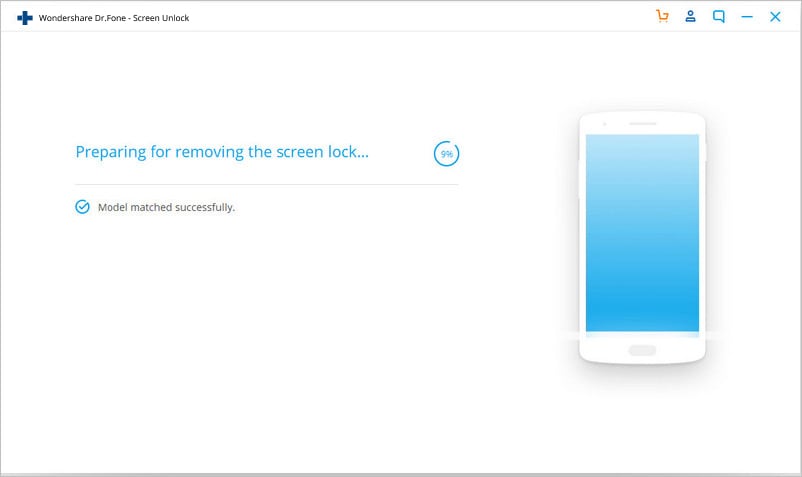
Then the android unlock tool will prepare for lock screen removal.
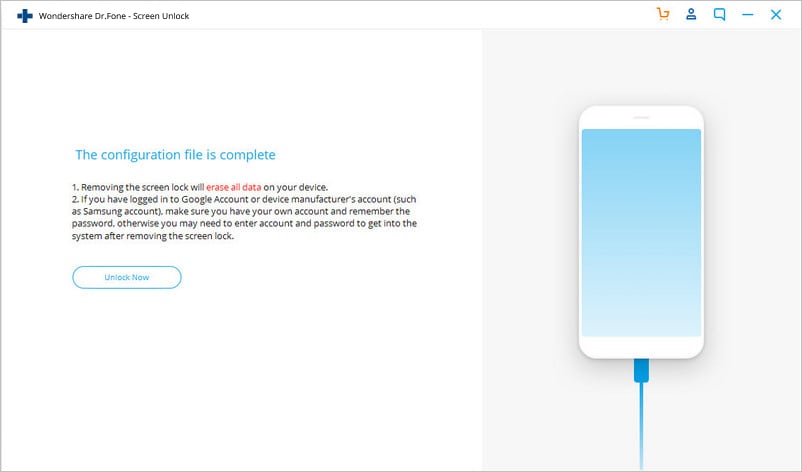
After the configuration file is prepared well, click on «Unlock Now».
Step 2. Enter the recovery mode.
Now it’s time to boot your Android into the Recovery mode.
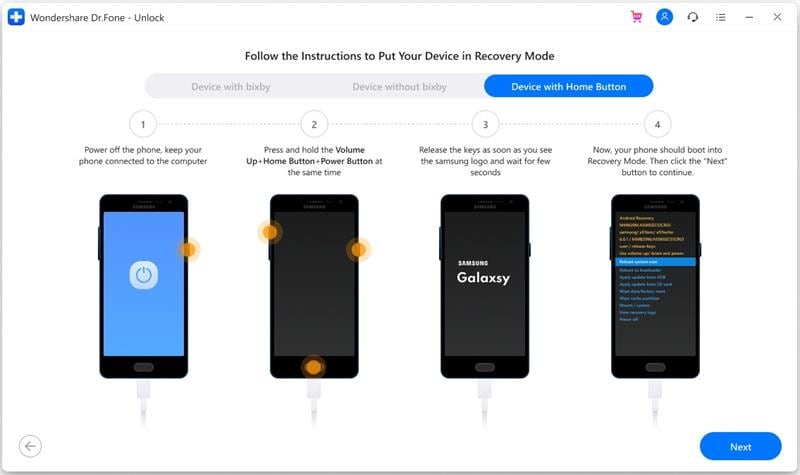
For an Android device with the Home button:
- Turn off the device first.
- Then long-press the Volume Down + Power buttons to restart it.
- When the screen turns black, immediately long press the Volume Up + Home + Power buttons for a few seconds.
- Release all the buttons when the brand logo appears.
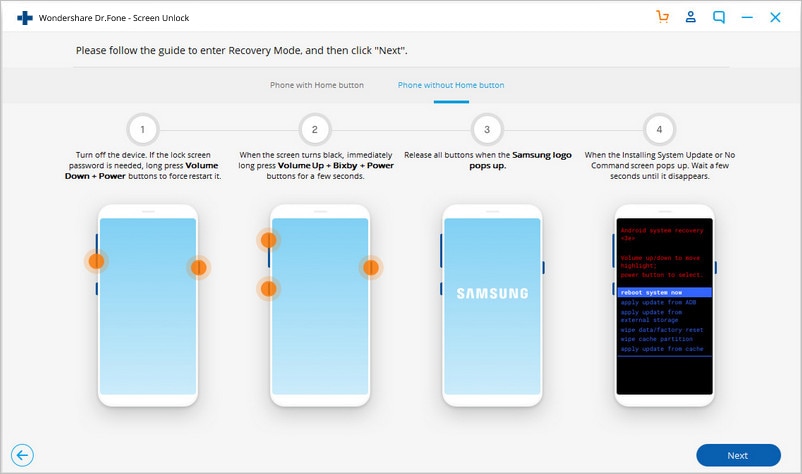
For an Android device without a Home button:
- Turn off the Android device. If you are prompted to enter a lock screen password, long-press Volume Down + Power buttons to force restart it.
- When the screen turns black, immediately long press Volume Up + Bixby + Power buttons for a few seconds.
- Release all the buttons when the brand logo pops up.
Step 3. Bypass the Android lock screen.
After the Recovery mode is activated, follow the on-screen instructions to wipe all device settings.
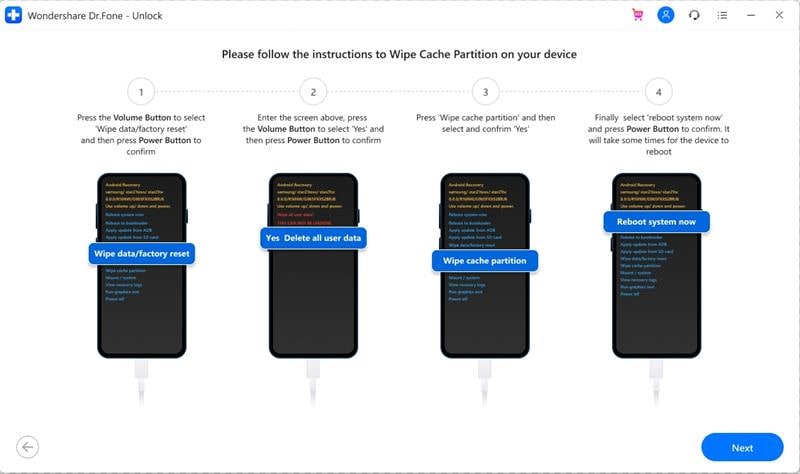
In a while, your Android device will have its lock screen removed.
Источник


