- Твиттер 9.21.0
- Facebook twitter google android
- Integrating Facebook, Twitter & Google in Android Using Android Studio
- What is Social Login Integration?
- TUTORIAL
- GETTING STARTED WITH FACEBOOK:
- 1. Create sample application
- 2. SETUP THE REPOSITORY AND DEPENDENCIES
- 2.Tell Facebook About Your App
- 3. SETUP THE SDK IN YOUR ANDROID PROJECT:
- 1.Internet permission:
- 2.Meta Data:
- 3.Facebook Activity:
- 4. ADD THE FACEBOOK LOGIN BUTTON:
- 5. FINDING HASH KEY FOR FACEBOOK:
- 6. Adding Hash key
- 7. Error App Not Setup:
- OUTPUT
- 3. Adding Fabric Plugin
- 3. Adding Login Button in activity_main.xml file.
- 4. Implementing CallBack Method
- 5. Add The OnActivityResult method
- OUTPUT:
- 1. INSTALL GOOGLE PLAY SERVICES
- 2. Setting up repositories and dependencies:
- 3. Authenticate your app with Google:
- 4. Download google-services.json
- 5. Adding Google-service file to Project:
- 6. Add Google Sign Button in activity.xml
- 7. Bind the button to your callback method inside the OnCreate method:
- 8. Handle SignInWithGoogle() Method:
- 9. Add The OnActivityResult method:
- Complete Main.activity.java code:
- Final Output of Facebook-Google-Twitter:
- Facebook twitter google android
Твиттер 9.21.0


Твиттер — это лучший способ выразить себя: общайтесь и оставайтесь в курсе событий.
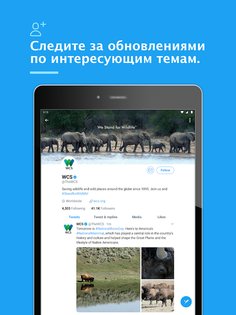
- Читайте то, что вам интересно
- Рассказывайте о себе в фотографиях, видеороликах и комментариях
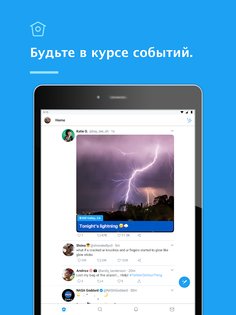
- Будьте в курсе событий. Общайтесь, вдохновляйтесь идеями, получайте фото и видео в режиме реального времени
- Чемпионат мира по футболу приходит в Твиттер. Мы запускаем несколько новых функций, чтобы вы получали больше интересной и полезной информации. Находить и начинать читать любимую команду или игроков — проще простого
Источник
Facebook twitter google android
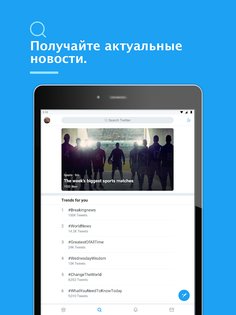
Актуальные новости, события в мире шоу-бизнеса, спорта, политики и информация по любым интересующим вас темам — обо всем, что происходит сейчас, можно узнать в Твиттере. Знакомьтесь с мнениями разных людей. Присоединяйтесь к переписке. Твиттер всегда знает, что происходит в мире и о чем говорят люди.
Еще подборки:
- Лента
- Читайте популярных блогеров, которые пишут о спорте, новостях, политике и развлечениях
- Пользуйтесь динамическими медиафайлами: фотографиями, видео и GIF-файлами
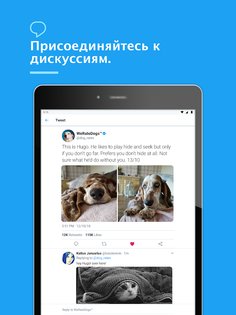
- Делайте ретвиты, делитесь контентом, ставьте отметки «Нравится», отвечайте на твиты в своей ленте
- Пишите твиты, чтобы рассказать всему миру, что происходит в вашей жизни
- Контент
- Находите самые актуальные темы и самые популярные хэштеги
- Просматривайте моменты — специальные подборки твитов о самых интересных событиях текущего дня
- Следите за новостями и смотрите видео с мест событий
- Просматривайте подборки самых интересных моментов спортивных соревнований
- Будьте в курсе всех сенсаций в мире развлечений и шоу-бизнеса
- Читайте забавные «вирусные» истории
- Уведомления
- Узнавайте, кто начал вас читать
- Отслеживайте реакцию на ваши твиты: какие понравились другим пользователям, а какие были ретвитнуты
- Отвечайте на комментарии других пользователей и получайте уведомления, когда они упоминают вас в твитах
- Сообщения
- Общайтесь в закрытом чате с друзьями и читателями
- Делитесь твитами и медиафайлами
- Создавайте групповые переписки со своими читателями
- Профиль
- Настройте свой профиль, добавив фотографию, описание, местоположение и фоновое изображение
- Просматривайте свои твиты, ретвиты, ответы, медиафайлы и отметки «Нравится»
UPD: Для объединения контактов Google и Twitter необходимо: В контактах выбрать для редактирования контакт Twitter -> Изменить контакт -> Меню -> Присоединить -> Выбираем к кому присоединить данный контакт.
UPD2: При первой установке клиента синхронизация в настройках телефона д.б. включена , иначе невозможно настроить клиент (меню настроек становится неактивным).
Требуется Android: 5.0 и выше
Русский интерфейс: Да
Источник
Integrating Facebook, Twitter & Google in Android Using Android Studio
In this tutorial, we will learn Integrating Facebook, Twitter and Google in Android for Login in our android app. Let’s start. First, we need to create a project in Android Studio. Read on and find out.
What is Social Login Integration?
- If you want to authenticate a user in your app without asking him/her to fill signup form, then integrating your app with any social site is the best way to do it. It will allow a user to login with google, facebook or twitter and use their details. It won’t require filling the complete process to login in your app.
TUTORIAL
GETTING STARTED WITH FACEBOOK:
- Facebook provides its native android SDK, so we’re going to use its services. Now, let’s see how to integrate facebook login in our app.
1. Create sample application
- In Android Studio, go to File -> New Project. When asked about the main screen, select an Empty Activity. Call this activity MainActivity. Set up the emulator or use your android phone. After completing, run that simple app.
2. SETUP THE REPOSITORY AND DEPENDENCIES
- In android Studio sidebar, look for Build.gradle file associated with the project and add the following code.
- After adding this line, your project will request to Sync. Wait until the gradle-building is completed. Then, go to build.gradle file associated with the app module and add the following code. Also import Facebook.
import com . facebook . FacebookSdk ;
2.Tell Facebook About Your App
- Go to https://developers.facebook.com/apps and click Add a New App.
- After Creating ID, go to settings -> Basic.
- At the bottom, we can see a button called +Add Platform, just click on that and select Android. There, you will see the main class, Package name and hash key.
“The hash key is going to identify your app to Facebook database servers.” We will generate hash key later, now we need to do some important work in our android studio project. Follow the steps below.
3. SETUP THE SDK IN YOUR ANDROID PROJECT:
- Now go to the Strings.xml file in layout and add the facebook app ID as facebook_app_id. In our case, the app id is 1702416153410004
- name=”facebook_app_id”>1702416153410004 .
- Edit your AndroidManifest.xml file and add the internet permission and the facebook app ID as meta-data and also add the facebook activity. Follow the codes below.
1.Internet permission:
2.Meta Data:
3.Facebook Activity:
4. ADD THE FACEBOOK LOGIN BUTTON:
- The Facebook SDK for Android comes with a convenient button that can be added easily to our activities and add the following code in activity_main.xml file in layout.
- Now, we’re going to jump to MainActivity.java and do the necessary SDK initialization in your app. Add the following code.
- And finally, add the onActivityResult method outside the onCreate method.
5. FINDING HASH KEY FOR FACEBOOK:
Lastly, we’re going to learn how to generate a hash key and add the key in our app so that it can identify our app because the hash key is truly unique.
- Download Openssl
- Make an OpenSSL folder in C drive
- Extract Zip files into this OpenSSL folder created in C Drive.
- Copy the File debug.keystore from .android folder in my case (C:\Users\SYSTEM.android) and paste into JDK bin Folder in my case (C:\Program Files\Java\jdk1.6.0_05\bin)
- Open the command prompt and give the path of JDK Bin folder in my case (C:\Program Files\Java\jdk1.6.0_05\bin).
- Copy the following code and hit enter “keytool -exportcert -alias androiddebugkey -keystore debug.keystore > c:\openssl\bin\debug.txt”
- Now you need to enter the password. Password = android.
- If you see in OpenSSL Bin folder, you will get a file with the name of debug.txt
- Now either you can restart command prompt or work with existing command prompt
- Get back to C drive and give the path of OpenSSL Bin folder
- Copy the following code and paste “ OpenSSL sha1 -binary debug.txt > debug_sha.tx t” you will get debug_sha.txt in OpenSSL bin folder
- Again copy following code and paste“OpenSSL base64 -in debug_sha.txt > debug_base64.txt”
- You will get debug_base64.txt in OpenSSL bin folder
- Open debug_base64.txt file Here is your Key hash.
6. Adding Hash key
- Now you have got your hash key so add that key in Facebook Developers site and save changes.
- After saving this info, you have successfully linked your app with facebook by giving the package name and hash key.
- Go back to Android Studio and run your app.
7. Error App Not Setup:
- You might get this error if the app is running on another mobile.
- You need to allow your app public if you want to publish your app on app store.
- Follow steps below.
- Go to https://developers.facebook.com/apps/
- Select your app.
- Select “App review.”
- As you can see in above wizard, “Make AppName public?”
- Turn this into YES and save changes.
That’s it. You have successfully integrated your app and also made it public.
OUTPUT
- Twitter also provides a native SDK for Android. Let’s see how we can integrate it.
- Create a simple project as we described above. You need to download the Fabric plugin for the android studio from https://get.fabric.io/android?locale=en-us. Sign in and download the plugin.
3. Adding Fabric Plugin
Alright, now we have to navigate the plugin in the android studio.
- Open Android studio and Go to Settings -> Plugins and select Install from disk.
- Browse your location where you downloaded the fabric plugin and Click Ok.
- Once the plugin is installed, create a new project. At right side corner, you can see Fabric bar. Click on that and turn on. Follow wizard.
- You will see a list of fabric Kits and we have to use Twitter so Click on Twitter.
- Now you have to install twitter.
- After installation add twitter to your project. Click on Apply.
- Now it will take some time to add the dependencies and plugins. You will see some changes in Build.gradle(Project) and Build.gradle(app_module) files. After build gradle is finished.
3. Adding Login Button in activity_main.xml file.
4. Implementing CallBack Method
5. Add The OnActivityResult method
- This method must be outside OnCreate() method
That’s it, run the app.
OUTPUT:
- Google also provides native android SDK to handle logins.
1. INSTALL GOOGLE PLAY SERVICES
- Make sure the Google Play Services are available.
- Go to tools -> Android -> SDK Manager -> SDK Tools .
- In Extras section, make sure the google play services is available and enabled.
2. Setting up repositories and dependencies:
- Open build.gradle of your project and add the Google play services classpath.
- Now, open build.gradle of your app module and add the Google Play Services plugin and Compile time dependency.
3. Authenticate your app with Google:
- Go to https://developers.google.com/mobile/add?platform=android.
- Add your app, it will ask your app name and android package name. After this, Google will provide you its services and we have to choose Google sign in.
- Click on “Choose and configure services.”
- Choose “Google Sign In.” Here we can see google is asking for “Android Signing Certificate SHA-1.” Let’s see how to find this key. There are two ways. I will explain the simplest one.
- Open Your Project.
- Click on Gradle (From Right Side Panel, you will see Gradle Bar).
- Click on Refresh (Click on Refresh from Gradle Bar, you will see List Gradle scripts of your Project).
- Click on Your Project (Your Project Name from List).
- Click on android-> signingReport and see the magic.
4. Download google-services.json
- Now you have your SHA1 key as you can see in above wizard which I have marked black (because it’s confidential). Paste this key to google developer console and continue. And there you can download Google services JSON.
5. Adding Google-service file to Project:
☛ Click on “ADD App” button in order to create “google-services.json” file.
- You will get a popup to save “google-services.json.”
- ADD “google-services.json” file in app file of your project.
6. Add Google Sign Button in activity.xml
7. Bind the button to your callback method inside the OnCreate method:
8. Handle SignInWithGoogle() Method:
9. Add The OnActivityResult method:
- Now you can add the login details in handleSignInresult method. For example, if you want to see user details, use result.getSignInAccount();
Complete Main.activity.java code:
That’s all for Google Sign In integrating with your app.
Final Output of Facebook-Google-Twitter:
That’s all for Integrating Facebook, Twitter and Google in Android. You have now successfully integrated your app with popular social networks.
Источник
Facebook twitter google android
Актуальные новости, события в мире шоу-бизнеса, спорта, политики и информация по любым интересующим вас темам — обо всем, что происходит сейчас, можно узнать в Твиттере. Знакомьтесь с мнениями разных людей. Присоединяйтесь к переписке. Твиттер всегда знает, что происходит в мире и о чем говорят люди.
Еще подборки:
- Лента
- Читайте популярных блогеров, которые пишут о спорте, новостях, политике и развлечениях
- Пользуйтесь динамическими медиафайлами: фотографиями, видео и GIF-файлами
- Делайте ретвиты, делитесь контентом, ставьте отметки «Нравится», отвечайте на твиты в своей ленте
- Пишите твиты, чтобы рассказать всему миру, что происходит в вашей жизни
- Контент
- Находите самые актуальные темы и самые популярные хэштеги
- Просматривайте моменты — специальные подборки твитов о самых интересных событиях текущего дня
- Следите за новостями и смотрите видео с мест событий
- Просматривайте подборки самых интересных моментов спортивных соревнований
- Будьте в курсе всех сенсаций в мире развлечений и шоу-бизнеса
- Читайте забавные «вирусные» истории
- Уведомления
- Узнавайте, кто начал вас читать
- Отслеживайте реакцию на ваши твиты: какие понравились другим пользователям, а какие были ретвитнуты
- Отвечайте на комментарии других пользователей и получайте уведомления, когда они упоминают вас в твитах
- Сообщения
- Общайтесь в закрытом чате с друзьями и читателями
- Делитесь твитами и медиафайлами
- Создавайте групповые переписки со своими читателями
- Профиль
- Настройте свой профиль, добавив фотографию, описание, местоположение и фоновое изображение
- Просматривайте свои твиты, ретвиты, ответы, медиафайлы и отметки «Нравится»
UPD: Для объединения контактов Google и Twitter необходимо: В контактах выбрать для редактирования контакт Twitter -> Изменить контакт -> Меню -> Присоединить -> Выбираем к кому присоединить данный контакт.
UPD2: При первой установке клиента синхронизация в настройках телефона д.б. включена , иначе невозможно настроить клиент (меню настроек становится неактивным).
Требуется Android: 5.0 и выше
Русский интерфейс: Да
Источник


