- How to fix «Failed to obtain IP address» error on Android
- Why am I getting the “Failed to obtain IP address” error?
- Forget network
- Restart the phone
- Restart the router
- Rename your Android device
- Turn Airplane mode on and off
- Use WPA2-PSK encryption
- Is the MAC filter on?
- Assign a static IP address
- Clear Google Play Services cache
- Factory data reset
- Top 7 Ways To Fix Failed to obtain IP Address Error
- How much complicated is the Failed to Obtain IP Address Problem?
- Method 1- Removing and then adding the network
- Method 2- Activating and deactivating the Airplane mode
- Method 3- Rebooting your phone and router
- Windows:-
- Method 4- Setting the WPA encryption methods
- Method 5- Switching off MAC filter
- Method 6- Reset your Router
- Hardware Method:-
- Software Method:-
- Alternate Method
- General FAQ’s
- How do I fix failed to obtain an IP address?
- What does it mean when failed to obtain IP address?
How to fix «Failed to obtain IP address» error on Android
Those who have encountered the “Failed to obtain IP address” error on Android are not alone. It seems to bug users of all Android phones and software versions. We’ll tell you why you’re getting the annoying error and how to fix it.
Why am I getting the “Failed to obtain IP address” error?
The “Failed to obtain IP address” error usually shows up when accessing a Wi-Fi network, whether it is new or one you have saved on your device. This error message means the router is having problems issuing an IP address to your device. As long as the issue persists, the user can’t access the internet using that Wi-Fi network.
Some users experience this error message differently. It can show up as “Obtaining IP address,” but the problem is the same, regardless.
Editor’s note: All instructions in this guide were compiled using a Pixel 4a running Android 11. Remember steps may differ depending on your hardware and software.
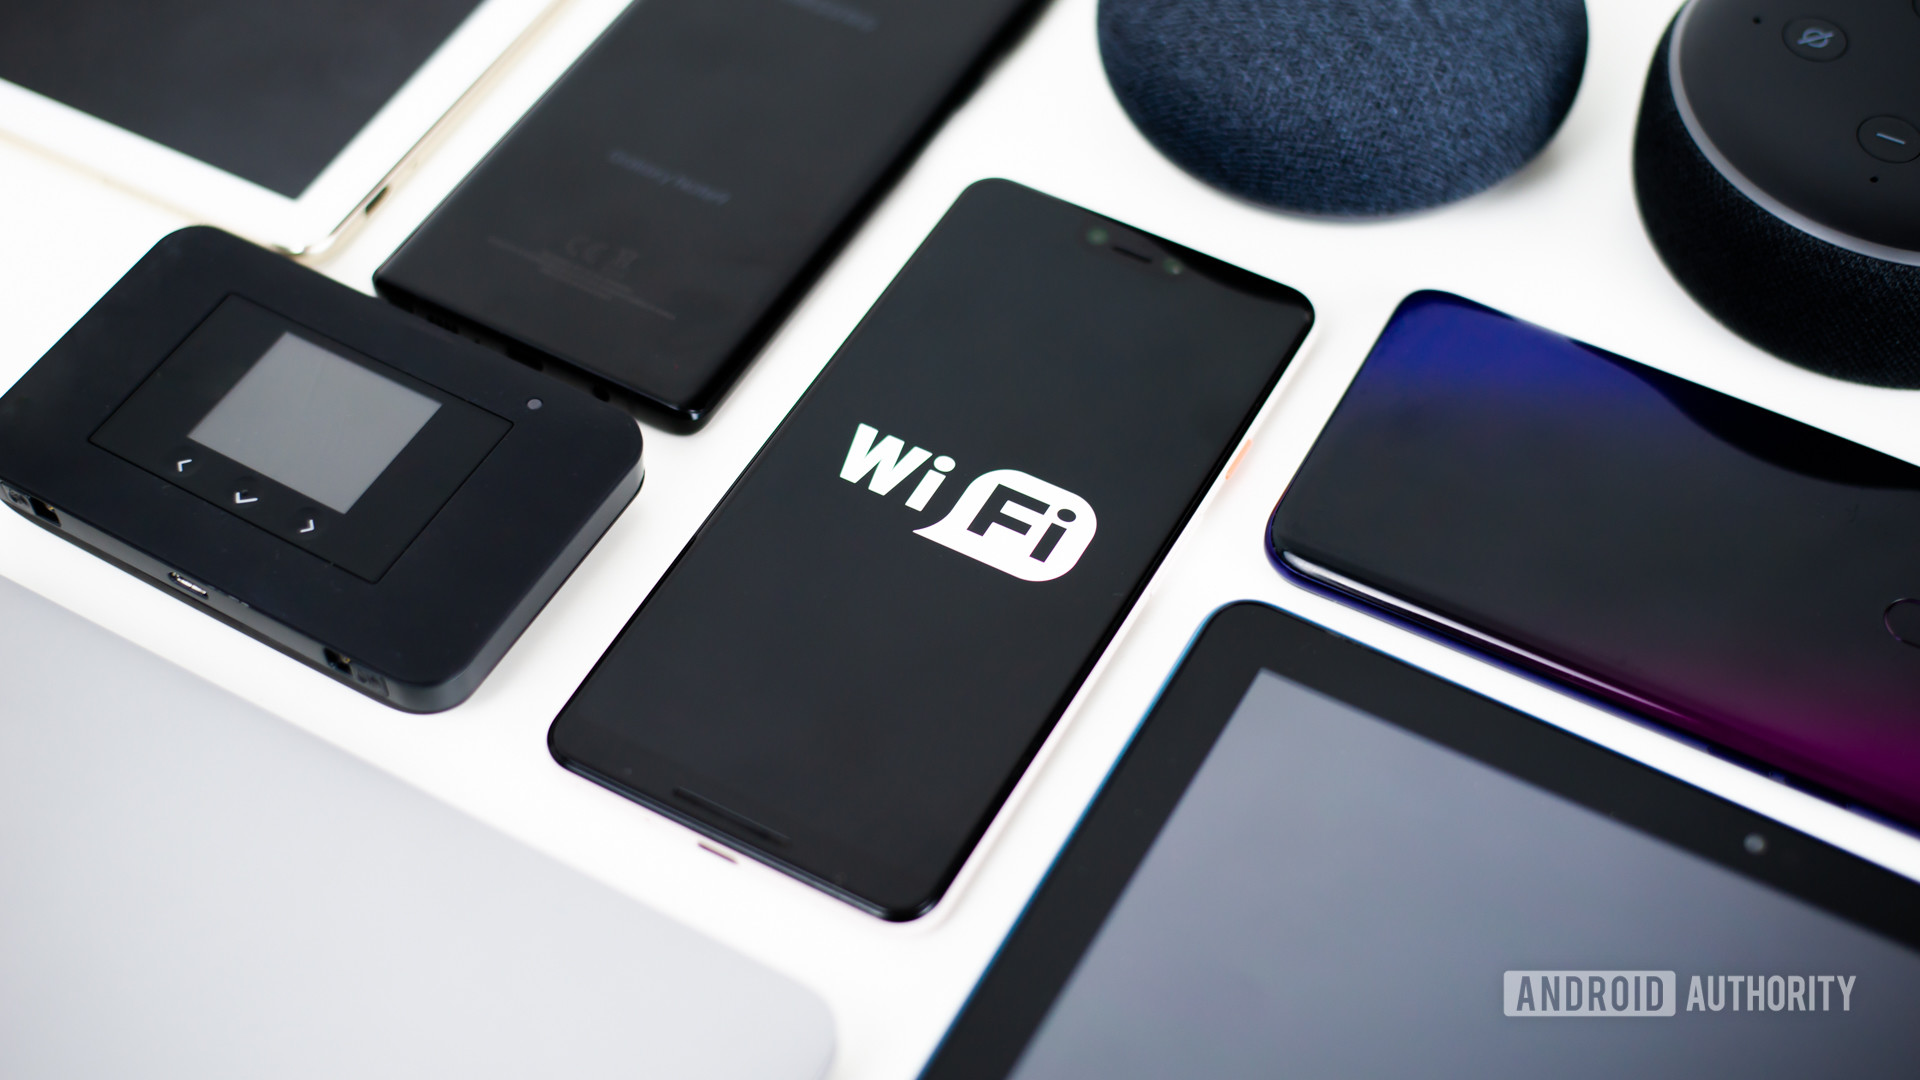
Forget network
![]()
The first method you should try is to forget the network and sign into it again. The steps to take are simple, and sometimes this is all it takes to get rid of the “Failed to obtain IP address” discrepancy.
- Open the Settings app.
- Select Network & internet.
- Tap on Wi-Fi.
- Long-press on the network you can’t connect to.
- Select Forget.
- Log into the Wi-Fi network again.
Restart the phone
This is always one of the first solutions in troubleshooting guides, and for good reason. While it may seem silly, restarting your phone seems to fix most problems magically. Give it a try!
Restart the router

If the phone is not the problem, the router could be the culprit. Try restarting it and see if that fixes it. Most routers have a reset button. You can also disconnect it and plug it back in.
Rename your Android device
We are not exactly sure why this would help, but many users claim it solves the issue. The process is simple too, so it’s worth a shot.
- Open the Settings app.
- Select About phone.
- Tap on Device name.
- Change the name to anything you wish and select OK.
- Try and reconnect to the network.
Turn Airplane mode on and off
Doing this forces the router to reconfigure your connection. It may also fix any bugs your phone may have. Try turning Airplane mode on for a little bit, then turn it back off.
Use WPA2-PSK encryption
Some devices don’t work very well with certain types of encryption, including AES and TKIP. Go to your router settings and switch over to WPA2-PSK. Every router works differently, so we can’t give you step-by-step instructions, but you can refer to your user guide for specific instructions.
Is the MAC filter on?
Wi-Fi administrators often use MAC addresses to whitelist or blacklist devices on their network. This means that if your device is not on the whitelist, or is on the blacklist, it won’t connect. The solution would be to either turn your router’s MAC filter off, remove your device from the blacklist, or add it to the whitelist. Again, instructions are different for every router, so look for steps in your user guide.
Assign a static IP address
Most devices don’t need a static IP address, but certain services require it. Especially those that need to remind your IP for security reasons. When your IP address changes, you may be running into some issues, so try a static IP address to see if that fixes your network issues.
- Open the Settings app.
- Select Network & internet.
- Select Wi-Fi.
- Tap on the gear icon next to the network you can’t connect to.
- Hit the pencil icon near the top-right corner.
- Select Advanced options.
- Look for IP settings and tap on the drop-down menu.
- Select Static.
- In the IP address, change the last number to any number between one to 225.
- Try to connect again.
Clear Google Play Services cache
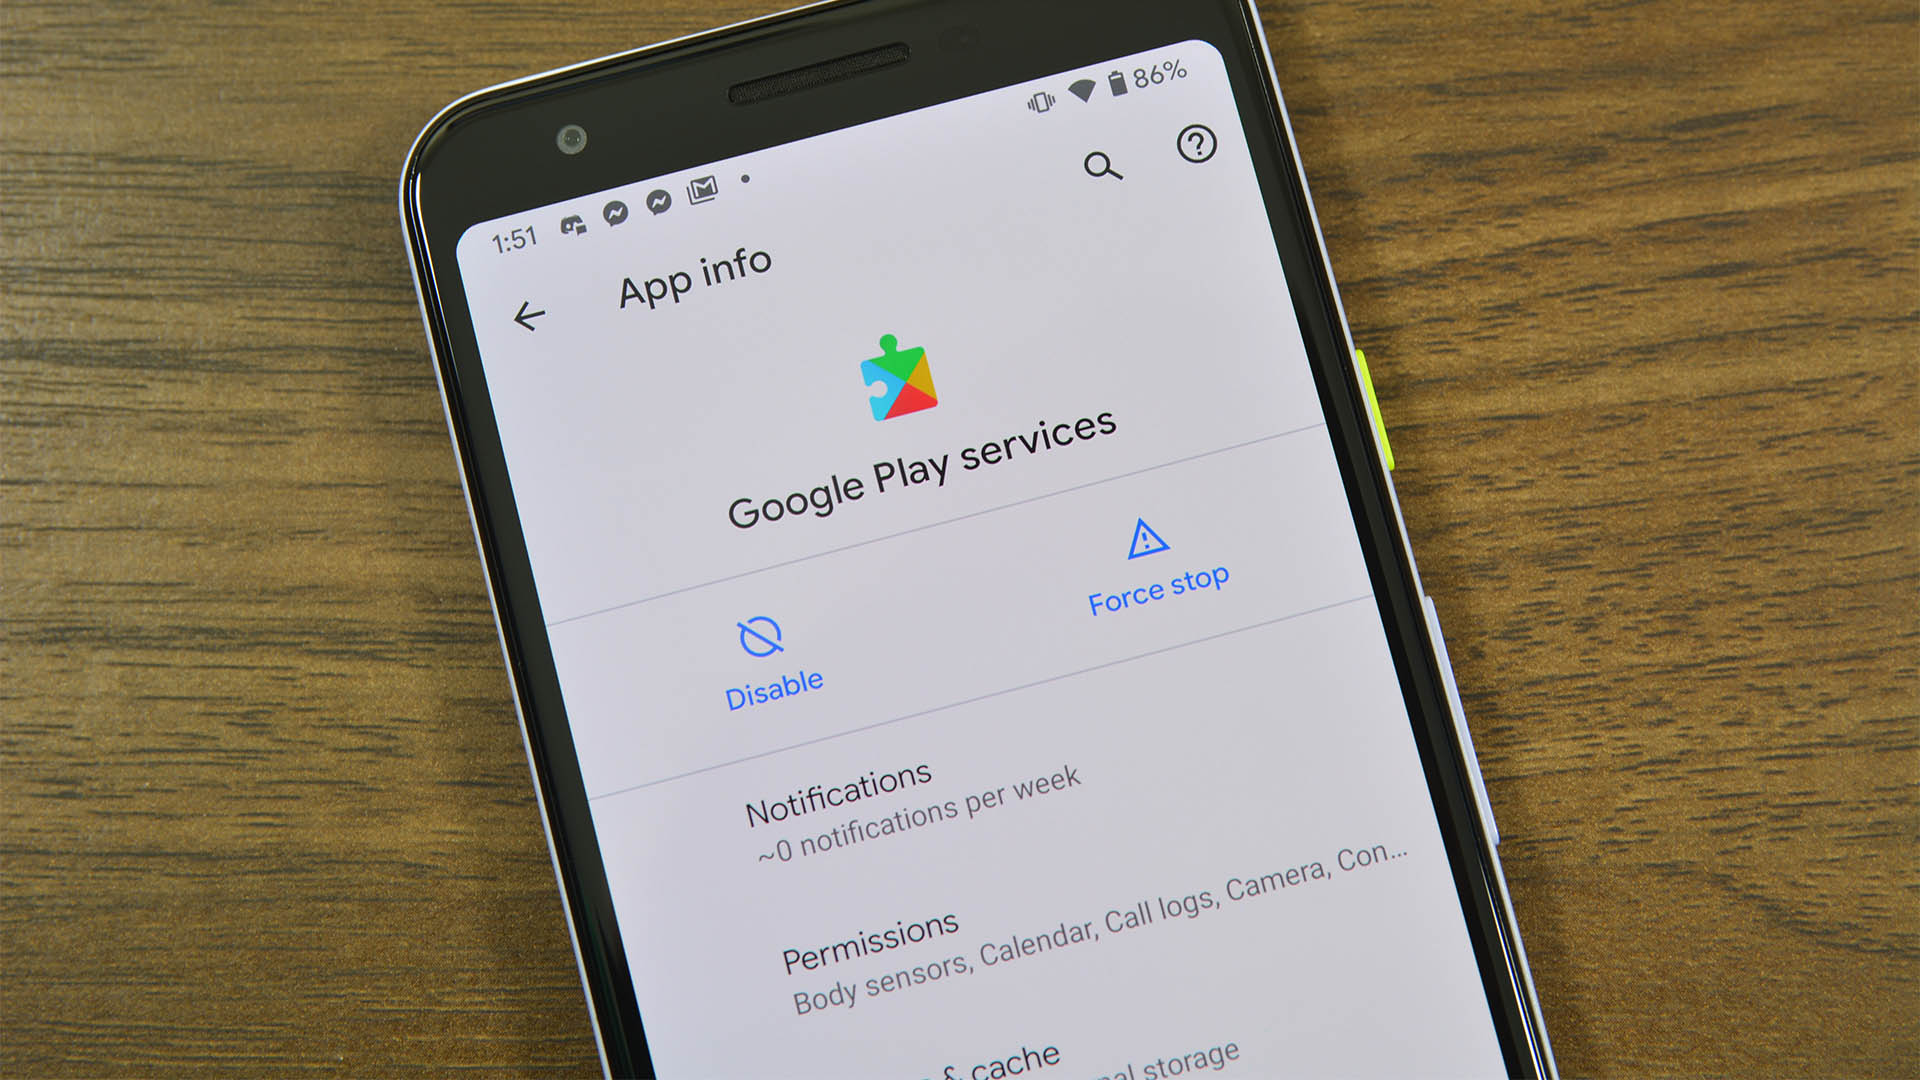
This method seems to be involved in every troubleshooting guide, and it’s because it involves so many things around your phone. Restarting the app from scratch can solve a plethora of problems.
-
- Open the Settings app.
- Select Apps & notifications.
- Go into See all apps.
- Find and tap on Google Play Services.
- Select Storage & cache.
- Select Clear cache.
- Try to connect to the same Wi-Fi again.
Factory data reset
If all else fails, and the problem persists for an extended time, you might want to consider doing a factory data reset on your Android phone. This will delete everything in your phone and bring it back to its factory state (software-wise). Make sure to back up any important files before proceeding.
- Open the Settings app.
- Select System.
- Hit Advanced.
- Tap on Reset options.
- Select Erase all data (factory reset).
- Tap on Erase all data.
- Enter your PIN.
- Let the phone do its thing until it restarts.
- Set up your phone and try to connect to the network.
Источник
Top 7 Ways To Fix Failed to obtain IP Address Error

If you have an android phone that you want to use in a smart way then you need to connect the same to the internet. You can connect your smartphone with the internet by either employing mobile data or Wifi. Usage of Mobile data solely at times is not preferred by the user and therefore connection to Wifi is done. However at times, one is unable to connect their mobile to a Wifi network as it shows the error of Failed to obtain IP Address.
Connection to a Wifi network is done by following the below steps-
- Turning on the WiFi
2. Selecting the preferred Hotspot/Wifi network
3. Entering the password for allowing connection
4. Obtaining IP address message displays
5. Your phone gets connected to the Wifi
Possible reasons for getting Failed to obtain IP Address error:-
If you have been facing the Wifi connection issue then below are certain reasons for the same-
3. Improper wireless security settings
4. Setting issue in MAC address
5. Software problem
Table Of Contents
How much complicated is the Failed to Obtain IP Address Problem?
The Wifi connection problem is not as complicated as it looks and can be resolved by following the listed methods. Remember that if you are able to connect to Wifi network by using any of the methods then other methods are not to be practised.
Method 1- Removing and then adding the network
This method requires first removing the network by clicking on Forget now and again connecting it. Below are the steps that are employed in this method-
- Click on Settings
- Select the option of “Wifi”
- Press over the network that refuses to connect and click on Wifi Settings icon.
- After click on the Forget network.
- Scan for available networks (if networks are not available)
- Select the network once more and ensure the connection with it by entering the relevant password
Method 2- Activating and deactivating the Airplane mode
This method works most of the time but is a temporary way of resolving the Failed to obtain IP Address issue. The basic science behind this method is that the network is made to reconfigure itself as the mode is initially connected and then disconnected. Below are the steps that are employed in this method-
- Selecting Flight or Airplane mode
- Waiting 15-20 seconds
- Disabling flight mode
- Waiting to see if your Android phone connects to the available Wifi network or not.
Method 3- Rebooting your phone and router
This method can be employed by you if you are trying to connect with your home Wifi network and you are unable to do that. Below are the steps that can be practiced. At first power off for some times, after turn on your Router or if you have reboot button on your router just click it. then still not solve your problem, then connect your PC/Laptop over WiFi, if wifi does not work then connect the router to PC/Laptop using an ethernet cable. This step divide to steps, one is for Windows & another is for Mac.
- Before proceeding this process you need to find your router IP address. There is so many methods for finding the IP address of the router. 192.168.0.1 that is the default IP address of all Router. But still, you are not able to find so, I tell you all the steps for Windows and Mac.
Windows:-
- At first, connect your router to pc using Ethernet cable or over WiFi.
2. Then go to your windows search box and type “cmd”, open command prompt.
3. In the command prompt, you need to type “ipconfig” command & hit enter. A list of information will show up on your screen.
4. If you connect your router to pc using ethernet cable then find “Ethernet adapter Ethernet” section in there “Default Gateway” line you will see an IP address (192.168.0.1) like that. That is your router IP address. But you do not connect your router to pc using ethernet cable so follow below step.
5. Connect your router to pc using wifi then go to the same area, in there you need to find “Wireless LAN adapter Wi-Fi” also find same “Default Gateway” line you will see an IP address (192.168.0.1) like that. And that is the IP address of your router
- At first, go to your MacBook homepage click on the apple logo on the left corner, a dropdown menu will open in there you need to click on the “System Preferences” and open it.
2. In there you need to find the “Network” tab & open it up.
3. Click on the Ethernet if you connect your MacBook to Router using the ethernet cable. On the Ethernet tab, you will see “Router” IP address like (192.168.0.1) that.
4. Same steps, going to the Network tab, but in this case, you need to Select “WiFi” if you connect your MacBook to Router over WiFi. On that tab click on the “Advanced” option & open it up.
5. On the new tab select “TCP/IP”, in there you will see Router IP address like (192.168.0.1) that. And that is the IP address of your router.
- After getting your router IP address open it up on any browser (Recommended Chrome) and log in with your credentials. If you aren’t able to login please try with default username:- admin/administrator, password:- admin/administrator also written on router backside. Sill not able to login please contact your internet service provider or who set up your router.
- After successful login your router web admin page. There is a different option for different routers. For Old Tp-Link & D-Link routers you need to go “System Tools” on the left side in there click on “Reboot” section after a page will open, on that page finally click on the “Reboot”.
- It will take some times for rebooting your router.
- Higher Version router has Reboot option on different places. Just go to the same router web admin page & see on the right corner you will see “Reboot” Icon.
- click on immediately a popup window will open and click on “Yes” to reboot your router.
- Wait for some times completely rebooting your router. Then try to connect wifi on your Android Phone and see whether getting the Failed to obtain IP Address error.
Method 4- Setting the WPA encryption methods
If you have less or no idea about this method then you can follow the steps mentioned below-
- Look for Wireless security/settings on your router. You will be able to find it under “Wireless”.
- Once when the settings have been located look for the type of encryption that the router is using.
- If the router has been set to AES you need to change it to “TKIP” and vice versa
- Click on the Save button after searching for the same.
- Move back to your phone and move to Settings > Wifi and press over the router’s network.
- Select the option of Forget network and reconnect with the network by entering relevant login credentials.
- Do not forget to Reboot your router and check wifi is connecting or getting same Failed to obtain IP Address error.
Method 5- Switching off MAC filter
This step involves switching off the MAC filter on your router. For this purpose, the first step is to deactivate MAC filtering initially. Here are the steps-
- Log into the Web Interface of the router following the previous method.
- Search for the “Wireless” tab and expand the same.
- You will be able to look at the MAC filter configuration option.
- You need to make sure in this step that the Enable MAC filter is deactivated. If it has been enabled then you need to Disable it.
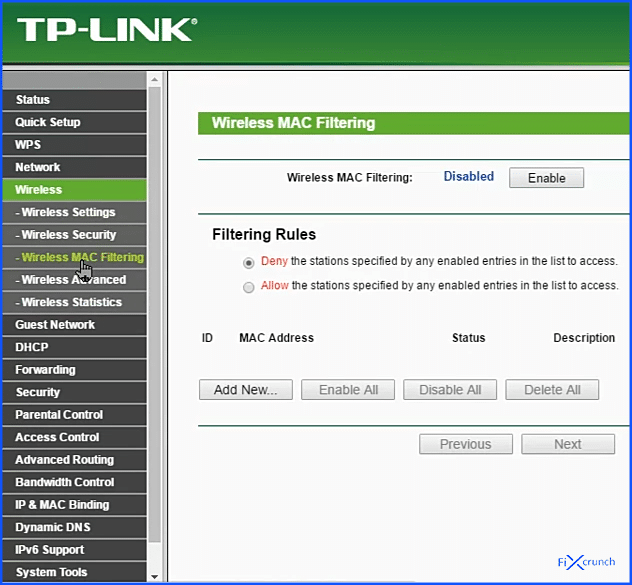 Router mac disable
- Move to your phone and click on settings.
- Select the option of Wifi and long press on the router’s network
- Click on Forget network
- Try to reconnect with the network by entering the relevant password
- If these steps resolve the issue practice the next step
- Move to the security tab of the router, re-enable the MAC filter and examine the same.
If the filter mode has been set to Blacklist and still you are able to the android device then you need to remove the same and hit the save button.
Method 6- Reset your Router
If you try all previous methods then you are getting the same error, so this time to reset your Wifi Router. Because most of cases router default configuration has been changed by mistake. This process will be done by Hardware and Software both methods.
Hardware Method:-
- At first, find which company router you are using. Because some of the routers have a physical reset button & some are hot have.
2. Put your router and see the backside you will see a Reset Hole as sown under the picture.
3. Then take a sim ejector tool (Best) or any kind of pin (Not Recommended) which can fit on the hole as like the below picture.
4. After press on the hole using sim ejector for 5-10 seconds. Timing depends on the router.
5. Your router all lights (if you have) glow up at the same time for some times. Now you can confirm your reset is complete using Hardware Method.
6. If you do not have a reset button on the router or sim ejector-types tool, then follow this Software Method.
Software Method:-
- At first, find your router IP following Method 3 First Point.
2. Open your router web admin by entering IP on any browser (Recommended Chrome) and log in with your credentials.
3. Every router has different options to reset your router. In my case, I am using a TP-link router. On that router to reset you need to go “System tools” > “Backup & Restore“, on that tab you will see “Factory Restore” Button just click on it.
4. Click on the “Yes”, to confirming.
5. Wait for some times & your router will reset. Most of router “Reset” button place under router settings “System tools” page. Try your self on your router, & comment down below.
5. Wait for some times to completely reset your router. After completely reset your router unplug your router power and Internet Cable, after waiting some times again plugin. Then try to connect wifi on your phone & also checking weather getting any error or not.
Alternate Method
If all the above methods have not been able to deliver you same Failed to obtain IP Address error then we can try and assign a static IP address. Below are the steps for the same-
- Select the option of “Settings” > “Wifi“
- Click on the network that refuses to connect for sometime
- Click on “Modify network“
- Move down to check that the “advanced options” box have been checked.
- If the Show advanced options checkbox has not been checked then you need to check the same and click on save.
- Move to “IP settings“
- Change the current IP settings to “static“.
- Move to IP address field as we will be making modifications there.
- From the IP address, you need to change the last octet with any number from 10-255
- You need to ensure that the newly entered IP address is different from the current one
- Click on save
- Wait to see if the Android device manages to connect to Wifi network or not
Apart from the above steps in order to make your device connect to Wifi, you can perform the malware wipe.
So practice the allocated steps of a method or more than one method and you will be able to use the Wifi near you quite easily. You need to be precise with methods and have to perform each step without missing any important detail.
General FAQ’s
How do I fix failed to obtain an IP address?
There is lot of reason casuing failed to obtain an IP address error. Following this common methods, you can solve this error.
1.WiFi Network
2.Airplane mode
3.Rebooting Router
4.WPA encryption
What does it mean when failed to obtain IP address?
When mobile unable to connect a Wifi network as it shows the error of Failed to obtain IP Address.
Источник


