- Feature Length Filmmaking with iPhone 11
- Get a film look with the iPhone
- Setting up your iPhone to get the “film look”
- Use a dedicated camera app
- Set your picture correctly
- Use the language and tools of cinema
- Use the FilmConvert iPhone profile
- How camera codecs work
- Creating a real film look with FilmConvert – Jonny Elwyn
- How to get the best footage from your camera
- Living On A Shoestring – Tamara Gabriel
- The Last Mambabatok – Foster Visuals
- Making a Movie with your iPhone or iPad
- What kind of video can you make?
- Key tips
- Edit on a computer if you can
- You’ll need plenty of light
- Get the sound right
- Keep it still
- Making your movie or video
- 1 Plan your film
- 2 Get ready to shoot
- 3 Check the sound
- 4 Check the framing and camera position
- 5 Get the exposure right
- 6 Film your shot
- Using effects
- 7 Get organised ready for editing
- 8 Edit your clips with iMovie
- iPhone and iPad film training
- Online course
- iPhone Filmmaking: From Shoot Through Edit
- Learn Filmmaking With My Step-by-step Guide
Feature Length Filmmaking with iPhone 11

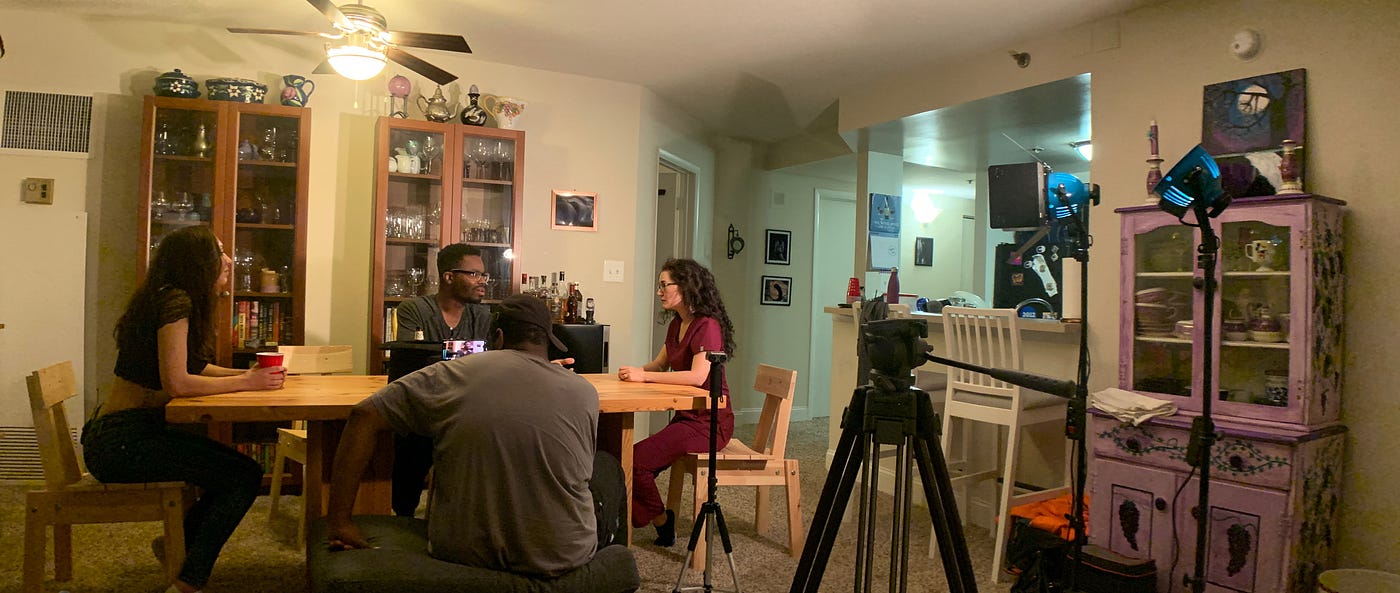
Can you shoot a feature length film in six days with $1,000 on a smartphone?
Our guest in Episode 70 of the SBP Podcast Mobile Filmmaking claims to have shot the first feature with the new iPhone 11 Pro Max. The Film is called Barbara, it’s scheduled to be released New Year’s Day 2020.

Rob Hagans didn’t realize films were made from screenplays. When he was 17, he watched The Matrix from a DVD on a laptop where he saw the screenplay. He wrote his first screenplay in High School, which he dedicated an entire year to. Rob shares that the experience of sharing that script with school administrators with hopes to receive some support taught him a lesson, which he shares in the podcast. Rob Hagans was a “theater kid” and he shares a story about the teacher who inspired him to make films, Don Leifert. He and his teacher would sit in the theater during rehearsals and talk about movies and film.
Rob moved on to make several shorts and feature films and most of his films follow a theme which he explains in this episode in great detail. But why would an experienced filmmaker make a feature with a smartphone camera?

In 2015, he heard Mark Duplass’ keynote at SXSW in 2015: “The cavalry isn’t coming,” which inspired him. He started a YouTube channel, revolving around how to make a movie with an iPhone and only $1,000. Listen to our discussion with Rob Hagans as he shares the story of how he traveled from a high schooler with a screenplay to an experienced filmmaker who is now making films with iPhones. Rob gives kudos to Steven Soderbergh as his “spirit animal.”
Episode 70 of the SBP Podcast Mobile Filmmaking with Rob Hagans shares a lot of practical details useful to mobile filmmakers using iPhone 11 Pro Max.
Listen to this Episode off line or online on your own time. You can download the MP3.
Источник
Get a film look with the iPhone
The camera sensor technology inside smartphones has improved dramatically over the past few years. Phone cameras that used to be used to capture backyard home videos and holiday snapshots are now capable of shooting 4K video at variable frame rates and with enough dynamic range to be used for professional filmmaking.
The Sundance Film Festival hit ‘Tangerine’, shows just what can be achieved with creative shot selection, lighting and storytelling techniques – shot entirely on the iPhone, the film has been selected for theatrical distribution and VOD worldwide.
While a smartphone will never be a replacement for a high-end cinema camera like the ARRI or RED, the raw capabilities of the sensor mean it’s possible to get cinema-quality visuals out of the camera you already have in your pocket.
Setting up your iPhone to get the “film look”
While the iPhone sensor itself is an amazing piece of technology, in order to get the most filmic look from it, you’ll need to tweak some settings.
Use a dedicated camera app
Use a dedicated camera app such as Filmic Pro to shoot your scenes. A dedicated camera app gives you manual control over the sensor and allows you to turn off lots of the automatic corrections which could otherwise ruin your shot.
Set your picture correctly
As with any camera, choose your exposure, color temperature carefully and try to set your ISO as low as possible to minimize digital noise in dark areas of your scene.
If you’re shooting a very bright scene, try adding an ND filter or lens to your camera to cut down the light entering the sensor – this will help prevent you from blowing out the highlights, or having a solid-white sky in outdoor shots.
To simulate the motion of film, shoot at 24fps or as close to it as possible. Set your shutter speed to 2x your frame rate (i.e. shooting at 24fps, set shutter speed to 1/48; if shooting at 25fps, set shutter speed to 1/50).
If you’re planning any slow-motion sequences, shoot at a higher frame rate such as 48fps or 60fps in order to give you enough frames to slow down in post.
Use the language and tools of cinema
You can employ multiple focal lengths, either by using third-party lenses, or if you’re lucky enough to own an iPhone 7 Plus, utilize both the wide and telephoto lenses.
By varying your shot composition and focal lengths, you’ll make your film look more professional, as well as give yourself more options in editing, and you can use the frame to exclude certain details or focus the audience’s attention on what you want them to look at.
In the same vein, use a stabilizer or gimble to create smooth, professional-looking camera movement, or use a tripod to lock off your shot, and eliminate shaky shots that can distract from your story.
Use the FilmConvert iPhone profile
Download the FilmConvert camera profile from our website, and install it on your computer, along with the FilmConvert plugin or standalone grading app.
Copy your footage from your phone to your local storage in your computer, and import it into your project.
Drag your iPhone footage to the timeline, apply FilmConvert from the ‘Effects’ menu and for Camera Profile, choose ‘iPhone’.
When your film is online, don’t forget to use #FilmConvert to share it with us!

How camera codecs work
September 19, 2016
Creating a real film look with FilmConvert – Jonny Elwyn
October 27, 2016

How to get the best footage from your camera
September 19, 2016

Living On A Shoestring – Tamara Gabriel
September 26, 2016
The Last Mambabatok – Foster Visuals
October 26, 2016
Hi Micahel, thanks for your comment. That does sound like strange behavior — could you drop a line to support@filmconvert.com with a link to the footage to download so we can take a look?
Hi Jason. Sorry for the confusion and thanks for your question. It is just a matter of semantics, as a «white balance card» (a card designed for white balancing from) is normally light grey. I was not meaning a white card. Grey is used for white balancing because (in most cameras) the minimum amount of signal compression occurs in the middle tonal range, so the camera can make a much more accurate reading from that region, compared to white, where the gamma curve compresses the signal more and it’s more likely that one or more of your channels could be clipped. The key thing is that your white balance target is spectrally flat, reflecting all the frequencies of the light hitting it, and that you white balance in camera. I wouldn’t advise using a white picker in post to fix white balance, due to the compression that occurs in camera, as discussed in the article. Hope that clears things up for you.
Loads of handy tips thanks, one thing that has me puzzled, footage I’ve shot with the blackmagic pocket cinema camera when I add film convert to the clip and choose the blackmagic camera profile the clip comes out really awful ,over saturated, contrast and brightness way to much,and I have to resort to using one of the other camera profiles , Any tips as to what I might be doing wrong, this happens in both premiere pro cs6 and in premiere CC, any help appreciated. Many thanks .
Hello — could you clarify something — towards the end of the article, you reference the use of a » spectrally-flat, grey card on your shoots» and then in the conclusion you say «White balance properly in camera, using a spectrally-flat white balance card». So which is it? A white card or a grey card? I’m assuming a white card, as a grey card would only allow you adjust in post. Otherwise a very sensible argument for a different approach to image capture. Thanks
Источник
Making a Movie with your iPhone or iPad
What kind of video can you make?
You can shoot pretty much any kind of film with an iOS device. But if you’re planning to shoot and edit on your phone, it’s best to keep the movie short and simple. It’s tricky to manage a long, complex movie on a phone or tablet.
Key tips
Edit on a computer if you can
You can shoot and edit on your iPhone or iPad. Or you can shoot on iPhone and edit on iPad: that’s useful if you need to edit in the field. But computer editing apps can do much more than the mobile versions. If you have a Mac, it’s a no-brainer: the desktop version of iMovie is much more flexible than the iOS version.
You’ll need plenty of light
Phone cameras have tiny sensors. They aren’t good in low light, or with a lot of contrast. So try to film where there’s plenty of light and where it’s not too contrasty. Shoot away from the light, or use reflectors to reduce the contrast. If you have to shoot in low light, you could put your phone in a case and mount a small light on it.
Get the sound right
The other big drawback with mobile devices is their tiny microphones. There are three main options for better audio: forget live sound, get in close to make the most of the built-in mic, or use a separate microphone.
- The easiest option is to create a film that doesn’t need live sound: add a voiceover when you edit, or create a digital story where you edit images to a pre-recorded soundtrack.
- If you have to record with the built-in mic, get in close.
- Use an affordable lavalier microphone, or mount a wireless or directional mic on a phone case.
Keep it still
Shaky footage looks terrible, and phones are hard to hold steady in horizontal (‘landscape’) mode. Use a simple clamp like the Joby M-Pod, or a more solid one like the Shoulderpod. Learn to hold your phone steady (rest your upper arms against your body and try to be relaxed). If you can afford it, an electronic stabiliser will make a big difference.
This factual film intro is based on interviews and cutaways, and uses the Ken Burns effect to zoom in on images. Play through to the second version for explanations of the techniques. There’s more detail here: Elements of a factual film.
Making your movie or video
Making an iPhone movie is like making any other kind of film. You need to plan it carefully, shoot separate shots, pay attention to sound, and think about your audience.
1 Plan your film
Think about why you’re making the film and what you want to say. Can you summarise your idea in a tweet? If not, you need to work on it more.
To plan, you could start with a mindmap and then make a shot list or storyboard, or you can write a script. Make sure you get enough shots to tell your story.
2 Get ready to shoot
Check the Settings to choose your recording quality. I usually shoot in 1080p HD even though my iPhone 6S can shoot 4K. But I use 4K when I want to be able to crop the image without losing quality.
Put your phone into Airplane mode to avoid distractions.

Hold your device horizontally (‘landscape’ format).
- Make sure the camera is in Video, not Photo mode.
- Keep the device still. Use a grip, tripod or stabiliser if you can. You could also rest your elbows on a table or the back of a chair, or lean against a wall.
- On an iPad, double-tap on the screen to see the full widescreen image (with black bars above and below).
- Don’t zoom the image (unless you have a dual lens device) as you’ll lose quality.
3 Check the sound
- Unless you have a separate microphone, you’ll only be able record speech well if the iPad is close to the sound. So you’ll need to shoot closeups.
- Film a bit then play it back (on headphones if possible). Does it sound OK?
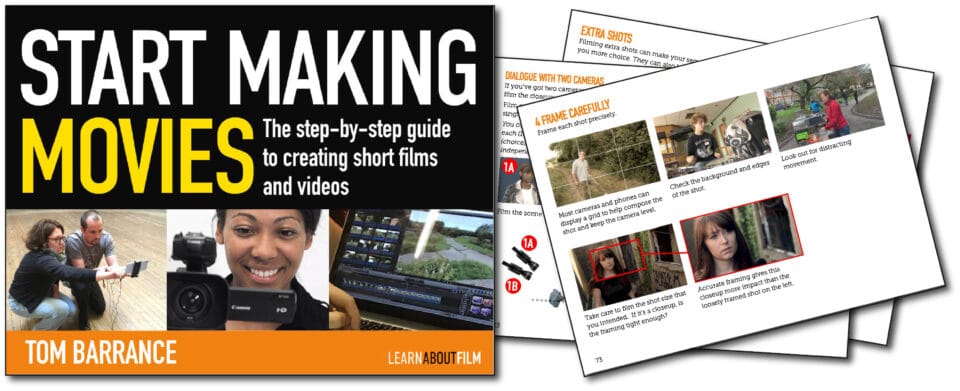
4 Check the framing and camera position
- Check there’s nothing distracting in the background.
- If the shot is supposed to be a closeup, make sure it really is a closeup. My ABCDEF checklist will help you see if you’re ready to film.


Tip: Filming a piece to camera? Make sure your presenter is looking at the camera in the corner of the device – not the Apple logo in the middle – otherwise they’ll look shifty.
5 Get the exposure right

- Film away from the light if you can.
- Lock the exposure. Touch and hold on the important part of the image until AE/AF LOCK appears.
- Then stroke up or down on the line to the right of the box to make the image brighter or darker if necessary.
Tip: iPhone cameras can’t handle a lot of contrast. You can use an affordable, folding five-in-one reflector/diffuser to fill in the shadows and improve the quality of your film.
6 Film your shot

- Touch the red button once to start filming. It’ll turn to a square while you’re recording (above).
- Shoot at least ten seconds of each clip, or five seconds before and after any action.
- Touch the red button again to stop filming.
- Review your clips by tapping the picture icon that appears on the bottom right when the camera is paused. Don’t delete anything unless you’re sure it’s unusable.
Using effects
Don’t use effects just for the sake of them. But you can use slow-motion to emphasise things or to analyse fast actions, for example a sports technique. It’s also useful for reducing camera shake in closeups. It’s no good in low light, though, as it needs fast shutter speeds.
Timelapse can give life to static scenes such as cityscapes or landscapes with moving clouds. You’ll need to keep your device still on a tripod.
7 Get organised ready for editing
Use the Photos app to organise your clips into Albums before you start editing. This will make them easier to find, especially if you have a lot of video clips on your device.
8 Edit your clips with iMovie
If iMovie isn’t already installed, you can get it from the iTunes store.
Tap the ? symbol at the top of the screen to get tips that will help you find your way around the app.

Here’s a piece to camera with cutaways: you see the images on the track above the main clip, but you still hear the original audio.
iMovie lets you put clips in order, trim them, change the order, and voiceover, cutaways, titles and effects. You can also import music or edit your clips to a soundtrack.
iMovie also lets you add the Ken Burns effect to pan and zoom still images. This is a great way to give life to archive clips.
- Always rename your iMovie project – don’t just call it ‘My Movie 1, My Movie 24’…
- Always export a full quality version of your movie, however you’re planning to use it.
- Don’t delete any of your clips or other media until you’re sure you’ve finished editing and you’ve safely exported your movies.
iPhone and iPad film training
I run half-day, one-day and two-day courses on iPhone/iPad filmmaking for organisations including businesses, nonprofits, charities, research organisations, theatre companies, museums and universities. I can also provide tailor-made online training for individuals or teams. Learn more
Online course
If you don’t need a tailor-made course, you can save money by getting an off-the-shelf online course instead.
iPhone Filmmaking: From Shoot Through Edit

This CreativeLive.com course is taught by experienced mobile filmmaker/photographer Cielo de la Paz. It’s a comprehensive three-hour course with 19 video lessons covering everything from planning and equipment to location shooting, audio interviewing and editing.
Cielo’s course covers filming with the Filmic Pro app, and editing with LumaFusion. Cielo has an engaging teaching style and her course gets 100% positive student reviews. And all CreativeLive courses have a 30-day money back guarantee. Learn more
Learn Filmmaking With My Step-by-step Guide
Start Making Movies is an easy to understand, 163-page PDF guide that shows you how to start making short films and videos. It uses clear explanations and hundreds of illustrations to introduce equipment, the filmmaking process, film language and film storytelling.

“A great visual primer. Highly recommended” (Peter, UK)
“This book is amazing” (Tiffany, USA)
Источник


