- Игра Flappy Bird на Unity 2D. Часть 1
- Настройка проекта
- Как сделать фон в Unity 2D
- Ландшафт
- Anwell
- Install Unity
- Create a new project
- Organize your project
- Prefabs
- Scenes
- Scripts
- Textures
- Set up the background
- Add the player
- Controlling the Player
- Creating the obstacles
- Moving the obstacles
- Generating obstacles
- Killing the Player
- Add a touch of randomness
- Keeping score
- Save your work
- That’s all folks!
Игра Flappy Bird на Unity 2D. Часть 1
Идея игры следующая: птица должна лететь вперед не сталкиваясь с препятствиями. Такие простые игры, как эта, идеально подходит для учебника. Все, что нам потребуется — 40 строк кода и несколько спрайтов.
В нашем учебнике используется Unity 5.0.0f4. Игра будет работать и в более новых версиях Unity, работа в старых версиях не гарантируется. Бесплатная версия Unity 5 теперь поставляется со всеми функциями движка, поэтому мы рекомендуем именно ее.
Настройка проекта
Запустите Unity и выберите New Project (Новый проект):
Назовите его flappybird, выберите где он будет храниться, например, на C:\, выберите 2D и нажмите на Create Project (Создать проект):
Если мы выберем Main Camera (Основная камера) в Hierarchy (Иерархия) то мы можем сделать Background Color (Фоновый цвет) светло-голубым (R=198, G=208, B=230) под цвет неба и задать Size (Размер) как показано на рисунке ниже:
Как сделать фон в Unity 2D
Начнем мы с того, что нарисуем небо на фоне:
Щелкните правой кнопкой мыши на изображении выше, выберите Save As. , перейдите в папку Assets и сохраните картинку в новой папке Sprites. После сохранения, мы можем выбрать фон в Project Area:
Измените Import Settings в Инспекторе:
Величина Pixels Per Unit , равная 16 , означает, что 16х16 пикселей поместится в одном объекте в игровом пространстве. Мы будем использовать это значение для всех наших текстур, потому что размер птицы — 16х16 пикселей и это должно быть одним объектом в нашей игре.
Давайте добавим фон в игровой мир, перетащив его из Project Area на Main Camera в Иерархии:
Так фон становится потомком для Main Camera:
Теперь, когда фон является потомком камеры, он всегда будет идти следом за камерой. Таким образом, игрок всегда будет видеть фон.
Мы могли бы поместить несколько фонов рядом друг с другом так, чтобы при перемещении камеры в горизонтальном направлении все равно был бы виден фон, но сделать его потомком камеры намного проще.
Обратимся к вкладке Инспектор и установим позицию фона Y=-1 так, чтобы он как раз подходил к игре и в дальнейшем:
Если нажать Play, то мы увидим небо на заднем фоне:
Существует еще одна необходимая корректировка. В ближайшее время мы добавим птицу и некоторые препятствия, так что давайте убедимся, что фон на самом деле нарисовал позади всего остального. В Unity используются свойства SpriteRenderer: Sorting Layer (Сортировка Слоя) и Order in Layer (Порядок в Слое), чтобы решить какой слой игры должны находиться впереди, а какие за ними.
Мы установим Order in Layer в -1 , так что все остальное будет нарисовано перед небом:
Чем больше величина, тем вероятней, что слой будет находиться на переднем плане. При уменьшении величины вероятность нахождения слоя на заднем плане возрастает.
Ландшафт
Давайте также нарисуем какой-нибудь ландшафт на земле. Мы сделаем его очень широким, чтобы хватило места для наших препятствий:
Щелкните правой кнопкой мыши на изображение, выберите Save As. (Сохранить как. ) и сохраните изображение выше в проекте в папке Assets/Sprites. Выберем землю в Project Area, а затем назначим те же Import Settings (Настройки Импорта), что мы использовали ранее:
После этого мы перетащим его из Project Area в Hierarchy (Иерархия) снова (обратите внимание: на этот раз мы не будем делать его потомком камеры):
Взгляните на вкладку Inspector (Инспектор) и спозиционируйте нашу землю в X=16 , а Y=-6 : так она будет находится ниже фона, а большая часть области окажется в правой части экрана:
На этот раз мы зададим Order in Layer (Порядок в Слое) значение, равное 1 , чтобы слой всегда находился перед птицей и препятствиями:
Ground Physics
Почва должна быть частью игрового мира. Сейчас это просто изображение в игровом мире, только визуальный эффект и больше ничего. Мы хотим, чтобы земля была как стена, с которой птица может столкнуться, поэтому давайте выберем Add Component→Physics 2D→Box Collider 2D в Инспекторе:
По идее, на этом можно было бы закончить, но осталось еще одно маленькое «но».. В дальнейшем мы добавим препятствия в нашу игру (как зеленые трубы в оригинальной игре Flappy Bird) и эти препятствия будут перемещаться вверх и вниз. Препятствия и земля будут частью игрового мира и, в соответствии с законами физики, не может быть двух объектов в одной точке (или, в нашем случае, двух Коллайдеров).
Есть несколько способов обойти эту проблему. Как обычно, мы выберем самый простой путь, создав новый слой, который мы будем использовать для земли и препятствий. После этого мы сообщим Unity игнорировать столкновения в/между этим слоем.
Мы можем создать новый слой, выбрав Add Layer (Добавить Слой) в Инспекторе:
После этого мы добавим один User Layer (Пользовательский Слой), давайте назовем его WeirdPhysics:
Теперь мы можем выбрать землю в Иерархии, а затем снова назначить слой WeirdPhysics:
Затем мы выберем Edit→Project Settings→Physics 2D в верхнем меню и отключим столкновения WeirdPhysics в Layer Collision Matrix, которая определяет как будет себя вести система обнаружения столкновений, привязанных к слоям:
В Unity редко приходится делать что-то такое, но наша игра как раз является исключением.
Теперь земля никогда не столкнется с каким-либо препятствием. Кроме того, если мы нажмем на кнопку Play, то увидим не только небо, но и землю:
На этом первая часть нашего урока подошла к концу. В следующем уроке Игра Flappy Bird на Unity 2D. Часть 2 мы поработаем над нашим пернатым героем.
Источник
Anwell
Yes, using a 3D game engine for a 2D game.
This is a tutorial that will teach you how to make a clone of Flappy Bird called Tappy Plane using Unity3D. You should use this tutorial if you’re a beginner to Unity 2D game development with some C# programming experience. Let’s get started!
The complete project code can be found on Github
All images used under Creative Commons from Kenney Vleugels
Install Unity
Unity3D is a free game development engine. Although Unity3D has “3D” in it, its most recent version supports the creation of 2D games. When you create a game on Unity, it can be run on iOS, Android, Windows Phone, the Web, and many other platforms.
Create a new project
When you open up Unity, this should be the first window you see.
Go to the Create New Project tab and select the folder to put it in. The name can be changed later. Change the setup defaults for at the bottom to be 2D. Then press the Create button.
Organize your project
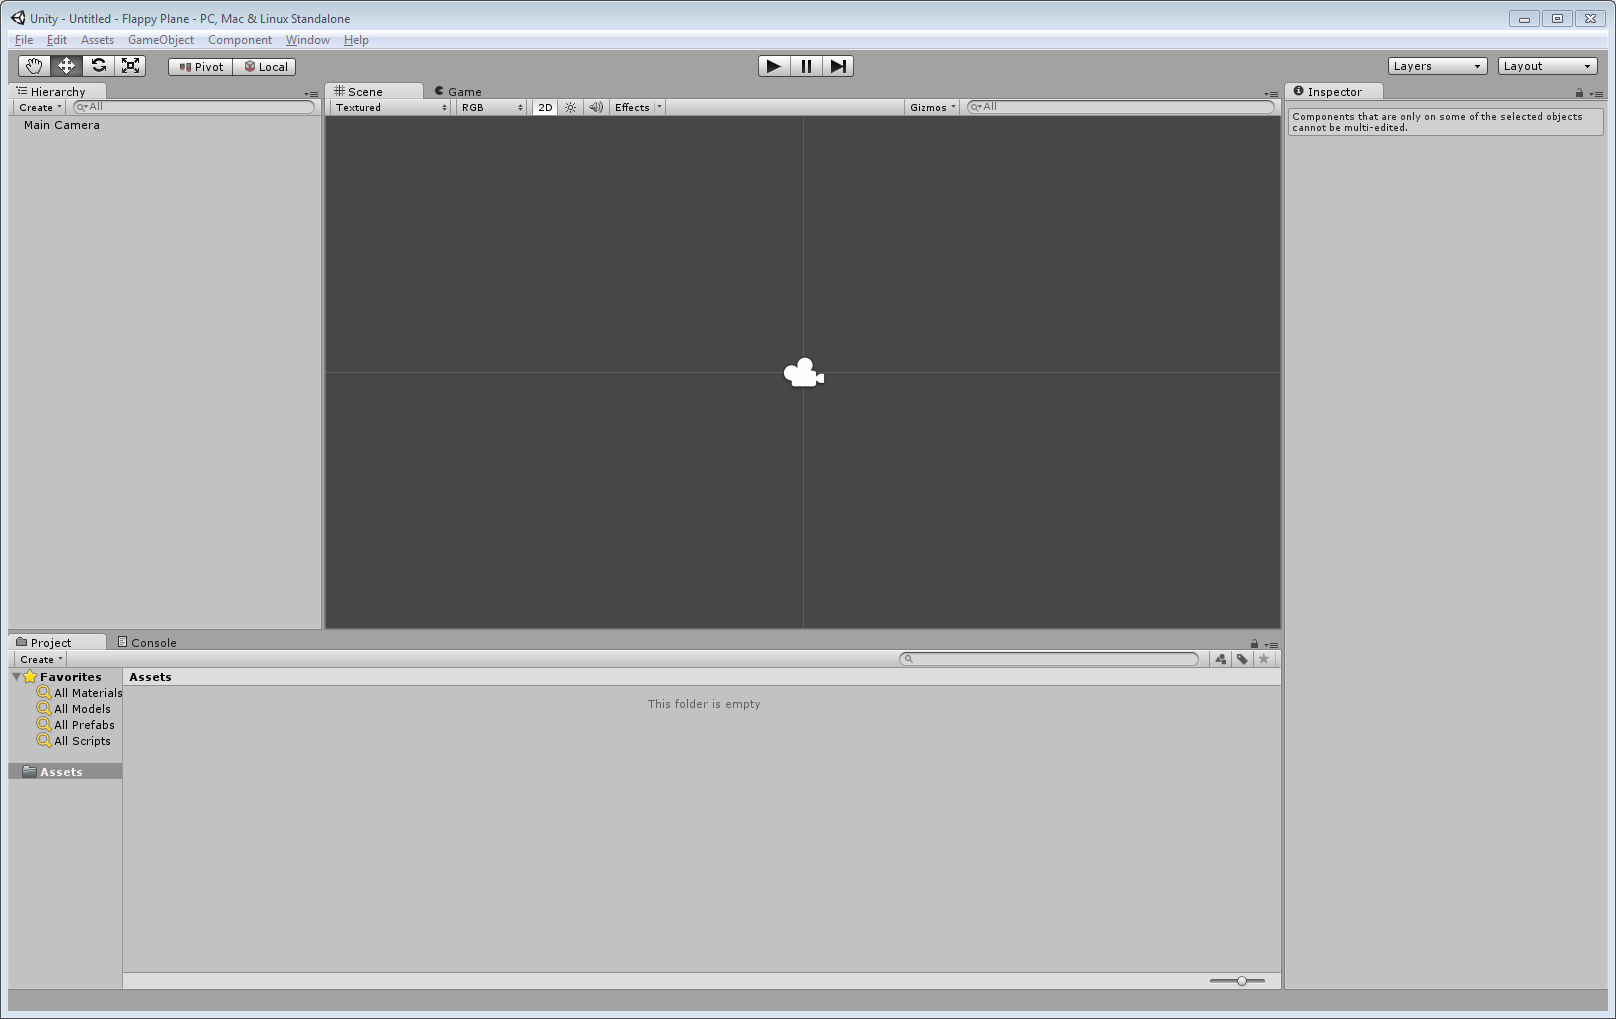
After creating the project, you should be greeted with this blank screen.
Navigate over to the Project window at the bottom to create the folder structure you need to organize your files. Add four folders called “Prefabs”, “Scenes”, “Scripts”, and “Textures”.
Here’s an explanation for what type of file each folder holds.
Prefabs
In Unity, a Prefab is an object that can be reused and created such as bullets, enemies, or walls.
Scenes
A scene is like a level of a game.
Scripts
This folder will hold all the code.
Textures
All the images used in the game. In 2D gaming, these images are called “Sprites”.
Set up the background
Save this image to the Textures folder you created.

Drag the image into the center main Scene area. Using the inspector, set the scale to be 2.5 in both the X and Y fields.
Add the player
Save this image to the Textures folder. Drag and drop it into the scene just as you did with the background.

Set the value of Z in the right side bar under Transform to -1 . This ensures that the player will always be in the front.
In the inspector, click Add Component, type “Rigidbody 2D”, and press enter. A Rigidbody component gives the airplane gravity and other physics characteristics.
Press the triangle Play button at the top of the screen. You should see the plane falling as it adheres to gravity.
Controlling the Player
Now we’re going to create a script that allows the player to move. Inside the Scripts folder, create a C# file called Player.cs . Fill the contents with this code:
There are two main parts in this code: the jumpForce variable and the Update method.
- jumpForce stores the force applied to the player when we jump.
- It is of the Vector2 type, meaning that it stores two values: x and y .
- Because this variable is public, you can change its value in the Inspector.
- The Update method is a function that is called every frame of the game. In it, if the spacebar button is pressed, a force is added to the rigidbody.
Add this script to the Player object the same way you added the RigidBody 2D, with the Add Component button. Now when you press Play, you’ll be able to jump up and fall back down.
Creating the obstacles
Drag these two images in and once again, save them into the Textures folder. Drag these images onto the Scene and in the Inspector, change their X and Y scales to be 2.5 .
Position these objects so that they are above each other, to the right of the background, and wide enough apart that the player can jump through them.
In the file menu, go to GameObject->Create Empty. This will add an object to the scene that is invisible and will serve as a folder that holds our rock obstacles. Name it “RockPair”. Drag the two rock GameObjects onto the RockPair object.
Moving the obstacles
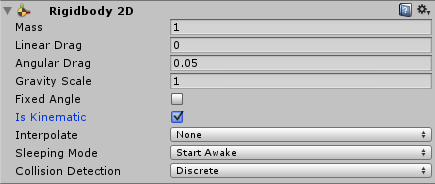
Add a “RigidBody 2D” component to the RockPair parent object. In the inspector, check Is Kinematic. This prevents the obstacles from being affected by gravity.
Create another script called Obstacle.cs and place it in the Scripts folder. This script will be used to move the rocks from the right of the screen to the left. Fill this file with this code:
The Start method runs once, when the GameObject is created. In this case, we are setting the object’s velocity to be -4 in the x direction.
Add this script to the RockPair GameObject and hit the Play button. You should see the obstacles move across the screen.
Generating obstacles
We need to create new rock obstacles every few seconds. To begin, drag the RockPair Object into the Prefabs folder. This turns RockPair into a Prefab, which is an object that can be created and destroyed many times. Delete the RockPair object that is in the scene.
Create another Empty GameObject and rename it to “Scripts”. Create another Script called Generate.cs . Paste this code into it and add the Generate script to the Scripts empty GameObject.
In this script, we use the InvokeRepeating method. This will call a specific function once every several seconds. The first parameter is a string with the name of the method to call. The second is the number of seconds to delay these repeated calls. And the third parameter is the number of seconds between method calls.
In the CreateObstacle method, we use Instantiate , a method that will generate a new prefab to the scene. And the prefab that we add to the scene is a variable called rocks . This variable isn’t linked to our RockPair prefab yet though. To do this, drag the RockPair prefab from its folder into the empty field that says rocks in the Inspector. Follow this video:
Try running the code. You should see obstacles being generated every 1.5 seconds!
Killing the Player
You may have noticed that running into the obstacles doesn’t do anything. Let’s make something happen because of this collision.
Click on the player GameObject. Add a component called “Box Collider 2D”.
Now go to the RockPair prefab and click on the small arrow. Select the first object and add a component called “Polygon Collider 2D”. Do the same for the other Obstacle.
A Collider component is a shape that triggers collisions to happen. Play the game and see what happens. It’s a really interesting thing to watch.
When the player collides with the obstacle, let’s make the game restart. We’re going to edit the Player.cs file to do this. Open the file up and edit it to look like this:
- Inside the Update method, we’ve added some lines of code that check if the player’s position is inside the screen or not. If it’s not, the player will die.
- transform holds the position, rotation, and scale of whatever GameObject the script is attached to.
- The Die method will cause the level to reset.
- The OnCollisionEnter2D method is called whenever there is a collision detected between two GameObjects that have Collider 2D components.
Run the game. The game should restart every time the player crashes or goes off screen.
Add a touch of randomness
If you try to play the game now, it can be a little… boring. We need to vary the height of the rocks to make it more challenging. Update your Obstacle.cs file.
- The range variable is a range of randomness. The higher this number is, the greater the variation the rocks will be. You may need to adjust this value to fit your game.
- When the object is first created, we move its position down a random amount.
Keeping score
Finally, let’s keep score. Update the Generate.cs file to look like this:
- We now have an integer used to keep the score
- The OnGUI method is called several times a frame and is used for displaying text and buttons. Here we display the score in the top left of the screen in black text.
- Every time a new obstacle is created, a point is added.
Save your work
Go to File->Save and save this level into the Scenes folder, named Play.unity . Breathe a sigh of contentment.
That’s all folks!
Congratulations! You’ve made a Flappy Bird clone in Unity. Feel free to change this game and work on your own ideas and art. Here are a couple ideas on things to change:
- Right now, we create new obstacles, but never destroy them. After a while of running, the game could slow down a lot.
- There is no proper menu or play screen.
Thanks for reading! If you enjoyed this please share, and if you have any questions, feel free to ask me.
Источник


