- #4 Floating Windows on Android: Floating Window
- Learn how to use floating windows in your Android apps. The fourth lesson teaches you how to create; actual floating windows and show them.
- WindowManager
- LayoutParams
- Layout
- Floating Window
- Floating Apps
- Results & Missing Pieces
- Source Code
- Stay Tuned
- The Series
- Localazy
- #4 Floating Windows on Android: Floating Window
- WindowManager 🔗
- LayoutParams 🔗
- Layout 🔗
- Floating Window 🔗
- Floating Apps 🔗
- Results & Missing Pieces 🔗
- Source Code 🔗
- Stay Tuned 🔗
- The Series 🔗
- Русские Блоги
- Реализация плавающего окна Android
- Плавающее окно должно отображать элементы управления поверх других приложений. Очевидно, это требует определенных разрешений. Когда API Level> = 23, вам нужно объявить разрешение SYSTEM_ALERT_WINDOW в файле AndroidManefest.xml для рисования элементов управления в других приложениях.
- Настройки LayoutParam
#4 Floating Windows on Android: Floating Window
Learn how to use floating windows in your Android apps. The fourth lesson teaches you how to create; actual floating windows and show them.

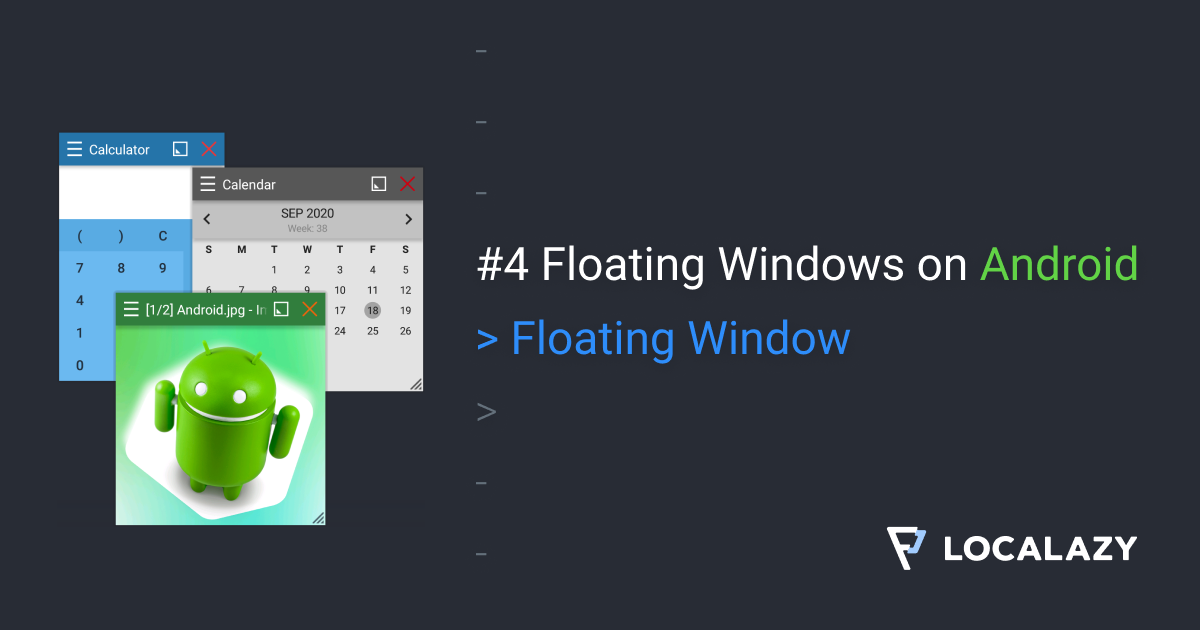
Have you ever wondered how to make those floating windows used by Facebook Heads and other apps? Have you ever wanted to use the same technology in your app? It’s easy, and I will guide you through the whole process.
I’m the author of Floating Apps; the first app of its kind on Google Play and the most popular one with over 8 million downloads. After 6 years of the development of the app, I know a bit about it. It’s sometimes tricky, and I spent months reading documentation and Android source code and experimenting. I received feedback from tens of thousands of users and see various issues on different phones with different Android versions.
Here’s what I learned along the way.
Before reading this article, it’s recommended to go through Floating Windows on Android 3: Permissions.
In this article, I will teach you how to show the actual floating window over other apps.
WindowManager
WindowManager is an interface that the app can use for communication with the window manager.
And the window manager on Android handles everything you can see on the screen. Fortunately, it allows us to add and remove views directly, and if we add them with correct parameters, we have our floating windows!
LayoutParams
In the short source code sample above, we called addView with the second parameter being windowParams of type WindowManager.LayoutParams . What are the correct params?
The first four parameters specify the position and size of the window. Usually, I tend to have layout params defined on class level, so I keep these four being zero and calculate them later. Technically, we can set them right in place, but I rather move this code outside of the variable assignment. For calculation, it’s possible to use something like this to consider also screen size:
The next parameter is the type of window. This one is critical, and using the right type, we tell Android how it should treat our view. Before Android O, the recommended type was WindowManager.LayoutParams.TYPE_PHONE . There are other types, and it’s possible to mix them to achieve different priorities of windows. However, as it’s unavailable from Android O, I don’t recommend using it. From Android O, the recommended type is WindowManager.LayoutParams.TYPE_APPLICATION_OVERLAY , and other types fallback to it.
The next comes flags , and they are also critical as they tell Android how we want our window to be interacting with touches, buttons and key input.
- FLAG_LAYOUT_NO_LIMITS — Allow window to extend outside of the screen. This one is optional, but I tend to use it and calculate limits on my own.
- FLAG_NOT_FOCUSABLE — The window won’t ever get key input focus, so the user can not send key or other button events to it. Those will instead go to whatever focusable window is behind it. This one is extremely important, because it allows us to control the apps behind the floating window.
- FLAG_NOT_TOUCH_MODAL — Allow any pointer events outside of the window to be sent to the windows behind it.
- FLAG_WATCH_OUTSIDE_TOUCH — Receive events for touches that occur outside of your window. This one will be important in the future.
The last parameters is the pixel format. I recommend PixelFormat.TRANSLUCENT as it tells Android to select a format that supports translucency. And having windows partly transparent is fun ;-).
Layout
Unfortunately, we can’t use Jetpack Compose for floating windows as we need just a view, and there is no activity and thus no lifecycle.
However, we can use old good layout XML. To use it, we need to get instance of the LayoutInflater and inflate the view:
For demonstrational purposes, let’s rely on LinearLayout . It nicely demonstrates how our window layout is structured. In Floating Apps, I use the base layout for the window and insert the content dynamically, but we can have just a single layout file as there is only one window type.
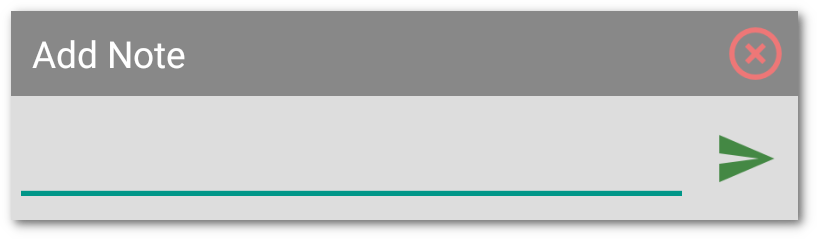
I’m not good designer, so I just pick a few semi-random colors for the window design ;-).
And, voála, the result of my designing skill:

Floating Window
We have prepared view, layout parameters, and window manager. Now, let’s put the code together, and our very first floating window is ready!
Let’s create Window class to encapsulate the whole logic. The full source code:
Floating Apps
If you are interested in how complex the logic behind simple floating windows can get, there is a bit of the background from Floating Apps.
There are many mini-apps. Each of them has a header file that contains the necessary information about it — localized name, internal identifier, icon, list of required permissions, launch preferences, window presets, etc. Headers files are kept in memory and used for listing available apps.
When the app is launched, the information from its header file is used to create the app’s instance and an instance of Window .
Each of the apps extends Application that provides a basic set of features for managing its lifecycle, defining menus, handling window size, position, minimizing, etc. Also, the Application class can automatically solve a lot of shortcomings in floating technology. I will teach you more about all these issues in one of the next articles.
Also, all running apps are registered with the global list of active windows, and that allows for many exciting features — listing all active apps, running some of them only once, reactivating running apps instead of rerunning them, cross-app state refreshing, etc.
As you can see, there can be a vast logic. As normal Android apps rely on the system to provide many of these features, I had to rewrite all of these features for Floating Apps from scratch.
Results & Missing Pieces
As you can see in the animation below, we open our new floating window and even switch apps. The window is still there visible above them.
However, there are two main issues:
- The window stays in the center of the screen, and we can’t move it anywhere.
- It’s not possible to type texts. The keyboard is not activated and doesn’t appear.
We will address both of these problems in the next articles.
Source Code
The whole source code for this article is available on Github.
Stay Tuned
Eager to learn more about Android development? Follow me (@vaclavhodek) and Localazy (@localazy) on Twitter, or like Localazy on Facebook.
The Series
This article is part of the Floating Windows on Android series.
Localazy
There are over 4 billion people online behind language barriers. Speak everyone’s language.
Источник
#4 Floating Windows on Android: Floating Window
Learn how to use floating windows in your Android apps. The fourth lesson teaches you how to create actual floating windows and show them.
Have you ever wondered how to make those floating windows used by Facebook Heads and other apps? Have you ever wanted to use the same technology in your app? It’s easy, and I will guide you through the whole process.
I’m the author of Floating Apps; the first app of its kind on Google Play and the most popular one with over 8 million downloads. After 6 years of the development of the app, I know a bit about it. It’s sometimes tricky, and I spent months reading documentation and Android source code and experimenting. I received feedback from tens of thousands of users and see various issues on different phones with different Android versions.
Here’s what I learned along the way.
Before reading this article, it’s recommended to go through Floating Windows on Android 3: Permissions.
In this article, I will teach you how to show the actual floating window over other apps.
WindowManager 🔗
WindowManager is an interface that the app can use for communication with the window manager.
And the window manager on Android handles everything you can see on the screen. Fortunately, it allows us to add and remove views directly, and if we add them with correct parameters, we have our floating windows!
LayoutParams 🔗
In the short source code sample above, we called addView with the second parameter being windowParams of type WindowManager.LayoutParams . What are the correct params?
The first four parameters specify the position and size of the window. Usually, I tend to have layout params defined on class level, so I keep these four being zero and calculate them later. Technically, we can set them right in place, but I rather move this code outside of the variable assignment. For calculation, it’s possible to use something like this to consider also screen size:
The next parameter is the type of window. This one is critical, and using the right type, we tell Android how it should treat our view. Before Android O, the recommended type was WindowManager.LayoutParams.TYPE_PHONE . There are other types, and it’s possible to mix them to achieve different priorities of windows. However, as it’s unavailable from Android O, I don’t recommend using it. From Android O, the recommended type is WindowManager.LayoutParams.TYPE_APPLICATION_OVERLAY , and other types fallback to it.
The next comes flags , and they are also critical as they tell Android how we want our window to be interacting with touches, buttons and key input.
- FLAG_LAYOUT_NO_LIMITS — Allow window to extend outside of the screen. This one is optional, but I tend to use it and calculate limits on my own.
- FLAG_NOT_FOCUSABLE — The window won’t ever get key input focus, so the user can not send key or other button events to it. Those will instead go to whatever focusable window is behind it. This one is extremely important, because it allows us to control the apps behind the floating window.
- FLAG_NOT_TOUCH_MODAL — Allow any pointer events outside of the window to be sent to the windows behind it.
- FLAG_WATCH_OUTSIDE_TOUCH — Receive events for touches that occur outside of your window. This one will be important in the future.
The last parameters is the pixel format. I recommend PixelFormat.TRANSLUCENT as it tells Android to select a format that supports translucency. And having windows partly transparent is fun  .
.
Layout 🔗
Unfortunately, we can’t use Jetpack Compose for floating windows as we need just a view, and there is no activity and thus no lifecycle.
However, we can use old good layout XML. To use it, we need to get instance of the LayoutInflater and inflate the view:
For demonstrational purposes, let’s rely on LinearLayout . It nicely demonstrates how our window layout is structured. In Floating Apps, I use the base layout for the window and insert the content dynamically, but we can have just a single layout file as there is only one window type.
I’m not good designer, so I just pick a few semi-random colors for the window design  .
.
And, voála, the result of my designing skill:
Floating Window 🔗
We have prepared view, layout parameters, and window manager. Now, let’s put the code together, and our very first floating window is ready!
Let’s create Window class to encapsulate the whole logic. The full source code:
Floating Apps 🔗
If you are interested in how complex the logic behind simple floating windows can get, there is a bit of the background from Floating Apps.
There are many mini-apps. Each of them has a header file that contains the necessary information about it — localized name, internal identifier, icon, list of required permissions, launch preferences, window presets, etc. Headers files are kept in memory and used for listing available apps.
When the app is launched, the information from its header file is used to create the app’s instance and an instance of Window .
Each of the apps extends Application that provides a basic set of features for managing its lifecycle, defining menus, handling window size, position, minimizing, etc. Also, the Application class can automatically solve a lot of shortcomings in floating technology. I will teach you more about all these issues in one of the next articles.
Also, all running apps are registered with the global list of active windows, and that allows for many exciting features — listing all active apps, running some of them only once, reactivating running apps instead of rerunning them, cross-app state refreshing, etc.
As you can see, there can be a vast logic. As normal Android apps rely on the system to provide many of these features, I had to rewrite all of these features for Floating Apps from scratch.
Results & Missing Pieces 🔗
As you can see in the animation below, we open our new floating window and even switch apps. The window is still there visible above them.
However, there are two main issues:
- The window stays in the center of the screen, and we can’t move it anywhere.
- It’s not possible to type texts. The keyboard is not activated and doesn’t appear.
We will address both of these problems in the next articles.
Source Code 🔗
The whole source code for this article is available on Github.
Stay Tuned 🔗
Eager to learn more about Android development? Follow me (@vaclavhodek) and Localazy (@localazy) on Twitter, or like Localazy on Facebook.
The Series 🔗
This article is part of the Floating Windows on Android series.
Источник
Русские Блоги
Реализация плавающего окна Android

Современные технологические новости
19 июня Xiaomi официально объявила, что после неоднократных и тщательных исследований она решила поэтапно реализовать план листинга в Гонконге и Китае, то есть после листинга в Гонконге, затем выбрать возможность листинга в стране, выпустив CDR. В связи с этим SFC выразил уважение к выбору Xiaomi отложить выдачу CDR.
Эта статья из Донг Сяочонг Вклад, делясь знаниями о плавающих окнах в Android, взгляните! Надеюсь, вам всем нравится.
Донг Сяочонг Адрес блога:
Многие приложения теперь используют плавающие окна. Например, когда WeChat находится в видео, нажмите кнопку «Домой», и на экране все еще будет отображаться небольшое видеоокно. Эта функция очень полезна во многих ситуациях. Поэтому сегодня мы реализуем плавающее окно Android и исследуем точки ошибок при реализации плавающего окна.
Интерфейс плагина плавающего окна
Перед реализацией плавающего окна нам нужно знать, через какой интерфейс мы можем поместить элемент управления на экран. Рисование интерфейса Android достигается через сервис WindowMananger. Итак, поскольку мы хотим реализовать плавающее окно, которое может быть на интерфейсе, отличном от нашего собственного приложения, мы должны использовать WindowManager, чтобы «сделать это».
WindowManager реализует интерфейс ViewManager, который можно получить, получив системную службу WINDOW_SERVICE. Интерфейс ViewManager имеет метод addView, и мы используем этот метод для добавления элемента управления плавающим окном на экран.
Настройка разрешения и запрос
Плавающее окно должно отображать элементы управления поверх других приложений. Очевидно, это требует определенных разрешений. Когда API Level> = 23, вам нужно объявить разрешение SYSTEM_ALERT_WINDOW в файле AndroidManefest.xml для рисования элементов управления в других приложениях.
В дополнение к этому разрешению нам также нужно установить разрешение плавающего окна для этого приложения в настройках системы. Это разрешение должно запускать Settings.ACTION_MANAGE_OVERLAY_PERMISSION в приложении, чтобы позволить пользователю вручную устанавливать разрешения.
Настройки LayoutParam
Метод addView в WindowManager имеет два параметра: один — объект управления, который необходимо добавить, а другой — объект WindowManager.LayoutParam.
Здесь необходимо подчеркнуть переменную типа в LayoutParam. Эта переменная используется для указания типа окна. При настройке этой переменной вам нужно обратить внимание на яму, то есть вам нужно адаптироваться к различным версиям системы Android.
До Android 8.0 параметром плавающего окна мог быть TYPE_PHONE, который не является окном приложения и используется для взаимодействия с пользователем.
Android 8.0 изменил поведение системы и API, в том числе приложения, использующие разрешение SYSTEM_ALERT_WINDOW, больше не могут использовать тип окна для отображения окон напоминания над другими приложениями и окнами:
Если вам нужно реализовать окно напоминания над другими приложениями и окнами, это должен быть новый тип TYPE_APPLICATION_OVERLAY. ¡Если плавающее окно типа TYPE_PHONE по-прежнему используется в Android 8.0 и выше, появится следующее сообщение об исключении:
android.view.WindowManager$BadTokenException: Unable to add window [email protected] — permission denied for window type 2002
Позвольте мне объяснить конкретную реализацию плавающего окна. Чтобы отключить плавающее окно от Activity, чтобы плавающее окно могло нормально работать, когда приложение находится в фоновом режиме, здесь мы используем Service, чтобы запустить плавающее окно и служить его логической поддержкой. Перед запуском сервиса вам необходимо определить, разрешено ли открывать плавающее окно в данный момент.
Элемент управления плавающим окном может быть любым подтипом View. Вот пример с самой простой кнопкой.
Хорошо, закончил! Да, верно, это самое простое плавающее окно. Разве это не просто? Давайте посмотрим на эффект.

Конечно, эффект этого плавающего окна только отображается, и он далек от действительно желаемого эффекта. Но основной принцип уже реализован, а остальное — добавить немного функциональности.
Добавить небольшие функции
Функция перетаскивания
Первое, что я хочу добавить, — это возможность перетаскивать это плавающее окно. Поскольку положение плавающего окна может блокировать информацию, которую мы хотим видеть позади, лучше, если вы можете утащить плавающее окно. В Android обработка сенсорных событий считается самой основной операцией непосредственно в коде.
Здесь следует отметить, что метод обновления макета плавающего окна управления при комментировании кода. Только при вызове этого метода положение плавающего окна изменится. Посмотри на эффект.

Автовоспроизведение фото
Давайте внесем небольшие изменения в плавающее окно, чтобы продемонстрировать немного сложный интерфейс. Здесь мы больше не просто используем элемент управления Button для интерфейса с плавающим окном, но добавляем ImageView в LinearLayout. Файл макета выглядит следующим образом.
Внесите некоторые изменения в место создания плавающего окна.
Мы также хотим, чтобы изображение переключалось каждые две секунды, поэтому давайте создадим механизм для регулярного переключения изображений.
Посмотрите на эффект автоматического воспроизведения картинок в плавающем окне.

Видео виджет
Давайте посмотрим на наиболее часто используемую функцию плавающих окон: маленькие видеоокна. Например, когда WeChat выходит из интерфейса во время видео, видео будет отображаться в виде небольшого окна. Здесь я сначала использую MediaPlay и SurfaceView для воспроизведения сетевого видео для имитации эффекта. Реализация в основном такая же, как у проигрывателя картинок выше, за исключением того, что элементы управления и соответствующая логика воспроизведения изменены. Файл макета аналогичен изображенному выше проигрывателю изображений, за исключением того, что ImageView заменен на SurfaceView. Создать плавающее окно управления.
Хорошо, давайте иметь печальное «Сокровище» с Марса.

Выше приведена реализация плавающего окна Android и некоторых небольших простых приложений. Это можно суммировать как следующие шаги:
Декларация и применение приложения
Элементы управления, необходимые для создания плавающих окон
Добавить элементы управления в `WindowManager`
Обновите макет WindowManager, если это необходимо
Яма, которая должна быть замечена, является проблемой адаптации версии LayoutParams.type.
Адрес проекта следующий:
добро пожаловатьДолгое нажатие -> Определите QR-код на картинке
Илиотсканируйте этоСледуйте за моим публичным аккаунтом
Источник


