- How to format Android phone using computer
- 1. Format Android phone using computer
- 2. Download and install Android SDK
- 3. Extract from the archive
- 4. Install Sun Java
- 5. Set path to Android SDK
- 6. The final steps
- 2 Ways to Format or Reset Your Android Phone or Tablet
- Part 1. Format Your Android with Factory Reset
- Test 1: Let’s see how Android Data Recovery softare recovers your data
- Part 2: Format Android Phone with SafeWiper for Android
- Different Ways to Format Code in Android Studio
- Method 1: By using a shortcut key for formatting a code in any file in Android Studio
- Method 2: Formatting a code from MenuBar
- Method 3: By using different shortcut keys for formatting our code
How to format Android phone using computer
Did you know that a lot of problems with your mobile phone can be easily solved? In this article, you will read about useful information that answers this question. So learn how to format android phone!

Looking for some tips on your Android phone formatting? Search no further, as we have covered everything. You will find the following aspects in this comprehensive guide:
- Format Android phone using computer
- Download and install Android SDK
- Extract from the archive
- Install Sun Java
- Set path to Android SDK
- The final steps
Go ahead and format your phone with ease!
1. Format Android phone using computer

When your Android smartphone starts to perform slowly, switch off and on on its own, or give you some issues, the fastest and most convenient solution for many problems is to format the android.
You probably know that you can format android through the main menu of your phone and recovery mode. But if none of these methods has helped, you need to format the android through the computer.

How to sync contacts from iPhone to Mac — Simple methods that work
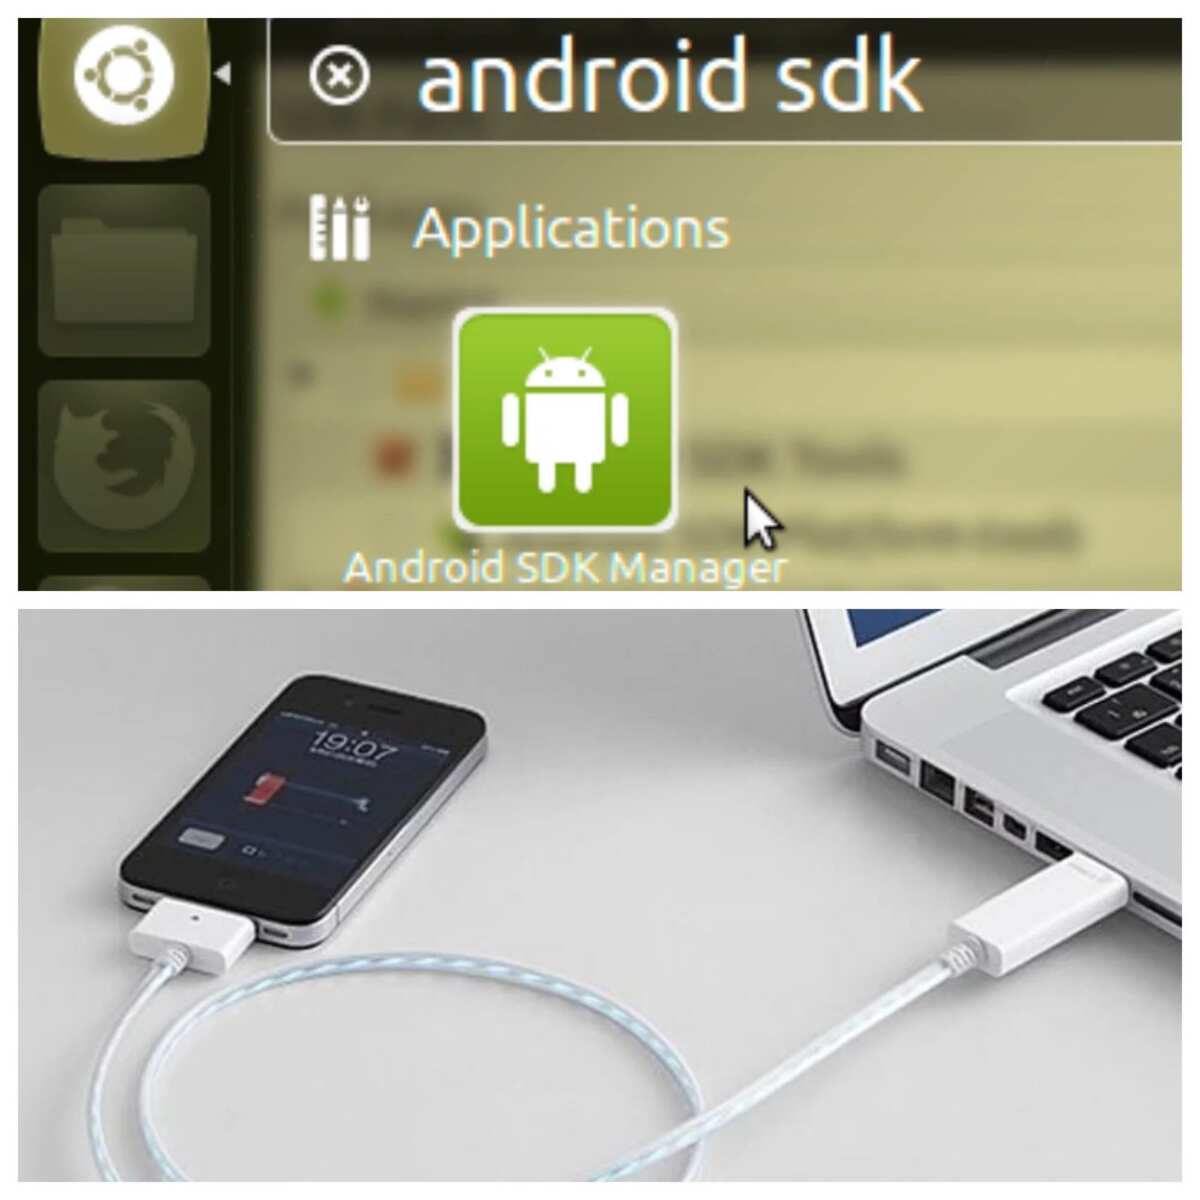
Android Developer’s software (SDK) includes useful tools that will allow you to format android phone using laptop.
2. Download and install Android SDK
The first step – you have to download and install the Android SDK. We will try to explain to you how to do it.

You need to download the Android SDK from the Google Developers site. Scroll down and find the section labeled «SDK Tools Only». Save the file in a convenient place on the computer — for example, on the desktop.
3. Extract from the archive
The next step is to extract from the archive to the following address:
— Windows: Extract to system disk C.
— OS X: Extract to the home folder.
— Linux: Extract to the home folder.
Rename the extracted folder to «Android». At some point, we will refer to a folder called Android.
4. Install Sun Java
To work with the Android SDK, you need to install a working version of Sun Java. To do this, go to the official Oracle website and download the appropriate version for your computer (32-bit or 64-bit version). Please note that without Sun Java, you will not be able to install the Android SDK.

All you need to know about how to backup iPhone to iTunes

For users of computers running the Linux operating system, you also need to install Sun Java. You can download the x86 and x64 versions on the Oracle website.
For Mac computers, this is easier, because the manufacturer has already taken care of installing Sun Java.
5. Set path to Android SDK
Now, you need to set path (PATH) to Android SDK. The PATH variable in the operating system of your computer shows where to look for the executable file when you want to run the command from a command line or a terminal. For example, to start the ADB command you need to set the full path — i.e. ADB folder is inside the SDK folder — or specify the location set in the PATH variable itself.
Maybe it sounds difficult and confusing but it is much easier to do than explain. For users of computers with the Windows operating system you should do these to configure the path to the Android SDK:
Easy ways on how to transfer contacts from iPhone to iPhone
— Click the Start button on the keyboard;
— Start typing «Environment Variables»;
— As you enter, you will see the line «Edit the system environment variables». Select it;
— In the «Environment Variables» window, select PATH in the «System Variables» section. Then click the «Edit» button.
— Add the full path to the Android SDK and Android SDK Platform-tools, separated by a semicolon. It should look like this:
C: \ Android \ tools; C: \ Android \ platform-tools
READ ALSO: How to unlock modem?
You may set the PATH on a computer running OS X on your Bash profile. It’s very simple, and everything is done in one file. Find the file called .bash_profile. in the home folder. Open it with any text editor.
This file can be empty or filled with some information. Add the following pair of lines to the top of the file:
— Export PATH = »$ HOME / Android / tools: $ PATH

3 easy methods to install WhatsApp on your PC
— Export PATH = »$ HOME / Android / platform-tools: $ PATH
READ ALSO: How to unlock modem?
Please note that the Android SDK must be in your home folder. Then save the file and restart the computer. Install the PATH on a Linux computer similar to Mac computers — you need to edit the file. Use some text editor and open the
/ .bashrc file. If such a file does not exist on your computer, you can create a new file and save it as
/ .bashrc. At the end of the file, add the following lines:
Export PATH = »$ HOME / Android / tools: $ PATH»
Export PATH = »$ HOME / Android / platform-tools: $ PATH»
Save the file and restart the computer.
After doing this, let’s continue to format our Android phone.
6. The final steps
After installing Android SDK click the Windows + R button on the keyboard to open the Run application. After that, you need to type cmd to go to the command line.

Learn how to capture your biometric data with NYSC software
The next step is to specify the path to the folder that contains Android Debug Bridge or ADB. You can do this using the “CD” command.
If you installed the SDK using our instructions, then the folder containing the ADB system is located at the following address: C: \ Android \ Android-SDK \ Platform-Tools.

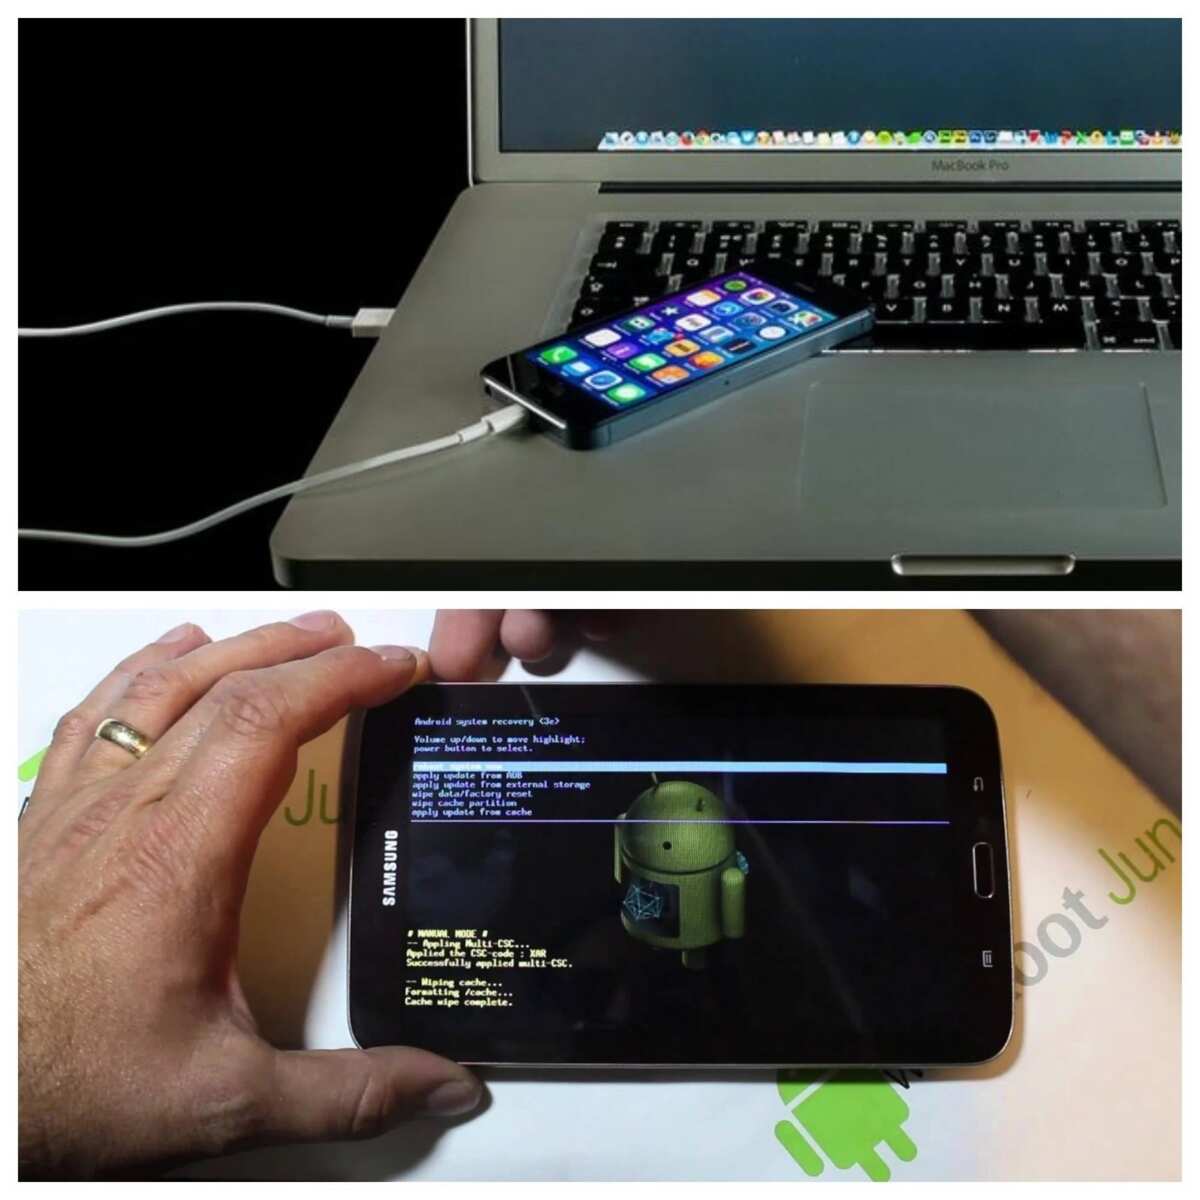
Remember that your path to the ADB system may be different, so you need to check if the Adb.exe file exists in the folder of your SDK. Then connect your Android smartphone to your computer through the USB cable. During the formatting of the android phone, it is recommended to disconnect all USB devices that are connected to the computer, except for the Android smartphone itself.
And the last step is to enter the following command:
-Adb shell recovery -wipe_data
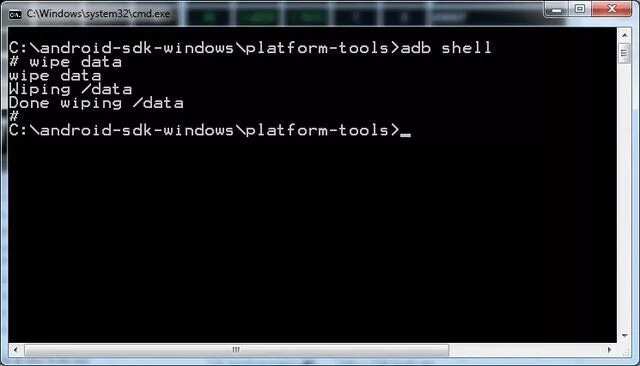
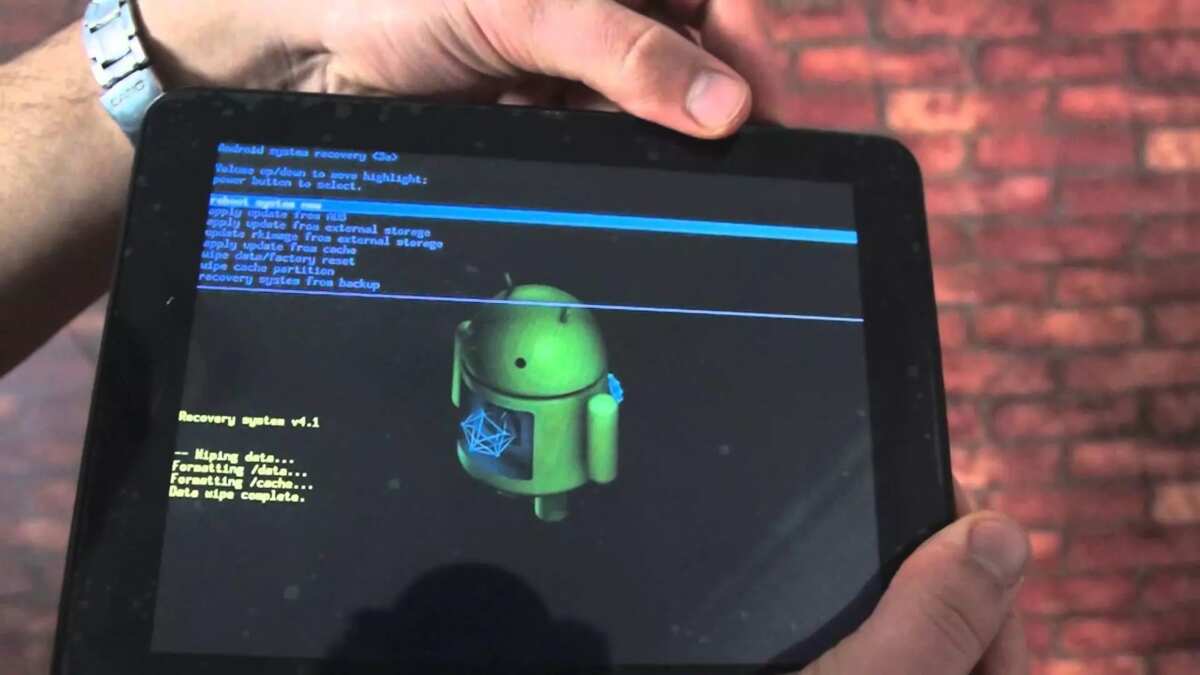
After that, your Android smartphone will be formatted. This will return the phone to factory settings. As you see it is not so hard to format your phone if you follow the instructions. We hope this guide has helped you a lot!

How to update WhatsApp on different devices?
READ ALSO: Top 5 Xiaomi phones in Nigeria
Источник
2 Ways to Format or Reset Your Android Phone or Tablet
One should always format their Android devices on two conditions: first if you are trying to sell or donate your phone so that the new owner can’t glance on your personal details and second, if you feel your Android phone is performing slower than before to speed it up again. It doesn’t matter for what reason you are formatting your Android phone, one should always keep their phone up to date by resetting it time to time.
When we say formatting Android phone, it simple means that you are erasing the multimedia files, contacts, messages, documents and other private stuff and not the operating system itself. Your phone will still function properly even if you format it but obviously all the customization will be erased. It is also recommended to format your device if it is attacked by virus or malwares or if your phone behaves abnormally.
In this guide, we will recommend two exhilarating ways to format Android phone but first we will recommend to learn how to backup your Android phone before proceeding with the mentioned methods below to avoid any data damage.
Part 1. Format Your Android with Factory Reset
As we mentioned earlier, factory resetting Android phones simply erase all the data from your phone and it will take your phone back to the factory state. But remember, it will not harm your system and it won’t defect your phone. Here’s how to factory reset any Android smartphone.
Step 1. Tap on Menu and find Settings.
Step 2. Choose «Backup and reset» under Personalization section.
Step 3. Scroll down to the bottom and tap on «Factory data reset»
Step 4. Confirm all the details and tap on «Reset Device».
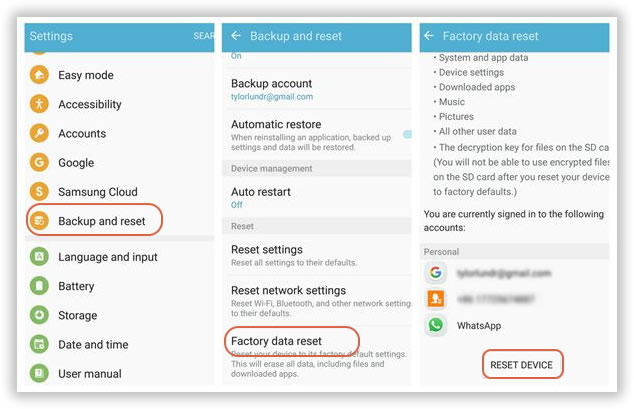
That’s all. Just wait until the factory reset progress is finished successfully and you should now have a clean and clear phone.
1. 100% Recovered by most Android Data Recovery Softwares.
2. Don’t use this method if you are selling or trading your phone as the deleted data can be restored effortlessly.
3. Improper factory reset may cause system crash.
Test 1: Let’s see how Android Data Recovery softare recovers your data
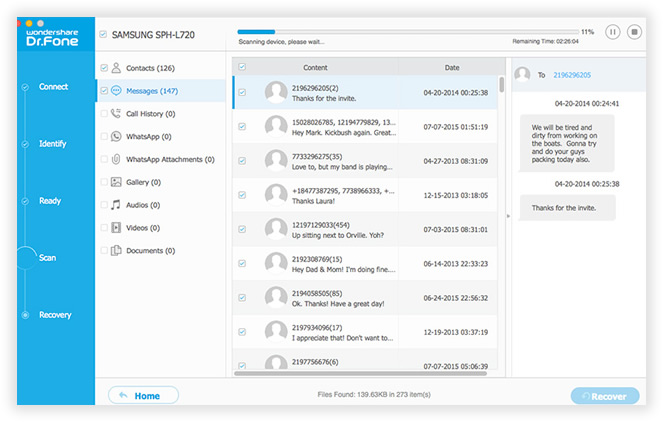
Ther are many free Anroid data recovery software online that can easily scan all of your erased data and recover them. Just one click, everyone can retrieve messages and other data.
To completely destroy your sensitive data, you’d better see the Part 2 below.
Part 2: Format Android Phone with SafeWiper for Android
The safest way to wipe out an Android phone before selling or giving away to any other person is to do it with a commercial Android Data Eraser. The fact is even if you factory reset your phone, if any hacker has access to a professional data recovery tool then they can retrieve all the deleted data from your phone and misuse them. Imagine if your private pictures or confidential data such as messages, contacts, documents, etc. are exposed to some spammer or hacker then certainly, they will totally destroy your reputation. That’s why SafeWiper for Android makes sure that any data deleted with this tool can never be recovered ever again.
Источник
Different Ways to Format Code in Android Studio
Code formatting is very important when you are building an Android application. This will help you to organize your code properly and to maintain your code to make it easily readable. Below is a list of purposes of having a standard coding format.
Purposes of Having Coding Standards
- A coding standard gives a uniform appearance to the codes written by different engineers.
- It improves the readability, and maintainability of the code, and it reduces complexity also.
- It helps in code reuse and helps to detect errors easily.
- It promotes sound programming practices and increases the efficiency of the programmers.
In this article, we will take a look at different ways to format the code in Android Studio. We are going to discuss three different methods with the help of which we can format the code in our Android Studio.
- Method 1: By using a shortcut key for formatting a code in any file in Android Studio
- Method 2: Formatting a code from MenuBar
- Method 3: By using different shortcut keys for formatting our code
Method 1: By using a shortcut key for formatting a code in any file in Android Studio
In this method, we simply have to navigate to the file in which we have to format our code. After opening the file we have to simply press the shortcut key as Ctrl+Alt+L to reformat the code in your file. With this key, the code in your file will be rearranged according to the code standards. You can get to see below image 1 in which our code is not formatted properly and after pressing this shortcut key our code will be formatted as shown in the second image.
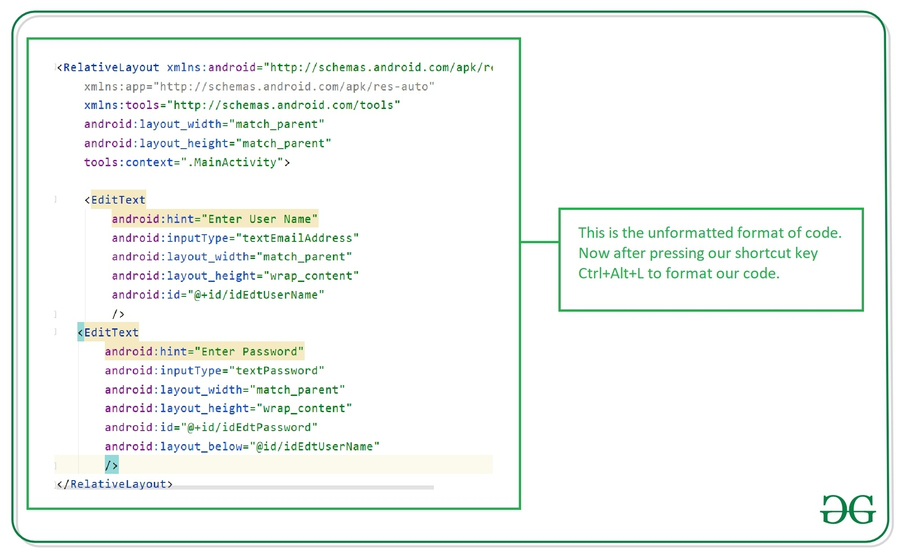
Unformatted code which we have written.

Formatted code which we get after pressing Ctrl+Alt+L
Shortcut keys for different Operating Systems
| Windows | Ctrl+Alt+L |
| Mac OS | Option+Cmd+L |
| Linux | Ctrl+Shift+Alt+L |
Method 2: Formatting a code from MenuBar
In this method, we will rearrange our code from the Menu Bar. To format our code navigate to the file in which we have to format our code and inside that file. Navigate to the top bar and click on the Code option and inside that option click on Reformat code option which is shown in the below screenshot.
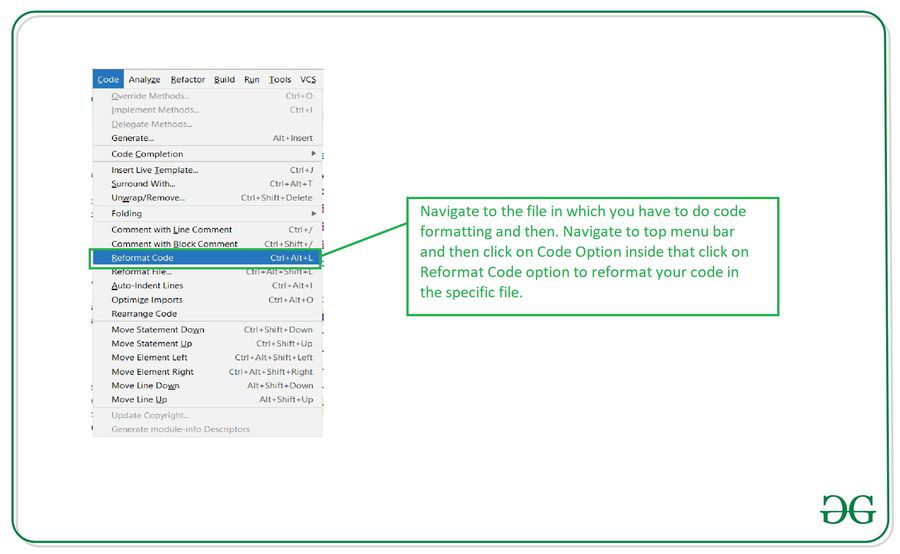
After clicking on this option your code will be formatted as shown in the above screenshot
Note: This method will be similar for all the operating systems
Method 3: By using different shortcut keys for formatting our code
Navigate to the file in which we have to format our code and then click on the shortcut key as Ctrl+Shift+Alt+L after clicking this key you will get to see the below dialog on your screen. Select the formatting options and your code will be formatted and rearranged according to selected options. The options present inside this dialog box is explained below.

After selecting the option on this dialog make sure to run it to format your code
Источник


