- How to stream from iPhone, iPad, or Android to Kodi
- Enabling Airplay and DLNA functionality in Kodi
- Enabling Airplay and DLNA in Kodi
- Instructions forВ Kodi 14/15/16 (Helix, Isengard, Jarvis)
- Instructions forВ Kodi 17 (Estuary Skin)
- Casting or streaming from iPhone, iPad, or Android devices
- Streaming from iPhone and iPad
- Casting from Android
- From android to kodi
- From android to kodi
- HOW-TO:Install Kodi for Android
- Contents
- 1 Installing Kodi from the Google Play Store
- 1.1 Google Play — stable
- 1.2 Google Play — beta testing
- 2 Manual installation
- 2.1 Enabling installation
- 2.1.1 Android (normal)
- 2.1.2 Android TV
- 2.2 Download
- 2.2.1 Android TV
- 2.2.2 Android (normal)
- 2.3 Install
- 2.3.1 Install on Fire TV
- 2.4 Tidy up
- 2.5 Update
- 2.6 Uninstall
- 2.6.1 Android (normal)
- 2.6.2 Android TV
How to stream from iPhone, iPad, or Android to Kodi
January 15, 2017 at 10:56 am by Corey
Media such as music and videos can be streamed to Kodi from an iOS or Android device basically transforming your Kodi instance into an AirPlay and/or DLNA receiver. Apple’s iPhone and iPad devices rely on Airplay while Android device can leverage the DLNA standard in conjunction with an app. However these features are not enabled within Kodi by default.В
Enabling Airplay and DLNA functionality in Kodi
Enabling support for Airplay and DLNA is fairly straight forward. In the case of Kodi running on Windows you’ll need to download and install Apple’s Bonjour Print Services on the system hosting Kodi. Bonjour is an open-source network service discovery protocol. If iTunes is already installed, chances are you will already have the Bonjour service installed.
Enabling Airplay and DLNA in Kodi
If Kodi is running on a Windows host, Apple’s Bonjour Print Services for Windows must be installed on the system before Airplay can be enabled. Browse to this Apple Knowledge Base ArticleВ to download and install the Bonjour Print Services for Windows application.В Reboot the host after installation.
Instructions forВ Kodi 14/15/16 (Helix, Isengard, Jarvis)
- Launch Kodi.
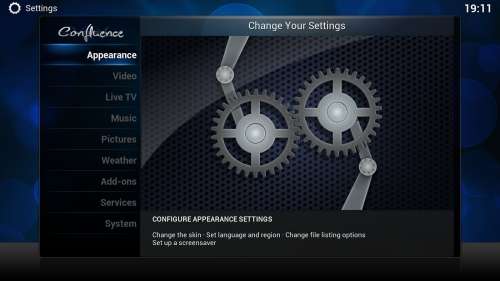
- Navigate to System в†’ Settings в†’ Services. Note: Some of these settings could be hidden. To resolve this Highlight Settings level and hit enter until it changes to Expert.
- Select UPnP / DLNA and enable Share my libraries and enable Allow remote control via UPnP.
- Select Webserver and enable Allow remote control via HTTP.
- Select Remote control and enable Allow remote control by programs on this system and enable Allow remote control by programs on other systems.
- Select Zeroconf and enable Announce services to other systems. If you run into issues enabling this, then Apple’s Bonjour Print Services for Windows isn’t installing or functioning properly.
- Select Airplay and enable AirPlay support.
Instructions forВ Kodi 17 (Estuary Skin)
- Launch Kodi.
- Navigate to Settings→ Services.
- Under General, enable Announce services to other systems.
- Select Control and enable Allow remote control via HTTP, enable Allow remote control from applications on this system, and enable Allow remote control from applications on other systems.
- Select UPnP / DLNA and enable Share my libraries and enable Allow remote control via UPnP.
- Select AirPlay and enable AirPlay support and enable AirPlay Videos and Picture support.
Casting or streaming from iPhone, iPad, or Android devices
Streaming from iPhone and iPad
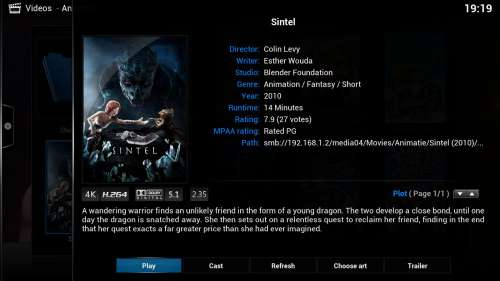
Streaming from the iPhone or iPad is quite easy. Simply tap the Airplay icon В on Videos and other sourcesВ which support Airplay. Kodi will appear as an Airplay supported device as long as your iOS device is connected to the same network as Kodi (for example, connected to the same WiFi).
But I have some bad news. If you’re using iOS 9 orВ iOS 10 you will need to deselect the optionВ AirPlay Videos and Picture support. Unfortunately this means Airplay with Kodi is limited to audio only. I’ll update this article once a free or open source solution is available.
Casting from Android
Casting from Android isn’t as straight forward as Airplay. Instead a third-party app is required to cast content from apps such as YouTube or OneDrive.
I recommend the full version of Yatse. It costs a few bucks but it’s well worth it. Yatse is a remote control for Kodi which allows you to navigate Kodi’s menus entirely from your mobile device. It also includes a DLNA server which is used to stream content to Kodi.
- From your Android device, download and install Yatse. Then have it upgraded to the premium version. At the time of writing this, there’s a trial period of which you can cast up to five minutes using Yatse which will allow you to try before you buy.
- Launch Yatse and add a Kodi system. Yatse should be able to automatically locate any Windows versions of Kodi. If a Kodi system can’t be located, you’ll need to configure the connection from Yatse manually by inputting the IP address of the system which is running Kodi.
- Once Yatse is configured, try using the remote to make sure you can successfully control Kodi.
- You now have Yatse and it’s included DLNA server installed on your Android mobile device. Yatse uses the Android Share menu within apps for casting. For example, you can now launch YouTube and cast to Kodi by selecting the Share button on a video and then Play on Kodi (or whatever the Kodi’s system hostname is). I’ve also found this to work successfully on a number of other applications such as Photos and OneDrive.
Источник
From android to kodi
Новые темы необходимо создавать только в корневом разделе! В дальнейшем они будут обработаны модераторами.
Если Вы выложили новую версию программы, пожалуйста, сообщите об этом модератору нажав на вашем сообщении кнопку «Жалоба».
Последнее обновление программы в шапке: 11.10.2021

Краткое описание:
Кросс-платформенный медиацентр XBMC.
Бесплатный кроссплатформенный медиаплеер и программное обеспечение для организации HTPC с открытым исходным кодом. Графический интерфейс программы позволяет легко управлять видеофайлами, фотографиями и музыкой, находящимися на компьютере, оптическом диске, в интернете или в локальной сети. Может управляться с помощью ПДУ.
Android 4.2+:
версия: 16.1 Jarvis for Windows Kodi (Пост _SERGEYX_ #56018605)
версия: 16.0 Jarvis Kodi (Пост fack1900 #47300196)
версия: 16.0 Jarvis x86 Kodi (Пост ROMANFIONOV #47315630)
версия: 15.2 final Kodi (Пост grey684 #43824098)
версия: 15.2 + кэш Kodi (Пост fack1900 #44038040)
версия: 14.2 (x86) Stable  kodi-14.2-Helix-x86.apk ( 61.12 МБ )
версия: 14.2 (windows) Stable  kodi-14.2-Helix.exe ( 67.82 МБ )
версия: 15.1.1 Kodi (Пост grey684 #42405075)
версия: 15.1 + кэш Kodi (Пост fack1900 #42280136)
версия: 15 + кэш Kodi (Пост fack1900 #41793816)
версия: 15.0 + кэш KODI (XBMC) (Пост fack1900 #41260543)
версия: 14.2 (arm) Stable kodi-14.2-Helix-armeabi-v7a.apk ( 59.74 МБ )
версия: 13 Stable XBMC (Пост #31290789)
версия: 13 XBMC (Пост #31210770)
версия: 12.2 https://4pda.to/forum/dl/post/2915114/xbmc-12.2-Frodo-armeabi-v7a.apk
версия: 12.1 xbmc-12.1-Frodo-armeabi-v7a.apk
версия: 12.0 http://mirrors.xbmc.org/releases/android/x. armeabi-v7a.apk
NEON Devices (Nexus 7 / Tegra3 / Newer Samsung Devices): xbmcapp-armeabi-v7a-debug-08-22-full-neon.apk
Non-NEON Devices (Tegra2 / A500 / A100 / Thrive): xbmcapp-armeabi-v7a-debug-08-22-no-neon.apk
версия: n/axbmcapp_armeabi_v7a_debug_20120714.apk ( 39.01 МБ )
Сообщение отредактировал iMiKED — 11.10.21, 04:47
Источник
From android to kodi
Новые темы необходимо создавать только в корневом разделе! В дальнейшем они будут обработаны модераторами.
Если Вы выложили новую версию программы, пожалуйста, сообщите об этом модератору нажав на вашем сообщении кнопку «Жалоба».
Последнее обновление программы в шапке: 11.10.2021
Краткое описание:
Кросс-платформенный медиацентр XBMC.
Бесплатный кроссплатформенный медиаплеер и программное обеспечение для организации HTPC с открытым исходным кодом. Графический интерфейс программы позволяет легко управлять видеофайлами, фотографиями и музыкой, находящимися на компьютере, оптическом диске, в интернете или в локальной сети. Может управляться с помощью ПДУ.
Android 4.2+:
версия: 16.1 Jarvis for Windows Kodi (Пост _SERGEYX_ #56018605)
версия: 16.0 Jarvis Kodi (Пост fack1900 #47300196)
версия: 16.0 Jarvis x86 Kodi (Пост ROMANFIONOV #47315630)
версия: 15.2 final Kodi (Пост grey684 #43824098)
версия: 15.2 + кэш Kodi (Пост fack1900 #44038040)
версия: 14.2 (x86) Stable  kodi-14.2-Helix-x86.apk ( 61.12 МБ )
версия: 14.2 (windows) Stable  kodi-14.2-Helix.exe ( 67.82 МБ )
версия: 15.1.1 Kodi (Пост grey684 #42405075)
версия: 15.1 + кэш Kodi (Пост fack1900 #42280136)
версия: 15 + кэш Kodi (Пост fack1900 #41793816)
версия: 15.0 + кэш KODI (XBMC) (Пост fack1900 #41260543)
версия: 14.2 (arm) Stable kodi-14.2-Helix-armeabi-v7a.apk ( 59.74 МБ )
версия: 13 Stable XBMC (Пост #31290789)
версия: 13 XBMC (Пост #31210770)
версия: 12.2 https://4pda.to/forum/dl/post/2915114/xbmc-12.2-Frodo-armeabi-v7a.apk
версия: 12.1 xbmc-12.1-Frodo-armeabi-v7a.apk
версия: 12.0 http://mirrors.xbmc.org/releases/android/x. armeabi-v7a.apk
NEON Devices (Nexus 7 / Tegra3 / Newer Samsung Devices): xbmcapp-armeabi-v7a-debug-08-22-full-neon.apk
Non-NEON Devices (Tegra2 / A500 / A100 / Thrive): xbmcapp-armeabi-v7a-debug-08-22-no-neon.apk
версия: n/axbmcapp_armeabi_v7a_debug_20120714.apk ( 39.01 МБ )
Сообщение отредактировал iMiKED — 11.10.21, 04:47
Источник
HOW-TO:Install Kodi for Android
 Android Android | HOW-TO:Install Kodi for Android |
This page describes how to install Kodi, either from an app «store» such as Google Play, or manually from an APK file.
Contents
1 Installing Kodi from the Google Play Store
1.1 Google Play — stable
Kodi is now available on Google Play:
Google Play will automatically select which version (ARM(32bit), ARM(64bit) or x86) of Kodi you need, and will also automatically handle updates (unless you change your Google Play preferences).
1.2 Google Play — beta testing
In order to test Kodi nightlies on your Android device, just download them from here:
Note: Be sure to backup before you install this!
These alpha and beta builds are considered «semi stable», and contain the latest changes to Kodi. They may contain bugs and/or drastically change how the program works.
Please report any bugs and issues you come across to the Kodi forum.
If you want to go back to the most recent stable version, uninstall the Kodi nightly first and reinstall Kodi either via Google Play or the manual installation which is explained in this article. Uninstalling the Kodi nightly and reinstalling Kodi will reset all Kodi settings. So make sure to backup your stable Kodi settings before testing nightlies and then restore from that backup once you have stable Kodi installed again.
2 Manual installation
2.1 Enabling installation
2.1.1 Android (normal)
This includes installation instructions for phones, tablets and most boxes running Android.
Here’s how to install Kodi from an .APK file. This is commonly known as «sideloading».
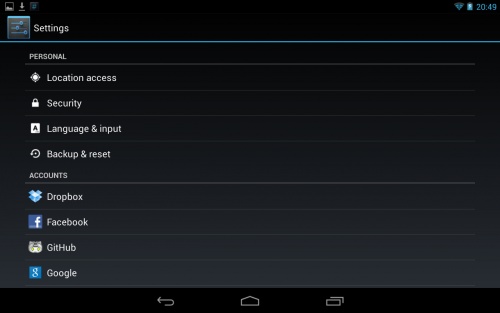
Step 1: First located the settings menu on your Android device and search for the «security» menu.
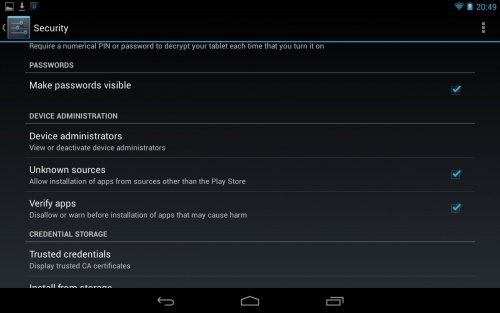
Step 2: Now enable «Unknown sources» option. This will allow you to directly install Kodi as easy as you would install it from Play Store.
2.1.2 Android TV
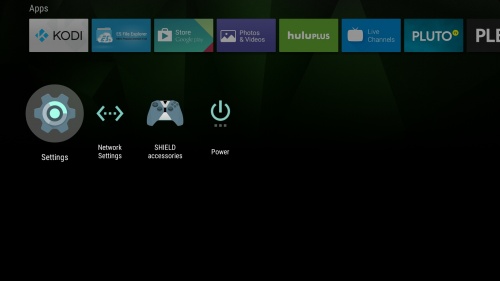
Step 1: From the Android TV launcher, scroll down to and select «Settings».
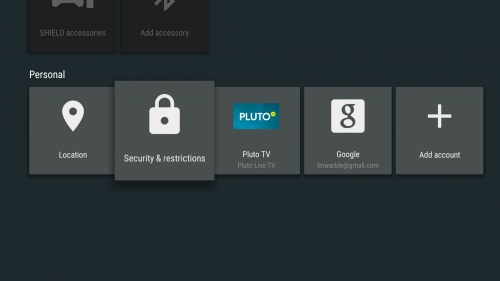
Step 2: From the «Settings» menu, scroll down and select the «Security & Restrictions» menu.
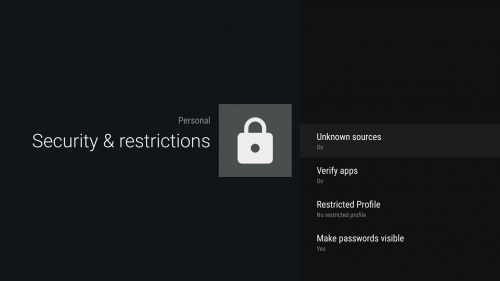
Step 3: In the «Security & Restrictions» menu, turn on «Unknown Sources».
2.2 Download
Download Kodi for Android from the Kodi.tv servers. Official stable builds can be found here: http://kodi.tv/download/ You need to either select the ARM or x86 version depending on your hardware.
2.2.1 Android TV
- From a desktop computer or phone/tablet, go to http://play.google.com using the same Google account as used in your Android TV device.
- Install a browser such as Chrome. Select your Android TV box from the popup menu after clicking the install/get button.
- To make things easy, connect a USB or Bluetooth mouse.
- Open the browser either by voice remote (for example, say «Open Chrome») or from something such as Sideload Launcher.
- Follow the rest of the steps below for «‘Normal’ Android»
2.2.2 Android (normal)
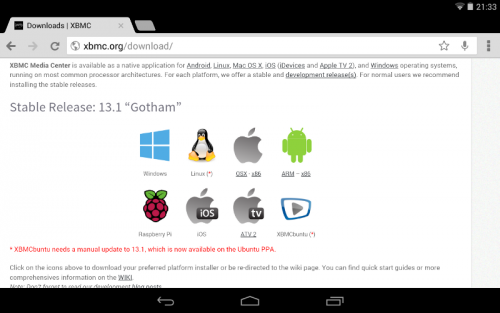
Step 1: Load up http://kodi.tv/download/ in your Android web browser. Most users will want to use the ARM link, unless you have an Intel or AMD CPU. You may get a warning trying to download the file depending on which browser you use. You should say «OK» to actually download it.
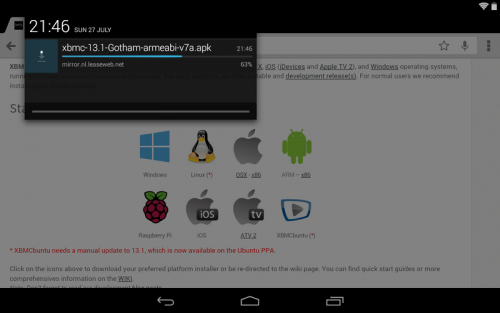
Step 2: Wait for the «apk» to download.
2.3 Install
Installing the Kodi app package is as simple as just finding the .apk you just downloaded and opening it up. You can do this either though the download menu in the web browser or selecting it with a file explorer.
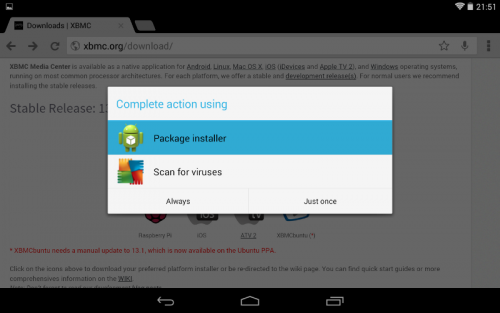
Step 1: After selecting the Kodi apk file you might be asked to select something to open it with. «Package installer», «Google Play», or some similar option will be what you want.
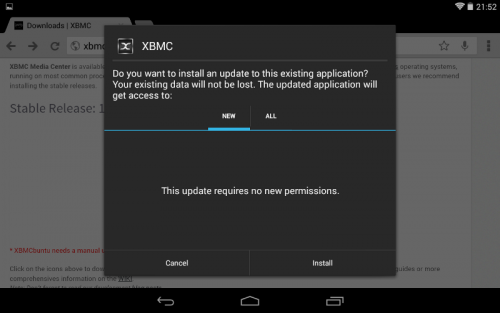
Step 2: You will get another confirmation screen where you will need to select «install».
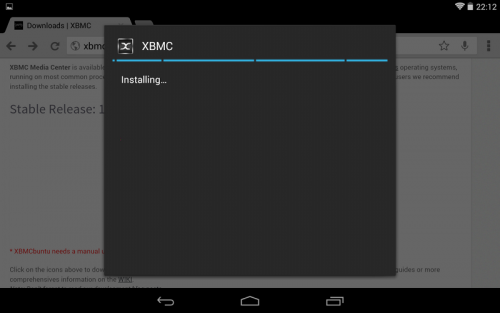
Step 3: Wait for the installation to complete.
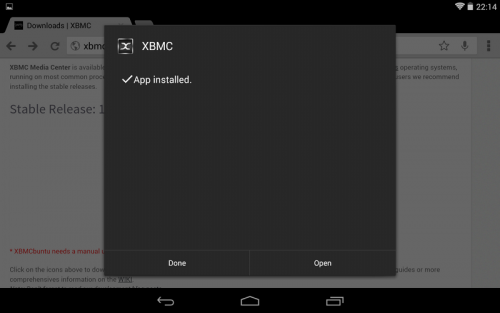
Step 4: You’ve now installed Kodi for Android!
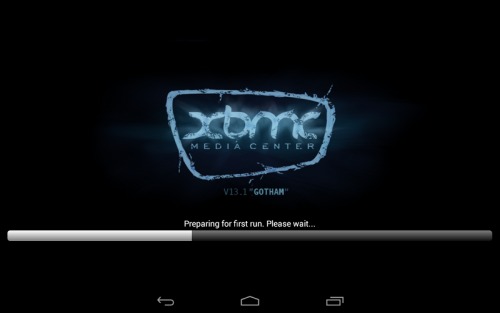
First run: The first time you run Kodi it will take slightly longer than normal in order to finish some final installation steps. When it is done Kodi will open normally. This is only done once per installation/update, so the next time Kodi will start up a little faster.
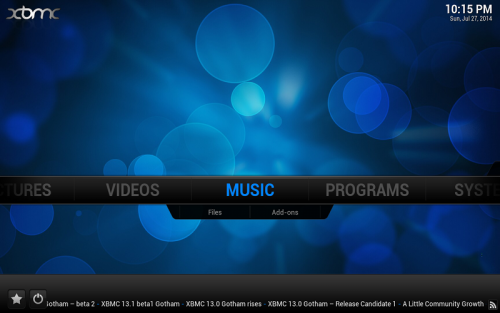
All done!: Once started you are on Kodi home menu just like on any other platform.
If you are new to Kodi you might wish to check out this section of the wiki: First time user.
2.3.1 Install on Fire TV
This page describes some of the methods to install Kodi onto an Amazon Fire TV (box) or Fire TV Stick. The Fire TV uses Kodi for android and does not require root. All Fire TV products allow sideloading, so no hacking or modification is required to install Kodi.
2.4 Tidy up
After Kodi has installed you can delete the downloaded Kodi APK file to save some disk space.
2.5 Update
To update Kodi for Android simply follow the normal install steps with the newer version. All your settings and files will be preserved as they are located in a different place in the userdata folder. Be sure to make a backup of the userdata folder when doing updates in case something goes wrong.
Note: Since Kodi for Android is signed with our own signatures you will be able to install all succeeding versions without a problem. If you are using a non-official version not signed by us you may be required to un-install Kodi and you will loose all your settings due to this. Be warned before trying.
2.6 Uninstall
To un-install Kodi just go to your Android settings menu and select «apps». From there you will be able to un-install Kodi like any other Android app.
2.6.1 Android (normal)
Note: Unlike other OSes, uninstalling Kodi on Android will also erase your userdata folder and all of your settings.

Step 1: Go into your Android «Settings» app and then select «Apps».
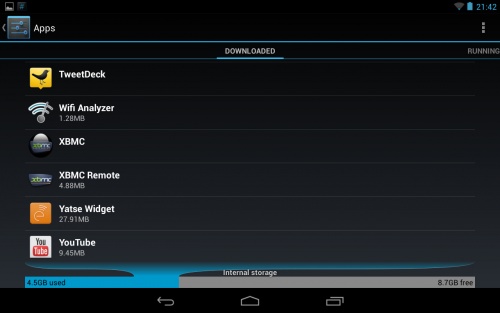
Step 2: Select Kodi from the list.

Step 3: Select uninstall and confirm.
2.6.2 Android TV
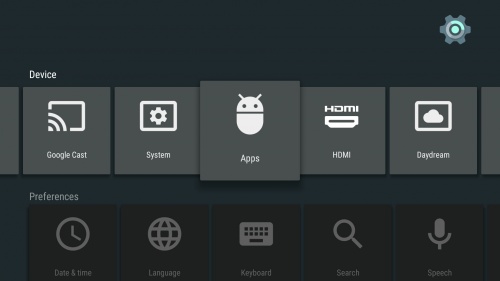
Step 1: Go into your Android TV Settings menu and then select Apps.
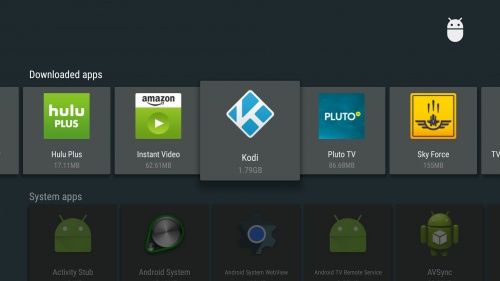
Step 2: Go to the Downloaded apps then select Kodi.
Источник


