G950fd root android 9
- Операции происходят в выключенном состоянии устройства
- Download Mode(Odin Mode)- уменьшение громкости, кнопка питания, кнопка»Bixby» одновременно
- Recovery- увеличение громкости, кнопка питания, кнопка»Bixby» одновременно


В теме нет куратора. Если в теме есть пользователь, желающий стать Куратором и соответствующий Требованиям для кандидатов, он может подать заявку в разделе Хочу стать Куратором (предварительно изучив шапку темы и все материалы для кураторов).
До назначения куратора, по вопросам наполнения шапки, обращайтесь к модераторам раздела через кнопку  под сообщениями, на которые необходимо добавить ссылки.
Сообщение отредактировал derak1129 — 04.12.21, 13:36
Samsung SM-G950F/FD Galaxy S8 — Неофициальные прошивки
 SM-G950F, SM-G950FD, кодовое название — dreamlte
Описание | Обсуждение » | Покупка » | Аксессуары » | Брак и ремонт S8/S8+ » | Официальная прошивка » | Неофициальные прошивки » | Энергопотребление (автономность) S8/S8+ » | Обсуждение камеры S8/S8+ » | Клуб общения владельцев »
• Скриншоты синтетических тестов выкладывать в тему не нужно, достаточно ссылки на ваш пост в профильной теме Benchmark — Результаты
• Приложение по бесконтактной оплате обсуждайте в одноименной теме Samsung pay
• Просьбы перезалить прошивку публикуйте в соответствующей теме Перезалейте.
• Если обсуждение какого-либо вопроса сводится к диалогу двух человек — оно обязательно должно переноситься в QMS. Не стоит устраивать из темы чат.
• Работа с изображениями на форуме | Официальный клиент
Уважаемые форумчане!
Убедительная просьба придерживаться тематики ветки, избегать флуда и оффтопа!
Будьте взаимно вежливы!
«Kies» — многофункциональная программа для устройств Samsung, она автоматически установит все нужные драйвера на ПК
Samsung SM-G950F/FD Galaxy S8 — Неофициальные прошивки
SM-G950F, SM-G950FD, кодовое название — dreamlte
Описание S8 | Описание S8+ | Обсуждение » | Официальные прошивки S8 » | Официальные прошивки S8+ » | Неофициальные прошивки S8 » | Неофициальные прошивки S8+ » | Покупка » | Аксессуары S8 » | Аксессуары S8+ » | Брак и Ремонт » | Обсуждение камеры » | Клуб владельцев » | Энергопотребление » | Модификации и украшательства » | Операторские версии »
• Скриншоты синтетических тестов выкладывать в тему не нужно, достаточно ссылки на ваш пост в профильной теме Benchmark — Результаты
• Приложение по бесконтактной оплате обсуждайте в одноименной теме Samsung pay
• Просьбы перезалить прошивку публикуйте в соответствующей теме Перезалейте.
• Если обсуждение какого-либо вопроса сводится к диалогу двух человек — оно обязательно должно переноситься в QMS. Не стоит устраивать из темы чат.
• Работа с изображениями на форуме | Официальный клиент
Уважаемые форумчане!
Убедительная просьба придерживаться тематики ветки, избегать флуда и оффтопа!
Будьте взаимно вежливы!
- 24.10.17 — Проект alexega Rom S8 | 27.10.17 — Проект alexega Port Note8
- 04.12.17 — RENOVATE ICE 6.0 | 29.10.17 — RENOVATE ICE N950 2.3
- 25.11.17 — AMBASADII ROM | 30.11.17 — NOTE 8 FULL PORT
- 21.09.17 — Minotaurus Rom V14 | 21.11.17 — Minotaurus N8 Rom V7
- 28.09.17 — CarHDRom V.7.2 | 09.12.17 — CarHDRom V.8.6
- 18.09.17 — NEMESIS NOUGAT N8 PORT S8 V2.0
- 21.10.17 — Project Alice 3.0.1
- 05.12.17 — IronMan-Rom V1.1.0
- 30.11.17 — BatMan-Rom V1.5.0
- 24.10.17 — Taimen 1.1
- 26.11.17 — LightROM
- 26.11.17 — Google Edition
- 08.11.17 — Aspiration N8 V1
- 06.11.17 — KING_ROM_V6-S8_Edition
- Операции происходят в выключенном состоянии устройства
- Download Mode(Odin Mode) — уменьшение громкости, кнопка питания, кнопка»Bixby» одновременно
- Recovery — увеличение громкости, кнопка питания, кнопка»Bixby» одновременно
Сообщение отредактировал Kommandoz — 11.12.17, 19:27
Прикладываю также необходимые файлы (для меня):
Бузибокс (тут все ясно)
Вайпер+ДД (та версия которая делает звук звуком, все остальные версии это чьи то неудачные шутки)
Набор всех шрифтов+смайлы из айОС 10 (наверное, все шрифты которые есть + самые последние смайлы из айфона)
 Busybox-1.26.2-YDS-UNIVERSAL.zip ( 9.52 МБ )FONTS&IOS10EMOJI.zip ( 85.51 МБ )ViPERAtmos_4.8_Sony_Beats_Universal_Edition.zip ( 11.47 МБ )
Сообщение отредактировал KPOCAB4EG — 01.05.17, 13:26
Источник
How to Root Galaxy S8/S8+ on Android 9.0 Pie!
by Max Lee · March 14, 2019
In this tutorial, I am going to show you how to root the Samsung Galaxy S8 or S8 Plus on latest Android 9.0 Pie. This root method is probably the easiest method so long as you follow step-by-step.
This root method supports the following models:
- Exynos Galaxy S8 SM-G950F, SM-G950FD, Korean SM-G950N
- Exynos Galaxy S8+ SM-G955F, SM-G955FD, Korean SM-G955N
- Qualcomm Galaxy S8 SM-G9500 Chinese Dual SIM
- Qualcomm Galaxy S8+ SM-G9550 Chinese Dual SIM
U.S. models Galaxy S8 SM-G950U and S8+ SM-G955U are NOT SUPPORTED as they have LOCKED BOOTLOADERS, please sell it and get a model that has unlocked bootloader to root.
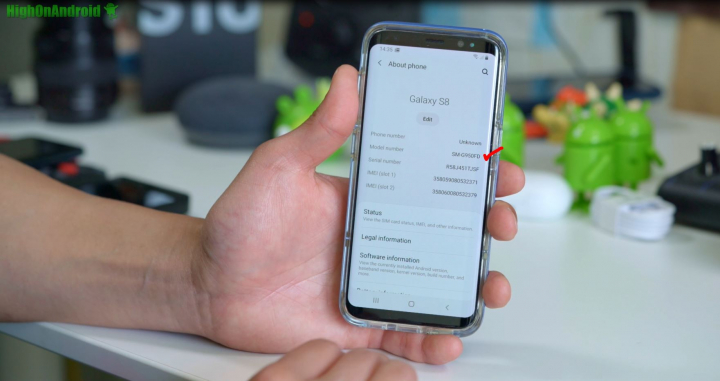
Step 1. Go into Settings->About Phone and check you have a model that is supported. If you have a model that is not supported, please do not follow this root guide.
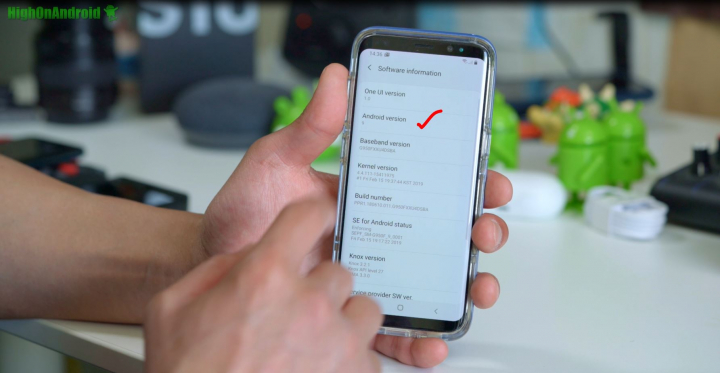
Step 2. Go into Software Information and make sure you have Android version 9. For future Android versions, I should have an updated root guide such as Android Q 10.0.
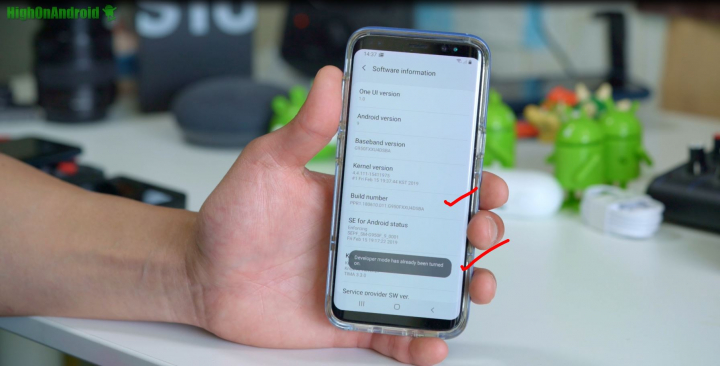
Step 3. Tap on “Build number” 5 times or more until it says developer mode has been turned on.
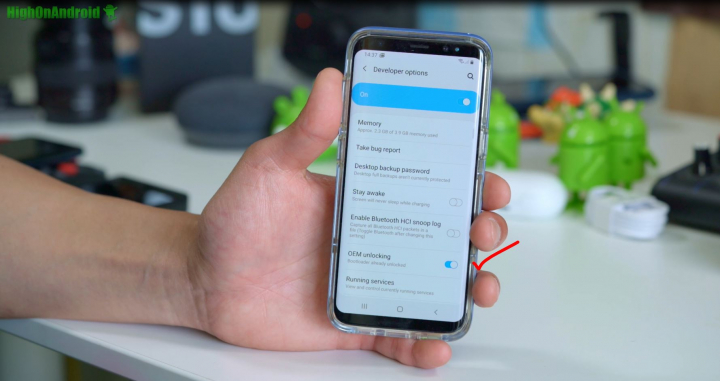
Step 4. Tap on the back button twice and go into “Developer options” menu. In there you should see a menu button for “OEM Unlocking”. Turn it ON.
IMPORTANT: While turning on, if your phone asks you to factory reset you will have to be READY to press Volume Down, Bixby, and Power buttons together as soon as your phone reboots. If you don’t do this, you may have to wait 7 more days to root your Galaxy S8 or S8 Plus.
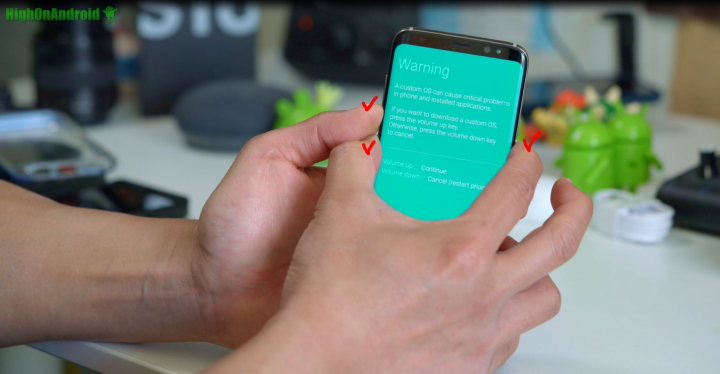
Step 5. If you are able to turn on OEM unlocking without factory reset, also hold down Volume Down, Bixby, and Power buttons until you get into the warning screen.
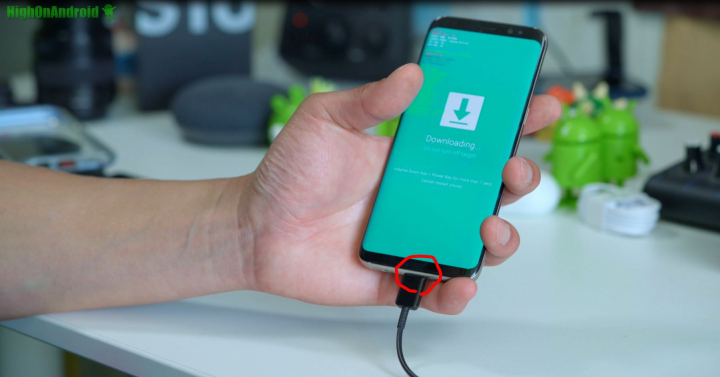
Step 6. Tap the Volume Up button to enter ODIN download mode then connect a USB cable from your Galaxy S8 or S8 Plus to your Windows computer. Yes, you will need a Windows computer as ODIN program we will be using only supports Windows. You can also use VMWware to run Windows on Mac or Linux but that’s outside the scope of this tutorial and you should be able to Google how to do that. But my advice is to use a Windows computer, go borrow one from your friend or you can even pick up an old Windows netbook on eBay for less than $50.

Step 7. Download all the necessary files for rooting:
Once downloaded, also unzip ODIN zip file but leave the rest of zip files zipped.
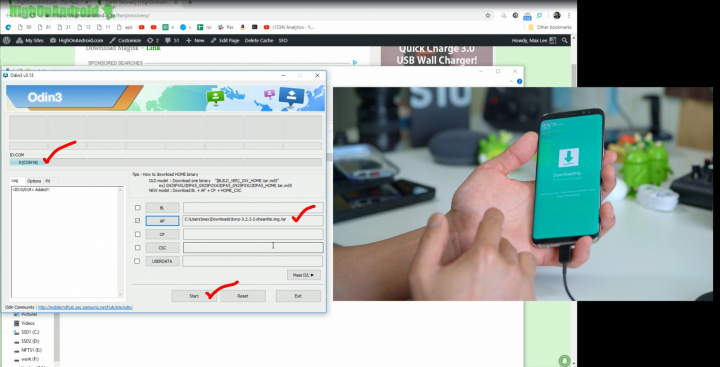
Step 8. Run the ODIN program inside the unzipped ODIN folder and you should see ODIN program. If you see a light blue highlighted box with a random COM number, you have already installed the proper drivers(perhaps you have rooted a Samsung device before on your computer), otherwise you will have to install the Samsung USB drivers you downloaded earlier. Once drivers are installed, unplug and re-plug the USB cable and you should see the highlighted box like shown in above screenshot.
Next, click on “AP” then choose the TWRP file you downloaded earlier.
VERY IMPORTANT: Next, before you hit Start, be READY to hold down Volume Up, Bixby, and Power buttons simultaneously and QUICKLY when the screen goes blank/black. PLEASE watch the video tutorial several times and practice hitting the buttons. If you miss this step, you may have to unroot your Galaxy S8 or S8 Plus then wait additional 7 days to try again. So, PLEASE do not mess up this step.
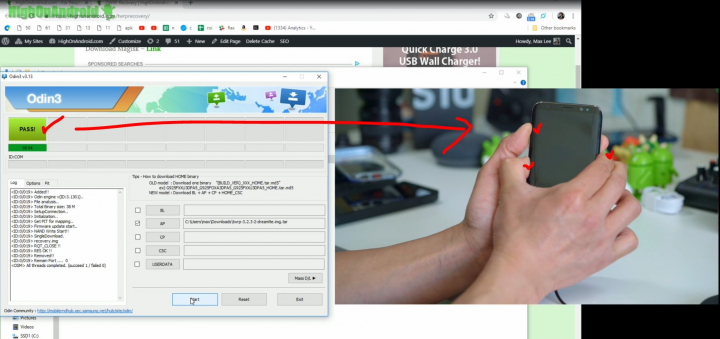
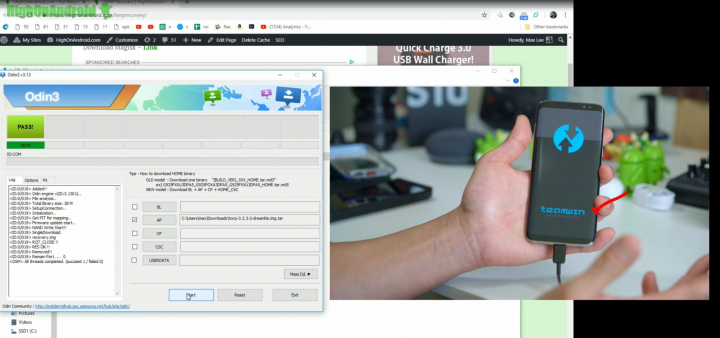
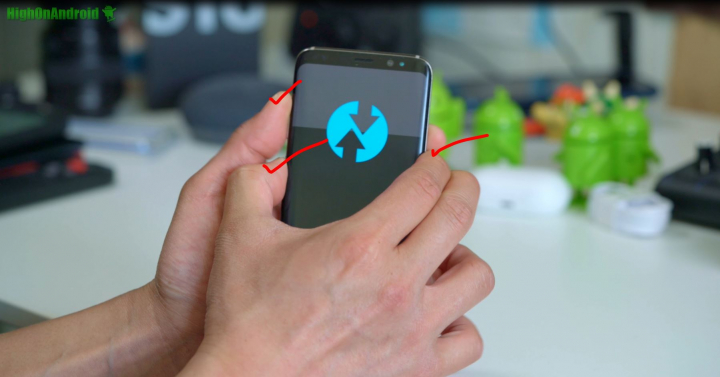
Step 9. If you are ready, click on the “Start” button and you will see TWRP file flashing within less than a few seconds. After that screen will go blank and you have to IMMEDIATELY hold down Volume Up, Bixby, and Power buttons together and HOLD THEM until you see TWRP, then let go of all buttons. If you don’t get this part, again PLEASE watch the video tutorial several times until you are sure of what to do.

Step 10. Tap on “Keep Read Only”.
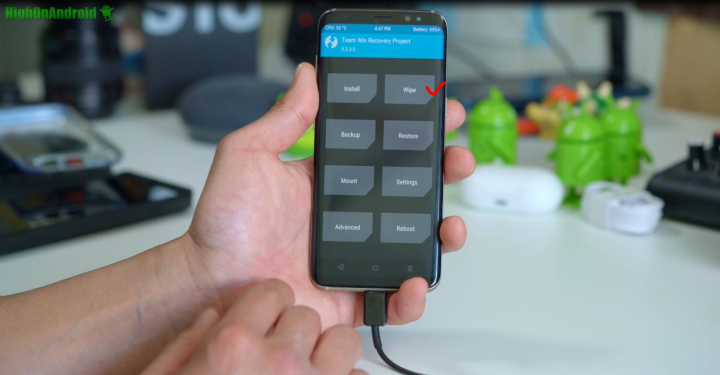
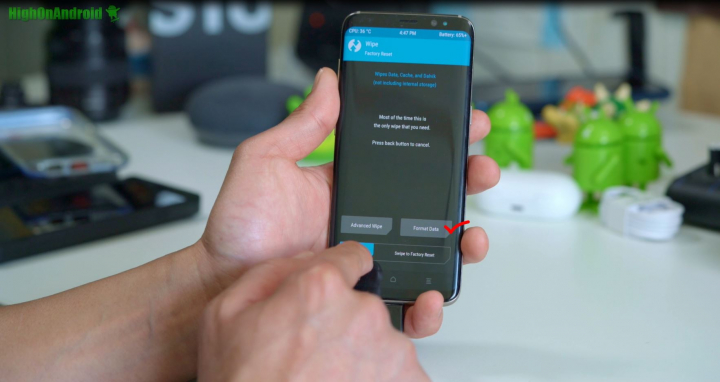
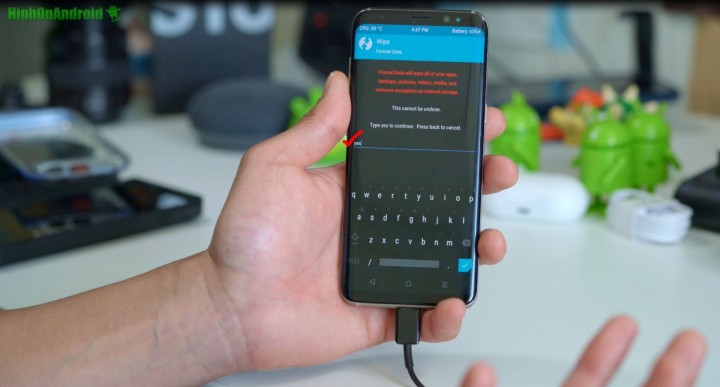
Step 11. Wipe your device by using the wipe menu and format data. This will ERASE EVERYTHING on your Galaxy S8 or S8 Plus. There is no going back so if at this point you need to back up, reboot and backup everything and start the root tutorial again.
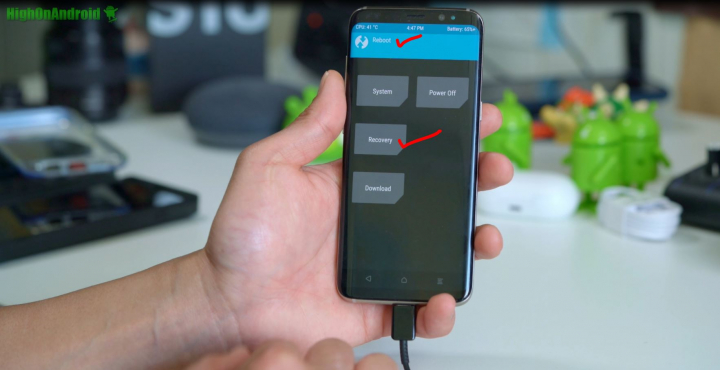
Step 12. Also VERY IMPORTANT, use the Reboot menu then tap on “Recovery” to reboot recovery.
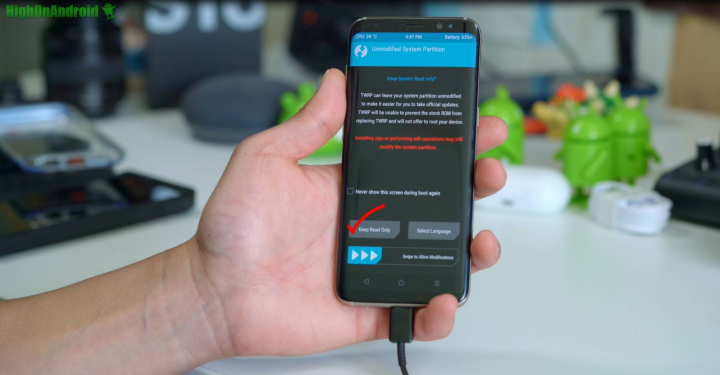
Step 13. Once rebooted, tap on “Keep Read Only”.
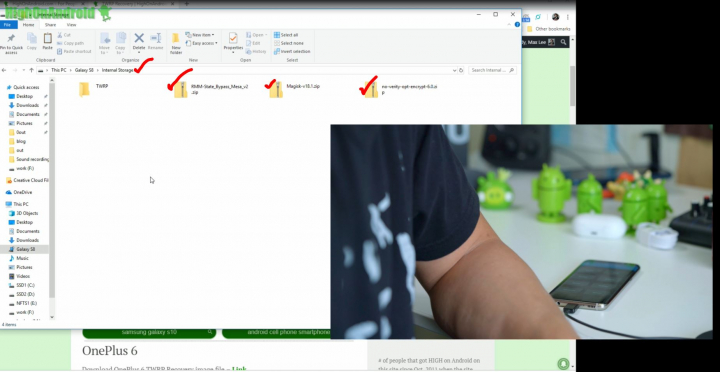
Step 14. Copy over the Magisk, RMM State Bypass, No Verify Opt Encrypt files to your Galaxy S8 or S8 Plus. It should automatically connect to your Windows computer as a disk drive at this point. If for some reason you don’t see it on your computer, you can also alternatively use a microSD card or USB OTG to copy the files over.
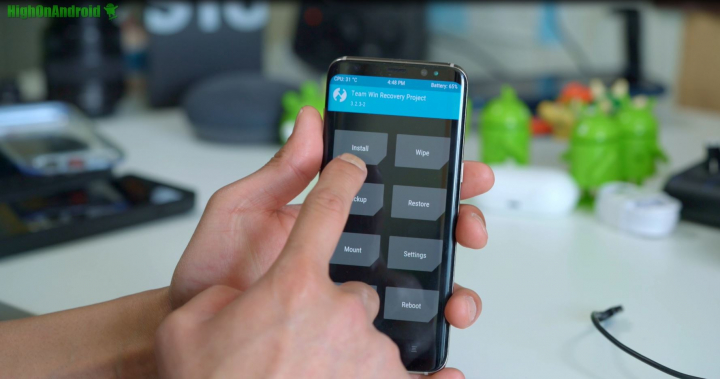
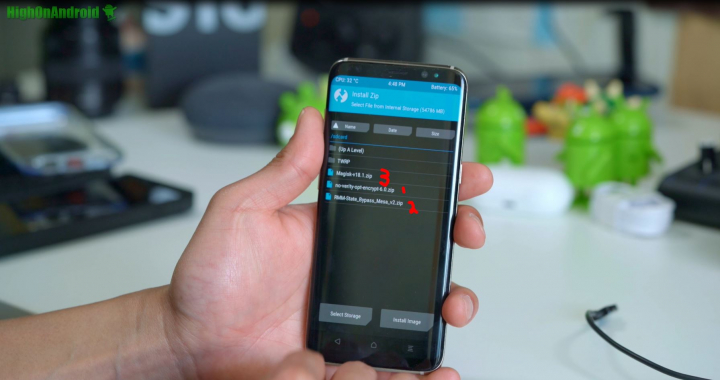
Step 15. Use the Install menu to install all three files, install the No Verify Encrypt ZIP fist, followed by RMM State Bypass, then Magisk ZIP. Then reboot.
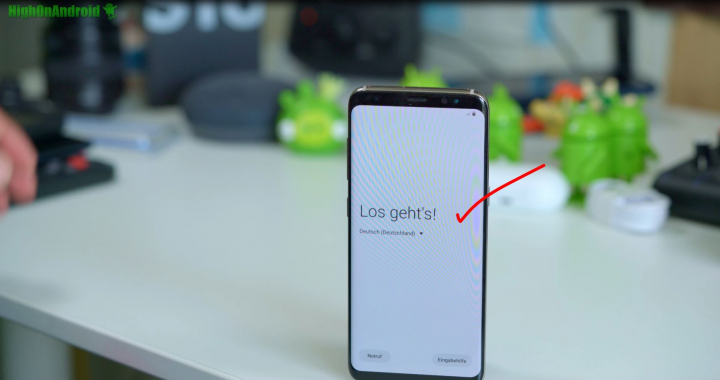
Step 16. Once rebooted, sign in and you should see Magisk Manager. If you don’t see it, power off your Galaxy S8 or S8 Plus then hold down Volume Up, Bixby, and Power buttons to enter TWRP recovery to re-install Magisk, which I had to do and I think this is actually a necessary step with Android 9.0 Pie.
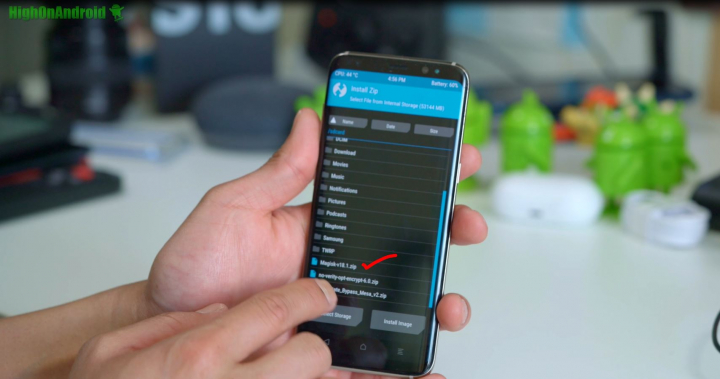
Step 17. Use install menu to install Magisk ZIP file again. If you don’t see the file(as it happened to me), copy the file over again then install Magisk ZIP.
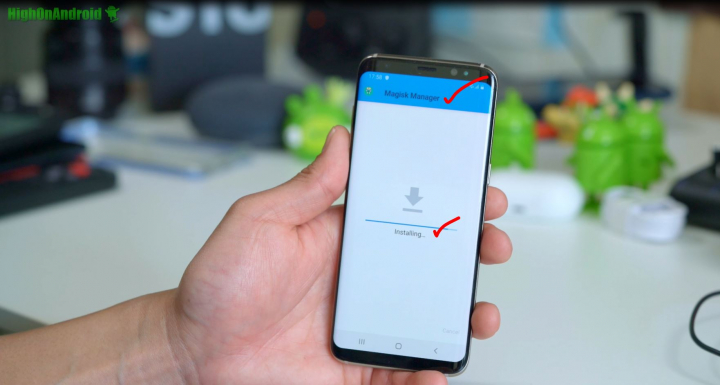
Step 18. Once rebooted, you should see Magisk Manager app. If you still don’t see it, download Magisk Manager APK (direct download) and install manually. If you don’t know how to install it manually, please watch the video tutorial.
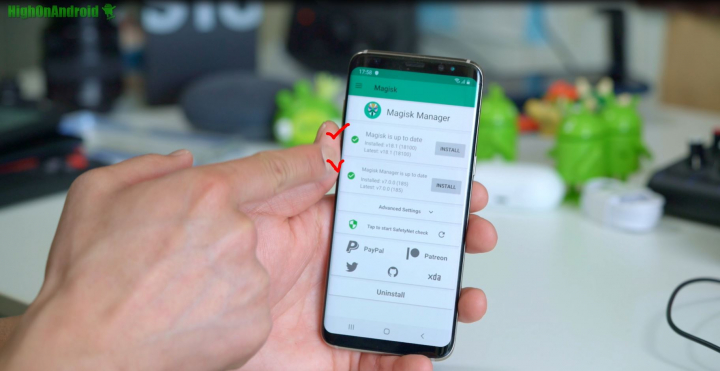
Step 19. Open up Magisk Manager app and if you see two checkmarks like above, you have fully rooted your Samsung Galaxy S8 or S8 Plus on latest Android 9.0 Pie. Congratulations, pat yourself on the back and make sure to hit Like on YouTube for my video tutorial if you can, thanks.
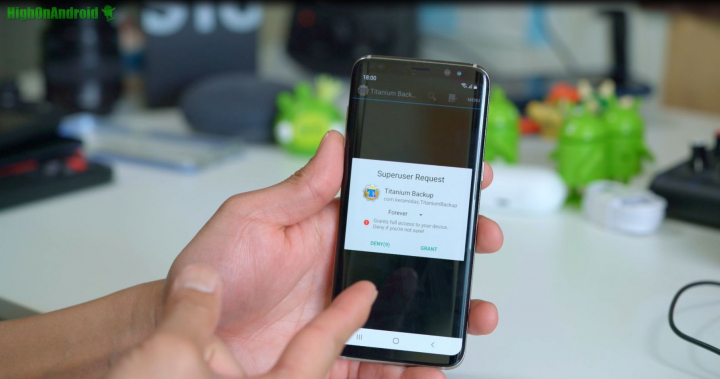
You can verify root working properly by installing and running any rooted app on the Play Store, I recommend running the free Titanium Backup app and you should see a Superuser request window pop up! Congrats! Cheers!
Having trouble rooting your Samsung Galaxy S8 or S8 Plus following this tutorial? Leave a comment on our forum for help!
Источник


