Git клиент для android
Краткое описание:
Клонирование репозиториев, работа с ветками, коммитами, тегами, push, pull, fetch и т.д.
Описание:
Pocket Git это самостоятельный git-клиент для Android со следующими особенностями:
★ Простой интерфейс.
★ Поддерживается клонирование репозиториев.
★ Поддержка https и SSH.
★ Пароли и приватные ключи (с поддержкой парольных фраз).
★ Автоматом подхватывает GitHub и BitBucket ссылки.
★ Переключение между локальными и удаленными ветками, коммитами и тегами.
★ Stage, unstage and коммиты.
★ Создание, объединение и удаление веток.
★ Создание и удаление тегов.
★ Создание файлов и папок.
★ Редактируйте файлы в сторонних приложениях (например QuickEdit, DroidEdit и т.д.).
★ Отмена изменений для конкретных файлов или даже для веток.
★ Связь с удаленными репозиториями (push, pull и fetch)
★ Проекты с более чем одним удаленным репозиторием.
★ Визуальная информация по веткам и коммитам.
★ Просмотр разницы перед коммитом.
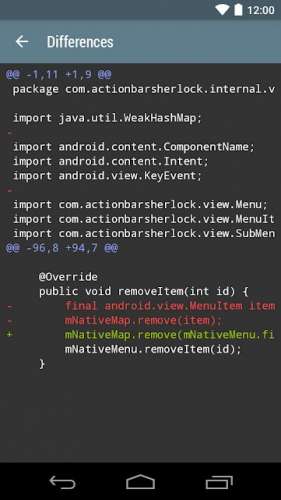
★ Просмотр разницы для каждого из сделанных коммитов.
★ Просмотр разницы для любого файла между текущим рабочим каталогом и HEAD (заголовками? Буду признателен если кто подскажет как это написать правильно) .
Требуется Android: 4.0
Русский интерфейс: Нет
Скачать: версия: 1.5 Pocket Git [1.5].apk ( 3.62 МБ )
Источник
Proper Git client on Android
For a while now I was looking into finding a good, preferably open-source solution to having a git client on an Android device. I’ve tested almost every Android application out there that could potentially achieve this, and here are my conclusions:
- Most solutions do not actually allow you to clone a git repository, but are instead implementations of specific service APIs such as GitHub or BitBucket. Because of this you end up locked up on their UI when it comes to managing files found in the repository. Some of them are even dependent on constantly requesting the server for each new directory or file you open so forget about proper offline support for those. In essence they are not true git clients, but rather service-specific clients.
- SGit (now MGit) and GitPocket are what we could call true git clients and they do allow you to clone the actual git repository but they always lack some important feature such as no proper ssh support, or allowing you to clone a repository to the external storage. Also as a matter of preference I try to stay away from a closed-source solutions for this one, since this application will be holding my ssh keys.
Enter Termux
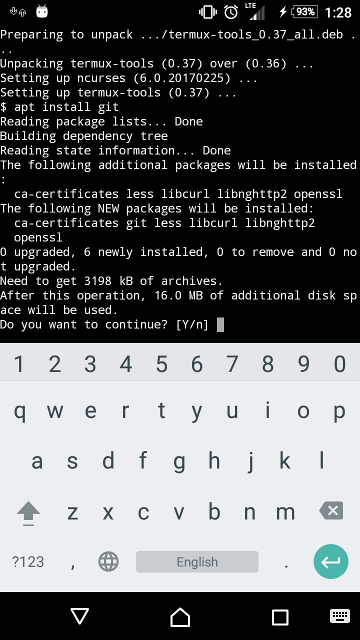
Eventually I found that the best solution for me was to use Termux. In their own words, «Termux is an Android terminal emulator and Linux environment app that works directly with no rooting or setup required.«. Git is one of the many tools you can install via the built-in package manager apt , and it will work exactly like the one on a Linux machine. Better yet, it *is* the same command-line git that you use on a desktop machine, and it is up-to-date ( 😀 git and openssh packages like this:
Notice that by default, Termux stores the $HOME folder into the application’s private storage, the one provided by Android application sandbox and which by design is unique and only accessible to the app itself (expect for root and system user’s of course). This is a good thing because it means your SSH keys won’t be accessible to applications outside Termux.
External Storage support
If you want a cloned repository to be accessible by other Android applications, so you can edit or view the files externally, you’ll want to clone them to the external storage. This used to be the sdcard on older versions of Android, but nowadays it is usually just a separate partition on the device that is accessible by any application that has been given external storage permissions. On the new Android phones that support sdcards you’ll basically have more than 1 external storage. So don’t worry if you don’t have an actual sdcard as you’ll always have an external storage within your device.
You should configure the external storage for usage with Termux by issuing the following command:
Note: On newer versions of Android you’ll be asked to give the application access to your external-storage, which is expected.
This is create a directory on your $HOME directory with the name storage , which is a symlink to the external storage directory. The storage directory will in turn contain several sub-directories that serve various different purposes, the one we’ll be using is storage/shared which is the root of your device’s external directory, the same one that can be accessed by other Android applications.
Copy SSH keys
The directory .ssh on your Termux’s Home was created automatically when you installed the openssh package. Now you should copy your ssh keys to that directory. In my case I had adb with root permission, so I’ve simply copied my keys via adb. I’ve written 2 different methods below, use the one that fits you best.
ADB Root method
If you’ve root on your device, you may start adb as root like this:
You’re then able to copy your keys directly to the secure .ssh on the Termux home directory this way:
Manual copy method
If you cannot start adbd as root then an alternative is to copy the files to your sdcard and then from Termux move them from the sdcard to the .ssh directory. This is the basic procedure:
- Copy your keys to your device’s sdcard. You can use MTP for file transfer or use adb.
- Open Termux, and navigate to /sdcard/ as you normally would on the command line.
- Use mv to move the files to /data/data/com.termux/files/home/.ssh/
- Make sure you didn’t leave any keys on the sdcard after you’ve confirmed that the keys were successfully copied to .ssh . Read Secure your keys below to know why you should be careful with this.
Secure your keys
After copying the keys to the .ssh directory erase any trace of them from your external storage. Do NOT leave your ssh keys on the external storage of your phone! This would make it easy for them to be read and therefore stolen by any application on your Android phone that have the permission to read external storage. Even if you trust that you’ve installed only trustful applications, one of those applications might get hijacked and the attacker would get the same permissions as the hijacked application has (applications like your browser and social network apps are usual targets for this type of attack).
Test it out
You’re done!
You can test if your ssh keys are working properly by cloning a private repository that you’ve assigned that key. Remember that on Termux the home directory is on accessible to Termux alone, so if you want to use the files of a repository with other applications installed on your Android device clone to /storage/shared instead which is a symlink to the root of your device’s external storage.
I recommend that you check-out Termux web-page and learn more about it, and while you’re at it think about donating to help the project’s developers continue their good work (I’m not affiliated in any way).
Extras
Here are some cool tips on using Termux that will make your life easier.
Tune Termux
Using a command line with a touchscreen as input is not easy but Termux has some built-in features that make the experience better. While on Termux, Volume-Down acts as the CTRL key and Volume-Up is used for special keys. Touch Volume-Up + Q on your virtual-keyboard to make Termux display a row on top of the keyboard that has practical shortcuts for commonly used keys.
Also, you might notice that basic command line tools you’ve come to expect from a Linux environment are somewhat ‘defective’. For example, in many Android devices this parameterized command ls -la will not be recognized as a valid one. You can fix this by installing the coreutils package:
SSH into your Termux
Termux help page has a very good entry on the subject of running a openssh server on Termux.
Install Tig
Tig is an ncurses-based text-mode interface for git. It makes it easier to browse a git repository, therefore defeating the need for a dedicated Android application for this purpose. When using it note that on Termux you can emulate the keyboard arrow keys for navigating ncurses by simply swiping on the screen in the same direction of the arrow key you’re trying to use. To install tig :
Got some cool tips that I’ve missed? Let me know in the comments or shoot me a tweet. ✌
Источник
Git клиент для android

Краткое описание:
Официальный клиент крупнейшего веб-сервиса совместной разработки
Описание:
На GitHub можно сделать многое, без необходимости использования сложной среды разработки: например, оставить свое мнение в обсуждении дизайна или просмотреть несколько строк кода. GitHub для Android позволяет продвигать работу вперед, где бы вы ни находились. Оставайтесь на связи со своей командой, устраняйте проблемы и даже объединяйте их прямо из приложения. Мы упрощаем выполнение этих задач независимо от того, где вы работаете, с помощью удобного интерфейса.
Вы можете использовать приложение GitHub для:
- Просмотра последних уведомлений
- Чтения, реагирования и комментирования проблем и Pull-запросов
- Просмотра и слияния Pull-запросов
- Сортировки проблем по названию, подписи, проекту и так далее
- Просмотра ваших файлов и кода
Требуется Android: 6.0+
Русский интерфейс: Нет
Сообщение отредактировал iMiKED — 02.12.21, 13:08
Тип: Модификация
Версия: 0.9.25
Краткое описание: собрал сплиты в один апк
Тип: Новая версия
Версия: 0.9.25
Краткое описание: GP [BETA]
Изменения:
Первый релиз.
Скачать: GitHub_0.9.25_(30).apks ( 3.89 МБ )
 Displax, Неужели оф клиент?) Наконец-то!
Update: Блин! Хотел с маркета скачать, не судьба (

Сообщение отредактировал Ph03niX-X — 16.01.20, 18:26
Источник
Git клиент для android
MGit is a Git client Android App.
This is a continuation of the SGit project.
![]()
![]()


![]()
- If you encounter any issues (bugs, crashes, etc.) and want to help improve this project, please open an issue on GitHub describing: what the issues are; and how they were caused, to allow for re-creation and fixing of bugs.
- This app requires minimum of for Android v5.0
As of version 15.7, MGit no longer provides an internal texteditor, instead if you wish to edit files, you will need to have an editor app installed.
An open source editor that has been tested to work with MGit is «Turbo Editor»
but others that support File Providers should also work.
- Create local repositories
- Clone remote repositories
- Pull from origin
- Delete local repositories
- Browse files
- Browse commit messages (short)
- Checkout branches and tags
- HTTP/HTTPS/SSH are supported (including SSH with private key passphrase)
- Username/Password authentication is supported
- Search local repositories
- Private key management
- Manually choose code language
- git diff between commits
- Import existing repositories (that is, you can copy a repository from computer and import to MGit)
- Checkout remote branches
- Merge branches
- Push merged content
- Edit file (built-in editor or external app that can edit the given file type)
- Commit and push changed files
- Committer information
- Prompt for password
- Option to save username/password
- git status
- Cancel when cloning
- Add modified file to stage
- View state of staged files (aka index)
- git rebase
- git cherrypick
- git checkout (reset changes of a file)
Clone a remote repository
- Click on the + icon to add a new repository
- Enter remote URL (see URL format below)
- Enter local repository name — note that this is not the full path, as MGit stores all
repositories in the same local directory (can be changed in MGit settings) - Click the Clone button
- If required, you will be prompted for credentials to connect to the remote repo. MGit will download the repository (all branches) to your device
Create a local repository
- Click on the + icon to add a new repository
- Click on Init Local to create a local repository
- Enter the name for this repository when prompted
- A local empty repo will be created
- SSH running on standard port (22): ssh://username@server_name/path/to/repo
- SSH running on non-standard port: ssh://username@server_name:port/path/to/repo
- username is needed — by default, MGit tries to connect as root.
- HTTP(S) URL: https://server_name/path/to/repo
All code written by maks@manichord.com can at your option also be used under the MIT license.
If you want to help improve this project, contributions, especially translations are very welcome. Also contributions to documentation via the wiki for this repo are also most welcome!
If you would like to contribute code, either a bugfix or a new feature, please make sure there is a open issue that addresses the new code. No Pull Requests will be merged that do not reference an existing issue in the repo.
Please use the Android Studio formatting settings set for this project in the repo.
All strings visible to the user need to go into strings resource file.
- Provide the best GUI git client available on any platform
- Be usable on both phone, tablet and laptop form-factor devices
Non-goals for the project
- Support for proprietary vendor APIs (eg. Github)
For new features, a discussion of the new functionality may need to take place in the comments on the issue covering it, so it may be best for that to occur before you spend time on writing the new code.
The app is about to have a major restructure. All new functionality in the app will be written in Kotlin/Rx per #277. Please be aware that the project is now using Data Binding Library and all future functionality should make use of it.
Submitting a Pull Request (PR)
Fork from this repo, create a new branch, commit your changes and then send a pull request against the master branch of this repo.
If you are working on a branch for some time, you may find that changes to master get merged in the meantime, if that happens please do NOT merge master into your branch! Instead rebase your branch onto the current head of master.
Источник


