- Андрей Алеев
- Настройка CI в GitLab для Android проекта
- 3 комментария
- Build and test Android with Gitlab Continuous Integration
- In this article I’ll try to explain how we, at Oddbit, are developing for Android with Continuous Integration to build, test and package deliverables for our clients.
- Gitlab
- Step 1: Build
- Step 2: Test
- Step 3: Package
- The full configuration
- Setting up GitLab CI for Android projects
- Our sample project
- Testing
- Setting up GitLab CI
- Understanding .gitlab-ci.yml
- Defining the Docker Image
- Defining variables
- Installing packages
- Installing the Android SDK
- Setting up the environment
- Defining the stages
- Building the app
- Running tests
- Run your new CI setup
- Conclusion
- Master your CI/CD
Андрей Алеев
Настройка CI в GitLab для Android проекта
CI — continuous integration — можно описать как практику автоматизированного внедрения результатов работы программиста по целевому месту назначения и использования (деплой). CI имеет множество преимуществ, и особенностей, среди которых отметим следующие:
- Единая кодовая база, в которую сливаются ветки разработчиков — достигается с помощью GitFlow
- Автоматизация сборок — сборка запускается автоматически после вливания в нее нового кода с помощью pipeline в GitLab
- Автоматизация тестирования — как один из шагов в pipeline-e
- Удобный доступ к сборкам
- Автоматизированный деплой — дополнительный скрипт может публиковать сборки в магазинах приложений или по пути дистрибуции.
CI как и любая автоматизация позволяет устранить человеческий фактор и автоматизировать повторяющиеся действия.
Поэтому CI желательно настраивать на любом серьезном проекте. А в случае, когда разработчиков несколько и релизы необходимо собирать часто, CI должен быть настроен в обязательном порядке.
Обычно настройка CI лежит в зоне ответственности DevOps инженера. Однако, хотя в большинстве компаний такой человек есть, он может быть недоступен или не уметь настраивать CI именно для Android проекта. Поэтому Android-разработчику необходимо уметь делать это самостоятельно. Как это делается, расскажу и покажу в этой статьте.
Итак, приступим.
С точки зрения GitLab, CI состоит из
- Jobs, которые описывают что сделать. например, собрать код или протестировать
- Stages, которые определяют когда стартовать Job-ы, например, стадия тестирования
Обычно stages бывают
— buiild job под названием compile
— test — запуск тестов
— staging — деплой на stage
— production -деплой на prod
Всю эту информацию о jobs и stages нам нужно передать GitLab-у. Сделаем мы это с помощью файла .gitlab-ci, который положим в корне проекта. В нем будут описаны все шаги, а также выполнятся необходимые скрипты.
Во-первых укажем образ, который будет выполнять Job
Затем в разделе под названием before_script напишем скрипты, которые сервер должен выполнить, чтобы настроить сборочное окружение.
Никакой магии здесь нет, и, если вы знакомы unix-системами, и их командами, то вам все должно быть понятно
Не забудьте указать номера версий SDK, которые сервер должен установить. Для этого перед блоком before_script добавьте
Далее, указываем типы этапов сборки в блоке stages
Теперь мы готовы к выполнению собственно сборок.
Я рекомендую использовать два типа сборок — релизную и дебажную. Вы можете сделать столько вариантов, сколько вам угодня, исходя из ваших задач
Итак, для начала пропишем дебажную сборку
Тег only позволяет триггерить запуск сборки в случае пуша в конкретнкю ветку или по тегу, как мы увидим далее
Переменная BUILD_NUMBER будет считываться с помощью токена CI_PIPELINE_IID_TOKEN из настроек Variables в разделе CI в GitLab. Она позволяет нам добавлять автоинкрементируемый номер сборки в название версии. Подробнее этот подход описан здесь: https://gitlab.com/jmarcos.cano/CI_PIPELINE_IID/snippets/1675434. А ниже я покажу как настроить build.gradle для генерирования названия версии и номера сборки. А пока продолжим с .gitlab-ci
Следующий блок будет script
Теперь остается только указать как и где хранить артефакты, то есть apk:
Вот и все, а для релизной сборки укажем такой же блок, но stage и него будет deploy, а сборка будет собираться еще и с app:assembleRelease, и собираться такая сборка будет только при создании тэга в GitLab.
Дополнительно нам нужно настроить автоматическое инкрементирование номеров сборок
Для этого в Ваш build.gradle добавьте функции, которые будут генерировать versionCode и versionName на основе минимальной версии target api
Естественно, в корневом build.gradle у вас должны быть прописаны номера версии в виде
Также добавьте функции для получения номера сборки из CI GitLab, а в случае локальной сборки — из гита
// Этот метод получает номер сборки из специального файла, который мы генерировали выше в скрипте .gitlab-ci
def getBuildNumberFromFile() <
Остается вызывать этот метод для названия версии, а также для номера сборки
Готово с кодом, теперь нужно добавить переменную в GitLab, идея взята отсюда
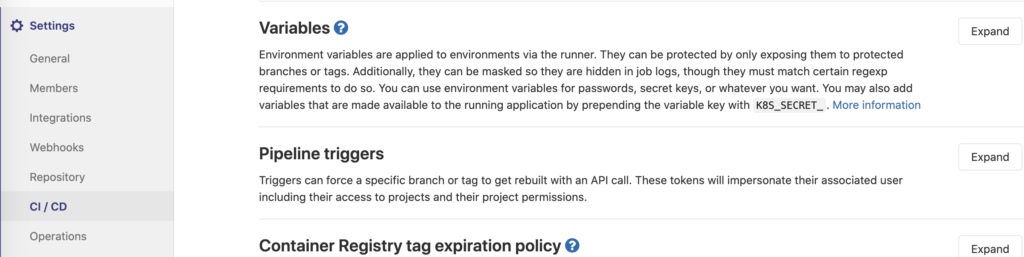
Заходим в Settings->CI/CD->Variables, далее добавляем две переменные BUILD_NUMBER и CI_PIPELIBE_ID_TOKEB
BUILD_NUMBER присваиваем 1, а в CI_PIPELIBE_ID_TOKEB положим значение токена, который нужно сгенерировать через раздел Access Tokens профиля
Остается запушить изменения в GitLab, и он автоматически будет стартовать Pipeline
Для создания релизной сборки, которую мы настроили выше, нужно создать Тэг через Repository->Tags-> New Tag
Выбираете ветку, из которой хотите создать сборку и запускаете. Все готово!
3 комментария
Спасибо большое за статью, но есть вопрос, что делать если в образе image: openjdk:8-jdk готовит, что не может найти apt-get, как тут быть?
Добрый день, так же как и коментатор выше получаю ошибку «apt-get: command not found»
Возможно есть какие то тонкости?
Возможно, у вас другой дистрибутив linux. Попробуйте использовать dpkg или установить APT
Источник
Build and test Android with Gitlab Continuous Integration
In this article I’ll try to explain how we, at Oddbit, are developing for Android with Continuous Integration to build, test and package deliverables for our clients.

At the end of the article, you will find a complete Gitlab CI configuration script that is ready to be used, straight out of the box.
Gitlab
Gitlab is definitely not getting a proportional amount of credits that they deserve. At least not in my circles and part of the world. But I do my fair share of praising whenever I get the chance.
GitHub is great for the open source community. But Gitlab is a one-stop-shop solution for a developer team like ours. I’ve written a few articles specifically on Gitlab CI in the past, because it’s one of the things I love the best with the platform.
In this article’s example gists, you can see that I’ve configured the script with “anchors” that allow us to re-use job specs in a modular DNRY way. Read more about it on Gitlab documentation if you are not sure about it yet.
Step 1: Build
In order to build Android on Gitlab CI, we’ll need to setup the environment and download and install a few packages first. Roll up your sleeves, we’ll get our hands dirty!
Let’s break this down into digestible pieces.
Start with downloading the latest version of SDK Tools, and in order to do that, we’ll have to explicitly define the version that we want to use. For my convenience, I have put the ANDROID_SDK_TOOLS version in a build environment variable, which was set to “3859397”, the latest build at the time of writing. (note to the helpful reader: I’d be happy to know if there’s a symlink to the “latest” package to download instead of having to specify the build version)
I’ve chosen to extract the package into a folder named “.android” within the project structure since I want to keep the files as artifacts to subsequent jobs. The artifacts are configured to expire after 4 hours, which is more than enough time to execute long running tests. Because that’s all we’ll need it for. There is a separate step at the end that will package the client deliverables.
Once you’ve extracted the package we can utilize the sdkmanager CLI tool to do all the same operations that Android Studio smoothly does for you. In one of the first lines, we extracted the build target SDK configuration from app/build.gradle, we’ll use it to install the platform tools and target SDK that we want to compile or app against.
That’s about it. Commit, push, wait… or continue with the subsequent steps.
Step 2: Test
In this example, the test step is only running unit testing. But as we’ll see in my next article “Deploying to Firebase Test Lab with Gitlab CI”, we can execute CI jobs in parallel before finally packaging the deliverables if all tests passed.
As you can see, there’s not much to explain in this step. The downloaded libraries and generated binaries from the build step are made available thanks to the artifacts configuration.
Step 3: Package
Finally, if everything has gone well up until here, then we’ll create a nice little zip file that we can download and send to our project manager, client or whomever that you would like to show off your latest build to.
As a simple example, this script is doing two things:
- Renaming the APK with the name of the app (replace “NameOfTheApp” to whatever your app is called) and adding the version information to the file name.
- Creating a simple text file with some additional information about the build: date, commit, pipeline id, etc.
The resulting package is stored for a certain amount of time, which you can configure to your own liking (optionally, you can even remove the expiry time altogether if that’s the sort of thing that you’re in to).
I’ve chosen to remove my “development” builds after 3 days, since it’s a busy branch that is sure to contain the latest development build even on Monday morning.
The release branch is keeping its deliverables for a longer period of time that spans over more than one sprint, therefore guaranteeing that we’re having the latest production app ready to be downloaded from the repository at any time.
If your project development is in vacuum for some time, you can choose to increase (or remove) the production expiry time. Or otherwise configure a scheduled build every few weeks on the master branch. Just to make sure everything is still ok 🙂
The full configuration
Here’s the full configuration, ready to copy/paste into your Android project. But… you didn’t just skip to the end without reading the article, did you? 🙂 If you did: don’t ask, read first.
Источник
Setting up GitLab CI for Android projects
Note: This is a new version of a previously published blog post, updated for the current Android API level (28). Thanks Grayson Parrelli for authoring the original post!
Have you ever accidentally checked on a typo that broke your Android build or unknowingly broke an important use case with a new change? Continuous Integration is a way to avoid these headaches, allowing you to confirm that changes to your app compile, and your tests pass before they’re merged in.
GitLab CI/CD is a wonderful Continuous Integration built-in solution, and in this post we’ll walk through how to set up a basic config file ( .gitlab-ci.yml ) to ensure your Android app compiles and passes unit and functional tests. We assume that you know the process of creating an Android app, can write and run tests locally, and are familiar with the basics of the GitLab UI.
Our sample project
We’ll be working with a real-world open source Android project called Materialistic to demonstrate how easy it is to get up and running with GitLab CI for Android. Materialistic currently uses Travis CI with GitHub, but switching over is a breeze. If you haven’t seen Materialistic before, it’s a fantastic open source Android reader for Hacker News.
Testing
Unit tests are the fundamental tests in your app testing strategy, from which you can verify that the logic of individual units is correct. They are a fantastic way to catch regressions when making changes to your app. They run directly on the Java Virtual Machine (JVM), so you don’t need an actual Android device to run them.
If you already have working unit tests, you shouldn’t have to make any adjustments to have them work with GitLab CI. Materialistic uses Robolectric for tests, Jacoco for coverage, and also has a linting pass. We’ll get all of these easily running in our .gitlab-ci.yml example except for Jacoco, since that requires a secret token we do not have — though I will show you how to configure that in your own projects.
Setting up GitLab CI
We want to be able to configure our project so that our app is built, and it has the complete suite of tests run upon check-in. To do so, we have to create our GitLab CI config file, called .gitlab-ci.yml , and place it in the root of our project.
So, first things first: If you’re just here for a snippet to copy-paste, here is a .gitlab-ci.yml that will build and test the Materialistic app:
Well, that’s a lot of code! Let’s break it down.
Understanding .gitlab-ci.yml
Defining the Docker Image
This tells GitLab Runners (the things that are executing our build) what Docker image to use. If you’re not familiar with Docker, the TL;DR is that Docker provides a way to create a completely isolated version of a virtual operating system running in its own container. Anything running inside the container thinks it has the whole machine to itself, but in reality there can be many containers running on a single machine. Unlike full virtual machines, Docker containers are super fast to create and destroy, making them great choices for setting up temporary environments for building and testing.
This Docker image ( openjdk:8-jdk ) works perfectly for our use case, as it is just a barebones installation of Debian with Java pre-installed. We then run additional commands further down in our config to make our image capable of building Android apps.
Defining variables
These are variables we’ll use throughout our script. They’re named to match the properties you would typically specify in your app’s build.gradle .
- ANDROID_COMPILE_SDK is the version of Android you’re compiling with. It should match compileSdkVersion .
- ANDROID_BUILD_TOOLS is the version of the Android build tools you are using. It should match buildToolsVersion .
- ANDROID_SDK_TOOLS is a little funny. It’s what version of the command line tools we’re going to download from the official site. So, that number really just comes from the latest version available there.
Installing packages
This starts the block of the commands that will be run before each job in our config.
These commands ensure that our package repository listings are up to date, and it installs packages we’ll be using later on, namely: wget , tar , unzip , and some packages that are necessary to allow 64-bit machines to run Android’s 32-bit tools.
Installing the Android SDK
Here we’re downloading the Android SDK tools from their official location, using our ANDROID_SDK_TOOLS variable to specify the version. Afterwards, we’re unzipping the tools and running a series of sdkmanager commands to install the necessary Android SDK packages that will allow our app to build.
Setting up the environment
Finally, we wrap up the before_script section of our config with a few remaining tasks. First, we set the ANDROID_HOME environment variable to the SDK location, which is necessary for our app to build. Next, we add the platform tools to our PATH , allowing us to use the adb command without specifying its full path, which is important when we run a downloaded script later. Next, we ensure that gradlew is executable, as sometimes Git will mess up permissions.
The next command yes | android-sdk-linux/tools/bin/sdkmanager —licenses is responsible for accepting the SDK licenses. Because the unix yes command results in an EPIPE error once the pipe is broken (when the sdkmanager quits normally), we temporarily wrap the command in +o pipefile so that it does not terminate script execution when it fails.
Defining the stages
Here we’re defining the different stages of our build. We can call these anything we want. A stage can be thought of as a group of jobs. All of the jobs in the same stage happen in parallel, and all jobs in one stage must be completed before the jobs in the subsequent stage begin. We’ve defined two stages: build and test . They do exactly what you think: the build stage ensures the app compiles, and the test stage runs our unit and functional tests.
Building the app
This defines our first job, called build . It has two parts — a linter to ensure that the submitted code is up to snuff, and the actual compilation of the code (and configuration of the artifacts that GitLab should expect to find). These are run in parallel for maximum efficiency.
Running tests
This defines a job called debugTests that runs during the test stage. Nothing too crazy here about setting something simple like this up!
If we had wanted to get Jacoco also working, that would be very straightforward. Simply adding a section as follows would work — the only additional thing you’d need to do is add a secret variable containing your personal COVERALLS_REPO_TOKEN :
Run your new CI setup
After you’ve added your new .gitlab-ci.yml file to the root of your directory, just push your changes and off you go! You can see your running builds in the Pipelines tab of your project. You can even watch your build execute live and see the runner’s output, allowing you to debug problems easily.

After your build is done, you can retrieve your build artifacts:
- First, click on your completed build, then navigate to the Jobs tab:

From here, simply click on the download button to download your build artifacts.
Conclusion
So, there you have it! You now know how to create a GitLab CI config that will ensure your app:
- Compiles
- Passes tests
- Allows you to access your build artifacts (like your APK) afterwards.
You can take a look at my local copy of the Materialistic repository, with everything up and running, at this link
Enjoy your newfound app stability 🙂
Master your CI/CD
Watch this webcast and learn to deliver faster with CI/CD.
Источник


