- Hardware acceleration for emulator performance (Hyper-V & HAXM)
- Accelerating Android emulators on Windows
- Accelerating with Hyper-V
- Verifying support for Hyper-V
- Enabling Hyper-V acceleration
- Accelerating with HAXM
- Verifying HAXM support
- Installing HAXM
- Troubleshooting
- Accelerating Android emulators on macOS
- Accelerating with the Hypervisor Framework
- Accelerating with HAXM
- Verifying HAXM support
- Installing HAXM
- Troubleshooting
- ERROR x86 emulation currently requires hardware acceleration — как исправить
- Суть возникновения
- Решение проблемы
- Активируем виртуализацию через BIOS
- На архитектуре Intel:
- На архитектуре AMD:
- Заключение
Hardware acceleration for emulator performance (Hyper-V & HAXM)
This article explains how to use your computer’s hardware acceleration features to maximize Android Emulator performance.
Visual Studio makes it easier for developers to test and debug their Xamarin.Android applications by using the Android emulator in situations where an Android device is unavailable or impractical. However, the Android emulator runs too slowly if hardware acceleration is not available on the computer that runs it. You can drastically improve the performance of the Android emulator by using special x86 virtual device images in conjunction with the virtualization features of your computer.
| Scenario | HAXM | WHPX | Hypervisor.Framework |
|---|---|---|---|
| You have an Intel Processor | X | X | X |
| You have an AMD Processor | X | ||
| You want to support Hyper-V | X | ||
| You want to support nested Virtualization | Limited | ||
| You want to use technologies like Docker | (with WSL2) | X | X |
Accelerating Android emulators on Windows
The following virtualization technologies are available for accelerating the Android emulator:
Microsoft’s Hyper-V and the Windows Hypervisor Platform (WHPX). Hyper-V is a virtualization feature of Windows that makes it possible to run virtualized computer systems on a physical host computer.
Intel’s Hardware Accelerated Execution Manager (HAXM). HAXM is a virtualization engine for computers running Intel CPUs.
For the best experience on Windows, it is recommended that you use WHPX to accelerate the Android emulator. If WHPX is not available on your computer, then HAXM can be used. The Android emulator will automatically make use of hardware acceleration if the following criteria are met:
Hardware acceleration is available and enabled on your development computer.
The emulator is running a system image created for an x86-based virtual device.
You can’t run a VM-accelerated emulator inside another VM, such as a VM hosted by VirtualBox, VMware, or Docker (unless using WSL2). You must run the Android emulator directly on your system hardware.
For information about launching and debugging with the Android emulator, see Debugging on the Android Emulator.
Accelerating with Hyper-V
Before enabling Hyper-V, read the following section to verify that your computer supports Hyper-V.
Verifying support for Hyper-V
Hyper-V runs on the Windows Hypervisor Platform. To use the Android emulator with Hyper-V, your computer must meet the following criteria to support the Windows Hypervisor Platform:
Your computer hardware must meet the following requirements:
- A 64-bit Intel or AMD Ryzen CPU with Second Level Address Translation (SLAT).
- CPU support for VM Monitor Mode Extension (VT-c on Intel CPUs).
- Minimum of 4-GB memory.
In your computer’s BIOS, the following items must be enabled:
- Virtualization Technology (may have a different label depending on motherboard manufacturer).
- Hardware Enforced Data Execution Prevention.
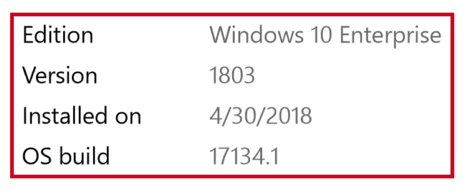
Your computer must be updated to Windows 10 April 2018 update (build 1803) or later. You can verify that your Windows version is up-to-date by using the following steps:
Enter About in the Windows search box.
Select About your PC in the search results.
Scroll down in the About dialog to the Windows specifications section.
Verify that the Version is at least 1803:
To verify that your computer hardware and software is compatible with Hyper-V, open a command prompt and type the following command:
If all listed Hyper-V requirements have a value of Yes, then your computer can support Hyper-V. For example:

Enabling Hyper-V acceleration
If your computer meets the above criteria, use the following steps to accelerate the Android emulator with Hyper-V:
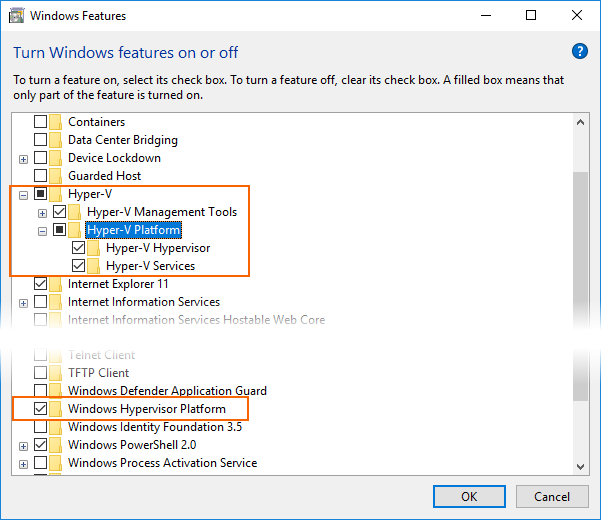
Enter windows features in the Windows search box and select Turn Windows features on or off in the search results. In the Windows Features dialog, enable both Hyper-V and Windows Hypervisor Platform:
After making these changes, reboot your computer.
On Windows 10 October 2018 Update (RS5) and higher, you only need to enable Hyper-V, as it will use Windows Hypervisor Platform (WHPX) automatically.
Install Visual Studio 15.8 or later (this version of Visual Studio provides IDE support for running the Android emulator with Hyper-V).
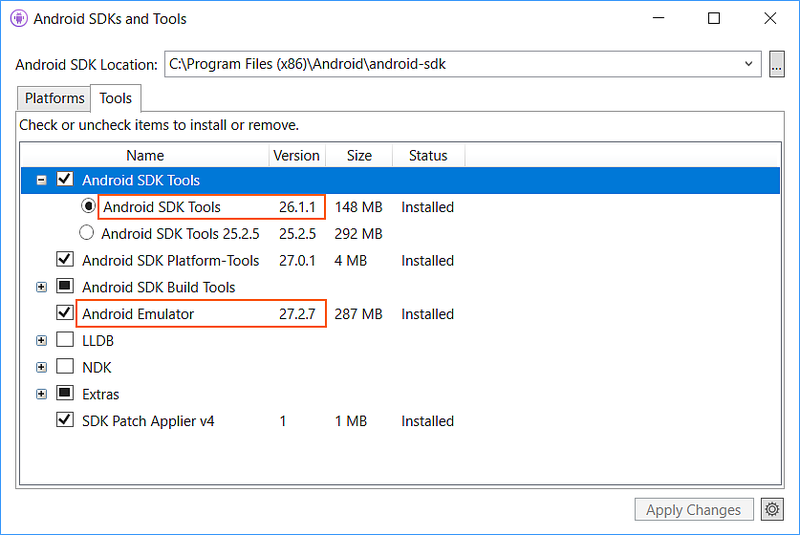
Install the Android Emulator package 27.2.7 or later. To install this package, navigate to Tools > Android > Android SDK Manager in Visual Studio. Select the Tools tab and ensure that the Android emulator version is at least 27.2.7. Also ensure that the Android SDK Tools version is 26.1.1 or later:
When you create a virtual device (see Managing Virtual Devices with the Android Device Manager), be sure to select an x86-based system image. If you use an ARM-based system image, the virtual device will not be accelerated and will run slowly.
Hyper-V should now be enabled and you can run your accelerated Android emulator.
Accelerating with HAXM
If your computer does not support Hyper-V, you may use HAXM to accelerate the Android emulator. You must disable Device Guard if you want to use HAXM.
Verifying HAXM support
To determine if your hardware supports HAXM, follow the steps in Does My Processor Support Intel Virtualization Technology?. If your hardware supports HAXM, you can check to see if HAXM is already installed by using the following steps:
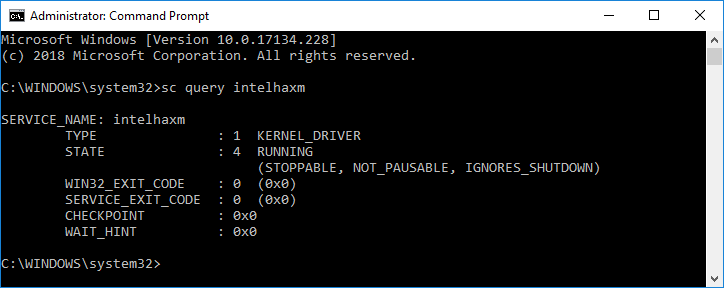
Open a command prompt window and enter the following command:
Examine the output to see if the HAXM process is running. if it is, you should see output listing the intelhaxm state as RUNNING . For example:
If STATE is not set to RUNNING , then HAXM is not installed.
If your computer can support HAXM but HAXM is not installed, use the steps in the next section to install HAXM.
Installing HAXM
HAXM install packages for Windows are available from the Intel Hardware Accelerated Execution Manager GitHub releases page. Use the following steps to download and install HAXM:
From the Intel website, download the latest HAXM virtualization engine installer for Windows. The advantage of downloading the HAXM installer directly from the Intel website is that you can be assured of using the latest version.
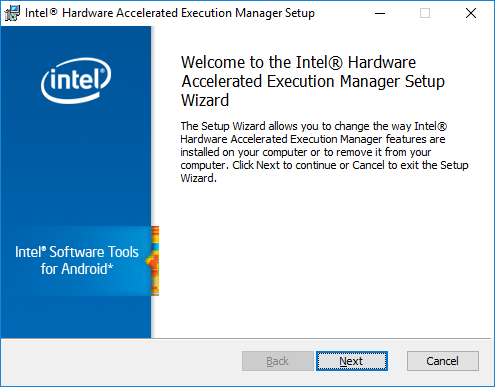
Run haxm-N.N.N-setup.exe (where N.N.N is the version number) to start the HAXM installer. Accept the default values in the installer dialogs:
When you create a virtual device (see Managing Virtual Devices with the Android Device Manager), be sure to select an x86-based system image. If you use an ARM-based system image, the virtual device will not be accelerated and will run slowly.
Troubleshooting
For help with troubleshooting hardware acceleration issues, see the Android emulator Troubleshooting guide.
Accelerating Android emulators on macOS
The following virtualization technologies are available for accelerating the Android emulator:
Apple’s Hypervisor Framework. Hypervisor is a feature of macOS 10.10 and later that makes it possible to run virtual machines on a Mac.
Intel’s Hardware Accelerated Execution Manager (HAXM). HAXM is a virtualization engine for computers running Intel CPUs.
It is recommended that you use the Hypervisor Framework to accelerate the Android emulator. If the Hypervisor Framework is not available on your Mac, then HAXM can be used. The Android emulator will automatically make use of hardware acceleration if the following criteria are met:
Hardware acceleration is available and enabled on the development computer.
The emulator is running a system image created for an x86-based virtual device.
You can’t run a VM-accelerated emulator inside another VM, such as a VM hosted by VirtualBox, VMware, or Docker. You must run the Android emulator directly on your system hardware.
For information about launching and debugging with the Android emulator, see Debugging on the Android Emulator.
Accelerating with the Hypervisor Framework
To use the Android emulator with the Hypervisor Framework, your Mac must meet the following criteria:
Your Mac must be running macOS 10.10 or later.
Your Mac’s CPU must be able to support the Hypervisor Framework.
If your Mac meets these criteria, the Android emulator will automatically use the Hypervisor Framework for acceleration. If you are not sure if Hypervisor Framework is supported on your Mac, see the Troubleshooting guide for ways to verify that your Mac supports Hypervisor.
If the Hypervisor Framework is not supported by your Mac, you can use HAXM to accelerate the Android emulator (described next).
Accelerating with HAXM
If your Mac does not support the Hypervisor framework (or you are using a version of macOS earlier than 10.10), you can use Intel’s Hardware Accelerated Execution Manager (HAXM) to speed up the Android emulator.
Before using the Android emulator with HAXM for the first time, it’s a good idea to verify that HAXM is installed and available for the Android emulator to use.
Verifying HAXM support
You can check to see if HAXM is already installed by using the following steps:
Open a Terminal and enter the following command:
This command assumes that the Android SDK is installed at the default location of
/Library/Developer/Xamarin/android-sdk-macosx; if not, modify the above path for the location of the Android SDK on your Mac.
If HAXM is installed, the above command will return a message similar to the following result:
If HAXM is not installed, a message similar to the following output is returned:
If HAXM is not installed, use the steps in the next section to install HAXM.
Installing HAXM
HAXM installation packages for macOS are available from the Intel Hardware Accelerated Execution Manager page. Use the following steps to download and install HAXM:
From the Intel website, download the latest HAXM virtualization engine installer for macOS.
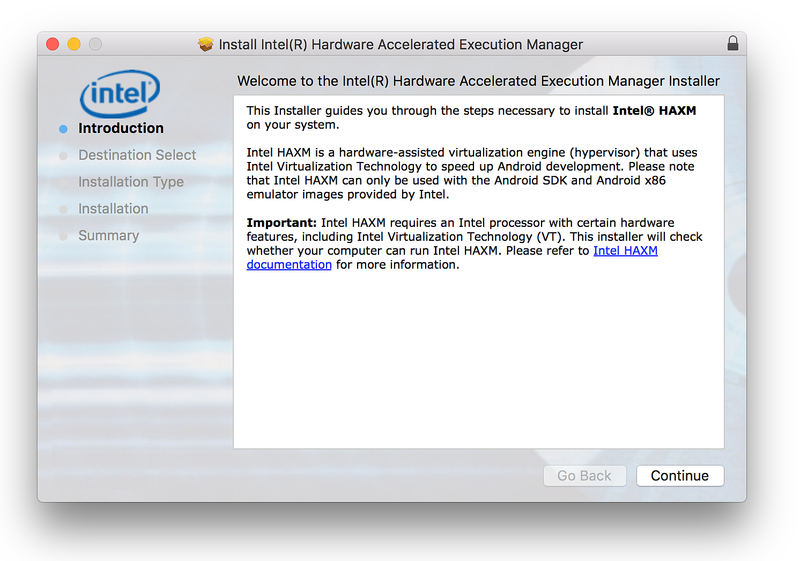
Run the HAXM installer. Accept the default values in the installer dialogs:
Troubleshooting
For help with troubleshooting hardware acceleration issues, see the Android emulator Troubleshooting guide.
Источник
ERROR x86 emulation currently requires hardware acceleration — как исправить
У многих пользователей, при первом использовании Android Studio нередко возникают различные неполадки. Одна из которых — ошибка «Emulation currently requires hardware acceleration». Что это за проблема, как ее решить и от нее избавиться? — расскажем обо всем поподробнее.
Суть возникновения
Чтобы пользоваться Android Studio, необходимо установить эмуляторный Intel Hardware Accelerated Execution Manager, но открыв ту же Android Studio. Стоит сказать, именно из-за него и появляется данная проблема. Ситуация возникает из-за того, что сама программа не устанавливает HAXM, а просто скачивает ее. То есть, вполне логично, что ее нужно установить.
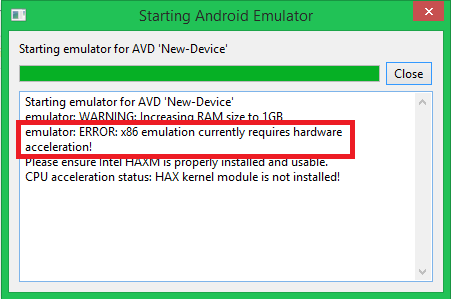
Ошибка Emulator ERROR x86 при запуске Android Studio
Помните: ошибка может возникнуть даже из-за неправильного скачивания или установки. Загружайте файлы только из проверенных ссылок и не доверяйте посторонним сайтам. Они могут занести на ваш ПК вредоносное программное обеспечение.
Решение проблемы
Решить ошибку можно обычной установкой Intel Hardware Accelerated Execution Manager (HAXM). Отыскать файл можно таким вот методом:
- Открываем SDK Manager — переходим в Extras.
- Отыскиваем Intel Accelerator.
- Убеждаемся, справа, в процессах, написано “Installed”.
- Такого нет? — клацайте на “install package”.
- Когда проблема сохранилась, значит нужно сделать все вручную. Так программа точно установится.
- Находим инсталляционный элемент, прописывая в поиске: intelhaxm-android.exe. Возможно, потребуется открыть доступ к скрытым файлам и папкам. «Пуск» — «Панель управления» — «Параметры проводника» — «Вид» — «Скрытые файлы и папки» — «Показывать скрытые файлы и папки»;
- Клацаем два раза на инсталляху.
- Дожидаемся окончания и спокойно включаем HAXM.
В MacOS происходящее практически идентично:
Маршрут такой же самый, как и в обычных операционных системах, но ищем в конце файл «silent_install.sh». Необходмо запустить его. Тихая инсталляция закончится. Закрываем и заново запускаем Android Studio и спокойно пользуемся программой.
Активируем виртуализацию через BIOS
Также, виртуализацию оборудования можно активировать в параметрах БИОС:
На архитектуре Intel:
- перезагружаем ПК;
- активно нажимаем на F12, Del, F11, F10, F2 (зависит от версии ПК);
- зашли в биос;
- переходим в Advanced > CPU Configuration;
- ищем самую нижнюю строчку Intel Virtualization Technology;
- выставляем Enabled — сохраняем информацию и благополучно выходим.
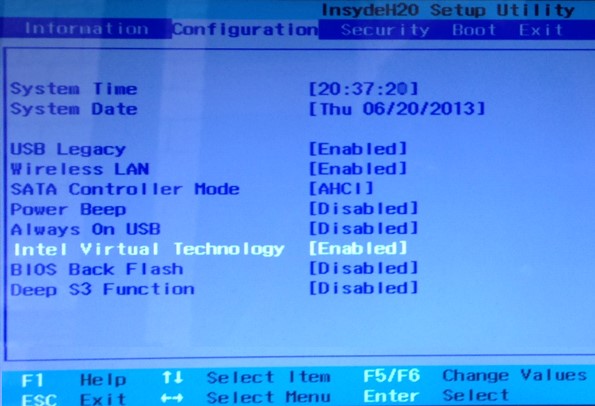
Включение IVT в Intel
На архитектуре AMD:
- заходим в биос;
- Advanced > CPU Configuration;
- выставляем режим Enabled для строчки SVM Mode;
- переходим, чтобы сохранить настройки и выйти.
Обратите внимание: в случае, когда ЦП не имеет поддержки виртуализации, можно воспользоваться ARM эмулятором. В таком случае, придется создавать новое ВУ, либо изменить используемое устройство виртуализации. Зайдите в Android, в Диспетчере виртуальных устройств, в пункте CPU/ABI заменить на ARM в предложенном выпадающем меню.
Также, не забудьте выставить реалистичное значение доступной оперативной памяти, конечно, учитывайте ваши компьютерные возможности. Опять изменить количество используемой ОП можно при повторной инсталляции. Если ситуация не изменилась, перезагрузитесь и попробуйте заново.
Заключение
В целом, мы разобрались, что справиться с ошибкой “Error: x86 emulation currently requires hardware acceleration” можно и сделать это совсем несложно. Все вышеописанные действия правильные и решают данную проблему. Если советы не помогут: сносите снова программу — выполняйте очистку через CCleaner — устанавливайте все последние KB-пакеты обновлений в Windows — пробуйте вновь. Последний совет — используйте более раннюю версию.
Источник


