- If your iPhone, iPad, or iPod touch is lost or stolen
- Look for your device on a map
- Mark as Lost
- Report your missing device to local law enforcement
- File a Theft and Loss claim
- Remotely erase your device
- Contact your wireless carrier
- Remove your missing device from your account
- Use Emergency SOS on your Apple Watch
- Here’s how it works
- How to call emergency services on your Apple Watch
- Stop sharing your location
- End a call that you started accidentally
- Add emergency contacts
- Remove emergency contacts
- Turn off automatic dialing
- International emergency calling
- Make and receive calls on your Mac, iPad, or iPod touch
- Set up iPhone Cellular Calls
- Make and receive phone calls
- Make a call on your Mac
- Make a call on your iPad or iPod touch
- Answer a call
- If you can’t make or receive calls on your iPhone
- If you can’t make or receive calls on your iPhone
- Contact your carrier
- Update your software
- Check your iPhone settings
- Check your network settings
- Contact Apple Support
- Make a call with Wi-Fi Calling
- Place Wi-Fi calls from your iPhone
- Add a device
- Make and receive Wi-Fi calls from another device
- Call from your iPad, iPod touch, or Mac
- Call from your Apple Watch
- Remove a device
- Get help
If your iPhone, iPad, or iPod touch is lost or stolen
If you lose your iPhone, iPad, or iPod touch or think it might be stolen, use Find My and protect your data.
Look for your device on a map
To find your device, sign in to iCloud.com/find. Or use the Find My app on another Apple device that you own.
If your iPhone, iPad, or iPod touch doesn’t appear in the list of devices, Find My was not turned on. But you can still protect your account if Find My was not turned on.
Mark as Lost
When you mark your device as lost, you remotely lock it with a passcode, keeping your information secure. This also disables Apple Pay on the missing device. And you can display a custom message with your contact information on the missing device.
Report your missing device to local law enforcement
Law enforcement might request the serial number of your device.
File a Theft and Loss claim
If your missing iPhone is covered by AppleCare+ with Theft and Loss, file a claim for an iPhone replacement.
Remotely erase your device
After you erase a device, you can’t track its location, so make sure that you no longer need to search for the device. If you have AppleCare+ with Theft and Loss, do not erase your iPhone until your claim has been approved.
Contact your wireless carrier
If the missing device is an iPhone or an iPad with cellular, report your missing device to your wireless carrier. Ask the carrier to disable your account to prevent calls, texts, and data use. And if your device is covered under your wireless carrier plan, file a claim.
Remove your missing device from your account
If you have AppleCare+ with Theft and Loss, do not remove your lost iPhone from your account until your claim has been approved.
Go to appleid.apple.com to remove the missing device from your list of trusted devices.
AppleCare+ with Theft and Loss is not available in all countries and regions.
Information about products not manufactured by Apple, or independent websites not controlled or tested by Apple, is provided without recommendation or endorsement. Apple assumes no responsibility with regard to the selection, performance, or use of third-party websites or products. Apple makes no representations regarding third-party website accuracy or reliability. Contact the vendor for additional information.
Источник
Use Emergency SOS on your Apple Watch
With Emergency SOS, you can quickly and easily call for help and alert your emergency contacts from your Apple Watch.
Here’s how it works
To use Emergency SOS on an Apple Watch that doesn’t have cellular, your iPhone needs to be nearby. If your iPhone isn’t nearby, your Apple Watch needs to be connected to a known Wi-Fi network and you must set up Wi-Fi Calling.
When you make a call with Emergency SOS, your Apple Watch automatically calls local emergency services and shares your location with them. In some countries and regions, you might need to choose the emergency service that you need. For example, in China mainland you can choose police, fire, or ambulance. And if you have Apple Watch Series 5 or later (GPS + Cellular), or Apple Watch SE (GPS + Cellular), your watch can also call local emergency services when you’re traveling in other countries or regions.
Your Apple Watch sends them your current location, and, for a period of time after you enter Emergency SOS mode, it sends your emergency contacts updates when your location changes.* Learn how to add emergency contacts.
* Your watch doesn’t text your emergency contacts or share your location when you’re roaming outside your home country or region.

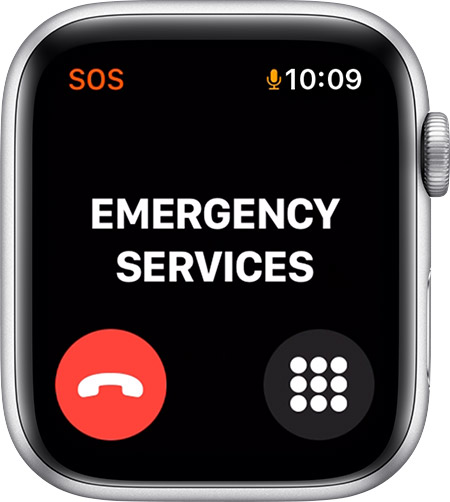
How to call emergency services on your Apple Watch
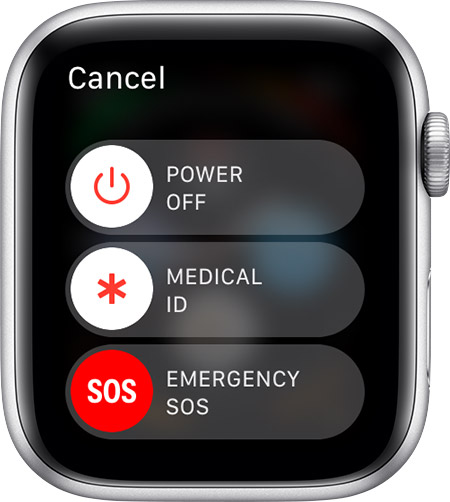
- Press and hold your watch’s side button (the button below the Digital Crown) until the Emergency SOS slider appears.

- Drag the Emergency SOS slider to start the call immediately. Alternatively, you can keep holding the side button. After a countdown, your watch calls emergency services automatically.
When the call ends, your Apple Watch sends your emergency contacts a text message with your current location, unless you choose to cancel. If Location Services is off, it will temporarily turn on. For a period of time after you enter Emergency SOS mode, your watch sends your emergency contacts updates when your location changes.* Learn how to add emergency contacts.
* Your watch doesn’t text your emergency contacts or share your location when you’re roaming outside your home country or region.
Stop sharing your location
After your emergency call, your Apple Watch will remind you every four hours that your location is being shared with your emergency contacts. Tap Stop Sharing in the notification to stop sharing your location.
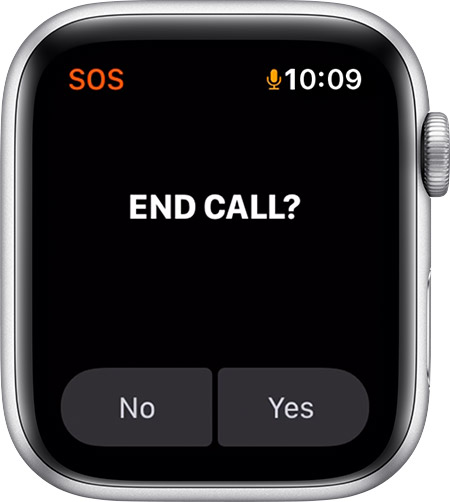
End a call that you started accidentally
If you start the Emergency SOS countdown by accident, just release the side button.
If you start an emergency call by accident, tap the End Call button , then tap Yes to confirm that you want to stop the call. After that, your watch asks if you still want to send a text message to your emergency contacts. Tap No if you want to cancel the text.
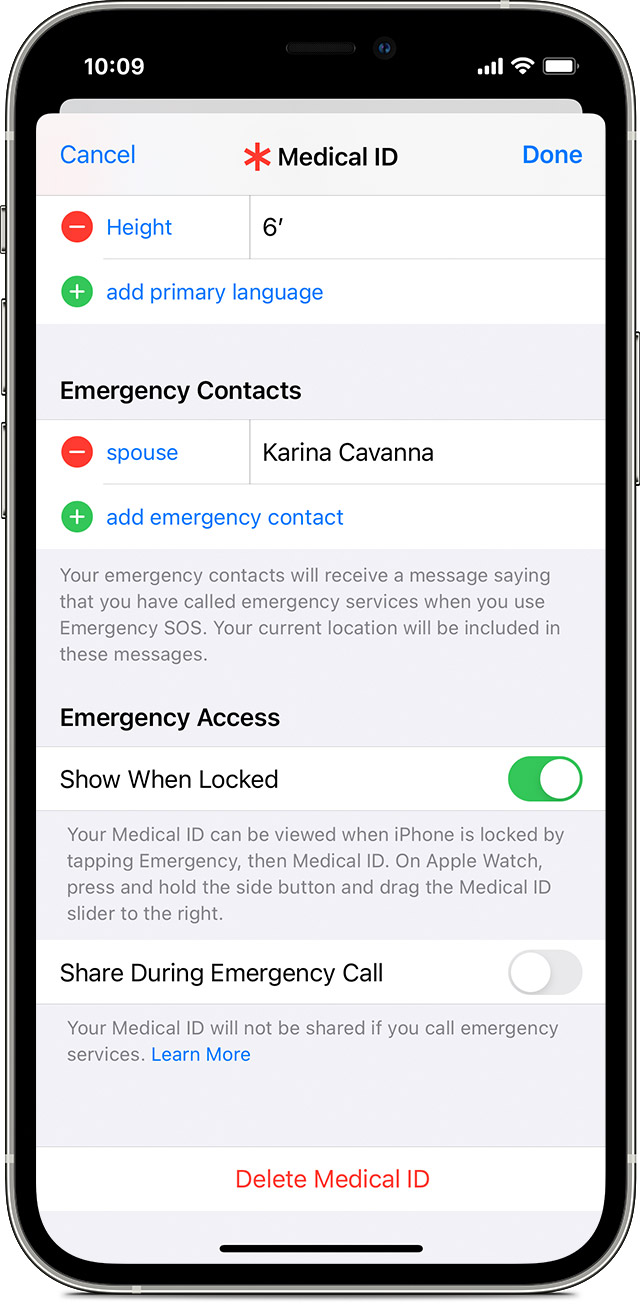
Add emergency contacts
- Open the Health app on your iPhone, then tap the profile icon (or your photo, if you’ve added one).
- Tap Medical ID.
- Tap Edit, then scroll to the Emergency Contacts section.
- Tap the add emergency contact button.
- Tap a contact name. If they have more than one phone number, tap the number that you want to use.
- Specify their relationship to you.
- Tap Done to save your changes.
You can’t set emergency services as an emergency contact.
Remove emergency contacts
- Open the Health app on your iPhone, then tap the profile icon (or your photo, if you’ve added one).
- Tap Medical ID.
- Tap Edit, then scroll to the Emergency Contacts section.
- Tap the delete emergency contact button next to a contact, then tap Delete.
- Tap Done to save your changes.
Turn off automatic dialing
You can change your settings so that holding the side button won’t call emergency services automatically:
- Open the Watch app on your iPhone, then tap the My Watch tab.
- Tap Emergency SOS.
- Turn off Hold Side Button to Dial.
If you turn off this setting, you can still use the Emergency SOS slider to make a call.
International emergency calling
Apple Watch Series 5 and later (GPS + Cellular), and Apple Watch SE (GPS + Cellular), can call local emergency services when you’re in another country or region. When you start an Emergency SOS call while abroad, your watch connects to local emergency services, but it doesn’t send your location or a text message to your emergency contacts. In some countries and regions, international emergency calling works even if you haven’t set up cellular service on the watch. Learn which countries and regions are supported.
Just like when you use Emergency SOS in your home country or region, your iPhone needs to be nearby if your Apple Watch isn’t a cellular model.
Источник
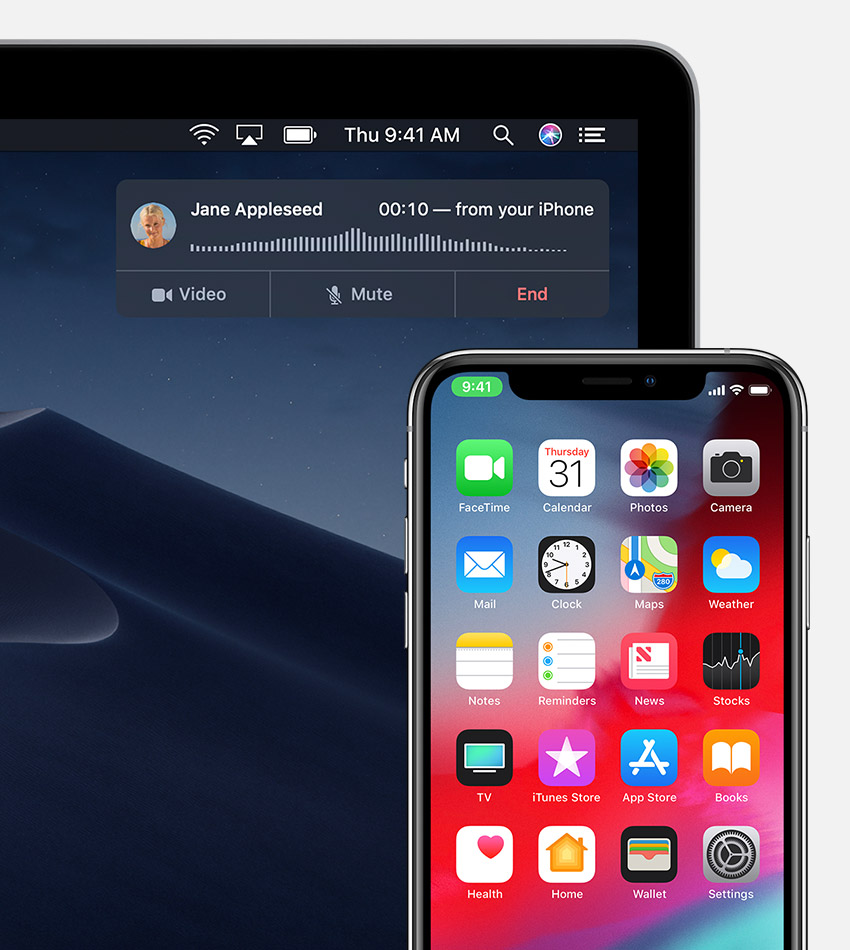
Make and receive calls on your Mac, iPad, or iPod touch
With the iPhone Cellular Calls feature, you can make and receive calls from your Mac, iPad, or iPod touch when those devices are on the same network as your iPhone.
Set up iPhone Cellular Calls
You can use iPhone Cellular Calls with any Mac, iPhone, iPad, or iPod touch that meets the Continuity system requirements. It works when your devices are near each other and set up as follows:
- Each device is signed in to iCloud with the same Apple ID.
- Each device is signed in to FaceTime with the same Apple ID.
- Each device has Wi-Fi turned on.
- Each device is connected to the same network using Wi-Fi or Ethernet.
- On your iPhone, go to Settings > Phone > Calls on Other Devices, then turn on Allow Calls on Other Devices.
- On your iPad or iPod touch, go to Settings > FaceTime, then turn on Calls from iPhone.
- On your Mac, open the FaceTime app, then choose FaceTime > Preferences. Click Settings, then select Calls From iPhone.
If your carrier supports Wi-Fi calling on other devices, you can set up those devices to make and receive calls even when your iPhone isn’t turned on or nearby. Learn about Wi-Fi calling.
Make and receive phone calls
Learn how to make and receive phone calls on your Mac, iPad, and iPod touch.
Make a call on your Mac
- Move the pointer over any phone number in Contacts, Calendar, Safari, or other app that automatically detects such data. Click the arrow in the box that outlines the phone number, then choose Call [phone number] Using iPhone.
- Or open the FaceTime app, enter a phone number in the search field, then click Audio.
Make a call on your iPad or iPod touch
- Tap a phone number in Contacts, Calendar, Safari, or other app that automatically detects such data.
- Or open the FaceTime app, tap , enter the phone number in the search field, then tap Audio.
Answer a call
- On your Mac, a notification appears when someone calls your iPhone. You can answer the call, send it to voicemail, or send the caller a message.
- On your iPad or iPod touch, slide to answer the call.
To stop getting calls on one of your devices, just turn off the Calls from iPhone setting on that device. See the setup section above for details.
Источник
If you can’t make or receive calls on your iPhone
You might not be able to make or receive calls on your iPhone if you have certain settings turned on, if your software isn’t up to date, or if there’s a problem with your network.
If you can’t make or receive calls on your iPhone
Find out what to do if you see «No Service» or «Searching» in the status bar. If you can’t make or receive calls on your iPhone, follow these steps, testing after each step:
Contact your carrier
When you contact your carrier, make sure that:
- Your account is set up to use your iPhone.
- There aren’t any localized service outages.
- Your account doesn’t have a billing-related block.
- Your calls don’t have errors on the carrier system.
Update your software
- Check for a carrier settings update.
- Check for an iOS software update. Some updates might require a Wi-Fi connection.
Check your iPhone settings
- Turn Airplane Mode on and off. Go to Settings and turn on Airplane Mode, wait five seconds, then turn it off.
- Check Do Not Disturb. Go to Settings > Focus > Do Not Disturb and make sure it’s off.
- Check for any blocked phone numbers. Go to Settings > Phone > Blocked Contacts.
- See if Call Forwarding is turned on. Go to Settings > Phone > Call Forwarding and make sure it’s off.
- Check to see if Silence Unknown Callers is turned on. If the setting is on, a caller must be listed in your Contacts or Recents. Or they must have shared their number in Mail or sent you a message using that number in order for their call to go through. Add their number to Contacts to ensure the phone rings. Calls from some third-party apps might not go through.
Check your network settings
- Reset your network settings. Go to Settings > General > Transfer or Reset iPhone > Reset > Reset Network Settings. This will erase all current saved settings, including Wi-Fi passwords, preferred networks, and VPN settings.
- Try to make or receive calls in another location.
Contact Apple Support
If you still can’t make or receive calls, contact Apple Support, then follow the steps to complete your request.
Источник
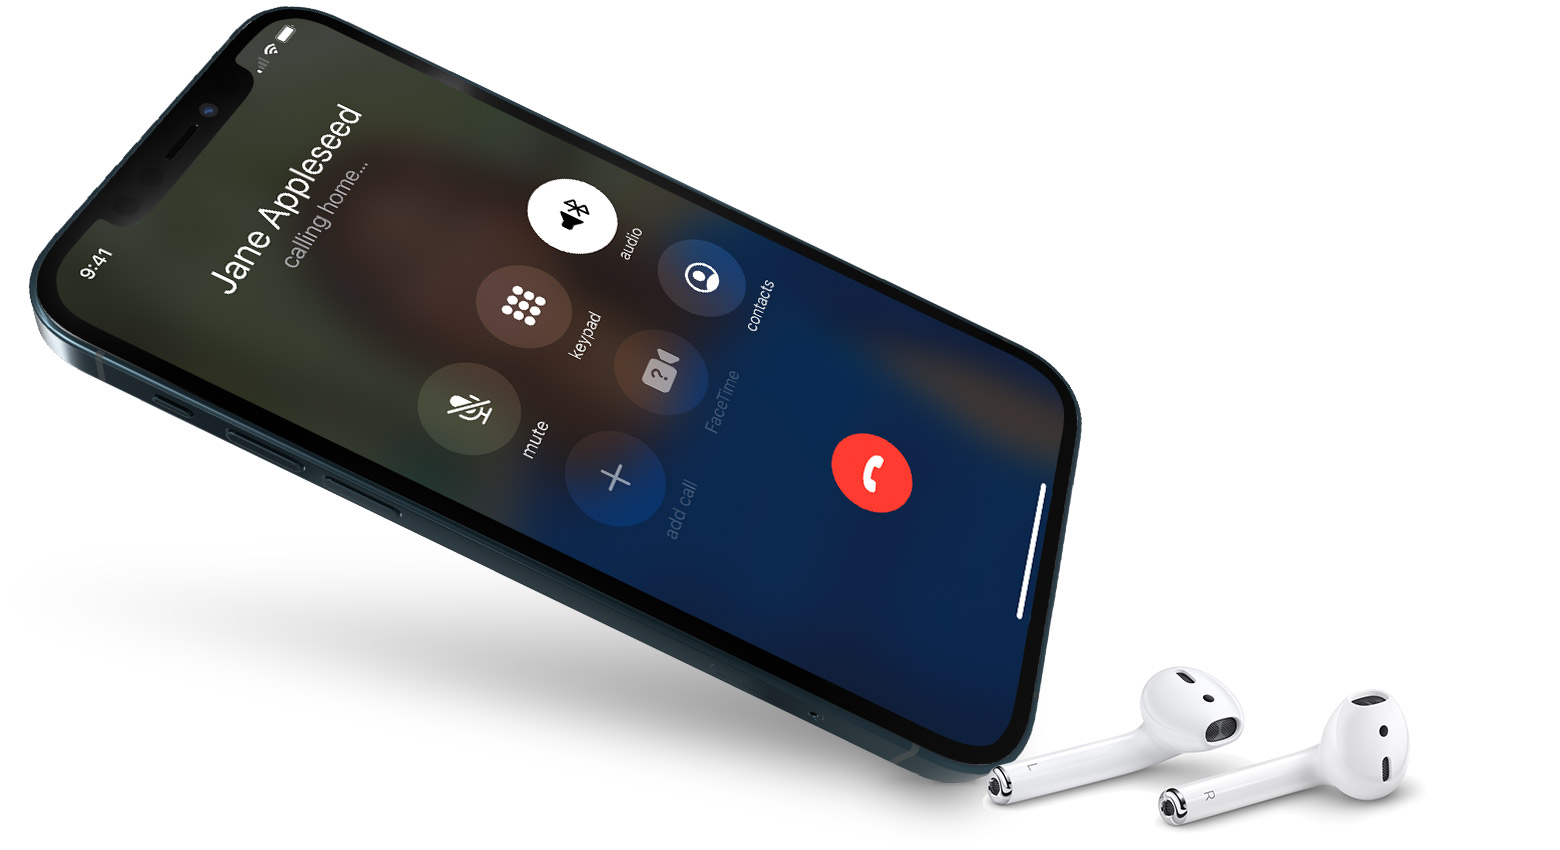
Make a call with Wi-Fi Calling
With Wi-Fi Calling, you can make or receive a phone call if you have a Wi-Fi connection in an area with little or no cellular coverage. Learn how to make a voice call using Wi-Fi Calling.
To use Wi-Fi Calling, you need an iPhone 5c or later on a supported carrier.
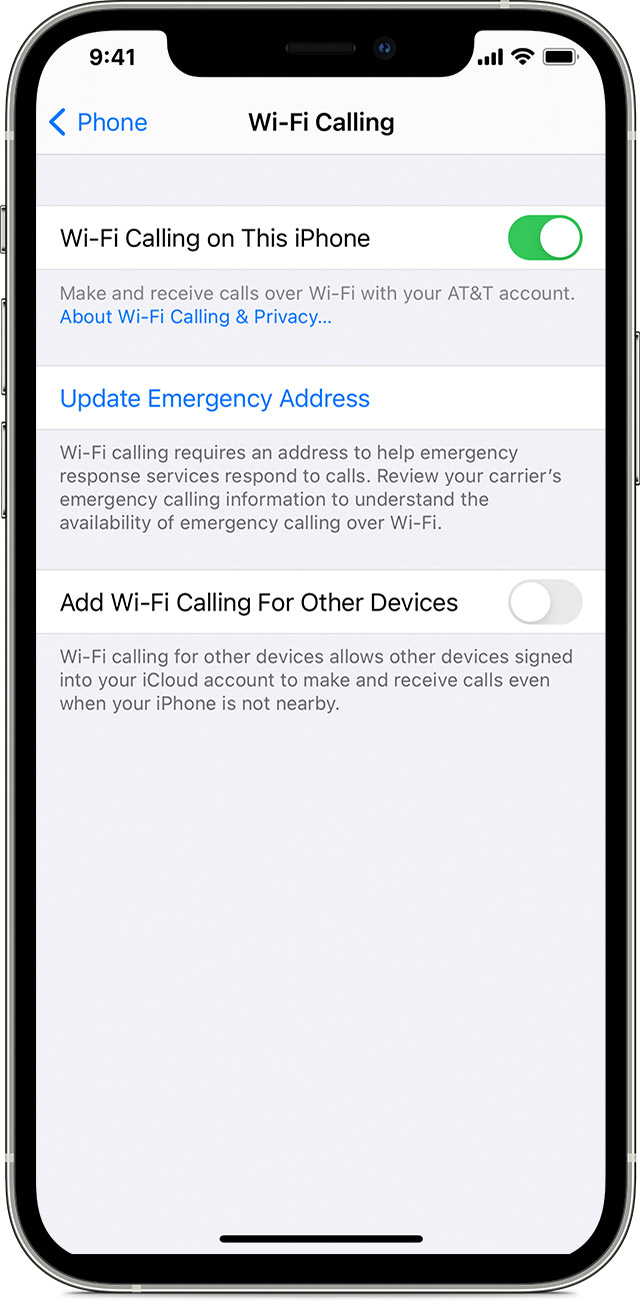
Place Wi-Fi calls from your iPhone
Turn on Wi-Fi calling in Settings > Phone > Wi-Fi Calling. You might need to enter or confirm your address for emergency services.*
If Wi-Fi Calling is available, you’ll see Wi-Fi after your carrier name in the status bar. Then your calls will use Wi-Fi Calling.
* When cellular service is available, your iPhone uses it for emergency calls. If you turned on Wi-Fi Calling and cellular service isn’t available, emergency calls might use Wi-Fi calling. Your device’s location may be used to aid response efforts when you place an emergency call, regardless of whether you enable Location Services.
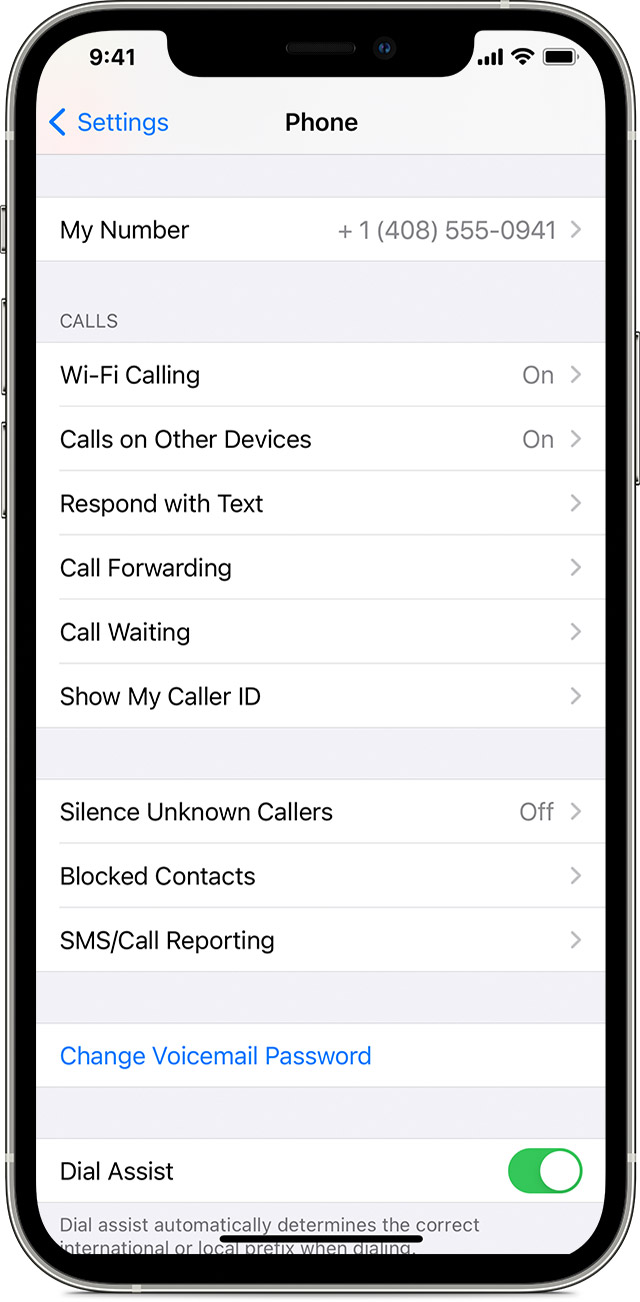
Add a device
Make sure that the device you want to add has the latest version of software. Then follow these steps:
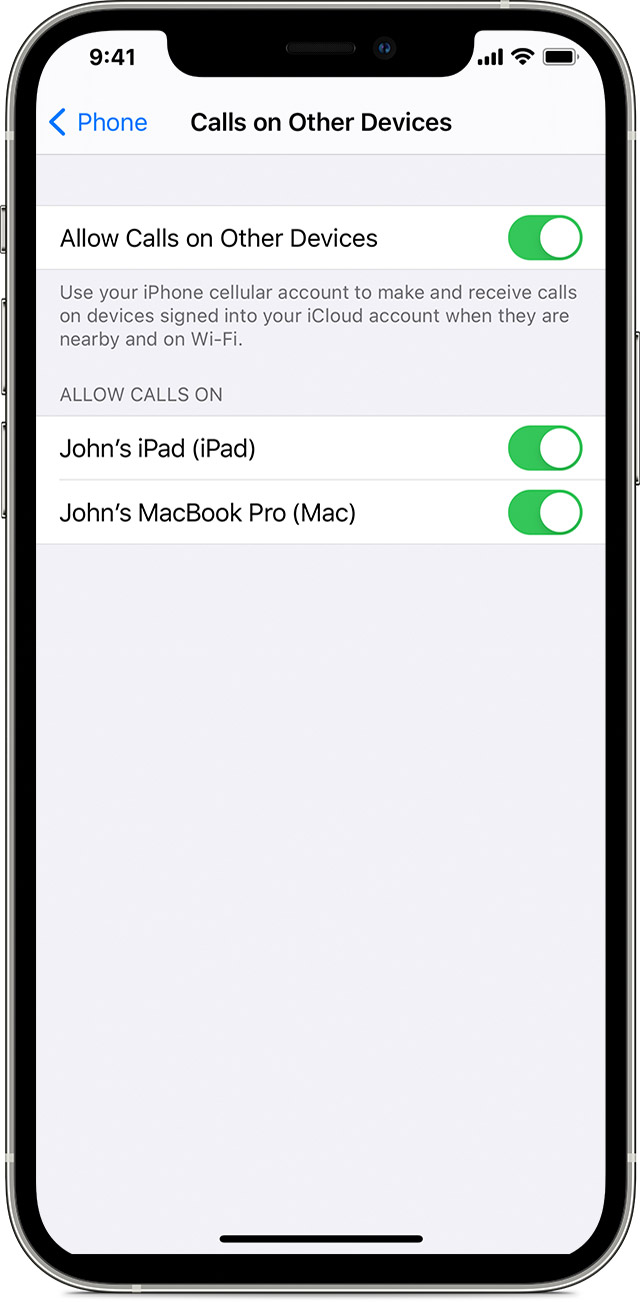
- On your iPhone, go to Settings > Phone > Wi-Fi Calling.
- Turn on Add Wi-Fi Calling For Other Devices.
- Go back to the previous screen, then tap Calls on Other Devices.
- Turn on Allow Calls on Other Devices if it’s not on. A list of your eligible devices appears under Allow Calls On.
- Turn on each device that you want to use with Wi-Fi Calling.
Next, make sure that your other devices will accept calls from your iPhone:
- On your iPad or iPod touch, go to Settings > FaceTime. Then turn on Calls from iPhone.
- On your Mac, open the FaceTime app and choose FaceTime > Preferences. Then turn on Calls from iPhone.
Wi-Fi Calling is enabled automatically for Apple Watch when you turn on Allow Calls on Other Devices.
![]()
If you can’t add a device, check these items:
- On your iPhone, make sure that Wi-Fi Calling and Allow Calls on Other Devices are on, and that your device appears under Allow Calls On.
- Make sure that you’re using the same Apple ID for FaceTime and iCloud on your iPhone and your other device.
Make and receive Wi-Fi calls from another device
If your carrier supports Wi-Fi Calling on iCloud-connected devices, you can also make and receive Wi-Fi calls on other devices.
Make sure that you’re signed in to iCloud and FaceTime with the same Apple ID that you use on your iPhone. Also make sure that your devices have the latest software.
To place a Wi-Fi call from your iPad, iPod touch, Apple Watch, or Mac, follow these steps.
Call from your iPad, iPod touch, or Mac
- If you haven’t added your device yet, which allows it to use Wi-Fi Calling, add it.
- Open FaceTime.
- Enter a contact or phone number, then tap the contact or phone number.
- Tap the Audio button.
You can also place a call by tapping a phone number in Contacts, Mail, Messages, Safari, and other apps.
Call from your Apple Watch
- Open the Phone app.
- Choose a contact.
- Tap the phone button .
- Select the number or address that you want to call.
Remove a device
If you don’t want to use Wi-Fi Calling from one of your devices, you can remove it:
- On your iPhone, go to Settings > Phone > Calls on Other Devices.
- In the list of devices, turn off Wi-Fi Calling for the device that you want to remove.
Get help
If you can’t turn on or use Wi-Fi Calling, make sure that your carrier offers Wi-Fi Calling and that your devices have the latest software. Then, follow these steps if you can’t turn on Wi-Fi Calling or make a Wi-Fi call. Wait two minutes before you go from one step to the next.
- Go to Settings > Phone > Wi-Fi Calling and make sure that Wi-Fi Calling is on.
- Restart your iPhone.
- Connect to a different Wi-Fi network. Not all Wi-Fi networks work with Wi-Fi Calling.
- Turn Wi-Fi Calling off and then on again.
- Go to Settings > General > Transfer or Reset iPhone > Reset, and tap Reset Network Settings.
FaceTime isn’t available in all countries or regions.
Information about products not manufactured by Apple, or independent websites not controlled or tested by Apple, is provided without recommendation or endorsement. Apple assumes no responsibility with regard to the selection, performance, or use of third-party websites or products. Apple makes no representations regarding third-party website accuracy or reliability. Contact the vendor for additional information.
Источник


