- HERE WeGo 4.2.500
- Here com android app
- About
- Here com android app
- What You’ll Learn
- What You’ll Need
- What You are Going to Build
- Final output
- HERE SDK for Android Features
- Acquiring HERE credentials and Downloading the HERE SDK
- Create an Android Project using Android Studio
- Importing HERE Android SDK into your project
- Add Required Permissions in the “AndriodManifest.xml”
- Add Your HERE Credentials to Authenticate the App
- Create a Map Fragment to Display the Map
- Implement the HERE Map
- Implement the initialize() Method
- Display Current User Location on the Map
- Request Location Permission
- Get Current User Location and add a Marker
- Run the project
- Conclusion
HERE WeGo 4.2.500
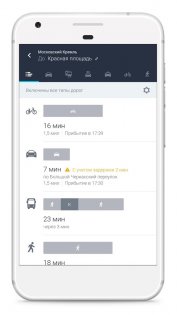
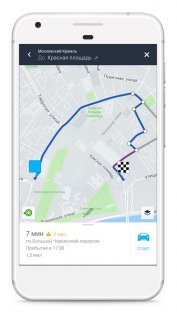
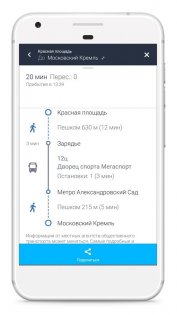
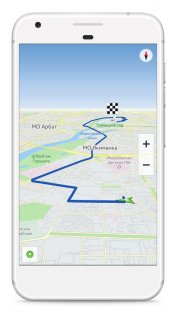
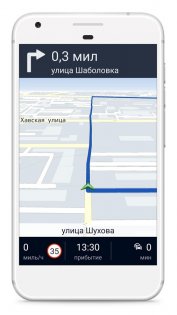
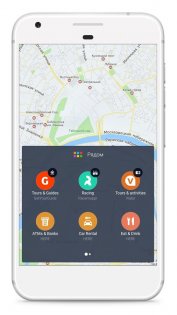
Nokia HERE — карты, которые помогут найти путь к месту назначения, где бы вы ни находились. Можно исследовать окружающий мир, разведывать новые места, не боясь при этом потеряться. С Here вы можете твердо стоять на земле, зная, в каком направлении двигаться дальше. С HERE вы можете путешествовать по всему миру, прокладывать собственные маршруты и отыскивать нужные места даже без подключения к Интернету. Просто скачайте карты и сохраните их на своем телефоне или планшете. Вы сможете полноценно работать с ними в автономном режиме, где бы вы ни находились. Приложение HERE поможет найти то, что вам нужно. Посмотрите, где находятся ближайшие к вам рестораны и магазины. Поменялись планы? Договоритесь о встрече с друзьями и отправьте им сведения о своем местонахождении с помощью функции Glympse. Готовясь к путешествию, отмечайте на карте места, которые хотите посетить по прибытии. Здесь также можно просмотреть оценки и обзоры с порталов Trip Advisor, Lonely Planet и других. Куда бы вы не отправились на автомобиле, поэтапные голосовые подсказки всегда доступны. Сведения о ситуации на дорогах и движении общественного транспорта в режиме реального времени помогут найти кратчайший путь.
Исследуйте мир по-новому:
- Не теряйте ориентира: голосовые подсказки на каждом этапе поездки или прогулки доступны, даже если вы не подключены к Интернету.
- Используйте карты, доступные в любом режиме: интерактивные карты для более чем 100 стран, которые можно скачать, сохранить и использовать, когда вы не в сети.
- Выбирайте кратчайший путь: сведения о движении общественного транспорта — карты, маршруты и прочее — для более чем 800 городов и 40 стран.
- Объезжайте пробки: сведения о ситуации на дорогах и ремонтных работах в режиме реального времени для более чем 40 стран.
- Планируйте поездки заблаговременно: отмечайте на карте места, которые хотите посетить во время путешествия.
- Встречаться с друзьями еще проще: с помощью функции Glympse можно сообщить им о своем местонахождении и времени прибытия на место встречи в текстовом или электронном сообщении.
Редакционный обзор бета-версии Nokia HERE Maps для Android можно прочесть здесь.
Источник
Here com android app
HERE SDK 4.x (Lite, Explore & Navigate Edition) — Examples for Android, iOS and Flutter
![]()
![]()
![]()
![]()
The HERE SDK enables you to build powerful location-aware applications. Explore maps that are fast and smooth to interact with, pan/zoom across map views of varying resolutions, and enable the display of various elements such as routes and POIs on highly customizable map views.

The HERE SDK consumes data from the HERE Platform and follows modern design principles incorporating microservices and modularized components. Currently, the HERE SDK supports three platforms: Android, iOS and Flutter.
For an overview of the existing features, please check the Developer’s Guide for the platform of your choice. Here you will also find numerous code snippets, detailed tutorials, the API Reference and the latest Release Notes:
For now, the Navigate Edition is only available upon request. Please contact your HERE representative to receive access including a set of evaluation credentials.
List of Available Example Apps (Version 4.9.4.0)
In this repository you can find the latest example apps that show key features of the HERE SDK in ready-to-use applications:
- HelloMap: Shows the classic ‘Hello World’.
- HelloMapWithStoryboard: Shows the classic ‘Hello World’ using a Storyboard (iOS only).
- Camera: Shows how to change the target and the target anchor point and how to move to another location using custom map animations.
- CustomMapStyles: Shows how to load custom map schemes made with the HERE Style Editor. Exclusively available for the Explore Edition and the Navigate Edition).
- Gestures: Shows how to handle gestures.
- OfflineMaps: Shows how the HERE SDK can work fully offline and how offline map data can be downloaded for continents and countries. Exclusively available for the Navigate Edition.
- MapItems: Shows how to add circles, polygons and polylines, native views, 2D and 3D map markers to locate POIs (and more) on the map. 3D map markers are exclusively available for the Explore and Navigate Editions.
- CartoPOIPicking: Shows how to pick embedded map markers with extended place details. Embedded map markers are already visible on every map, by default. This app is exclusively available for the Explore and Navigate Editions.
- Routing: Shows how to calculate routes and add them to the map.
- RoutingHybrid: Shows how to calculate routes and add them to the map. Also shows how to calculate routes offline, when no internet connection is available. Exclusively available for the Navigate Edition.
- EVRouting: Shows how to calculate routes for electric vehicles and how to calculate the area of reach with isoline routing. Also shows how to search along a route.
- Public Transit: Shows how to calculate routes for public transportation vehicles such as subways, trains, or busses.
- Search: Shows how to search POIs and add them to the map. Shows also geocoding and reverse geocoding.
- SearchHybrid: Shows how to search POIs and add them to the map. Shows geocoding and reverse geocoding. Also shows how to search offline, when no internet connection is available. Exclusively available for the Navigate Edition.
- NavigationQuickStart: Shows how to get started with turn-by-turn navigation. Exclusively available for the Navigate Edition.
- Navigation: Gives an overview of how to implement many of the available turn-by-turn navigation and tracking features. Exclusively available for the Navigate Edition.
- NavigationCustom: Shows how the guidance view can be customized. Exclusively available for the Navigate Edition.
- Positioning: Shows how to integrate HERE Positioning. Exclusively available for the Navigate Edition.
- Traffic: Shows how to search for real-time traffic and how to visualize it on the map.
- StandAloneEngine: Shows how to use an engine without a map view.
- IndoorMap: Shows how to integrate private venues. Exclusively available for the Navigate Edition.
- UnitTesting: Shows how to mock HERE SDK classes when writing unit tests (Android only, the example app is available for the Explore Edition and the Navigate Edition).
Most example apps contain a class named «XY-Example» where XY stands for the feature, which is in most cases equal to the name of the app. If you are looking for example code that shows how to use a certain HERE SDK feature, then please look for this class as it contains the most interesting parts. Note that the overall app architecture is kept as simple as possible to not shadow the parts in focus.
Not all examples are available for all editions and platforms.
Find the latest examples for the edition and platform of your choice:
Example Apps for Older Versions
Above you can find the example app links for the latest HERE SDK version. If you are looking for an older version, please check our release page where you can download tagged older releases.
What You Need to Execute the Example Apps
- Acquire a set of credentials by registering yourself on developer.here.com — or ask your HERE representative.
- Download the latest HERE SDK artifacts for your desired platform. These can be found on developer.here.com unless otherwise noted.
- Please refer to the minimum requirements and supported devices as listed in our Developer’s Guide.
Get Started for Android
- Copy the AAR file of the HERE SDK for Android to the example app’s app/libs folder.
- Open Android Studio and sync the project.
- To run the app, you need to add your HERE SDK credentials to the AndroidManifest.xml file.
Get Started for iOS
- Copy the heresdk.framework file of the HERE SDK for iOS to the example app’s root folder.
- To run the app, you need to add your HERE SDK credentials to the Info.plist file.
Get Started for Flutter
- Unzip the HERE SDK for Flutter plugin to the plugins folder that can be found inside the example app project. Renname the folder to ‘here_sdk’: hello_map/plugins/here_sdk
- Set your HERE SDK credentials to
- hello_map/android/app/src/main/AndroidManifest.xml
- hello_map/ios/Runner/Info.plist
- Start an Android emulator or an iOS simulator and execute flutter run from the app’s directory — or run the app from within your IDE.
- If you have more questions, please check stackoverflow.com/questions/tagged/here-api.
- Information on how to contribute to this project can be found here.
- If you have questions about billing, your account, or anything else Contact Us.
Thank you for using the HERE SDK.
Copyright (C) 2019-2021 HERE Europe B.V.
See the LICENSE file in the root of this repository for license details.
About
Android, iOS and Flutter example apps for the HERE SDK 4.x (Lite Edition, Explore Edition, Navigate Edition)
Источник
Here com android app
The HERE SDK for Android allows you to add HERE Location Services to your Android applications. You can add services such as routing, interactive maps, global places search and more to your applications.
What You’ll Learn
After completing this tutorial, you will have learned how to render a map in an Android application using the HERE Android SDK.
What You’ll Need
- Android Studio installed. In case if you don’t have Android Studio, here is Google’s guide on how to install it.
- HERE developer account
- HERE Android SDK (More on how to download that below)
What You are Going to Build
In this tutorial, you will learn how to setup your application to receive GPS updates and you will learn how to add the HERE SDK for Android to your application. Next you will learn how to add a HERE map into your Android application using HERE SDK for Android and finally locate the position of your device, place a marker on a map and zoom into your current location.
Final output
Here is a screenshot showing the Android application and HERE Map, centered over Hyderabad.

HERE SDK for Android Features
The main features offered by the HERE SDK for Android are:
- Mapping (Displaying a Map to an End User)
- Search (Finding Locations for an End User)
- Directions (Obtaining and Displaying)
- Turn-by-turn Navigation (Presenting Instructions for Navigating an End User)
- HERE Positioning (Locating an End User)
You can find more information about all the HERE Android SDK features from this link
For this tutorial we will focus on Mapping.
Acquiring HERE credentials and Downloading the HERE SDK
To acquire the HERE credentials, follow the graphical illustration:

- Login to developer.here.com
- Select one of your projects
- Scroll to the HERE SDK for Android section
- Then, click on Generate App ID and App Code button to generate the credentials needed to access the Android SDK
- Finally, download the HERE SDK by click on the download link.
Create an Android Project using Android Studio
Let’s get started by creating the Android project. To do that open up Android Studio and click on the Start a new Android Studio project .

In the next screen, choose the Empty Activity .

Now, configure your project as shown below:

Finally, click on the Finish button.
You will be redirected to the new project that was created.

Importing HERE Android SDK into your project
Next, we are going to include the HERE SDK into your Android project. To do this you need to locate the downloaded HERE-sdk.zip file and extract it. Now, copy the HERE-sdk.aar file. Go back to Android Studio, click on the Project view as shown below:

In the project view, navigate to the libs folder and paste the copied HERE-sdk.aar file.


Now that you have added the HERE-sdk.aar files lets tell the project about the HERE SDK by modifying the build.gradle file in the app folder as shown below:
In build.gradle add the following line into the Android < … >section:
Next, add the following into the dependencies < … >section:

Now click on the Sync Now on the top right corner as shown to Sync with Gradle files:

Add Required Permissions in the “AndriodManifest.xml”
Up to this point we have added the HERE SDK, but your application will not receive any location information because we have not configured the application to receive location updates.
Before you add the permissions, open the AndroidManifest.xml and add the attribute android:hardwareAccelerated=»true» to render the Map smootly as shown below:
The HERE SDK is an online SDK, which means it requires internet connectivity. To give the app internet connectivity you need to add the following permissions to the AndroidManifest.xml file.
- Write access to external storage
- Network state
- Internet Access
- WIFI state
To add the above permissions to your Android App, copy and paste the following code in the: AndroidManifest.xml before tag:
Add Your HERE Credentials to Authenticate the App
Now that you have configured the application, we need to configure your HERE API Access credentials so that the HERE SDK can communicate with the HERE Service.
Note: Make sure to replace the HERE Credentials with your own
Click here to see the final version AndroidManifest.xml
Create a Map Fragment to Display the Map
To display the map, we need a map Fragment . To setup a map fragment, open the exiting layout/activity_main.xml file and start editing it.
- Change the layout to the LinearLayout as shown below:
- Add the following mark-up beneath the
tag:
- Remove the text view for the Map only View
When AndroidXMapFragment is initialized, your application’s MainActivity contains an AndroidXMapFragment UI element (with the mapfragment ID) that owns a Map object.
Implement the HERE Map
Now let’s work on implementing the map. First up you will need to import the HERE Libraries.
To do this, open the MainActiviy.java file and add the following import statements:
Now, implement the MainActivity class by extending it with the FragmentActivity .
With in the MainActivity class, create a reference map object as shown below:
Now, create the fragment object as shown below:
In the onCreate method call the initialize method like below:
note: We will implement the initialize() in the next section
Implement the initialize() Method
The following function will render the map in the map fragment. This code will initialize and configure the map into the map UI fragment from above. The initialization code will initialize the map, set the centered position of the map over Vancouver and then zoom to a calculated level.
Finally, put together, your MainActivity.java file should look as below:
Once you run the project, you should see a HERE Map on the device as shown:
Display Current User Location on the Map
To get the current user location, you need to add the location access permissions. Open the app/src/main/AndroidManifest.xml file and add the following location permission before the tag:
You need to add the below import statements in the MainActivity.java file to access the current user location:
Request Location Permission
Before you access the current user location, you need to request for the permission.
To request for the permission, you need to add the following lines of code to MainActivity.java after the initialize() method:

Now, you got the user permission to access the location.
Get Current User Location and add a Marker
To access current user location, you need to use the LocationServices to get the latitude and longitude. Once you have the GPS coordinates, create a marker using it. Add the below code to MainActivity.java file after the onRequestPermissionsResult method:
Run the project
To run the app on a real device or an emulator follow the article How to run Android App on real device or emulator
Once you connect your device to the android studio click on the run button as shown:
 run_project
Conclusion
By following the above tutorial you’ve learn how to: — Download and Import the HERE-SDK — Implement the HERE Map using HERE SDK for Android — Get the Current User Location and add a Marker
Источник


