- Homemade Apple Pie
- Easy Homemade Apple Pie
- What You’ll Need
- What Kinds of Apples to Use
- How To Make Homemade Apple Pie
- Make the Pie Crust
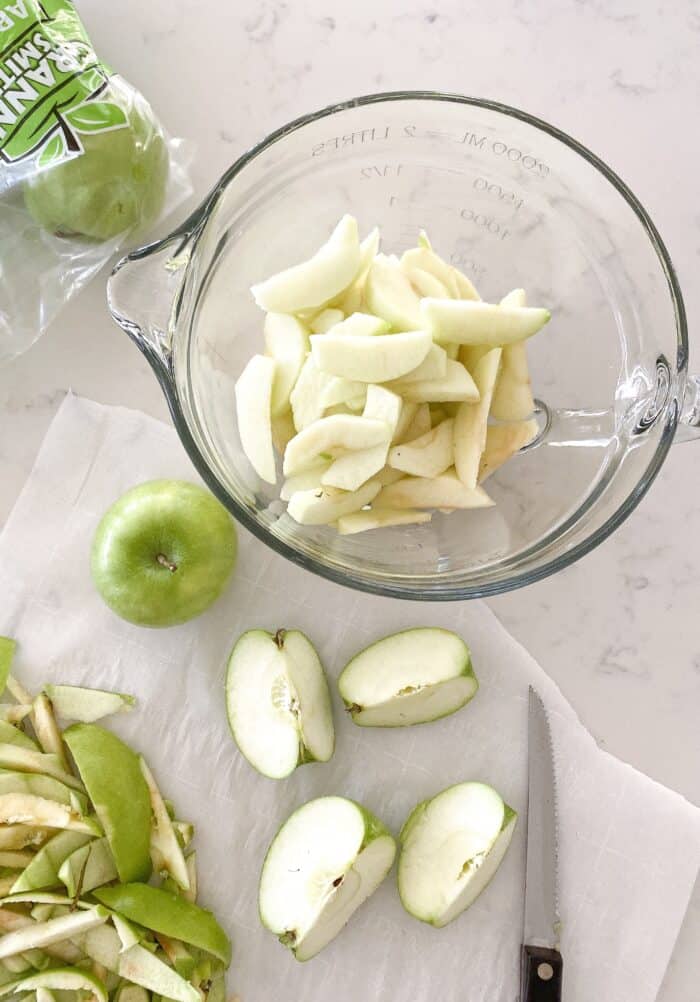
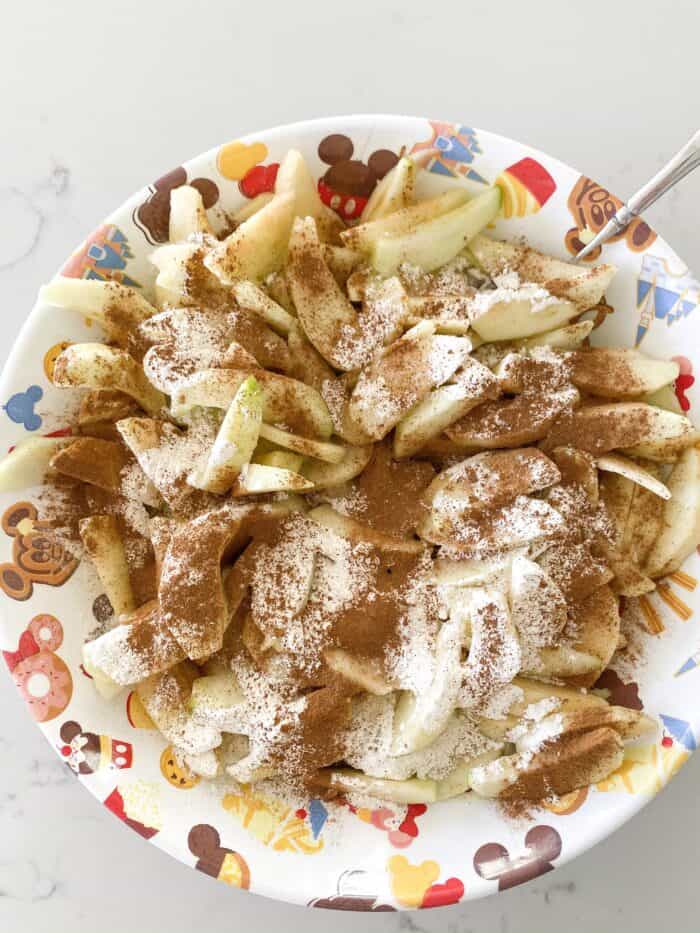
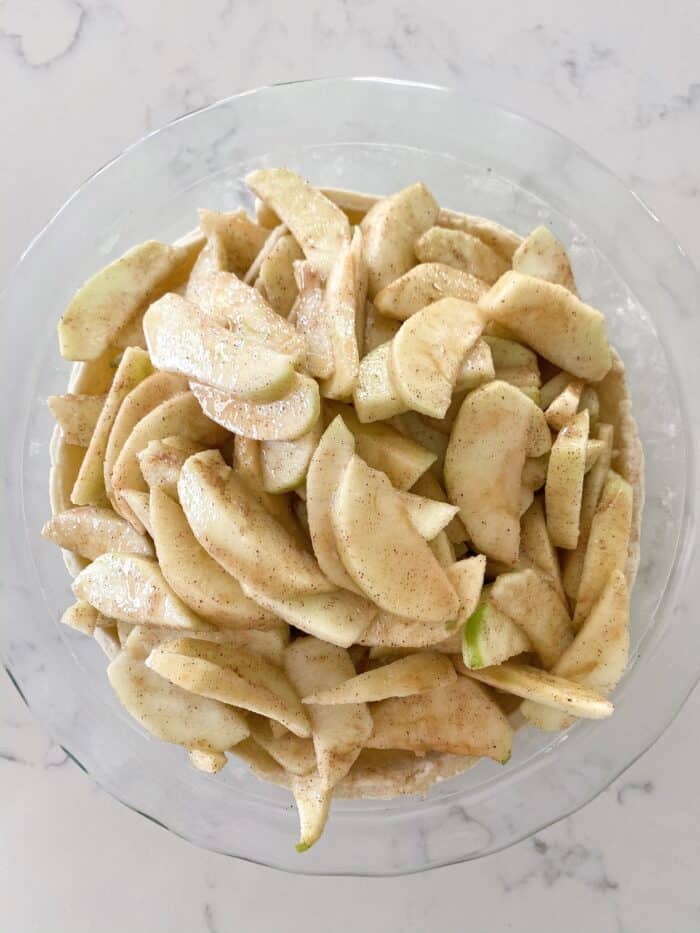
- Make the Apple Pie Filling
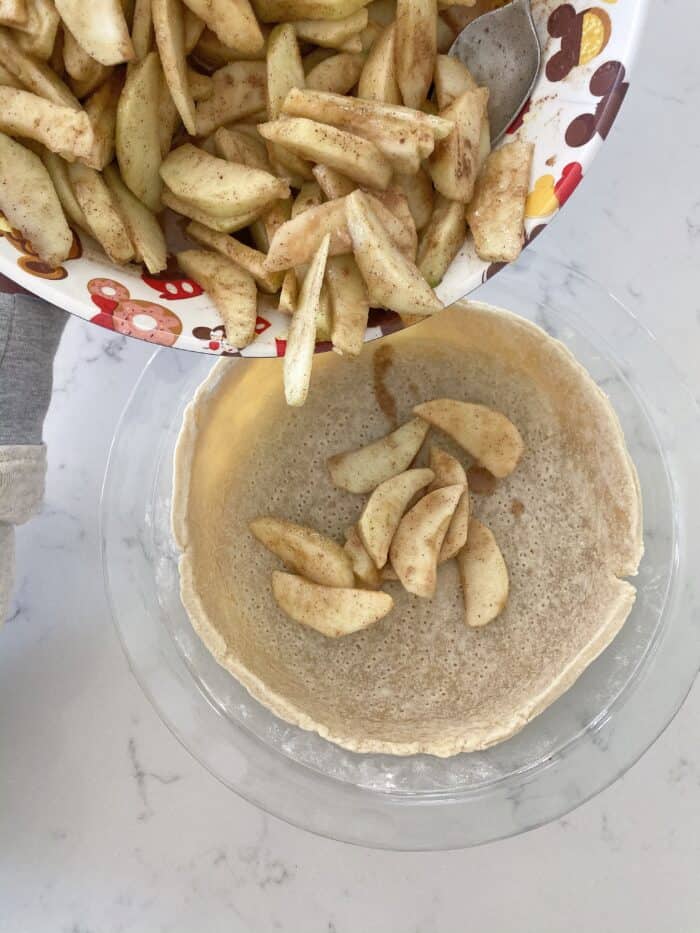
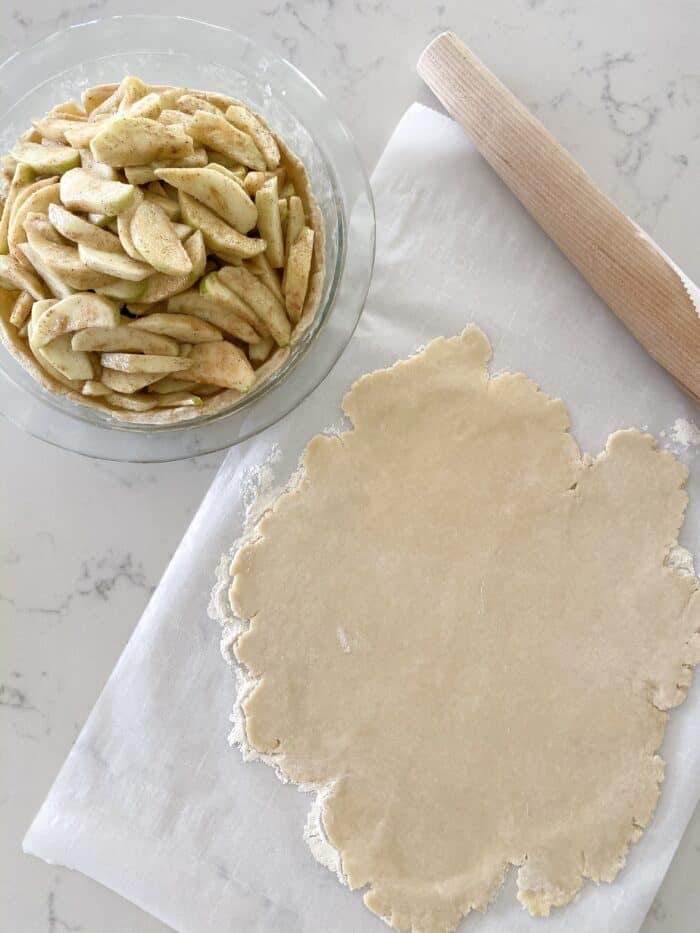
- Assemble Your Pie
- How Long Do You Bake Apple Pie?
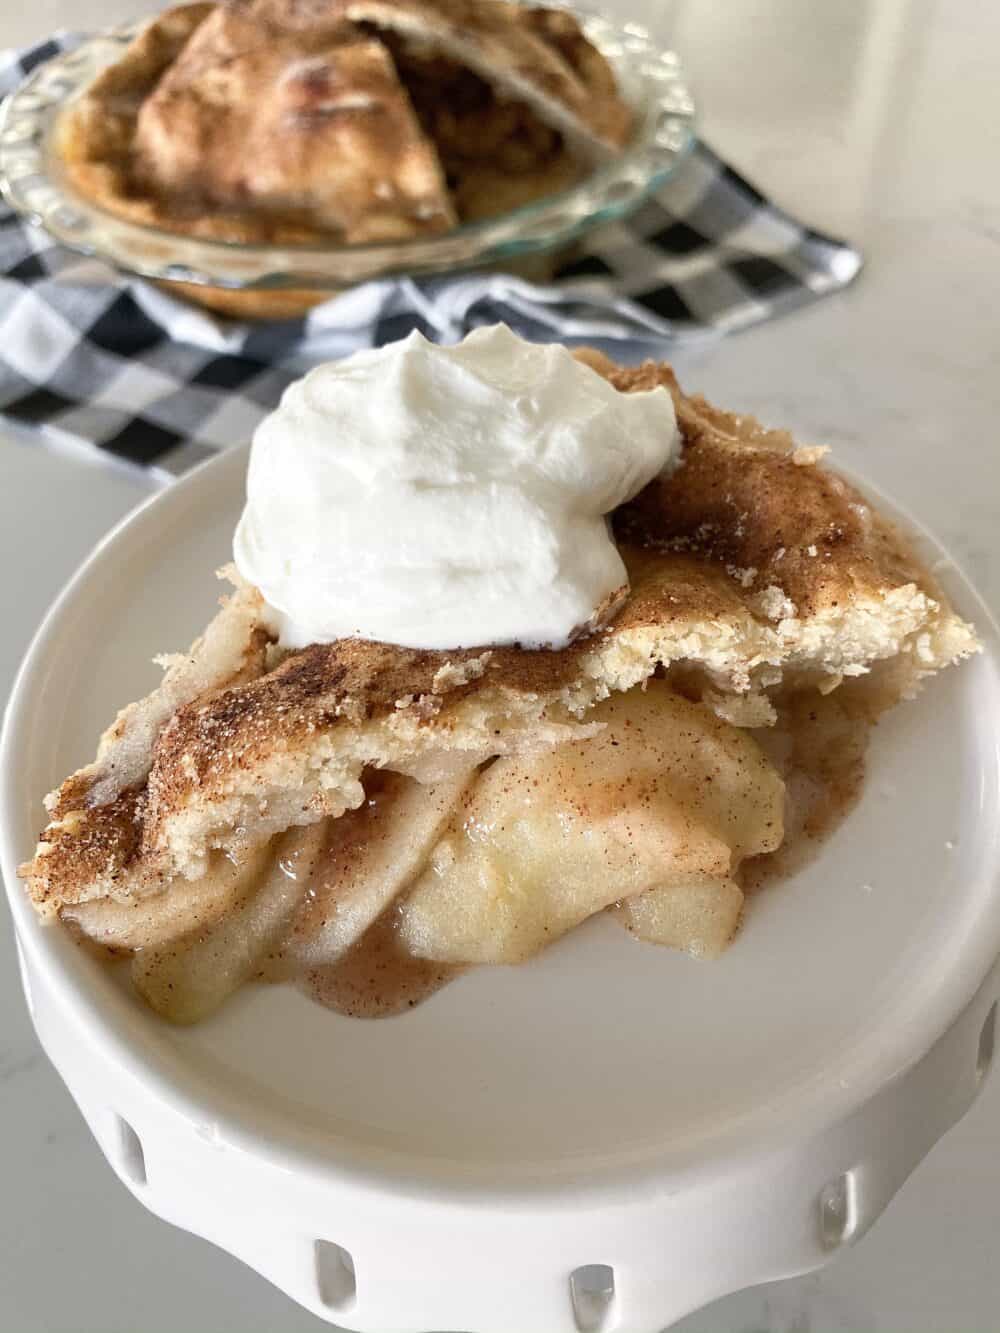
- How To Serve
- How To Store Pie
- Homemade Apple Pie
- Homemade Apple Pie
- Ingredients for Apple Pie
- Helpful kitchen tools for making homemade pie
- Tips for Pie Making Success
Homemade Apple Pie
It’s pie season which means you need a really good homemade apple pie recipe! I’ve got simple step-by-step photos to help you through the entire process. Get ready to learn how to make the best apple pie of your life.
Easy Homemade Apple Pie
If you’ve never made an apple pie from scratch, it’s time you give it a try! My recipe is totally manageable for any level of baker. Apple pie is perfect for Fall Baking, Thanksgiving and Christmas.
This recipe uses my all-butter pie crust recipe, which makes a tender, totally perfect pie crust that’s easy to roll out and work with. For this pie, we’ll be filling that pie crust with cinnamon sugar spiced apples. You won’t believe how easy it is to make apple pie with this recipe!

What You’ll Need
- Granny Smith Apples – You can also use other kinds of apples (see my list below).
- Lemon juice – This will help prevent the apples from browning and adds a bit of flavor to boot.
- Granulated sugar
- Ground cinnamon
- Kosher salt
- All-purpose flour – Used for the pie crust and also the apple pie filling. The flour will help the pie filling thicken so that it isn’t too juicy.
- Unsalted butter
- Egg whites
What Kinds of Apples to Use
I used Granny Smith for my pie today, but below, are other varieties that make a perfect apple pie!
- Granny Smith
- Esopus Spitzenburg
- Northern Spy
- Idared
- Pink Pearl
- Ginger Gold
- Golden Delicious
- Jazz
- Jonagold
- Pink Lady
How To Make Homemade Apple Pie
Alright, let’s start making our apple pie! There are three steps. First we will make our pie crust, then we’ll make the apple pie filling, and lastly we’ll put it all together and bake our pie.
Make the Pie Crust
- Add the flour, sugar and salt to a stand mixer with paddle attachment or whisk attachment. Beat on low to combine. Add cold butter, beat until most of the butter is the size of small peas with the flour mixture.
- With the mixer on, slowly add the ice water until dough forms and is combined.
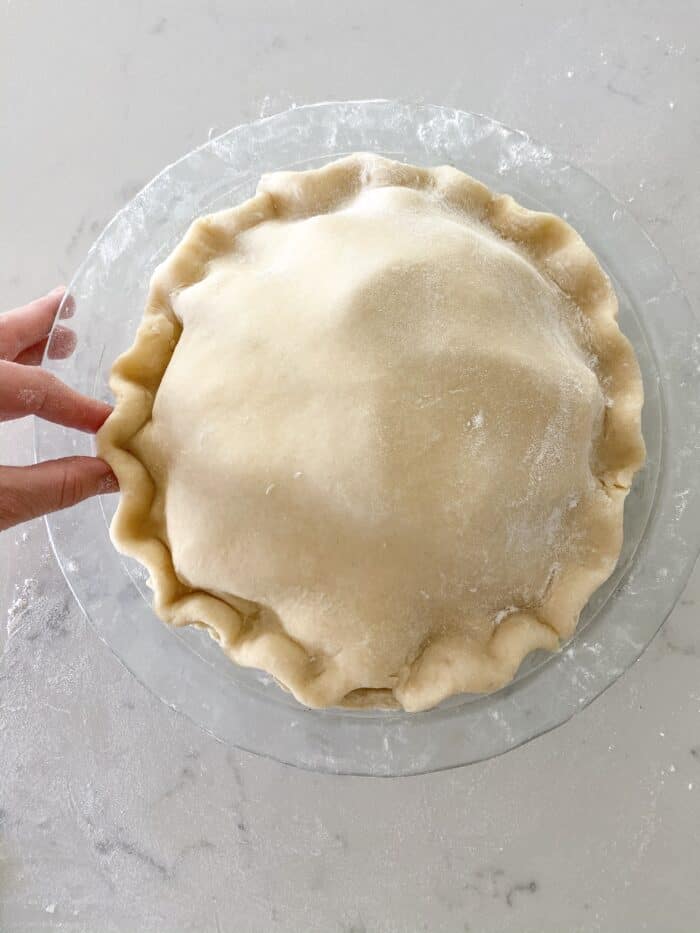
- Transfer dough to a lightly floured countertop, kneading a couple times to combine. Divide dough in half, flatten slightly and wrap tightly with plastic wrap. Refrigerate for 2-3 hours before using. When ready to use, roll out round large enough to fit your pie plate. Transfer to pie dish and crimp the edges as desired.
- Poke holes at the bottom of pie. Bake at 375 degrees F. for 25-30 minutes until baked through and slightly golden. Remove and let cool before filling.
- Store dough wrapped in plastic wrap for up to 1 week in the refrigerator or 2 months in the freezer.
Make the Apple Pie Filling
- To make apple pie filling add the apples to a large bowl and drizzle with lemon juice. Add sugar, flour, cinnamon and salt. Stir to combine.
Assemble Your Pie
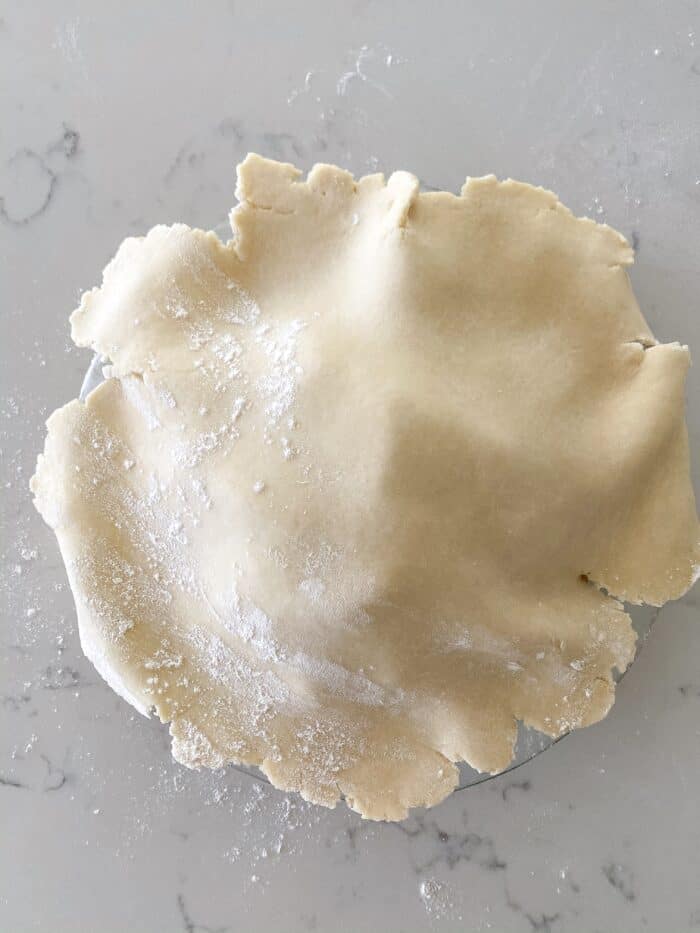
- Transfer filling to partially cooked crust. Roll out second pie crust and transfer to top of pie.
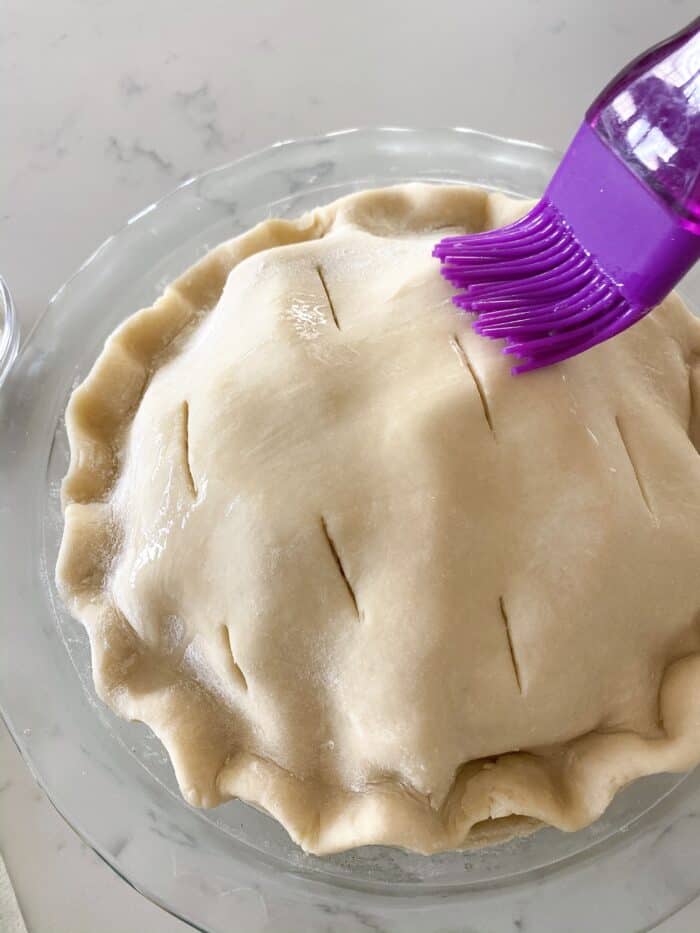
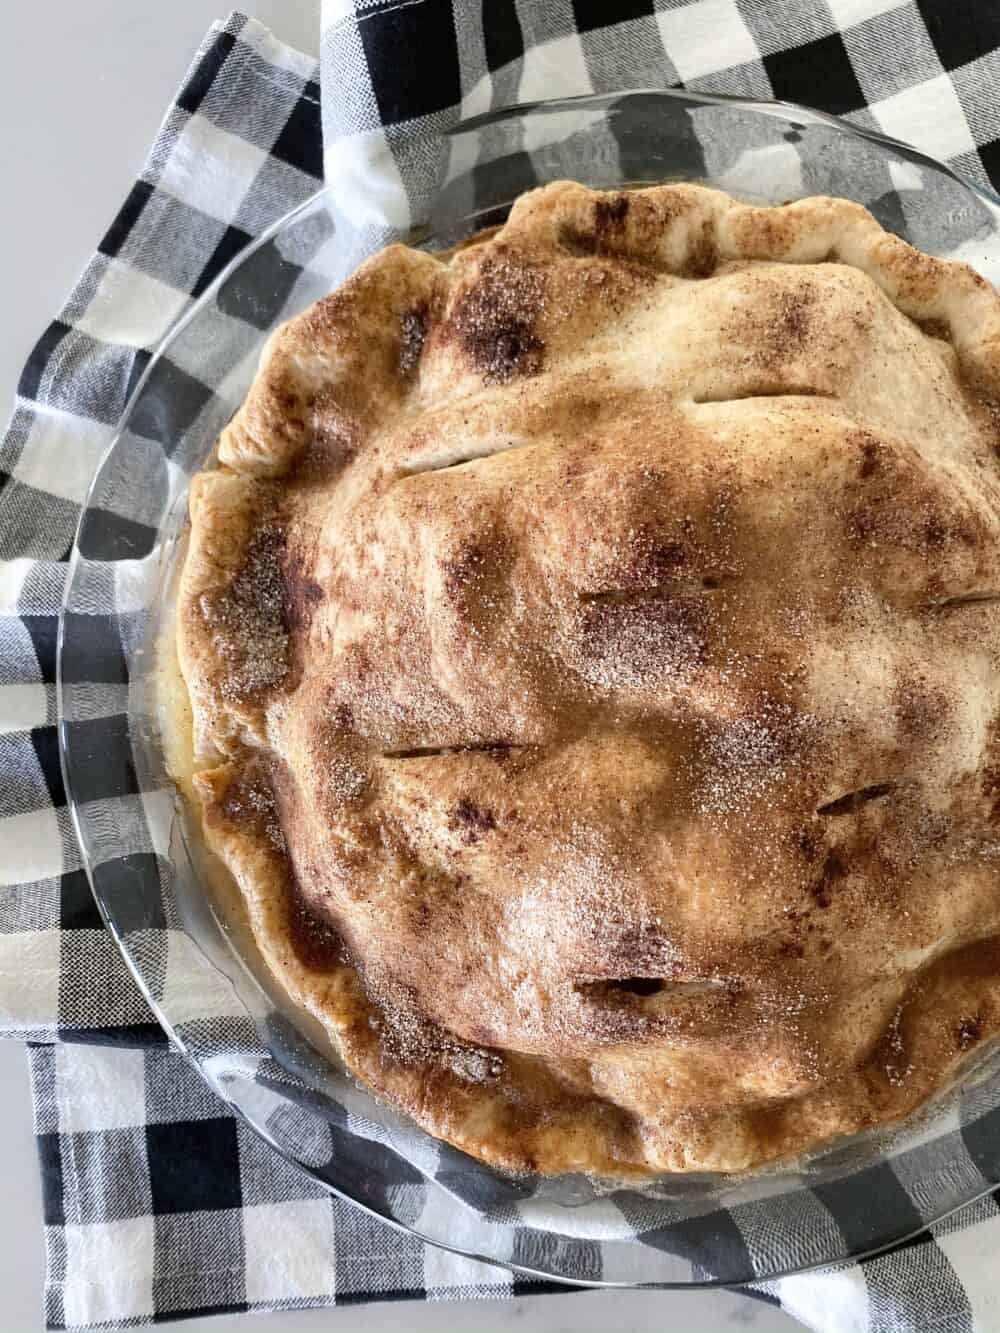
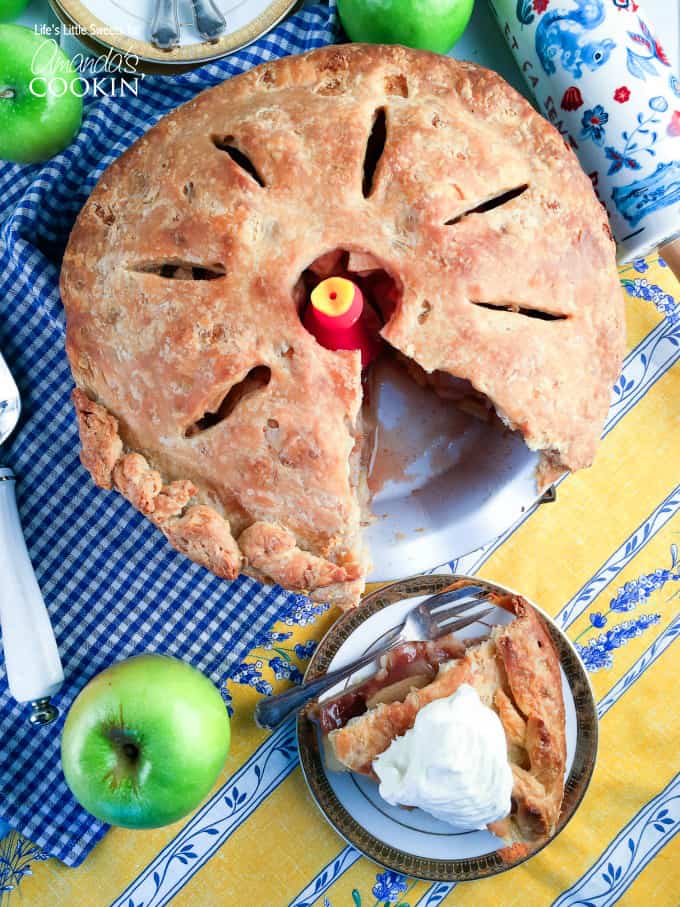
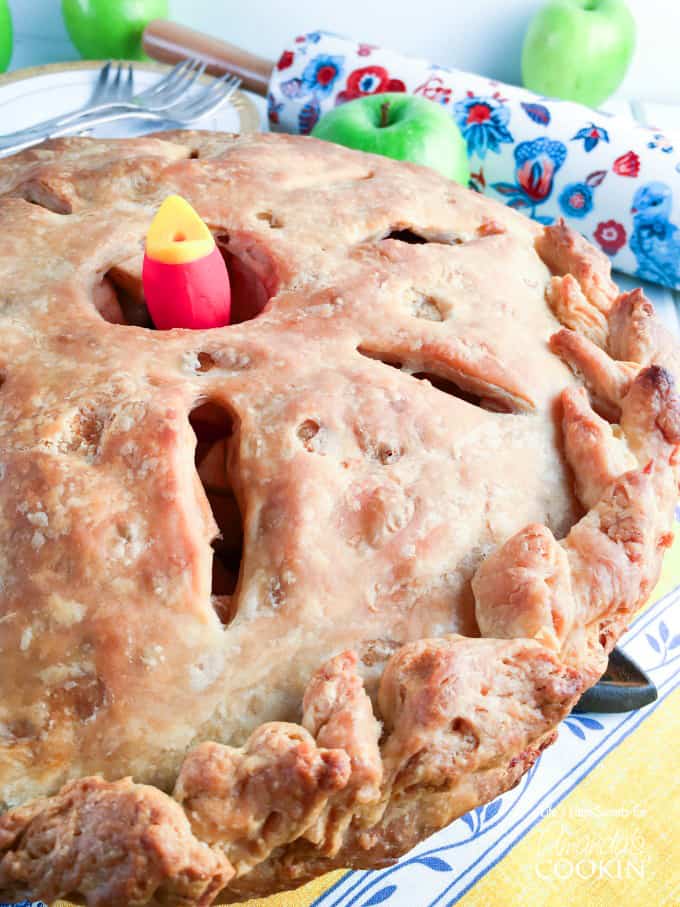
- Trim edges, fold under and crimp edges. Cut a few slits on top of pie crust for ventilation.
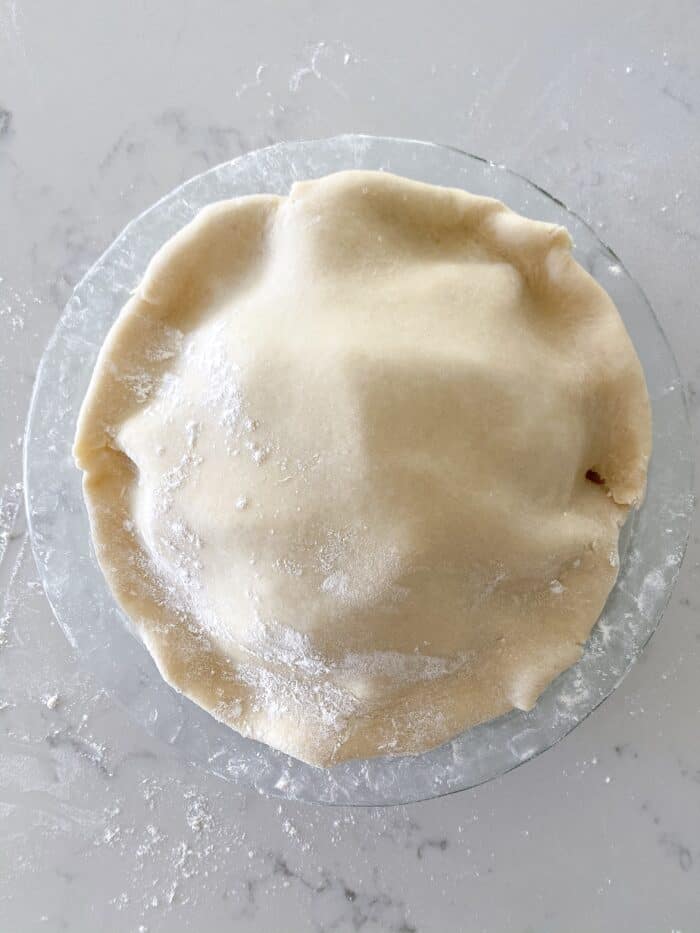
- Place egg whites and water in small bowl, whisk to combine and brush over top of pie crust.
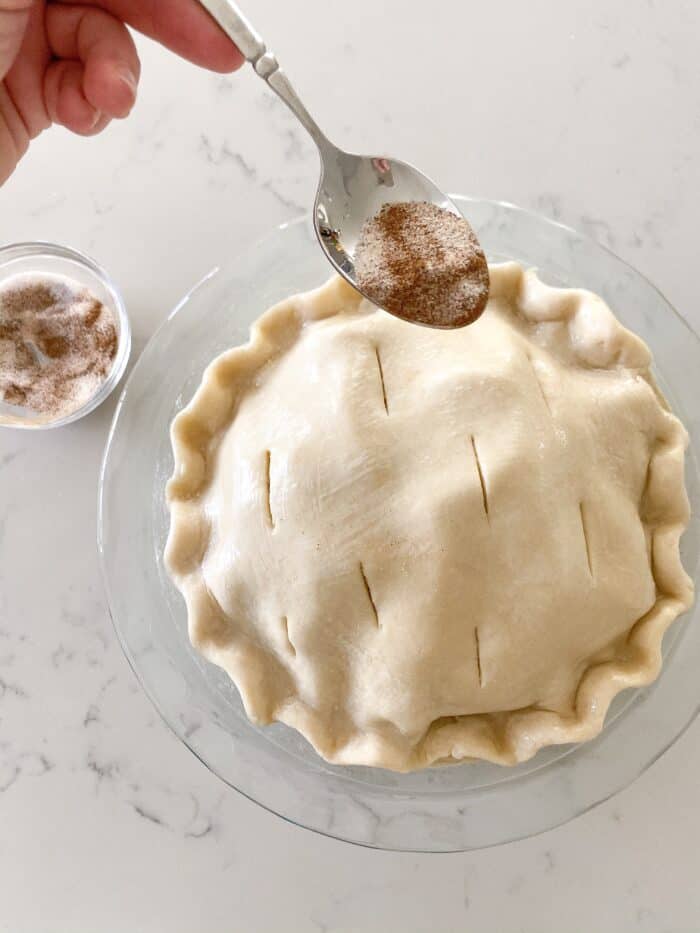
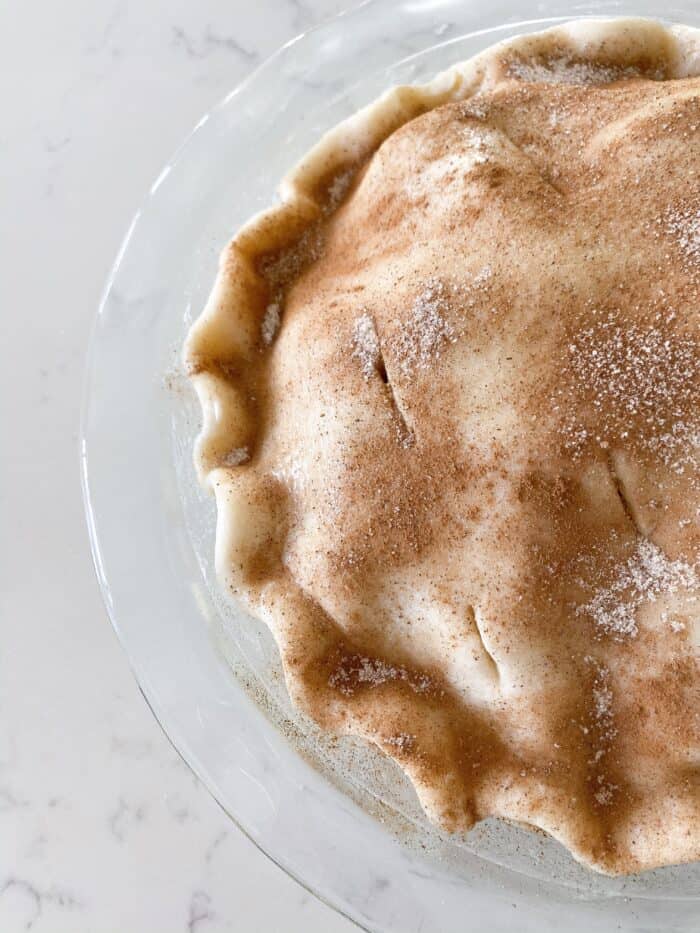
- For the topping, place sugar and cinnamon into a small bowl, stirring to combine. Sprinkle over top of pie crust.
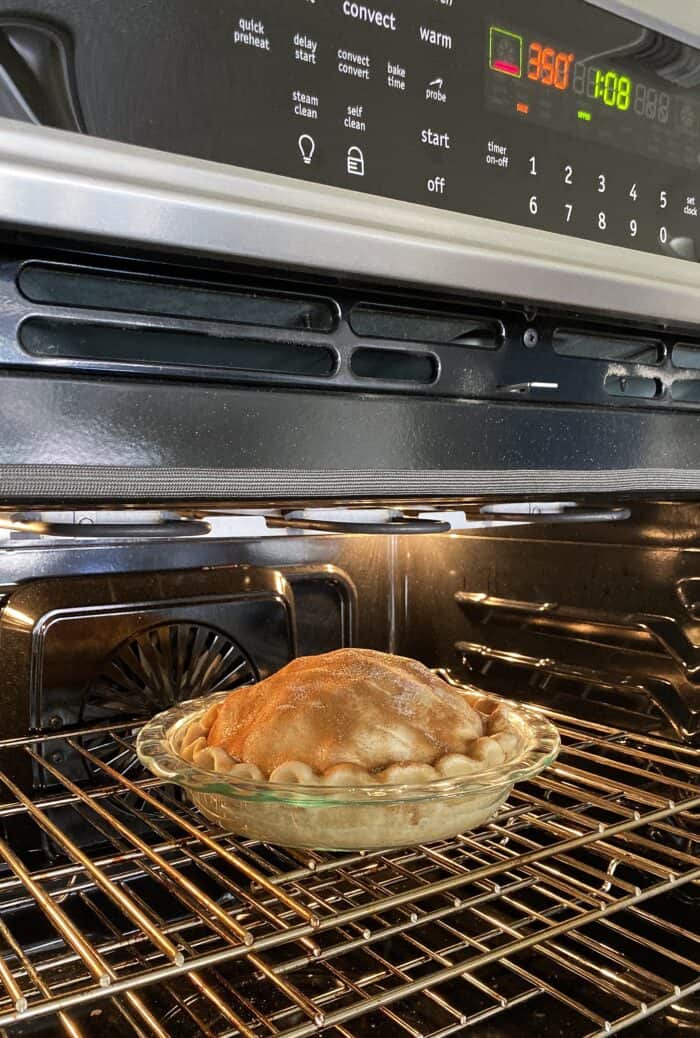
- Bake for 60 minutes, or until pie crust is golden brown. I always peek at the pie around 45 minutes then check every 10 minutes after that for doneness.
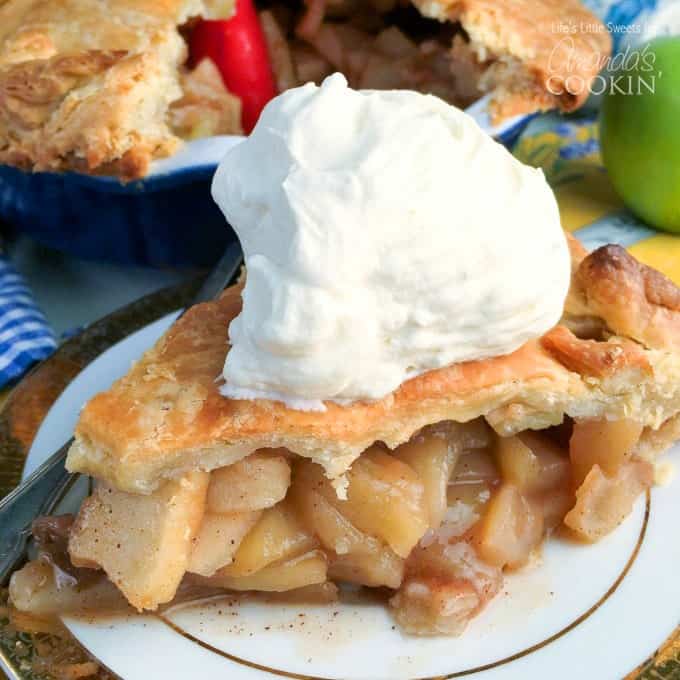
- Remove and let cool for an hour before slicing into wedges.
How Long Do You Bake Apple Pie?
Generally, you bake an apple pie for about an hour. The crust should be nice and golden. Every oven will be different, so check starting at 45 minutes to make sure it doesn’t get overcooked around the edges.
TIP: If your pie is browning too fast, you can loosely cover it with a sheet of aluminum foil to let the insides keep cooking while preventing the crust from continuing to brown too much. You can also add a rim that goes around the pie plate edges to prevent over-browning. You can find this at kitchen stores.
How To Serve
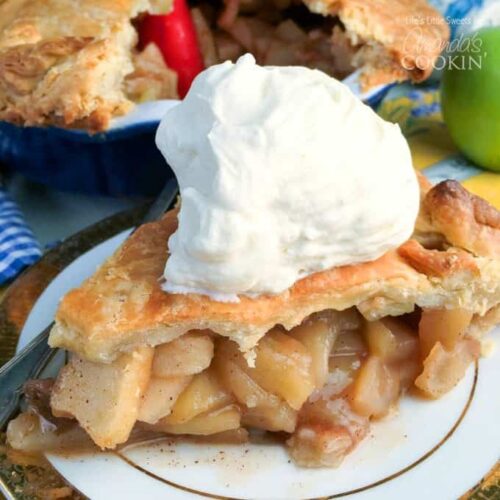
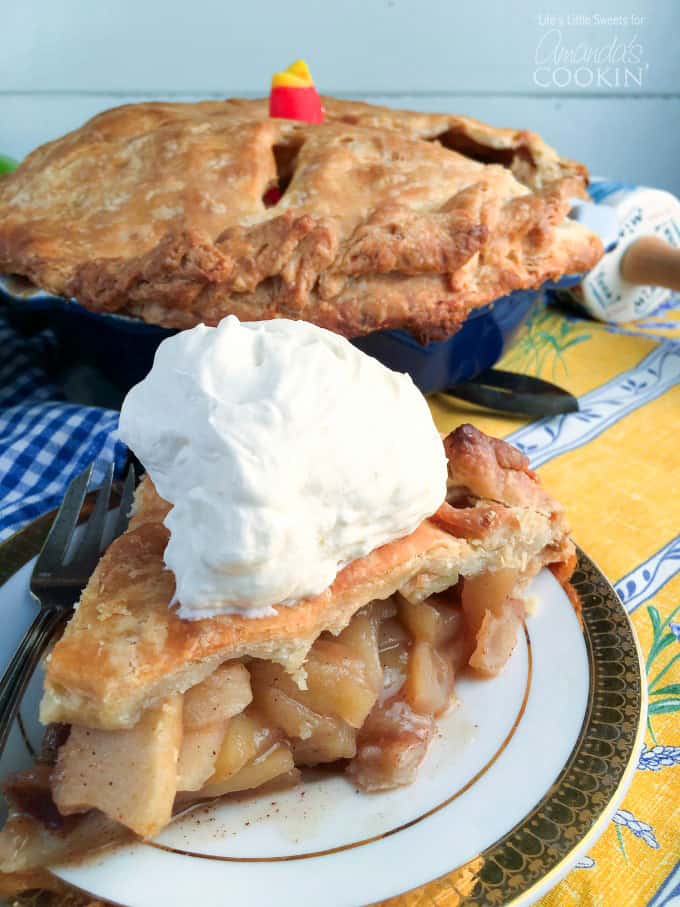
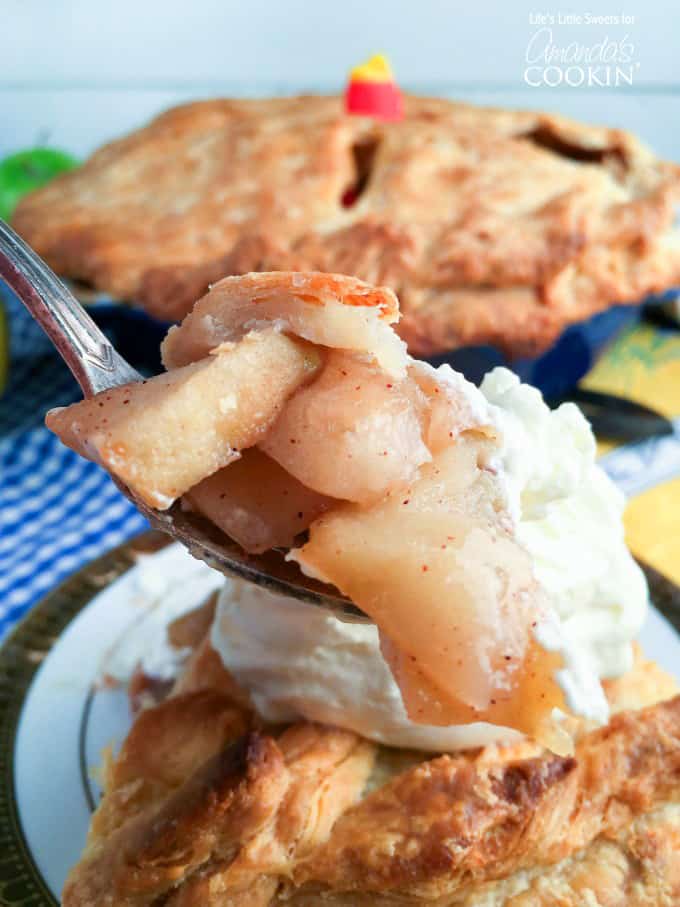
This pie is an absolute delight! I love the cinnamon sugar topping. Let the pie cool for a good hour before slicing into it. Serve with a dollop of fresh sweetened whipped cream or vanilla ice cream. I have included instructions for how to make whipped cream in the recipe card below, but you can also use the canned variety if that is your preference.
How To Store Pie
My preference is to store pie in the fridge, but you can also store it on the counter if you are baking for a holiday and fridge space is tight. In both cases, let your pie cool completely, then cover it with saran wrap. It will keep on the counter for 1-2 days and in the fridge for 3 days.
If you want to reheat your extras, I recommend cutting a slice of pie and then zapping it in the microwave for about 30-45 seconds until it is as warm as you want it to be. Add your toppings and then dig in!
Источник
Homemade Apple Pie
Author by Sara Maniez on November 27, 2016 Updated on October 29, 2021
This classic homemade apple pie has an incredible flavor with a buttery, crisp crust one can only dream about. Bring this epic homemade pie to your next holiday gathering and get ready for the fanfare it brings!
Homemade Apple Pie
The incredible aroma that this particular pie recipe has is amazing. The combination of honey, apples, cinnamon, vanilla and coconut sugar contribute to the perfect apple aroma. You’ll love the smell that comes wafting from the kitchen when this homemade apple pie is in the oven.
HOLIDAY FAVORITE – Be sure to check out our recipe for English Trifle or Homemade Pecan Pie for the holiday season!
Here’s what I have learned about making homemade apple pie. Good pie baking takes a lot of practice, but never let the idea of making a pie intimidate you. I have made this apple pie recipe and several other pie recipes, so many times that I have all the steps down.
If this is the first time you are making a pie, read and re-read the directions, give yourself ample time and you can always split up the steps and do the apple pie filling and/or pie crust the day before. Why not enlist a friend or family member as a helper? Once the “parts” of the pie are assembled, it’s just a matter of baking it.

This apple pie recipe comes from several years of practice and refining. It’s inspired by my Mile High Pear Pie recipe. I suggest serving it with a scoop of vanilla ice cream and/or my recipe for Vanilla Whipped Cream.
There are affiliate links in this post. That means if you buy something from that link, I will earn a small commission, but it won’t cost you anything additional.
Ingredients for Apple Pie
Filling:
- 3 pounds peeled and sliced (¼ inch thick) Granny Smith Apples or other variety good for baking
- ½ cup white granulated sugar (can substitute coconut sugar)
- ¼ cup brown sugar
- ¼ cup honey
- 2-3 tablespoons flour
- 1 tablespoon apple cider vinegar (can substitute fresh squeezed lemon juice)
- 1 teaspoon cinnamon
- 1 teaspoon vanilla extract
- ¼ teaspoon sea salt or kosher salt
Double Crust:
- 2-1/3 cups all-purpose unbleached flour, plus extra for rolling out dough
- 1 cup butter *solid, chilled (can substitute equal amount of coconut oil), plus more for greasing the pie plate
- 1 tablespoon granulated white sugar (can substitute coconut sugar)
- 1 tablespoon apple cider vinegar (can substitute fresh squeezed lemon juice)
- ¼ teaspoon sea salt or kosher salt
- 3/4 cup ice water, plus more, if needed
Helpful kitchen tools for making homemade pie
- 9″ x 2″ inch deep pie dish
- small, medium and large mixing bowls
- sharp knife and pie serving utensil
- vegetable peeler
- cutting board
- measuring spoons
- measuring cups
- apple slicer
- dough scraper
- pie weights or dried beans
- parchment paper
- aluminum foil
- pastry blender
- rolling pin
- pie bird, optional (this helps vent the pie filling and it can make the crust more crisp)
- pastry mat or large cutting board
- favorite cookie cutters for making decorative cutouts from the pie dough
Tips for Pie Making Success
- Cut butter into cubes and place in the freezer to chill before preparing dough, keeping the butter cold helps to make the crust flaky as it bakes!
- You can use a rolling pin specifically for pastry that is made out of ceramic or marble to help keep the crust cold, chill 5-10 minutes in the refrigerator before using.
- A pie bird vents the pie filling, helps to keep the pie filling from overflowing (although, I find that it doesn’t completely help with this) and can make the crust more crisp.
- Bake the pie on a baking sheet to prevent the pie filling from getting on the bottom of your oven, even if you use a pie bird, it’s a good idea just in case and it helps with handing the pie when taking it out of the oven.
- I recommend blind baking the bottom dough first using pie weights to keep the dough from bubbling up. This also helps keep the bottom crust from being wet and soggy.
- You can also add cornstarch to the pie filling if you are very worried about the filling being too wet
- Make sure to allow the pie to cool completely before slicing to allow the pie filling to set. If the pie is sliced when it’s hot, all the juice will flow out of it.
- When you chill the water for making the dough, chill 3/4-1 cup water, I generally use almost 3/4 ice water. You will need as little as 1/4 cup but it will depend on the humidity of the air you are working in. You can keep the ice water on hand if the dough dries out between handling/chilling sessions.
- You want nice big, gorgeous butter lumps in the crust pastry; make sure not to overwork the dough, it should not be too sticky nor falling apart.
- For the top crust, for easy handling, lay parchment paper down over a large cutting board (or pastry mat), roll out dough into a large circle (about 1/4″ inch thick) and then cover with plastic wrap and chill for a 1/2 hour in the refrigerator before handling again. Remember to always chill the dough between handling it for about a 1/2 hour, this is more time consuming but so worth getting that perfect crust.
- You have options for the thickness of the crust. You can roll it out to 1/4″ inch thick and just enough to cover the pie with none or some left over for cut outs. 1/4″ inch thickness is my favorite thickness because it makes the crust more sturdy for slicing and nice to bite into. Alternately, if you want to do a lot of cutouts on top of the pie, you can roll it out to 1/8″ thick and save any trimmings for cut outs to decorate the top of the pie.
- I wrote the recipe to make the pie filling first and then work on the double crust but you can reverse the order. In fact, it might make sense to depending on if you are spreading out making this over a couple days. I personally just like to marinate those apples for a while so they absorb the flavor of all the ingredients. You can cover and refrigerate the pie filling if you want, but if I am also making the double crust right away, I just leave it covered on the counter while I work with the dough.
- I do recommend Granny Smith apples because they are not overly sweet and hold up very well to baking.
- You can save time by purchasing a pre-made, double crust, however homemade dough is so delicious it’s worth it the extra effort if you’re willing.
- The egg wash is optional with this recipe. The photos show this homemade apple pie recipe without the egg wash. I went minimalist and opted not to have it because I felt this crust shines by itself.
I hope you enjoy this homemade apple pie, it is our family favorite!
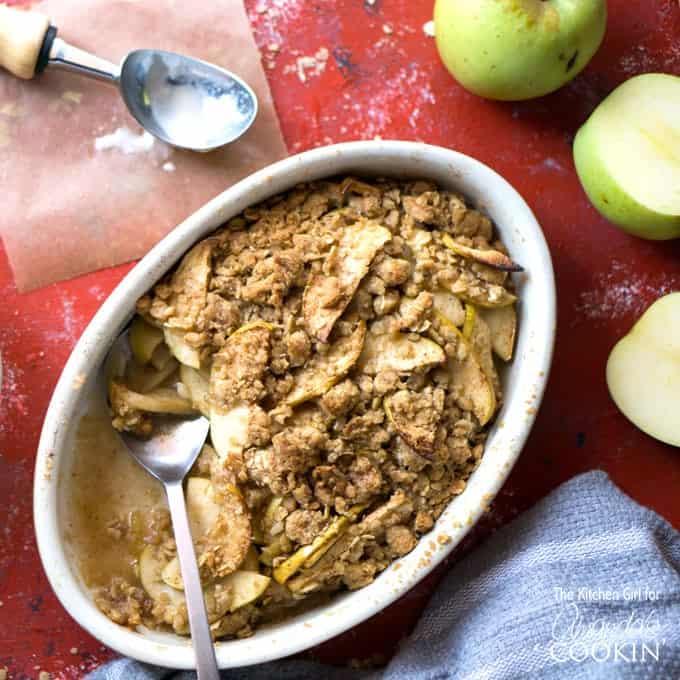
Have you done a lot of apple picking this year? Use up your apples with this Baked Apple Crisp! This Baked Apple Crisp will be your new go-to crisp recipe that the whole family will love. Add a scoop of vanilla ice cream to top it all off! Looking for more of a challenge? Try this amazing Christopsomos – a Greek apple pastry that is oh-so delicious!
Make sure you bookmark or pin my strawberry pie. You won’t regret it! And finally, check out these mini apple pies!
Источник


