- How to create a new Apple ID
- Create an Apple ID on your iPhone, iPad, or iPod touch
- Create an Apple ID when you set up your device
- Create an Apple ID using the App Store on your device
- Create an Apple ID on your Mac
- Create an Apple ID on your Windows PC
- Create an Apple ID on another device
- Create an Apple ID on the web
- If you see a message that you need to sign in to iTunes
- Learn more
- Set up cellular on Apple Watch
- Before you start
- Set up cellular on Apple Watch
- Set up cellular on a family member’s Apple Watch
- Connect to a cellular network
- Changing carriers
- Transfer your cellular plan to a new Apple Watch
- Remove your cellular plan
How to create a new Apple ID
Use the same Apple ID to enjoy all Apple services. All you need is your full name, date of birth, an email address, and phone number.
Not sure if you have an Apple ID, or forgot what it is? To find your Apple ID, enter your name and email address at iforgot.apple.com.
Create an Apple ID on your iPhone, iPad, or iPod touch
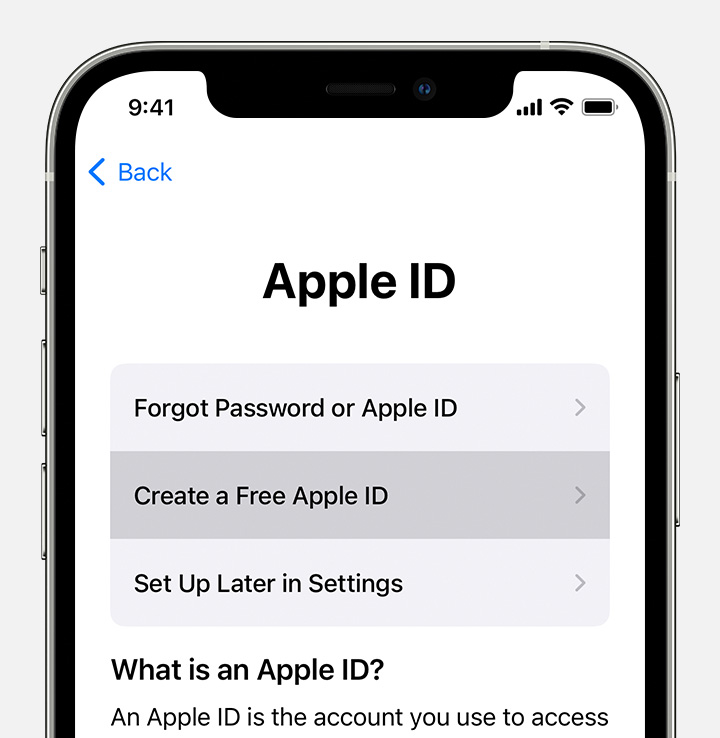
Create an Apple ID when you set up your device
- Tap «Forgot password or don’t have an Apple ID?».
- Tap Create a Free Apple ID.

- Select your birthday and enter your name. Tap Next.
- Tap «Use your current email address», or tap «Get a free iCloud email address.»
- When prompted, follow the onscreen steps to verify your email address and set up two-factor authentication. If you choose to skip this step, you’ll be prompted to do this later in Settings.
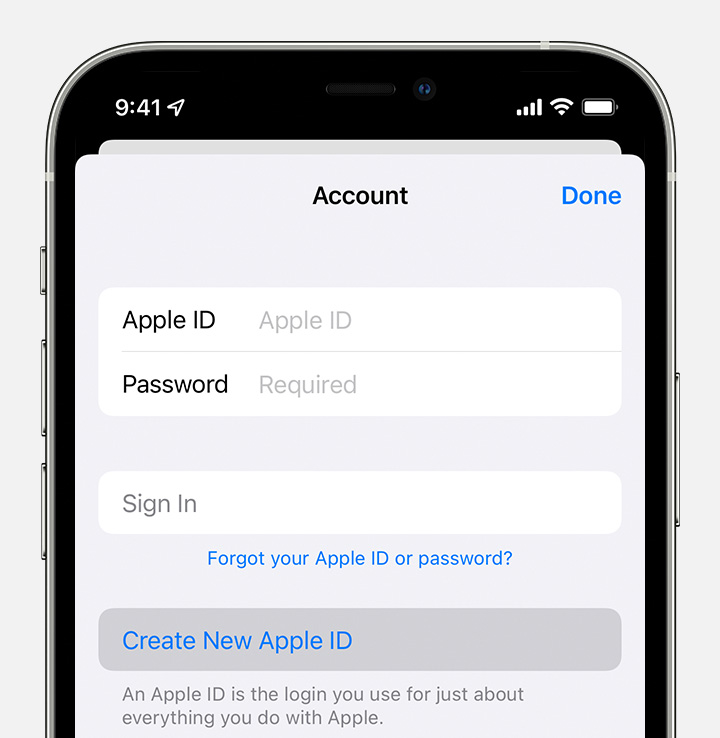
Create an Apple ID using the App Store on your device
- Open the App Store and tap the sign-in button .
- Tap Create New Apple ID. If you don’t see this option, make sure that you’re signed out of iCloud.
- Follow the onscreen steps. The email address that you provide will be your new Apple ID.*
- Enter your credit card and billing information, then tap Next. You can also choose None. Learn what to do if None isn’t showing or you can’t select it. You won’t be charged until you make a purchase.
- Confirm your phone number. This can help to verify your identity and recover your account if needed. Tap Next.
- Check your email for a verification email from Apple and verify your email address.
After you verify your email address, you can use your Apple ID to sign in to the iTunes Store, App Store, and other Apple services such as iCloud.
* In China mainland, you might be required to provide a +86 phone number for your Apple ID. You can change the number later, or change your country or region to a location that doesn’t require it. This number is only used for verification purposes.
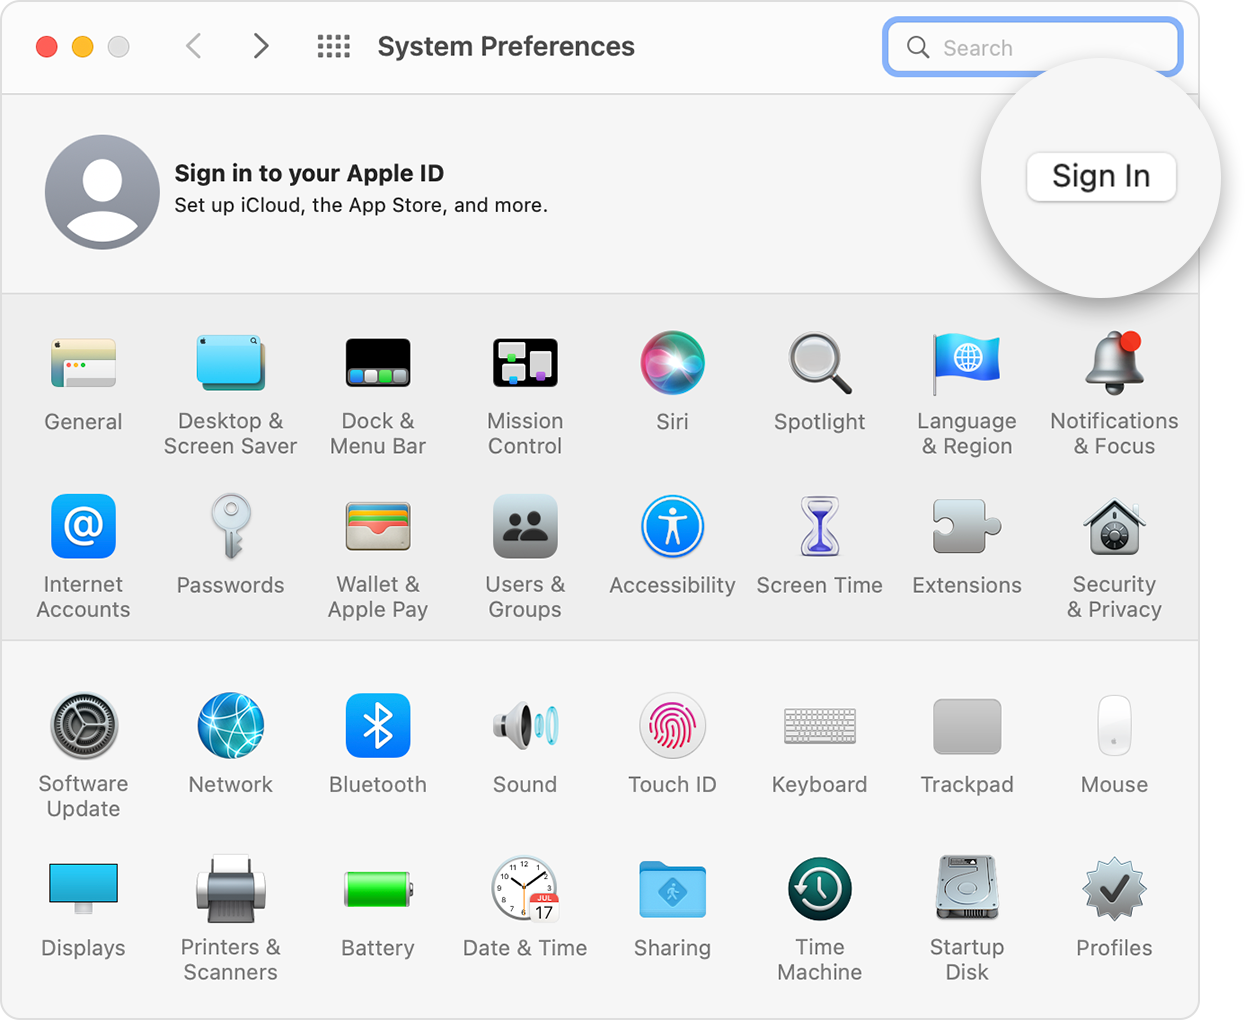
Create an Apple ID on your Mac
- Choose Apple menu > System Preferences.
- Click Sign In.
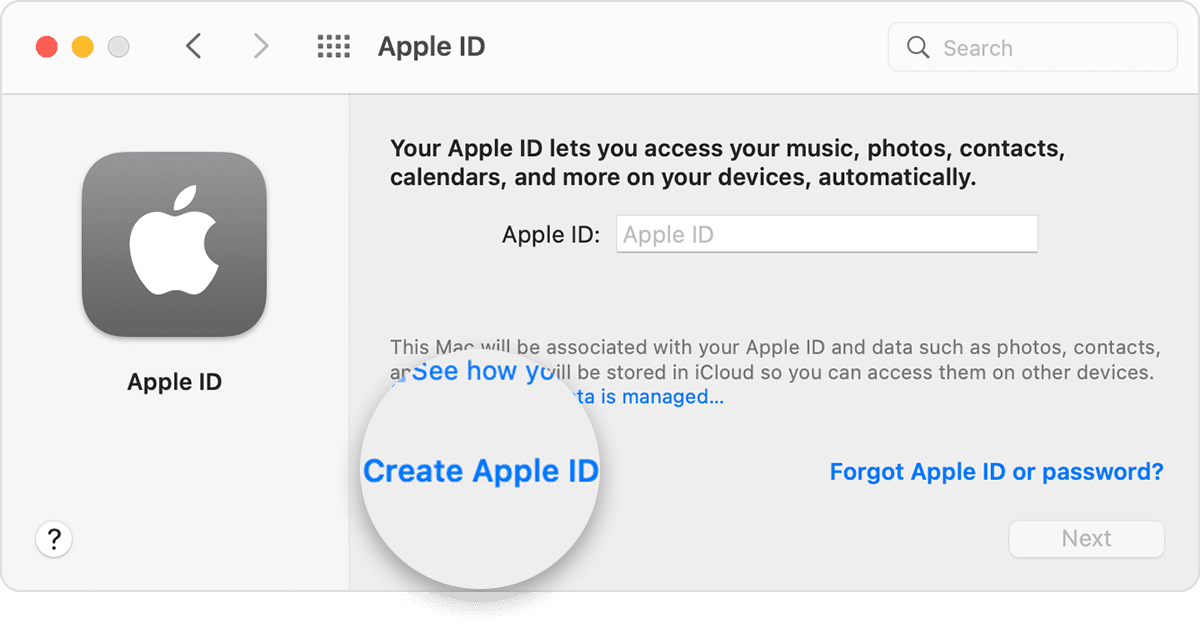
- Click Create Apple ID, then follow the onscreen steps. The email address that you provide will be your new Apple ID.*
- Enter your credit card and billing information, then click Continue. You can also choose None. Learn what to do if None isn’t showing or you can’t select it. You won’t be charged until you make a purchase.
- Check your email for a verification email from Apple and verify your email address.
After you verify your email address, you can use your new Apple ID to sign in to the App Store and other Apple services such as iCloud.
* In China mainland, you might be required to provide a +86 phone number for your Apple ID. You can change the number later, or change your country or region to a location that doesn’t require it. This number is only used for verification purposes.
Create an Apple ID on your Windows PC
- Open iTunes for Windows. Make sure that you have the latest version.
- From the menu bar at the top of your computer screen or at the top of the iTunes window, choose Account > Sign In. Then click Create New Apple ID.
- Follow the onscreen steps. The email address that you provide will be your new Apple ID.*
- Enter your credit card and billing information, then click Continue. You can also choose None, and learn what to do if None isn’t showing or you can’t select it. We’ll charge you only when you make a purchase.
- Check your email for a verification email from Apple and verify your email address.
* In China mainland, you might be required to provide a +86 phone number for your Apple ID. You can change the number later, or change your country or region to a location that doesn’t require it. This number is only used for verification purposes.
Create an Apple ID on another device
To create an Apple ID on an Apple TV, Android device, smart TV, or streaming device, you can usually follow the steps provided onscreen and enter your full name, date of birth, an email address or phone number, and a payment method. If you set up the Apple TV app on your smart TV, you might be redirected to activate.apple.com to create your Apple ID. You can also use the steps below to create your Apple ID on the web.
Create an Apple ID on the web
- Go to appleid.apple.com and click Create Your Apple ID.
- Follow the onscreen steps. The email address that you provide will be your new Apple ID.*
- Enter a phone number that you can always access.
- Check the boxes to subscribe to Apple Updates if you’d like. This keeps you up to date on the latest news, software, products, and services from Apple.
- Click Continue.
- Follow the onscreen steps to verify your email address and phone number.

After you verify your email address, you can use your new Apple ID to sign in to the iTunes Store and other Apple services such as iCloud.
* In China mainland, you might be required to provide a +86 phone number for your Apple ID. You can change the number later, or change your country or region to a location that doesn’t require it. This number is only used for verification purposes.
If you see a message that you need to sign in to iTunes
If you created a new Apple ID on the web and see a message that you need to sign in to iTunes, follow the steps below for your device:
- On an iPhone, iPad, or iPod touch: Open Settings, then tap «Sign into device» and sign in with your Apple ID.
- On a Mac: Choose Apple menu > System Preferences, then select Apple ID and sign in with your Apple ID.
- On an Apple TV: Sign in to the App Store, iTunes Store, or Apple Music with your Apple ID.
- On a PC: Sign in to iTunes with your Apple ID.
- On an Android device: Sign in to Apple Music on Android with your Apple ID.
Learn more
- An Apple ID is the account you use to access Apple services like iCloud, the App Store, the iTunes Store, Apple Music, and more.
- If you see a message that says that the email address that you entered is already associated with an Apple ID, you might have already created an Apple ID. Try signing in with that email address. If you don’t remember your password, you can reset your password to regain access to your account.
- Already have an Apple ID? Sign in to all Apple services on your device.
- Learn how to change or remove your Apple ID payment information.
- Learn about how two-factor authentication protects your Apple ID.
Store availability and features might vary by country or region.
Источник
Set up cellular on Apple Watch
With a cellular connection on Apple Watch, you can make calls, reply to messages, receive notifications, and more—even while you’re away from your iPhone.
Before you start
- Make sure that you have the latest software on your iPhone and your Apple Watch.
- Check for updates to your carrier settings.
- Make sure that you have an eligible cellular service plan with a supported carrier. Your iPhone and Apple Watch must use the same carrier,* and you must be within your carrier’s network when you set up cellular on your watch.
- If you have an enterprise or corporate cellular service plan, check with your company or carrier to see if they support this feature. Pre-paid accounts and some older accounts aren’t currently supported. To make sure that your account is eligible, contact your carrier.
* An Apple Watch that you set up for a family member can use a different carrier than your iPhone uses.

Set up cellular on Apple Watch
You can activate cellular when you first set up your Apple Watch, or when you set up a watch for a family member. During setup, look for the option to set up cellular, then follow the onscreen steps.
You can also set up cellular later from the Apple Watch app:
- On your iPhone, open the Apple Watch app.
- Tap the My Watch tab, then tap Cellular.
- Tap Set Up Cellular.
- Follow the instructions for your carrier. You might need to contact your carrier for help.
Set up cellular on a family member’s Apple Watch
You can set up a cellular Apple Watch for a family member who doesn’t have their own iPhone. If your cellular carrier supports the use of a managed Apple Watch, you’re given the option to add the watch to your plan during setup. Look for the option to set up cellular, then follow the onscreen steps. If your carrier doesn’t support it, you might be able to use an alternative carrier.
If you don’t set up cellular on your family member’s Apple Watch initially, you can do it later with these steps:
- Open the Watch app on your iPhone.
- Tap All Watches, tap your family member’s Apple Watch, then tap Done.
- Tap Cellular, then tap Set Up Cellular.
- Follow the instructions for your carrier. You might need to contact your carrier for help.
To see the phone number assigned to your family member’s Apple Watch after you set up cellular, go to Settings on the watch, then tap Phone.
Setting up a managed Apple Watch for a family member is available only in certain countries or regions.
If you’re in China mainland, you must verify your identity when setting up cellular on a family member’s Apple Watch, as required by local regulations. Contact your carrier for further assistance if needed.
Connect to a cellular network
Your Apple Watch with cellular automatically switches to the most power-efficient wireless available: It can connect to your iPhone when itʼs nearby, a Wi-Fi network, or cellular. When your watch connects to cellular, it uses LTE networks. If LTE isn’t available, your watch will try to connect to UMTS if your carrier supports it.
When your watch connects to a cellular network, you can check the signal strength from Control Center or the Explorer watch face. To open Control Center, touch and hold the bottom of the screen, then swipe up.
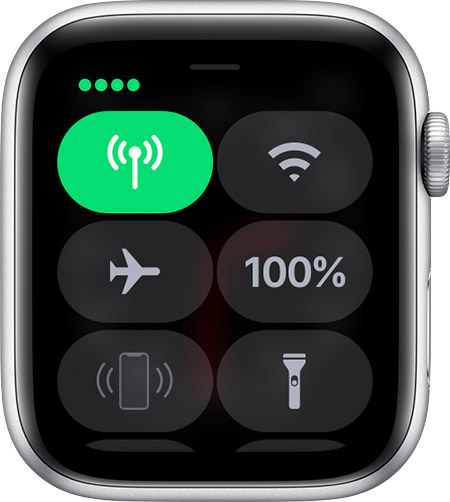
The Cellular button turns green when you have a connection. The green dots show the signal strength.
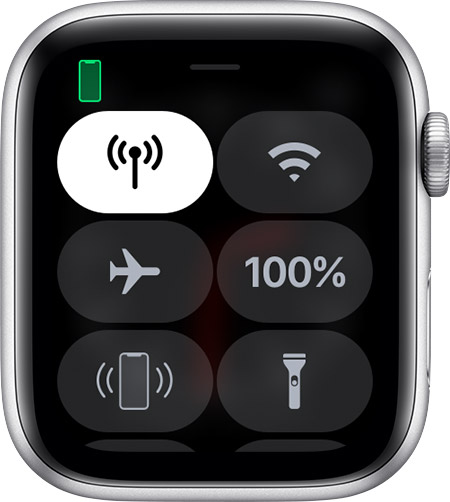
The Cellular button turns white when your cellular plan is active, but your watch is connected to your iPhone using Bluetooth or Wi-Fi.
![]()
Changing carriers
Your iPhone and Apple Watch must use the same carrier, unless the watch was set up for a family member who doesn’t have an iPhone. If you change carriers on your iPhone,* you need to remove the previous service plan on your Apple Watch and sign up for a new plan. Here’s how:
- On your iPhone, open the Apple Watch app.
- Tap the My Watch tab, then tap Cellular.
- Your Apple Watch should automatically switch to the carrier that your iPhone is using. If you need to add a new plan, tap Add a New Plan, then follow the onscreen steps. If your previous plan still appears in the Apple Watch app, you can remove it.
If you need help, contact your carrier.
* Carrier fees may apply. Contact your carrier for details.
Transfer your cellular plan to a new Apple Watch
When you’re ready to start using a new Apple Watch, you can transfer cellular service from your old watch to your new one. Here’s how:
- Remove the cellular plan from your old Apple Watch. You can do this from the Apple Watch app or by erasing your old Apple Watch.
- Pair your new Apple Watch with your iPhone. During setup, tap “Set up Cellular” to add a cellular plan.
- Some carriers allow you to transfer your existing plan to your new Apple Watch directly from the Apple Watch app.
- If you don’t see an option to transfer your cellular plan, contact your carrier for help.
Remove your cellular plan
You can remove your cellular plan at any time:
- On your iPhone, open the Apple Watch app.
- Tap the My Watch tab, then tap Cellular.
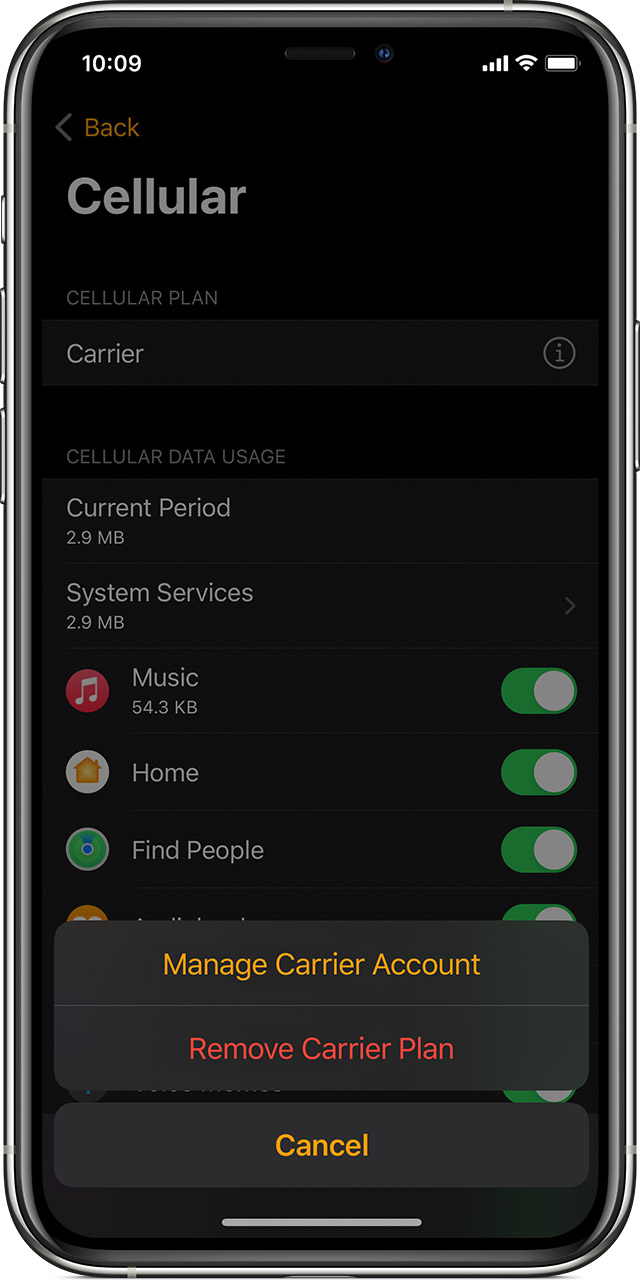
- Tap the information button next to your cellular plan at the top of the screen.
- Tap Remove [carrier] Plan. Tap again to confirm.
- If you aren’t going to pair again, you might need to contact your carrier to cancel your cellular subscription.*
When you erase and unpair your Apple Watch, you also get the option to remove the plan from your Apple Watch. When asked, choose Erase All to remove the plan.
* Carrier fees may apply. Contact your carrier for details.
Источник


