- American apple pie
- Difficulty
- Ingredients
- Utensils
- How-To Videos
- How to core and slice an apple
- How to fit dough into a pie dish
- Nutrition per serving
- More delicious ideas for you
- Step 1/6
- Step 2/6
- Step 3/6
- Step 4/6
- Step 5/6
- Step 6/6
- Perfect apple pie
- Ingredients
- For the filling
- For the pastry
- Method
- Let’s Bake an Apple Pie
- First Things First, Let’s Make Our Own Pie Crust
- For a perfect crust every time:
- Let’s Bake a Naturally Sweetened Apple Pie
- Subscribe For Free!
American apple pie

Difficulty
Ingredients
| 400 g | butter (cold, divided) |
| 520 g | all-purpose flour (divided) |
| 1 | egg yolk |
| ½ tsp | salt |
| 170 g | sugar |
| 60 ml | water |
| 8 | apples |
| ½ | lemon |
| ½ tsp | cinnamon |
| ¼ tsp | nutmeg |
| 100 g | brown sugar |
| 1 | egg white |
Utensils
- stand mixer
- plastic wrap
- oven
- rolling pin
- pie dish
- pie weights
- parchment paper
- cutting board
- knife
- large bowl
- cooking spoon
- pastry brush
How-To Videos

How to core and slice an apple

How to fit dough into a pie dish
Nutrition per serving
More delicious ideas for you
Sour cherry pie
Marbled coffee cake
Double chocolate beetroot cake
Step 1/6

- 360 g butter
- 500 g flour
- 1 egg yolk
- ½ tsp salt
- 120 g sugar
- 60 ml water
- stand mixer
- plastic wrap
Cut some of butter into large pieces and add to a stand mixer with most of flour, egg yolk, salt, and sugar. Beat for approx. 2 – 3 min. until crumbly. Then, slowly add water, reserving a small amount for the final step, and continue to beat for another 1 – 2 min. until dough is smooth and uniform in consistency. Wrap dough in plastic wrap and transfer to refrigerator. Allow to set for approx. 1 h.
Step 2/6

- flour for surface work
- oven
- rolling pin
Preheat oven to 180°C/350°F. Cut dough into two even rounds. Then, flour work surface, place dough on top, and roll out, one at a time, using a rolling pin until rounds are larger than your pie dish.
Step 3/6

- pie dish
- pie weights
- parchment paper
Flour both sides of dough and transfer to pie dish. Press evenly into all edges of dish and then remove excess dough. Place a piece of parchment paper on top of dish and fill with pie weights. Place in preheated oven at 180°C/350°F and blind bake for approx. 10 min.
Step 4/6

- 8 apples
- cutting board
- knife
Peel, core, and quarter apples. Then, cut crosswise into medallion-sized pieces.
Step 5/6

- ½ lemon
- ½ tsp cinnamon
- ¼ tsp nutmeg
- 2 tbsp flour
- 50 g sugar
- 100 g brown sugar
- large bowl
- cooking spoon
In a large bowl, thoroughly mix together apple, lemon juice, cinnamon, nutmeg, flour, sugar, and brown sugar.
Step 6/6

- 40 g butter
- 1 egg white
- 1 tsp water
- pastry brush
Transfer apple slices to pie dish and spread out evenly. Cut remainder of butter into pieces and place on top of apples. Cover pie with rest of dough. Make a small hole in the middle, so air can escape. Mix together egg white and water and brush on top. Return to oven and bake at 180°C/350°F for approx. 50 – 55 min. until golden brown. Enjoy!
Источник
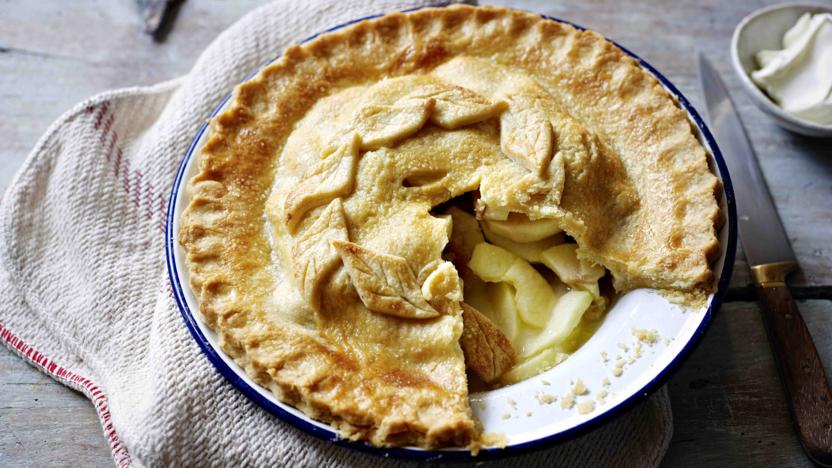
Perfect apple pie
less than 30 mins
30 mins to 1 hour
The Hairy Bikers’ Bramley apple pie recipe will help you perfect your pastry. A deep pie dish is essential for fitting in as many hot, fluffy apples as you can. Serve with vanilla ice cream.
![]()
less than 30 mins
30 mins to 1 hour
Ingredients
For the filling
- 5oz golden caster sugar, plus 1 tbsp for sprinkling
- 1 tsp ground cinnamon
- 2 tbsp cornflour
- 600g/1lb 5oz Bramley cooking apples, peeled, cored, sliced
For the pastry
- 400g/14oz plain flour, plus extra rolling
- 2 tbsp caster sugar
- 1 lemon, zest only
- 250g/10oz cold butter, cut into cubes
- 1 free-range egg, beaten with 2 tbsp cold water, plus 1 free-range egg, beaten, to glaze
Method
For the pastry, place the flour, sugar and lemon zest into a bowl and rub in the butter until the mixture resembles breadcrumbs. Add the beaten egg and stir with a round-bladed knife until the mixture forms a dough.
Set aside one-third of the pastry for the lid. Roll out the remaining pastry on a lightly floured surface until the thickness of a pound coin and 5-7cm/2-3in larger than the pie dish. Lift the pastry over the rolling pin and lower it gently into the pie dish.
Press the pastry firmly into the dish and up the sides, making sure there are no air bubbles. Chill the fridge for a few minutes.
Preheat the oven to 200C/180 (fan)/Gas 6. Place a baking tray into the oven to preheat.
For the filling, mix the sugar, cinnamon and cornflour in a large bowl. Stir in the apples.
Place the apple filling into the pie dish, making sure that it rises above the edge. Brush the rim of the dish with beaten egg.
Roll out the reserved ball of pastry. Cover the pie with the pastry and press the edges together firmly to seal. Using a sharp knife, trim off the excess pastry, then gently crimp all around the edge. Make a few small holes in the centre of the pie with the tip of a knife. Glaze the top with beaten egg.
Lightly knead the pastry trimmings and re-roll. Cut into leaf shapes place all around the edge of the pie, slightly overlapping each other, and glaze with more egg. Sprinkle the pie with sugar and bake in the centre of the oven for 45–55 minutes or golden-brown all over and the apples are tender.
Источник
Let’s Bake an Apple Pie
T he temperatures are dropping and school has officially started. This is my first time as a parent with a child at school and I have to admit, the first couple of weeks I was heartbroken. I missed my little guy during the days and what made it worse, he was having a rough time being away as well.
Now that he’s adjusted and quite happy to be in kindergarten, I’ve been on the upswing. I have found myself with more time on my hands and, in this season, there is nothing more relaxing than baking an apple pie.

All photos by Diana Bauman
With my 3 year old at home, we’ve been able to turn up the music, dance and bake. There’s so much freedom and peace in listening to good music and playing in the kitchen.
What’s even more rewarding is that the older boys are happy to see what you’ve created after a long day of school and work. I’m starting to enjoy these school days and the season in which I have found myself.
So, with fresh local apples at every farmers’ market (or your neighbor’s tree) let’s have some fun. Let’s bake an apple pie!
First Things First, Let’s Make Our Own Pie Crust
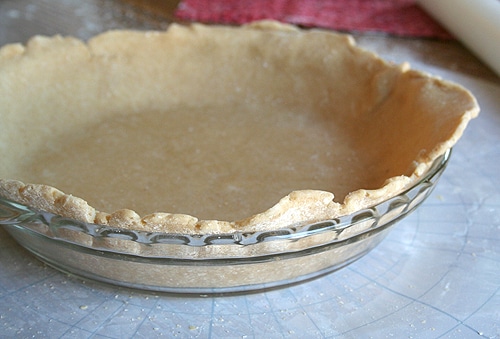
With only a few simple ingredients and a food processor, making a pie crust can be simple and quick to make.
This is my go-to recipe for a buttery, rich, flaky crust. A traditional French Pâte Brisée.
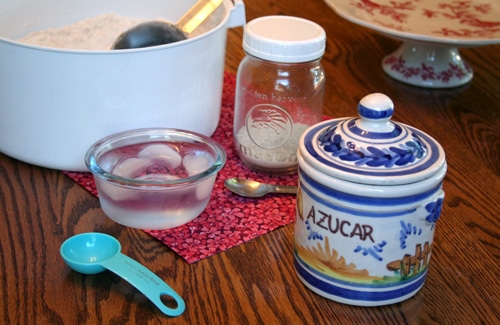
For a perfect crust every time:
- Keep all ingredients cold
- Do not over process the dough
- Use ice-water
- Allow your finished dough to rest in the refrigerator for at least 1 hour
For my pie crust, I grind my own whole wheat grain using soft white wheat berries. This is what you would find at the store called Whole Wheat Pastry Flour. In my opinion, store bought whole wheat flour does not compare to milling your own grain at home. It’s much heavier and in my opinion, gritty. If you do not grind your own grain, I would suggest using an unbleached all purpose white flour.
**For a video tutorial for this pie crust, head over to A Little Bit of Spain in Iowa and join me in my kitchen as I mix it up!**
Ingredients for a two crust pie:
- 2 1/2 cups flour
- 1 tsp salt
- 1 tsp sugar
- 2 sticks unsalted butter
- 6-10 tablespoons cold water (This is quite a gap in measurements, however, since I use freshly milled grains, it’s much lighter and I only need around 6tbls of water. If you’re using store bought flour, you will most likely need anywhere from 8-10tablespoons)
Method:
1. In a food processor combine the flour, salt and sugar. Blend to incorporate.
2. Cut the butter in small pieces, making sure to not handle it too much. Your hands will give off quite a bit of heat and it’s important to keep your butter as cold as possible.
3. Add the butter to the flour mixture and pulse 6-8 times or until the mixture resembles a coarse grain. Do not over process.
4. Add 1 tablespoon at a time of water and pulse. Continue to do this until the dough just begins to hold together without being wet or sticky. Again, do not over process.
5. The dough should not stick together in a ball-shaped form. It should just begin to hold. Once you’re at this stage, empty the dough “pieces” onto the counter and shape quickly into a rounded ball. Divide into two balls.
6. Quickly shape each piece into a disc and wrap in plastic. Do not overwork.
7. Place the dough in the refrigerator for at least 1 hour before using.
The dough will keep in the refrigerator for 2 weeks or frozen for up to a month.
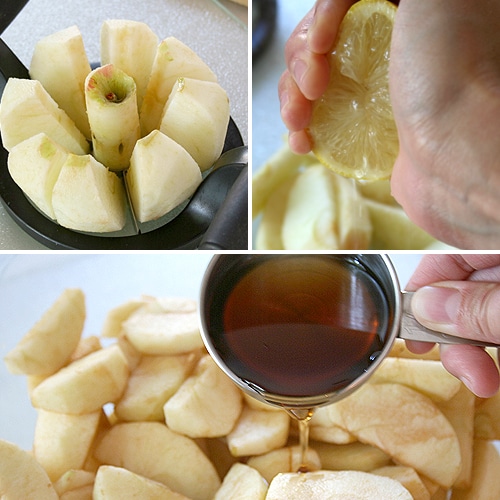
Let’s Bake a Naturally Sweetened Apple Pie

Now that our pie crust has been made, putting together a filling for apple pie is a breeze. What’s great about this version is that it uses real maple syrup as the sweetener. Its sweet maple flavor lends itself beautifully to the apples and cinnamon; no one would ever guess that a granulated sugar wasn’t used.
Ingredients:
- 7 large local apples, (Some prefer tart, others don’t. It’s up to you which variety to use), peeled and sliced thinly
- 1/2 lemon
- 2 tbsps melted butter
- 1/2 cup real maple syrup
- 1 tsp cinnamon
- 1 tsp nutmeg
- 3 tbsps flour
1. While peeling and slicing your apples, place in a large bowl and add the juice of 1/2 a lemon. Make sure to toss the apples in the lemon juice as you keep adding them to the bowl to prevent from discoloring. Once all the apples have been peeled and sliced, add the butter and maple syrup to the bowl. Mix well.
2. In a smaller bowl, combine the cinnamon, nutmeg and flour. Add to the apples and toss to incorporate.

3. Roll out one pie crust and line into a pie dish. Add the apple mixture into the pie crust, making sure to drizzle any remaining liquid on top.

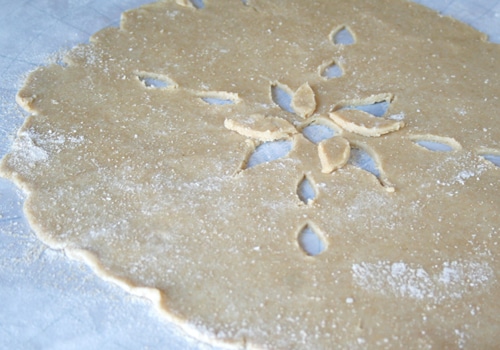
4. Roll out the top pie crust, cutting out any decorations into the crust.
5. Carefully, lift the top pie crust and cover the pie. Pinch the sides of the pie closed and sprinkle with organic sugar.
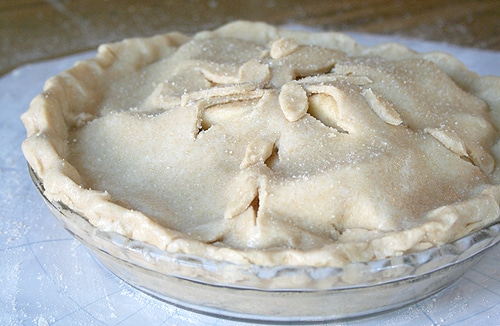
6. Bake at 450°F for 10 minutes. Lower the heat to 350°F and continue to bake for an additional 40-45 minutes.
Allow to rest for at least 1 hour before you cut through. The liquids will thicken as it cools.
What’s your favorite dish to make or treat to bake while jamming to your favorite tunes in the kitchen?
As a first generation American, Diana shares her family’s traditional Spanish and Mexican recipes at her blog, A Little Bit of Spain in Iowa. As a mami and urban homesteader she also writes about her faith, family, organic gardening, raising backyard chickens and preserving the harvest.
Subscribe For Free!
Like reading this post?
Get more delivered to your email inbox.
Источник


