- How to change the default icon of Android App
- How to change android app icon in Android Studio
- How to change android app icon in Android Studio.
- How To Change Your Android App Icon
- How to create adaptive icons for Android using Android Studio
- How to Update the Launcher Icon for Your Android App
- What Is Image Asset Studio?
- Using Image Asset Studio
- How to Update an Icon Using Image Asset Studio
- Create an Adaptive Launcher Icon
- Create a Legacy Launcher Icon
- Update the AndroidManifest File
- Conclusion
How to change the default icon of Android App
In order to get the app published in stores like Google Play Store, Amazon App Store, etc or if you just want to personalize the app, the default icon can be changed.

Attention reader! Don’t stop learning now. Get hold of all the important Java Foundation and Collections concepts with the Fundamentals of Java and Java Collections Course at a student-friendly price and become industry ready. To complete your preparation from learning a language to DS Algo and many more, please refer Complete Interview Preparation Course.
We can change the icon of the Android App by using the Android Studio itself and by following the below steps:
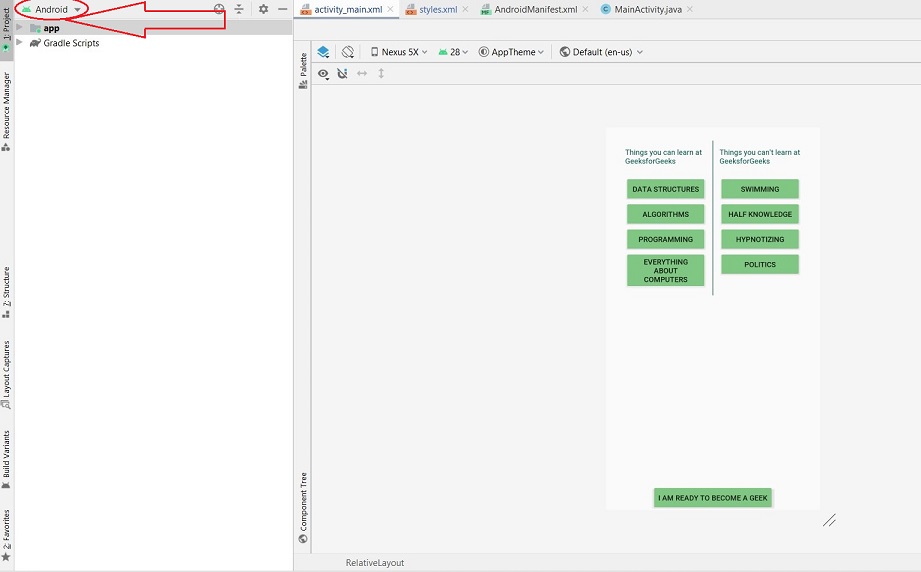
Step 1:
Open your Android Studio project and make sure that your Project is of the type Android.If it is not Android then select Android from the drop-down list. This is not necessary but will make it easier to search for the files and directories needed.
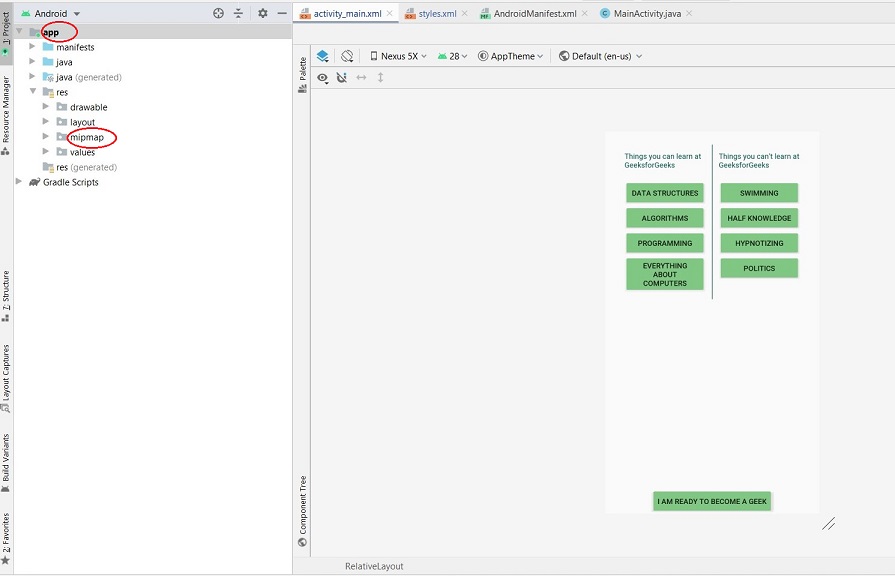
Step 2:
Now click on the strong>app directory and then click on the mipmap folder.
The order would be: app > mipmap.
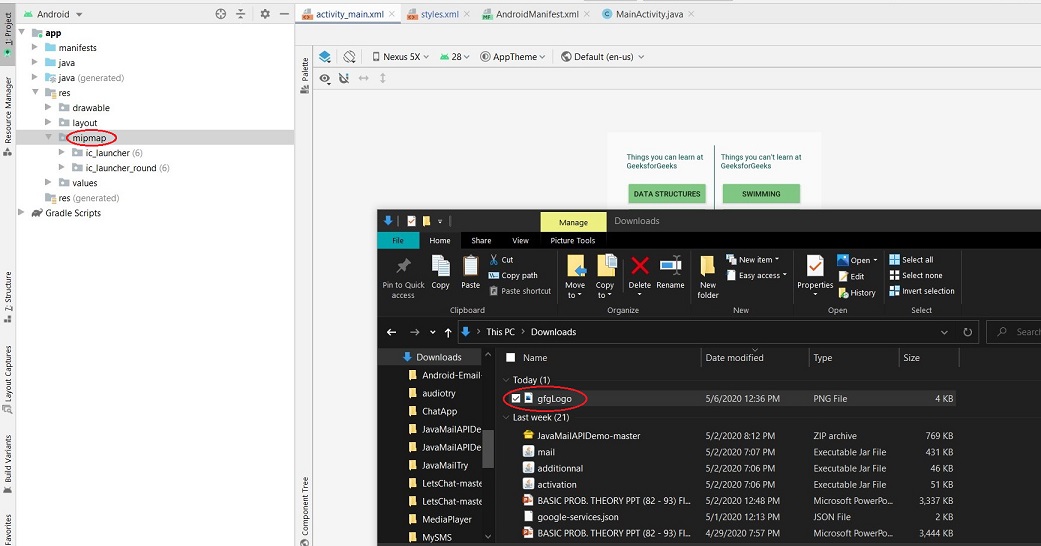
Step 3:
Make sure that the image of the icon is already present on the computer.Find the path of the image. Here, the file named gfgLogo is present in our Downloads folder. If we can’t find an icon for our app and also are unable to design one, then we can look for them in Flaticon or Material.io. However we must note that the former has icons designed by other designers and we need to give attribution to the respective designer when using it.
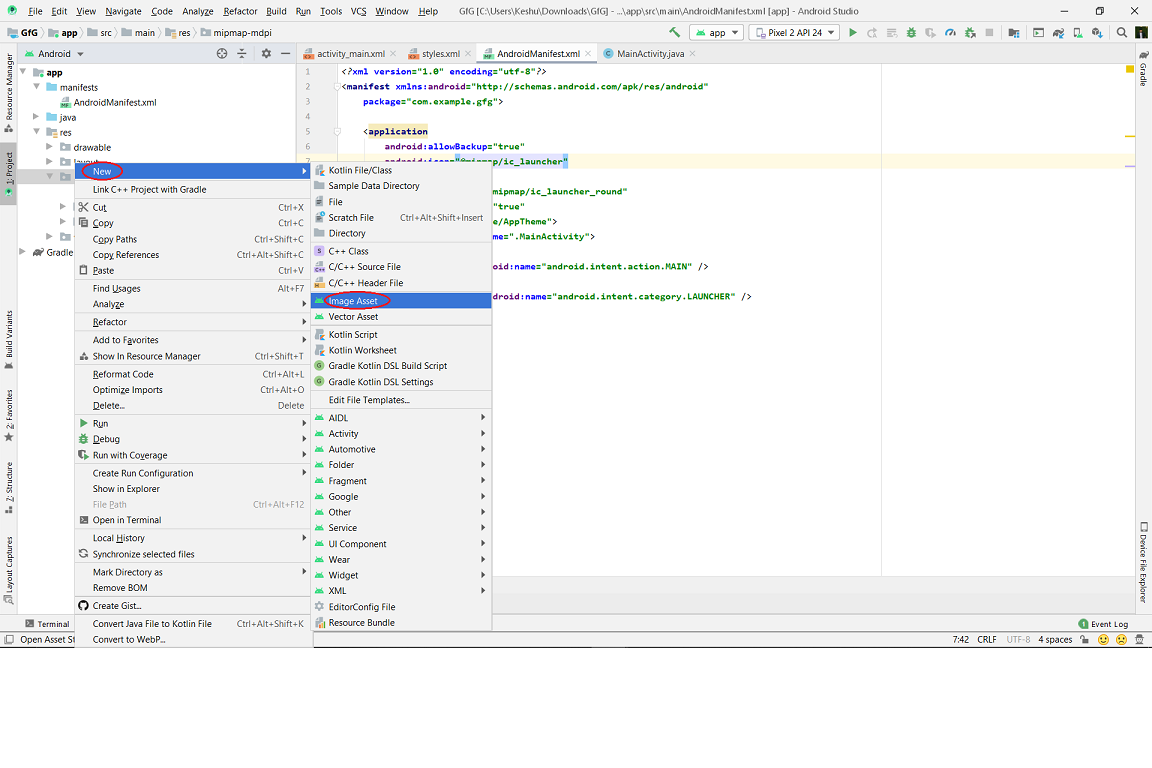
Step 4:
Now once we have our icon at the desired location and we know the path, right click on the mipmap directory and then click on New and choose Image Asset from the drop-down menu. The order of actions would be:
mipmap(Right click) > New > Image Asset
Step 5:
Now the following window will open once we click on Image Asset:
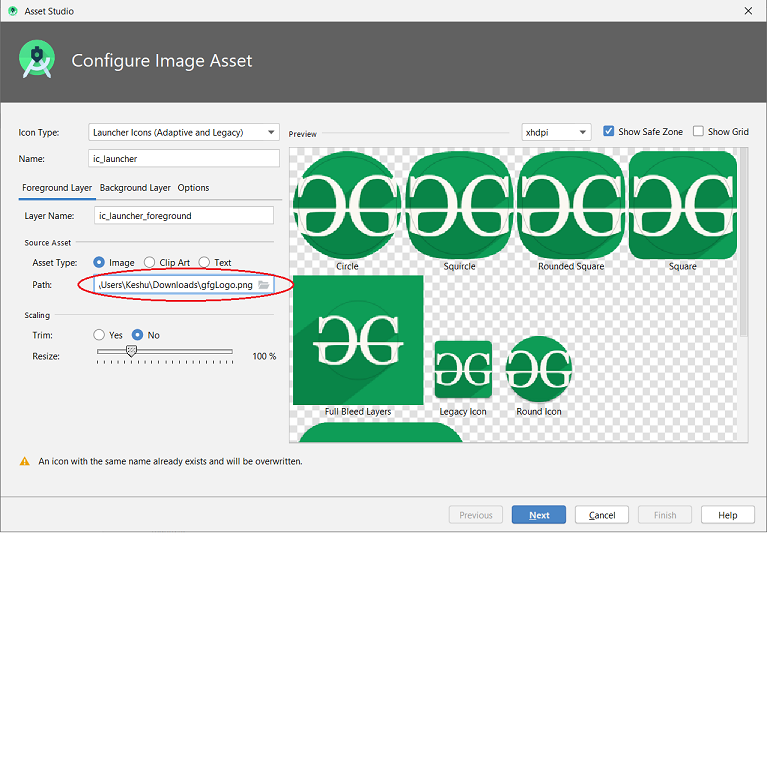
Give the location to the image icon in Path under Source Asset. In our example, the Path is:
Step 6:
If required, the image can be resized using the Resize option or change the color of our logo by heading to the Background Layer option. Once all the required changes are made, we will click on the Next button and then on Finish and then the icon of the app will be changed!
Источник
How to change android app icon in Android Studio
Android application icon means the main menu icon which is shows with other icons on android main menus screen. With the use of android application icon mobile phone user can open app and use that particular application. There are by default a simple android icon present on every designed android but that icon can be easily changeable through replacing the old default android app icon with yours. So here is the complete step by step tutorial for How to change android app icon in Android Studio.
How to change android app icon in Android Studio.
1. Start android studio in your computer.
2. Open select drawable folder under app->src->res->drawable .

3. Copy your own designed application icon into drawable folder.
4. Open AndroidManifest.xml file .

5. Fine this line ” android:icon=”@mipmap/ic_launcher ” in AndroidManifest.xml file.
6. Replace above line from ” android:icon=”@drawable/your_icon_name “ . In this line your_icon_name represents your copied icon name which you have already copy inside drawable folder and after done this compile and run your project and here you go now your application icon is successfully changed.
Источник
How To Change Your Android App Icon
An adaptive icon is an icon that consist of two layers, the foreground layer and background layer like the default icon of an android app. This makes it possible for launchers to have some visual effects. Adaptive icons work on android 8.0 (API level 26) and above.

Open android studio -> res folder-> drawable. You’ll see ic_launcher foreground.xml which will be the white default icon we are going to replace.

And below is ic_launcher_background, the greenish background we will also replace.

In the mipmap folder -> ic_launcher -> ic_launcher.xml contains an adaptive icon.xml which combines the foreground and background layer.

So to create an adaptive icon we right click on Res Folder -> Image assets. Then we select select launcher Icons(Adaptive and legacy) as Icon Type.
For the foreground layer you can replace the name and select image, clip art or text as Asset Type. In this example we’ll use alarm icon. You can also resize the asset type if it’s beyond the safe zone

In the background layer we can also choose between image or color as asset type.

Select next then finish. The default default launcher background will be overridden. You can check it out in the mipmap -> ic_launcher.xml

You can reach me on twitter @dope_soul if you have any questions. Happy coding.
Источник
How to create adaptive icons for Android using Android Studio
I have found myself with an issue on my android applications not been able to use adaptive icons, resulting in ugly app icons and strange shapes in different launchers, so. the solution was create adaptive icons and works perfectly. 🙂
On API’s > 26 android implements adaptive icons, is possible that this causes issues on app icon in existing applications, just like the following example.

Example: Old app icons
To avoid this is necessary to create an adaptive icon. To do so, you need the following assets:
- Image icon without background, example below (foreground)
- Color background

Foreground icon image
With this elements you need to follow these steps to generate the icon with the Image Asset Studio.
- Open the project in Android Studio
- Select the app folder
- Go to File → New → Image Asset
- On «Foreground Layer» select the provided image and resize in order to get the proper aspect for the icon
- On “Background Layer» use the background provided
- Click on Next button and then Finish
- After that, the icons are created on the «mipmap-* * * *» folder

Foreground layer configuration
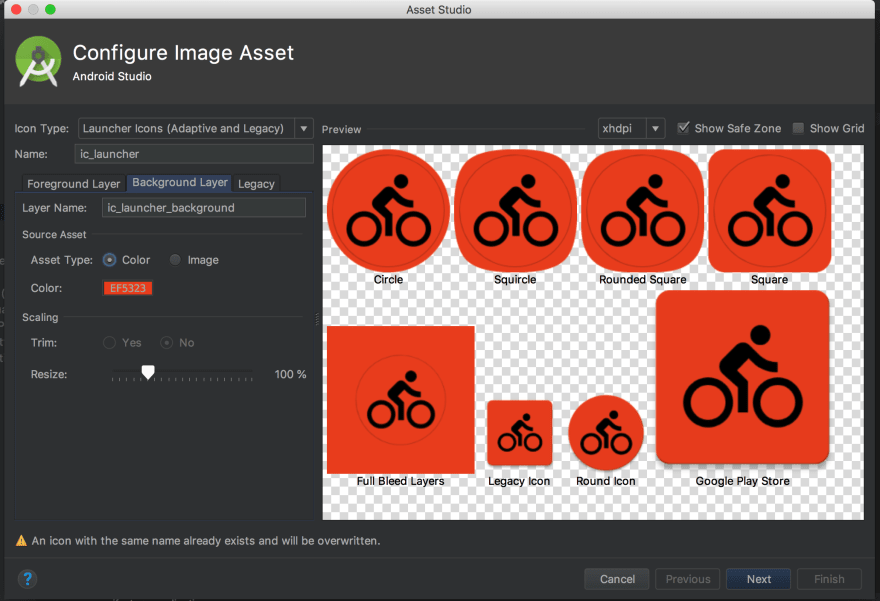
Background layer configuarion
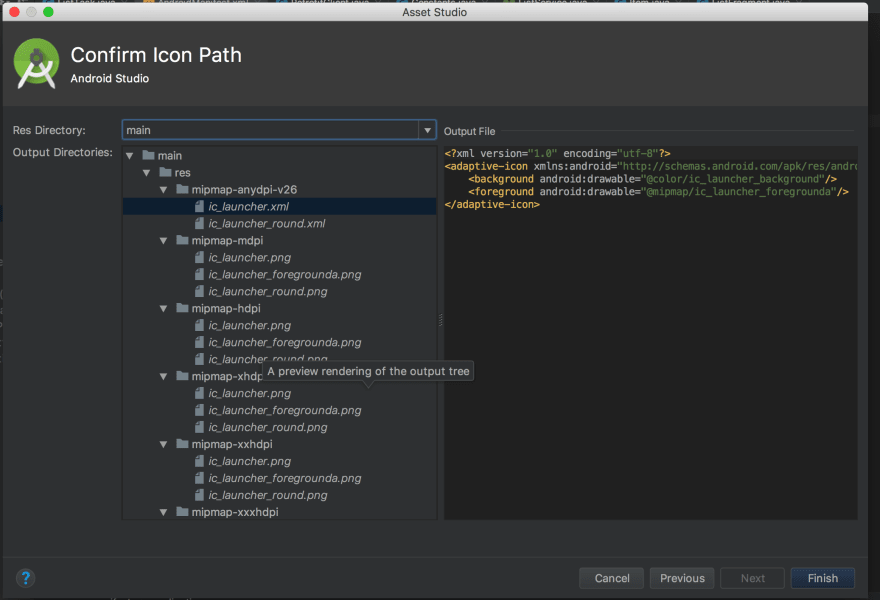
Last screen and creation of assets
You need to add the new rounded icons to the respective roundIcon option on the AndroidManifest.xml
Exit fullscreen mode
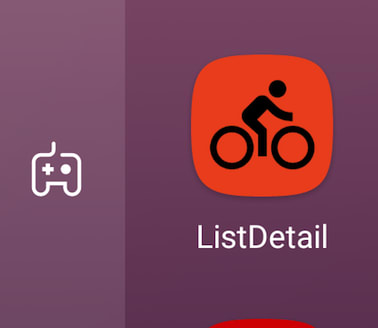
After apply the changes. The app icon will look according to the the guidelines of android for adaptive icons.

Example: Android 9, API 28 stock launcher
Example: Android 7.0, API 24, Smart Launcher
Источник
How to Update the Launcher Icon for Your Android App
You can add value to any product by giving the user interface a professional look and feel. When users like what they see in an app UI, they’re much more likely to install it. There are a set of defined rules for the design, colour, icon and other UI elements that your Android app should follow. In this article, we will stick to the icons, specifically the launcher icon, for your Android app.
The icons for an Android app are segregated into several categories. These include:
- Launcher Icon: this icon represents your app on the user’s device’s home screen or application list. This can either be an Adaptive Launcher Icon, for Android 8.0 (API level 26) or above, or a Legacy Launcher Icon, for Android 7.1 (API level 25) or below.
- Action Bar Icons: for the items in the action bar.
- Tab Icons: for the tab items that have icons, if any.
You can learn more about these icon categories by looking at other apps. Here is an example of the WhatsApp icons:


Now, creating these icons may seem easy if you are a designer, or if you are a developer who has a designer on your team. But it is not as easy as it seems. You will have to create icons for each different dimension, based on the Android device screen resolutions and density. To give you a sense of how much work this can be, here is the list of sizes for which you need to create the launcher icon if you are going to do it in the traditional way:
| Density | Icon |
|---|---|
| ldpi | 36 x 36 px |
| mdpi | 48 x 48 px |
| tvdpi | 64 x 64 px |
| hdpi | 72 x 72 px |
| xhdpi | 96 x 96 px |
| xxhdpi | 144 x 144 px |
| xxxhdpi | 192 x 192 px |
| Web | 512 x 512 px |
And this is just the launcher icon. There is a similar list for each category of icon. But thankfully, Android Studio provides us with a tool called Image Asset Studio that handles the creation of icons for all screen densities very easily.
What Is Image Asset Studio?
Android Studio 3 has introduced Image Asset Studio for creating icons for your app. It takes care of generating app icons of appropriate resolution for different screen densities and placing them in the respective mipmap-density folders in the resource directory. It also generates the icon for the web (512 x 512 px) which is required for uploading the application to the Google Play Store. These icons are then fetched accordingly from the folders based on the screen density of the devices during runtime.
For adaptive launcher icons, Image Asset Studio provides a complete preview of the icon set which includes circle, square, rounded square, squircle, full bleed layer, legacy icon, round and Google Play Store versions of the icon as well.

For legacy launcher icons, on the other hand, the devices do not support icons of varying shapes. So a more restricted set of icons will be generated.

Using Image Asset Studio
Let’s take a look at how to create an icon set using Image Asset Studio.
How to Update an Icon Using Image Asset Studio
To start Image Asset Studio, select Android in the Project Window. Right click on the res folder and select New > Image Asset. You have now opened Image Asset Studio. You can now create an Adaptive Launcher Icon or Legacy Only Launcher Icon as per your requirement.
Create an Adaptive Launcher Icon


You’ll use this icon type for Android 8.0 support.
First, select Launcher Icons (Adaptive & Legacy) for Icon Type. Change the name of the icon if you wish to. If the name already exists, there will be a warning at the bottom of the dialog, telling you the existing one will be overwritten.
In the Foreground Layer tab, select the Asset Type:
- Image: Set the path of the custom icon image.
- Clip Art: Select the icon from the set of material design icons and set the colour.
- Text: Set a specified string, and set the font and the colour.
Similarly, in the Background Layer tab, you can select an Image, Clip Art, or Text asset type.
For both the foreground and background layers, you also have the following optional settings:
- Layer Name: You can give the layer a unique name.
- Scaling Parameters: These can be set to your requirements. This option is disabled if you select a colour for the background layer.
- Trim: Choose if you want to remove the transparent spaces around your icon.
- Resize: Change the size of the icon.
The Legacy tab lets you decide whether to also generate a legacy icon. Here you can choose whether you want to generate a legacy icon, a Google Play Store icon, and a round icon, as well as what shape to use for each of them.
Create a Legacy Launcher Icon


This is the kind of icon you’ll create if you want to support versions of Android less than or equal to 7.1.
First, select Launcher Icons (Legacy Only) for the Icon Type. You can change the Name of the icon at this time if you wish to. If the name already exists, there will be a warning at the bottom that the existing one will be overwritten. Select the Asset Type and configure the associated settings.
- Image: Set the path of the custom icon image.
- Clip Art: Select the icon from the set of material design icons and set the colour.
- Text: Set a specified string, and set the font and the colour.
You can also configure some optional settings for the icon’s appearance:
- Trim: Choose this if you want to remove the transparent spaces around your icon.
- Padding: Set the padding for the icon.
- Foreground: Set the foreground colour.
- Background: Set the background colour.
- Scaling: Choose to crop or shrink to fit.
- Shape: To add a backdrop to the icon, select the shape. For a transparent backdrop, select none.
- Effect: Choose whether to have a dog-eared effect for your square or rectangular shaped icon.
Any changes you make will be reflected in the preview section . Once you’re happy with your icon’s look and feel, click Next.
You will then be taken to the settings screen, where you can change the Resource Directory where your icons will be emitted. Update it if you want. Following are the available options:
- main/res: for all build variants, including release and debug.
- release/res: overrides the main source set for the single release version of the build.
- debug/res: for debugging only.
- custom source set: you can define your own source set.
Finally, wrap it up by pressing Finish.
Now we are ready with our new launcher icon in all the respective folders. The name of my launcher icon is ic_launcher_demo . You can see all the icons that were generated for this icon in the screenshot below.


Update the AndroidManifest File
Now it’s time to update the AndroidManifest file so that our app knows to use the new icon. To start, open your AndroidManifest.xml file. Here, the default launcher icon is set on line 7 and 9. You need to update it with the new icon that you created.


Change android:icon and android:roundIcon to the name you have chosen for your launcher icon.
Congratulations! You have successfully updated the launcher icon for your app.
Conclusion
In this post, you learned about the different kinds of icons that are used in an Android app, as well as all the different screen resolutions that must be generated for each icon. Then you learned about the Image Asset Studio tool and how it makes generating icons for your Android app much easier.
Источник


