- My First App: How to Create Your First Android App Step by Step
- Prerequisites
- 1. Create a New Project
- 2. Create an Activity
- 3. Create a Layout
- 4. Implement Event Handlers
- Conclusion
- Android App Templates and UI Kits From CodeCanyon
- Getting Started With Android Studio
- 1. Project Setup
- 2. Android Virtual Devices
- 3. Live Layout
- 4. Templates
- 5. Lint Tools
- 6. Rich Layout Editor
- Conclusion
My First App: How to Create Your First Android App Step by Step
To create a native Android app, one that can directly use all the features and functionality available on an Android phone or tablet, you need to use the Android platform’s Java API framework. This is the API that allows you to perform common tasks such as drawing text, shapes, and colors on the screen, playing sounds or videos, and interacting with a device’s hardware sensors. Over the years, the Android API framework has evolved to become more stable, intuitive, and concise. As a result, being an Android developer today is easier than ever—even more so if you use Android Studio, the official tool for working with the framework.
In this tutorial, I’ll show you how to create your first Android app. While doing so, I’ll also introduce you to important Android-specific concepts such as views, layouts, and activities.
We’ll be starting from scratch to create a very simple app in this tutorial. If you prefer writing less code or need to develop your app as quickly as possible, however, consider using one of the native Android app templates available on CodeCanyon.


Using an app template, you can have a polished, ready-to-publish app in just a matter of hours. You can learn how to use an Android app template by referring to the following tutorial:


Prerequisites
To be able to follow along, you’ll need:
- the latest version of Android Studio
- a device or emulator running Android Marshmallow or higher
If you don’t have Android Studio, do refer to the following tutorial to learn how to install and configure it:


1. Create a New Project
You’ll need an Android Studio project to design, develop, and build your app. So launch Android Studio and click on the Start a new Android Studio project button.
On the next screen, choose Add No Activity because we don’t want to use any of the templates offered by Android Studio. Then press Next to proceed.


You’ll now see a form where you can enter important details about your app, such as its name and package name. The name is, of course, the name your users will see on their phones when they install your app.
The package name, on the other hand, is a unique identifier for your app on Google Play. You must follow the Java package naming conventions while specifying it. For example, if your app’s name is MyFirstApp and you work for an organization whose website address is example.com, the package name would ideally be «com.example.myfirstapp».
Next, you must decide the programming language you want to use while coding the app. For now, select Java and press Finish.


Android Studio will now take a minute or two to generate and configure the project.
2. Create an Activity
An activity is one of the most important components of an Android app. It is what allows you to create and display a user interface to your users. An app can have one or more activities, each allowing the user to perform an action. For example, an email client app can have three activities: one for the user to sign up, one to sign in, and one to compose an email.
To keep this tutorial simple, we’ll be creating an app with just one activity. To create the activity, in the Project panel of Android Studio, right-click on app and select New > Activity > Empty Activity.
In the dialog that pops up, type in MainActivity as the name of the activity, check the Launcher Activity option, and press Finish.
Checking the Launcher Activity option is important because it is what allows your users to open the activity using an Android launcher. As such, a launcher activity serves as an entry point to your app.


3. Create a Layout
Each activity usually has at least one layout associated with it. When you created your activity in the previous step, you also generated an empty layout for it. To take a look at it, open the activity_main.xml file.
An activity’s layout primarily consists of views and view groups. A view, sometimes referred to as a widget, is an individual component of your user interface. Buttons, text fields, labels, and progress bars are common examples of views. A view group is a component that can serve as a container for views. Usually, view groups also help you position and set the dimensions of your views.
ConstraintLayout is one of the most powerful and flexible view groups available today. By default, it is the root node of your activity’s layout XML file. It looks like this:
We’ll be creating a simple clock app in this tutorial. In addition to the local time, it will be able to show the current time in two different countries: India and Germany.
To allow the user to choose the country they’re interested in, our layout will have two Button views, one for Germany, and one for India. And to actually show the time, our layout will have a TextClock view.
Accordingly, add the following code inside the ConstraintLayout :
Note that each view must have the layout_width and layout_height properties. They decide how large the view is. Other properties such as layout_constraintBottom_toBottomOf and layout_constraintLeft_toLeftOf are necessary to position the view. With the above code, the TextClock view will be placed at the center of the screen, and both the Button views towards the bottom of the screen.
By default, the TextClock view only shows the hours and minutes. The format12Hour property, however, allows you to change that. In the above code, its value is set to h:mm:ss a . This tells the TextClock view that it should display the hours, minutes, seconds, and also an AM/PM suffix.
Also note that each Button view has an onClick property. This property is used to assign click event handlers to the buttons.
The handlers don’t exist yet, but you can ask Android Studio to generate them for you. To do so, hover over the name of the handler until you see a red light bulb appear beside it. Then click on the light bulb and select the second option, the one with the yellow light bulb.


At this point, you can try pressing Shift-F10 to run the app. If there are no errors in your XML code, you should see something like this on your phone or emulator:


Although the buttons don’t work yet, the TextClock view should show the local time, updating itself every second.
4. Implement Event Handlers
When you generated event handlers for the two buttons, Android Studio added two methods to your activity’s Java file, MainActivity.java. If you open it, you should find the following code in it:
Inside the event handlers, all we need to do is change the time zone of the TextClock view. But how do you reference a view that’s in your layout XML file from inside your Java file? Well, you just use the findViewById() method.
Once you have a reference to the TextClock view, you can call its setTimeZone() method to change its time zone. So add the following code inside the onClickGermany() method:
Similarly, add the following code inside the onClickIndia() method:
If you’re wondering what R is, it’s an auto-generated class that contains, among other things, the IDs of all the views you have in your layouts. The findViewById() method expects you to use this class while passing an ID to it.
At this point, you can press Shift-F10 again to re-run the app. You should now be able to click on the buttons to change the clock’s time zone.
Conclusion
You just created your first fully functional, native app for Android! I encourage you to make a few changes to it. For instance, you could try using other time formats or time zones. You could also try changing the positions of the buttons and the clock view.
There are dozens of views and view groups you can use to create your apps. Do refer to the official documentation to learn about them.
Android App Templates and UI Kits From CodeCanyon
You may have noticed that our app looks very plain and simple. That’s because we’re using the default theme, without applying any styles to our views. CodeCanyon is full of Android UI kits that offer beautiful, hand-crafted styles you can apply to your views.
The kits generally also have several custom views and layouts. You can refer to the following articles to learn more about them:
Источник
Getting Started With Android Studio
Android Studio is a fairly new IDE (Integrated Development Environment) made available for free by Google to Android developers. Android Studio is based on IntelliJ IDEA, an IDE that also offers a good Android development environment. In this tutorial, I’ll show you how to create a new Android project and take advantage of the features that Android Studio has to offer.
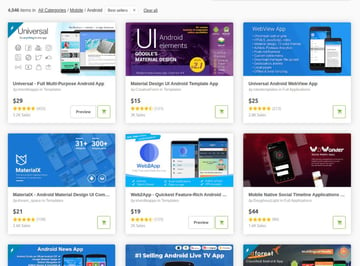
When you’re just getting started with Android Studio, it can be very helpful to use an Android app template. You can find over a thousand of them for sale on Envato Market:

 Android app templates for sale on Envato Market
1. Project Setup
Before you start exploring Android Studio, you’ll first need to download and install it. Note that you need to have JDK 6 or higher installed. If you’re on Windows, launch the .exe file and follow the steps of the setup wizard. If you’re running OS X, mount the disk image by double-clicking it and drag Android Studio to your Applications folder.
If you’ve successfully completed the above steps, then your development environment should be set up correctly. You’re now ready to create your first Android application using Android Studio. When you launch Android Studio for the first time, you should be presented with a welcome screen, offering you a number of choices to get you started.


In this tutorial, we’re going to choose the New Project option. However, you can choose Import Project if you’d like to import a project from, for example, Eclipse, into Android Studio. Android Studio will convert the Eclipse project to an Android Studio project, adding the necessary configuration files for you.
If you select Open Project from the list of options, you can open projects created with either Android Studio or IntelliJ IDEA. By choosing Check out from Version Control, you can check out a copy of a project that’s under version control. This is a great way to quickly get up to speed with an existing project.
To get us started, choose New Project from the list of options. This will show you a list of options to configure your new project. In this tutorial, we’re going to create a simple application to show you some of Android Studio’s most important features. I’m sure you agree that there’s no better name for our project than HelloWorld.


As you can see in the above screenshot, I’ve named my application HelloWorld and set the module name to HelloWorld. If you’re unfamiliar with IntelliJ IDEA, you may be wondering what a module is. A module is a discrete unit of functionality that can be compiled, run, tested, and debugged independently. Modules contain source code, build scripts, and everything else required for their specific task.
When creating a new project, you can also set the package name of the project. By default, Android Studio sets the last element of the project’s package name to the name of the module, but you can change it to whatever you want.
The other settings are the project’s location on your machine, the minimum and target SDK, the SDK your project will be compiled with, and the project’s theme. You can also tell Android Studio to create an Activity class and a custom launch icon for you, and whether the project supports GridLayout, Fragments, a Navigation Drawer, or an Action Bar.
We won’t create a custom icon for this application so you can uncheck the checkbox labeled Create custom launch icon. Click Next to continue setting up your project.
Because we checked the checkbox Create activity in the previous step, you are asked to configure the Activity class Android Studio will create for you.


Since we’ll be starting with a blank Activity class, you can click Next to proceed to the next step in the setup process in which you’re asked to name the Activity class, the main layout, and the fragment layout. You can also set the navigation type, which we’ll leave at None for this project. Take a look at the next screenshot to see what your settings should look like.


After clicking Finish, you’ll be presented with Android Studio’s user interface with the project explorer on the left and the workspace on the right. With your project set up in Android Studio, it’s time to explore some of the key features of Android Studio.


2. Android Virtual Devices
An Android Virtual Device or AVD is an emulator configuration, allowing you to model an Android device. This makes running and testing applications on a wide range of devices much easier. With an Android Virtual Device, you can specify the hardware and software the Android Emulator needs to emulate.
The preferred way to create an Android Virtual Device is through the AVD Manager, which you can access in Android Studio by selecting Android > AVD Manager from the Tools menu.


If you’re development environment is set up correctly, the Android Virtual Device Manager should look similar to the screenshot below.


To create a new AVD, click New. on the right, give the AVD a name, and configure the virtual device as shown below. Click OK to create your first AVD.


To use your newly created AVD, select it from the list in the AVD manager, and click Start. on the right. If your AVD is set up correctly, the Android Emulator should launch as shown in the screenshot below.


With the Android Emulator up and running, it’s time to launch your application by selecting Run ‘helloworld’ from the Run menu. That’s how easy it is to run an application in the Android Emulator.


3. Live Layout
Android Studio’s live layout feature lets you preview your application’s user interface without the need to run it on a device or the emulator. The live layout feature is a powerful tool that will literally save you hours. Viewing your application’s user interface is much faster using live layouts.
To work with live layouts, double-click the XML layout file and select the Text tab at the bottom of the workspace. Select the Preview tab on the right of the workspace to preview the current layout. Any changes you make to the XML layout will be reflected in the preview on the right. Take a look at the screenshot below to get a better idea of this neat feature.


There are a number of other advantages of the live layout feature that are worth pointing out. You can, for example, create a variation of the XML layout you’re currently working on by selecting an option from the first menu in the Preview pane. You can, for example, create separate views for portrait and landscape and Android Studio will create the necessary folders and files for you.
The second menu in the Preview pane lets you change the size of the device shown in the Preview pane. The third menu lets you change the orientation of the device shown in the Preview pane, which makes it easy to see how a layout looks in different orientations and using different themes.
The fourth menu in the Preview pane gives you easy access to the Activity or fragment in which the layout is used. The Preview pane also lets you change the language used in the live layout to make it easy to preview a layout in different languages. The rightmost menu lets you change the API version.
The Preview pane also includes controls to zoom in on the layout, refresh the Preview pane, or take a screenshot.
4. Templates
Android Studio provides developers with a number of templates to speed up development. These templates automatically create an Activity and the necessary XML files. You can use these templates to create a basic Android application, which you can then run on a device or in the emulator.
With Android Studio, you can create a template when you create a new Activity . Right-click on the package name in the project navigator on the left, select New from the menu, and choose Activity from the list of options. Android Studio then shows you a list of templates, such as Blank Activity, Fullscreen Activity, and Tabbed Activity.


You can also select Image Asset from the menu, which will launch a wizard that guides you through the creation process. Let me show you how to create a new Activity based on the Login Activity template. Select the Login Activity option from the list of Activity templates to fire up the wizard.


As you can see in the above screenshot, I’ve named the Activity LoginActivity, set the Layout Name to activity_login, given the Activity a title of Sign In. The checkbox labeled Include Google+ sign in is checked by default. Uncheck it since we won’t be using this feature in our example.
You can optionally set the Hierarchical Parent of the new Activity . This will let you navigate back if you tap the device’s back button. We will leave this field empty. After clicking Finish, Android Studio creates the necessary files and folders for you. If all went well, you should see a new Activity and Layout in your project.
The next step is to set up the new Activity in the manifest file so it’s used as the main Activity when the application launches. As you can see in manifest file below, the LoginActivity class has its own activity node.
To make your application launch the LoginActivity you created, remove the activity node for the LoginActivity class and replace com.tuts.HelloWorld.MainActivity
with com.tuts.HelloWorld.LoginActivity . The result is that the application will now use the LoginActivity class as its main Activity .
When you build and run your application in the emulator, you should see a screen similar to the one shown below. This means that we’ve successfully replaced the blank Activity class with the newly created LoginActivity class.


5. Lint Tools
Testing your code is one thing, but it’s equally important to apply best practices when writing code. This will improve performance and the overall stability of your application. It’s also much easier to maintain a properly structured project.
Android Studio’s includes Android Lint, a static analyzer that analyzes your project’s source code. It can detect potential bugs and other problems in your code that are the compiler may overlook.
The below screenshot, for example, tells us that the LinearLayout in this layout is of no use. The nice thing about Android Lint is that it gives you a reason for the warning or error, which makes it easier to fix or resolve.


It’s good practice to run Android Studio’s lint tool from time to time to check your project for potential problems. The lint tool will even tell you if you have duplicate images or translations.
To run the lint tool, select Inspect Code… from the Analyze menu in Android Studio to start the process. When Android Studio has finished inspect your project, it will present you with the results at the bottom of the window. Note that in addition to Android Lint, Android Studio performs a number of other checks as well. Simply double-click an issue to navigate to the file in which the problem is located.


6. Rich Layout Editor
Android Studio has a rich layout editor in which you can drag and drop user interface components. You can also preview layouts on multiple screen configurations as we saw earlier in this tutorial.
The rich layout editor is very straightforward to use. We first need a layout to work with. Navigate to the layout folder in your project’s res folder, right-click the layout folder, and select New > Layout resource file from the menu that appears.
Give the new layout a name, set its root element, and click OK. Android Studio will automatically open the layout in the editor on the right.


At the bottom of the editor, you should see two tabs, Design and Text. Clicking the Text tab brings up the editor, allowing you to make changes to the currently selected layout.
Clicking the Design tab brings up another editor that shows you a preview of the layout. To add a widget to the layout, drag it from the list of widgets on the left to the layout on the right. It’s that simple.


Conclusion
In this tutorial, we’ve taken a brief look at some of the key features of Android Studio. It is very similar to IntelliJ IDEA, but it contains a number of important enhancements that make Android development easier, faster, and more enjoyable.
If you want to speed things up even more, try using an Android app template from Envato Market, or working with a freelance Android developer on Envato Studio.
Источник


