- How to add Extended Floating Action Button in Android | Android Studio | Java
- Step 1: add the dependency
- Step 2: add the drawable files
- Step 3: design the XML file
- Step 4: add the functionality
- How to create custom button in Android using XML Styles
- 6 Answers 6
- How to add a button in android?
- 4 Answers 4
- Buttons
- Responding to Click Events
- Kotlin
- Using an OnClickListener
- Kotlin
- Styling Your Button
- Borderless button
- Custom background
- How to create button in android studio
- Attributes of Button in Android:
- Button Example In Android Studio:
How to add Extended Floating Action Button in Android | Android Studio | Java

How to add Extended Floating Action Button in Android | Android Studio | Java.
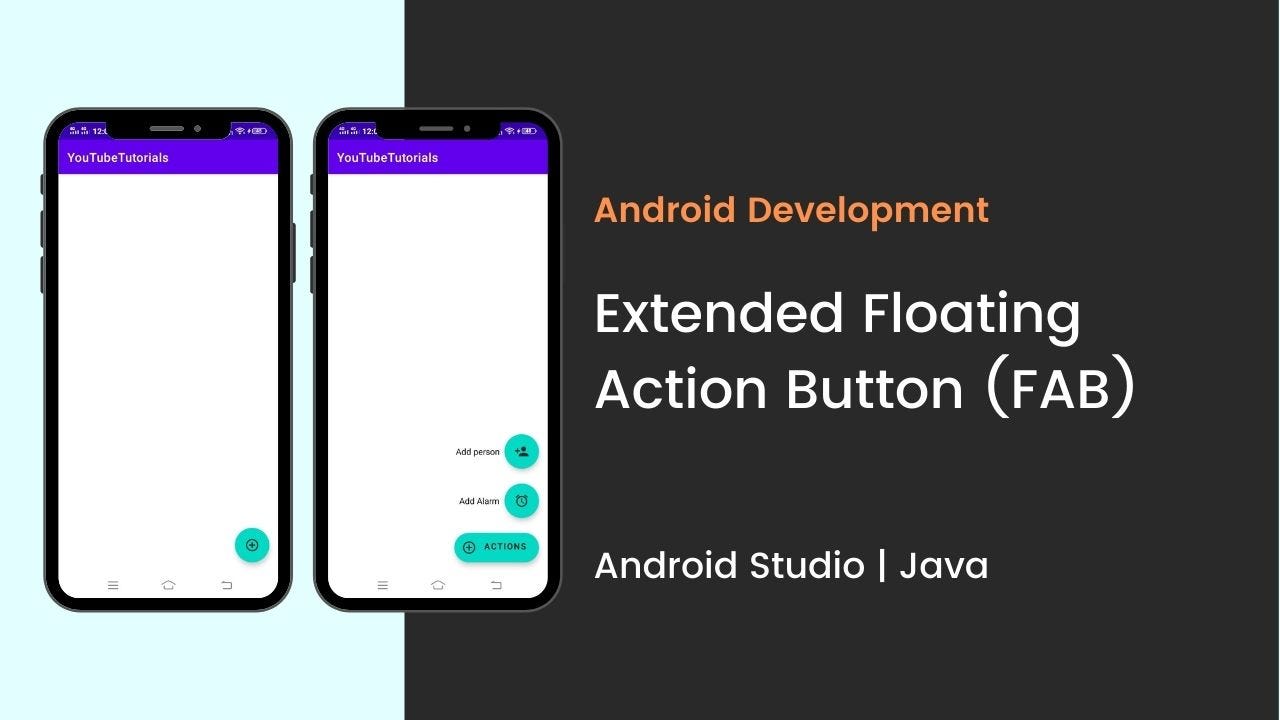
In this tutorial, we are going to create an extended floating action button in android. A floating action button (FAB) performs the primary, or most common, action on a screen. It appears in front of all screen content, typically as a circular shape with an icon in its center.
Extended Floating Action Button is the newly introduced class with Material Components library in Android.
Material Components is introduced with SDK 28 or Android P. It’s a superset of Support Design Library with lots of new additions and improvements. And, in this tutorial, we are going to create an extended floating action button.
So, let’s start creating the extended FAB.
Before going to create let’s see what you’re going to see.
Step 1: add the dependency
make sure to add the material design dependency in your build.gradle app file.
Step 2: add the drawable files
before going to design the main XML file, first, import the drawable files. Below drawable files that I used in my project.

Step 3: design the XML file
now, design the main XML file, add the Extended Floating Action Button that is set as the parent FAB and also add the child FAB. Here as a child FAB, I used two FABs.
parent FAB: Action
child FAB 1: Alarm
child FAB 2: Person
Step 4: add the functionality
now in the main JAVA file add the functionality for the extended FAB and add the click listener in the child FAB.
Источник
How to create custom button in Android using XML Styles
I want to make this kind of button [same background & text] colors by using XML Styles

that’s just for an example, i want to write some other texts, like: About Me
Still i am using button created by designer in Photoshop
Note: I need this kind of button in every size and shape
I don’t want to use any image in my Android App i want to make it using XML only

6 Answers 6
Copy-pasted from a recipe written by «Adrián Santalla» on androidcookbook.com: https://www.androidcookbook.com/Recipe.seam?recipeId=3307
1. Create an XML file that represents the button states
Create an xml into drawable called ‘button.xml’ to name the button states:
2. Create an XML file that represents each button state
Create one xml file for each of the four button states. All of them should be under drawables folder. Let’s follow the names set in the button.xml file.
3. Create an XML file that represents the button style
Once you have created the files mentioned above, it’s time to create your application button style. Now, you need to create a new XML file, called styles.xml (if you don’t have it yet) where you can include more custom styles, into de values directory.
This file will contain the new button style of your application. You need to set your new button style features in it. Note that one of those features, the background of your new style, should be set with a reference to the button (button.xml) drawable that was created in the first step. To refer to the new button style we use the name attribute.
The example below show the content of the styles.xml file:
4. Create an XML with your own custom application theme
Finally, you need to override the default Android button style. For that, you need to create a new XML file, called themes.xml (if you don’t have it yet), into the values directory and override the default Android button style.
The example below show the content of the themes.xml:
Hope you guys can have the same luck as I had with this, when I was looking for custom buttons. Enjoy.
Источник
How to add a button in android?
Can anybody tell how to add a button in android?
4 Answers 4
Check this Android Button tutorial; this simple example creates a Close Button.
All you need to do is:
1.Add Button widget to your Layout
2.Attach a setOnClickListener method to the button instance:
Dynamic:

Adding a Button
doesn’t add a Button. It declares and initializes an instance of Button which refers to a Button in your currently inflated xml which has an id of button1
So in your xml you would have somewhere
You can add a Button programmatically with
But it is generally easier to do in xml because here you have to programmatically give it parameters, properties, and add it to an inflated layout
OnClick
As far as the onClick() it depends on what you feel is the easiest and best in your situation. I like to declare it in the xml like that often but you can do it several ways. Using this method you just have to be sure that you have a function like this that is public and takes only one parameter and that parameter must be a View
I also changed the name so your xml would be like
You also can set onClick() in your Java with something like
Note that the last way you will need to add implements OnClickListener in your Activity declaration
You can also create your own click Listener by changing it to something like
then create an instance of it with something like
You can use this for multiple Buttons and switch on the id or check the View param to know which Button was clicked or create separate Listeners for different Buttons.
Источник
Buttons
A button consists of text or an icon (or both text and an icon) that communicates what action occurs when the user touches it.
Depending on whether you want a button with text, an icon, or both, you can create the button in your layout in three ways:
- With text, using the Button class:
- With an icon, using the ImageButton class:
- With text and an icon, using the Button class with the android:drawableLeft attribute:
Key classes are the following:
Responding to Click Events
When the user clicks a button, the Button object receives an on-click event.
To define the click event handler for a button, add the android:onClick attribute to the element in your XML layout. The value for this attribute must be the name of the method you want to call in response to a click event. The Activity hosting the layout must then implement the corresponding method.
For example, here’s a layout with a button using android:onClick :
Within the Activity that hosts this layout, the following method handles the click event:
Kotlin
The method you declare in the android:onClick attribute must have a signature exactly as shown above. Specifically, the method must:
- Be public
- Return void
- Define a View as its only parameter (this will be the View that was clicked)
Using an OnClickListener
You can also declare the click event handler programmatically rather than in an XML layout. This might be necessary if you instantiate the Button at runtime or you need to declare the click behavior in a Fragment subclass.
To declare the event handler programmatically, create an View.OnClickListener object and assign it to the button by calling setOnClickListener(View.OnClickListener) . For example:
Kotlin
Styling Your Button
The appearance of your button (background image and font) may vary from one device to another, because devices by different manufacturers often have different default styles for input controls.
You can control exactly how your controls are styled using a theme that you apply to your entire application. For instance, to ensure that all devices running Android 4.0 and higher use the Holo theme in your app, declare android:theme=»@android:style/Theme.Holo» in your manifest’s element. Also read the blog post, Holo Everywhere for information about using the Holo theme while supporting older devices.
To customize individual buttons with a different background, specify the android:background attribute with a drawable or color resource. Alternatively, you can apply a style for the button, which works in a manner similar to HTML styles to define multiple style properties such as the background, font, size, and others. For more information about applying styles, see Styles and Themes.
Borderless button
One design that can be useful is a «borderless» button. Borderless buttons resemble basic buttons except that they have no borders or background but still change appearance during different states, such as when clicked.
To create a borderless button, apply the borderlessButtonStyle style to the button. For example:
Custom background
If you want to truly redefine the appearance of your button, you can specify a custom background. Instead of supplying a simple bitmap or color, however, your background should be a state list resource that changes appearance depending on the button’s current state.
You can define the state list in an XML file that defines three different images or colors to use for the different button states.
To create a state list drawable for your button background:
- Create three bitmaps for the button background that represent the default, pressed, and focused button states.
To ensure that your images fit buttons of various sizes, create the bitmaps as Nine-patch bitmaps.
Источник
How to create button in android studio
In Android, Button represents a push button. A Push buttons can be clicked, or pressed by the user to perform an action. There are different types of buttons used in android such as CompoundButton, ToggleButton, RadioButton.
 Button is a subclass of TextView class and compound button is the subclass of Button class. On a button we can perform different actions or events like click event, pressed event, touch event etc.
Android buttons are GUI components which are sensible to taps (clicks) by the user. When the user taps/clicks on button in an Android app, the app can respond to the click/tap. These buttons can be divided into two categories: the first is Buttons with text on, and second is buttons with an image on. A button with images on can contain both an image and a text. Android buttons with images on are also called ImageButton.
Button code in XML:
The below code will create Button and write “Abhi Android” text on it.
Table Of Contents
Attributes of Button in Android:
Now let’s we discuss some important attributes that helps us to configure a Button in your xml file (layout).
1. id: id is an attribute used to uniquely identify a text Button. Below is the example code in which we set the id of a Button.
2. gravity: The gravity attribute is an optional attribute which is used to control the alignment of the text like left, right, center, top, bottom, center_vertical, center_horizontal etc.
Below is the example code with explanation included in which we set the right and center vertical gravity for text of a Button.
3. text: text attribute is used to set the text in a Button. We can set the text in xml as well as in the java class.
Below is the example code with explanation included in which we set the text “Learning Android @ AbhiAndroid” in a Button.
Setting Text Using Java class:
Below is the example code in which we set the text on Button programmatically means in java class. The output will be same as the above.
4.textColor: textColor attribute is used to set the text color of a Button. Color value is in the form of “#argb”, “#rgb”, “#rrggbb”, or “#aarrggbb”.
Below is the example code with explanation included in which we set the red color for the displayed text of a Button.
Setting Text Color On Button Inside Java class:
Below is the example code in which we set the text color of a Button programmatically means in java class.
5. textSize: textSize attribute is used to set the size of the text on Button. We can set the text size in sp(scale independent pixel) or dp(density pixel).
Below is the example code in which we set the 25sp size for the text of a Button.
Setting textSize In Java class:
Below is the example code in which we set the text size of a Button programmatically means in java class.
6. textStyle: textStyle attribute is used to set the text style of a Button. The possible text styles are bold, italic and normal. If we need to use two or more styles for a Button then “|” operator is used for that.
Below is the example code with explanation included, in which we set the bold and italic text styles for text of a button.
7. background: background attribute is used to set the background of a Button. We can set a color or a drawable in the background of a Button.
Below is the example code in which we set the gren color for the background, Black color for the displayed text and set 15dp padding from all the side’s for Button.
Setting background in Button In Java class:
Below is the example code in which we set the background color of a Button programmatically means in java class.
8. padding: padding attribute is used to set the padding from left, right, top or bottom. In above example code of background we also set the 10dp padding from all the side’s of button.
9. drawableBottom: drawableBottom is the drawable to be drawn to the below of the text.
Below is the example code in which we set the icon to the below of the text.
Make sure you have image saved in your drawable folder name ic_launcher.
10. drawableTop, drawableRight And drawableLeft: Just like the above attribute we can draw drawable to the left, right or top of text.
In the Below example we set the icon to the right of the text. In the same way you can do for other two attribute by your own:
Button Example In Android Studio:
Below is the example of button in which we display two buttons with different background and whenever a user click on the button the text of the button will be displayed in a toast.
Step 1: Create a new project in Android Studio and name it ButtonExample.
Step 2: Now open res -> layout -> xml (or) activity_main.xml and add following code. Here we are designing the UI of two button in Relative Layout.
Step 3: Now Open app -> package -> MainActivity.java and the following code. Here using setOnClickListener() method on button and using Toast we will display which button is clicked by user.
Output:
Now start the AVD in Emulator and run the App. You will see two button. Click on any button and you will see the message on screen which button is clicked.
Источник


