- Как навсегда скрыть панель навигации в активности Android?
- Как скрыть строку состояния и панель навигации | Android-студия
- Different Ways to Hide ActionBar in Android with Examples
- Different ways to Hide ActionBar
- 1. Hide ActionBar from the entire App using styles.xml
- Hide Navigation Bar from Android Screen Activity
- Method 1: Using AndroidManifest.xml
- Method 2: Using Java/Kotlin Code
- Comments:
- Get started with the Navigation component
- Set up your environment
- Groovy
- Kotlin
- Create a navigation graph
- Navigation Editor
Как навсегда скрыть панель навигации в активности Android?

Как скрыть строку состояния и панель навигации | Android-студия
Я хочу постоянно скрывать панель навигации в своей деятельности (а не в пользовательском интерфейсе всей системы). теперь я использую этот кусок кода
Он скрывает панель, но когда пользователь касается экрана, она снова отображается. есть ли способ скрыть это навсегда до активности onStop() ;
- 1 возможный дубликат постоянно скрывать панель навигации при активности
- Здесь, по этой официальной ссылке Google / Android, изложено много хороших и конкретных деталей: Включить полноэкранный режим.
- Флаг автоматически сбрасывается, когда пользователь касается экрана в соответствии с документацией. Вы должны внести изменения в свой дизайн пользовательского интерфейса, чтобы все время скрывать панель навигации.
Фрагменты:
Это для Android 4.4+
Попробуйте иммерсивный режим https://developer.android.com/training/system-ui/immersive.html
Быстрый фрагмент (для Деятельность класс):
Если при нажатии кнопки увеличения или уменьшения громкости возникают проблемы, отображается панель навигации. Я добавил код в onCreate см. setOnSystemUiVisibilityChangeListener
Вот еще один связанный с этим вопрос:
Навигация в режиме погружения становится липкой после нажатия кнопки громкости или минимизации-восстановления
- 4 Когда пользователь проводит пальцем вверх / вниз по экрану, полупрозрачные панели навигации временно появляются, а затем снова скрываются. МОЖНО ЛИ ЭТО СКРЫТЬ?
- @KarthickRamu Я нашел способ, просто посмотрите на мой ответ 🙂
- 1 @MuhammedRefaat Для вашей подсказки требуется устройство с root-доступом 🙁
- 1 @DawidDrozd Спасибо, но у меня проблема. Корневой макет моей активности — RelativeLayout, и у него есть дочернее представление, для которого установлено android: layout_alignParentBottom = «true», панель навигации исчезает, но дочернее представление не перемещается вниз край экрана, как будто панель навигации установлена на невидимку, не исчезла, не могли бы вы помочь?
- 1 Если вы хотите использовать пространство, занимаемое панелью навигации, необходимо удалить все вхождения android:fitsSystemWindows=’true’ с ваших взглядов. Android Studio включает этот атрибут при создании некоторых макетов. См. Stackoverflow.com/a/42501330/650894
Это работает на 100%, и вы можете сделать то же самое для более низких версий API, даже если это запоздалый ответ, я надеюсь, что это поможет кому-то другому.
Если вы хотите, чтобы это было навсегда, просто позвоните FullscreenCall() внутри твоего onResume() метод.
- 2 Я рекомендую взглянуть на developer.android.com/training/system-ui/immersive.html, где объясняется, что ваш метод просто скрывает панель до тех пор, пока не произойдет взаимодействие, и снова вскоре после завершения взаимодействия.
- Большое вам спасибо — вот и все! : D: +1
Для людей, ищущих более простое решение, я думаю, вы можете просто добавить эту строку кода в onStart()
Это называется иммерсивным режимом. Вы можете посмотреть официальную документацию, чтобы узнать о других возможностях.
Согласно сайту разработчика Android
Я думаю, вы не можете (насколько я знаю) скрыть панель навигации навсегда.
Однако вы можете сделать одну уловку. Заметьте, это уловка.
Просто когда navigation bar появляется, когда пользователь касается экрана. Немедленно снова спрячьте это. Это весело.
Проверь это.
См. Это для получения дополнительной информации об этом ..
Скрыть системную панель в планшетах
В планшетах под управлением Android 4+ скрыть панель системы / навигации невозможно.
SYSTEM_UI_FLAG_HIDE_NAVIGATION — это новый флаг, который запрашивает полное скрытие панели навигации. Имейте в виду, что это работает только для панели навигации, используемой некоторыми телефонами (она не скрывает системную панель на планшетах).
Это мое решение:
Сначала определите логическое значение, которое указывает, отображается ли панель навигации или нет.
Второй метод создания, скрывающий панель навигации.
По умолчанию, если вы щелкнете действие после скрытия панели навигации, панель навигации будет видна. Итак, у нас есть состояние, если оно видно, мы его скроем.
Теперь установите OnClickListener на свое представление. Я использую Surfaceview, поэтому для меня:
Также мы должны вызывать этот метод при запуске активности. Потому что мы хотим скрыть это вначале.
Это проблема безопасности: https://stackoverflow.com/a/12605313/1303691
поэтому невозможно навсегда скрыть навигацию на планшете одним единственным вызовом в начале создания представления. Он будет скрыт, но всплывет при касании экрана. Таким образом, всего лишь второе прикосновение к экрану может вызвать событие onClickEvent в макете. Поэтому вам нужно перехватить этот вызов, но я еще не успел это сделать, я обновлю свой ответ, когда узнаю об этом. Или вы уже ответили?
Я думаю, что код удара поможет вам, и добавьте этот код перед setContentView ()
Добавьте этот код за setContentView () getWindow (). GetDecorView (). SetSystemUiVisibility (View.SYSTEM_UI_FLAG_LOW_PROFILE);
- 1 Поле требует API уровня 21+
- НЕТ, это даст мне тот же результат
Думаю, этот код решит вашу проблему. Скопируйте и вставьте этот код в свой MainActivity.java
Он будет работать на Android-10. Надеюсь, это поможет.
В других ответах в основном используются флаги для setSystemUiVisibility() метод в View . Однако этот API устарел с Android 11. Дополнительные сведения см. В моей статье об изменении видимости пользовательского интерфейса системы. В статье также объясняется, как правильно обрабатывать вырезки или как прислушиваться к изменениям видимости.
Вот фрагменты кода для отображения / скрытия системных панелей с новым API, а также устаревшим для обратной совместимости:
Источник
Different Ways to Hide ActionBar in Android with Examples
ActionBar is a primary toolbar within the activity that may display the activity title, application-level navigation affordances, and other interactive items. Although, Action Bar is an important feature for android applications, sometimes we have the need to hide it in either the entire app, or some particular activity, or during some particular work. This article explains and demonstrates various ways to hide the ActionBar in an Android Application. There are various ways to hide Action Bar, demonstrated below:
Different ways to Hide ActionBar
1. Hide ActionBar from the entire App using styles.xml
If you want to hide Action Bar from the entire application (from all Activities and fragments), then you can use this method. Just go to res -> values -> styles.xml and change the base application to “Theme.AppCompat.Light.NoActionBar“.
Below is the code snippet for this method and changes are made to styles.xml:
Attention reader! Don’t stop learning now. Get hold of all the important Java Foundation and Collections concepts with the Fundamentals of Java and Java Collections Course at a student-friendly price and become industry ready. To complete your preparation from learning a language to DS Algo and many more, please refer Complete Interview Preparation Course.
Источник
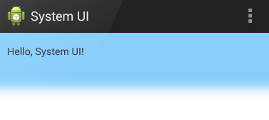
Hide Navigation Bar from Android Screen Activity
By default every Android Activity that will you create will have a Navigation Bar or so-called «The Status Bar» (Update 2018: This is not true anymore — you can select a completely blank template with no Navigation Bar while creating a new project using Android Studio) this bar displays the title of the Activity, you might be working on a scenario where you want to have a full-screen display for your app, this can be done in two ways — by using the XML property or programmatically using Java/Kotlin code.
Method 1: Using AndroidManifest.xml
To hide the title bar and the navigation bar from an Android Activity to make your App utilize full screen, all we need to do is add the following attribute to the Activity tag(in AndroidManifest.xml) which needs no title bar.
Below is how the activity code will look like,
If you want to make your whole application as full screen then use the below code snippet in the App Manifest file.
This is the most preferred way of setting your Activity full screen using Manifest XML file as it’s easy to maintain.
This is an old post, as Android development have evolved maybe this may not hold true if you are on Android 4.0 or above (API 14), if you want to do the same thing using Java code this can be achieved as following,
Method 2: Using Java/Kotlin Code
Using the code you can archive this using the WindowManager flags. You may want to use this approach if you want to toggle between hiding and showing status bar based on user interaction with the activity.
If the Android version is lower than Jellybean i.e. API 16 or lower,
If the Android version is 4.1 or higher,
If you just want to hide the title bar, you can use: this.requestWindowFeature(Window.FEATURE_NO_TITLE);
Comments:
- Nowadays Google provides pre-set templates for your application if you are using Android Studio!
> admin: Thanks, I have updated the text of this post with this note!
Источник
Get started with the Navigation component
This topic shows you how to set up and work with the Navigation component. For a high level overview of the Navigation component, see the Navigation overview.
Set up your environment
To include Navigation support in your project, add the following dependencies to your app’s build.gradle file:
Groovy
Kotlin
For information on adding other Architecture Components to your project, see Adding components to your project.
Create a navigation graph
Navigation occurs between your app’s destinations—that is, anywhere in your app to which users can navigate. These destinations are connected via actions.
A navigation graph is a resource file that contains all of your destinations and actions. The graph represents all of your app’s navigation paths.
Figure 1 shows a visual representation of a navigation graph for a sample app containing six destinations connected by five actions. Each destination is represented by a preview thumbnail, and connecting actions are represented by arrows that show how users can navigate from one destination to another.
 Figure 1. A navigation graph that shows previews of six different destinations that are connected via five actions.
- Destinations are the different content areas in your app.
- Actions are logical connections between your destinations that represent paths that users can take.
To add a navigation graph to your project, do the following:
- In the Project window, right-click on the res directory and select New > Android Resource File. The New Resource File dialog appears.
- Type a name in the File name field, such as «nav_graph».
- Select Navigation from the Resource type drop-down list, and then click OK.
When you add your first navigation graph, Android Studio creates a navigation resource directory within the res directory. This directory contains your navigation graph resource file ( nav_graph.xml , for example).
Navigation Editor
After adding a graph, Android Studio opens the graph in the Navigation Editor. In the Navigation Editor, you can visually edit navigation graphs or directly edit the underlying XML.
 Figure 2. The Navigation Editor
- Destinations panel: Lists your navigation host and all destinations currently in the Graph Editor.
- Graph Editor: Contains a visual representation of your navigation graph. You can switch between Design view and the underlying XML representation in the Text view.
- Attributes: Shows attributes for the currently-selected item in the navigation graph.
Click the Text tab to see the corresponding XML, which should look similar to the following snippet:
Источник


