- Install and configure the NDK and CMake
- Install NDK and CMake automatically
- Install the NDK and CMake
- Configure a specific version of CMake
- Groovy
- Kotlin
- Install a specific version of the NDK
- Configure specific versions of the NDK in your project
- Groovy
- Kotlin
- Default NDK version per AGP version
- Setting Up Android SDK and NDK for Unreal
- How to set up your Android development environment for Unreal 4.25 and later
- Recommended Setup
- 1. Installing Android Studio
- 2. Setting Up Android Studio for First-Time Use
- Finalizing Android Studio Installation on Your OS
- 3. Setting Up Unreal to Use Android NDK r21b
- Manually Targeting SDK Paths
- Android NDK Compatibility
Install and configure the NDK and CMake
To compile and debug native code for your app, you need the following components:
- The Android Native Development Kit (NDK): a set of tools that allows you to use C and C++ code with Android.
- CMake: an external build tool that works alongside Gradle to build your native library. You do not need this component if you only plan to use ndk-build.
- LLDB: the debugger Android Studio uses to debug native code. By default, LLDB will be installed alongside Android Studio.
This page describes how to install these components automatically, or by using Android Studio or the sdkmanager tool to download and install them manually.
Install NDK and CMake automatically
Android Gradle Plugin 4.2.0+ can automatically install the required NDK and CMake the first time you build your project if their licenses have been accepted in advance. If you’ve already read and agree to the license terms, then you can pre-accept the licenses in scripts with the following command:
Install the NDK and CMake
When you install the NDK, Android Studio selects the latest available NDK. For most projects, installing this default version of the NDK is sufficient. If your project needs one or more specific versions of the NDK, though, you can download and configure specific versions. Doing so helps you ensure reproducible builds across projects that each depend on a specific version of the NDK. Android Studio installs all versions of the NDK in the android-sdk /ndk/ directory.
To install CMake and the default NDK in Android Studio, do the following:
With a project open, click Tools > SDK Manager.
Click the SDK Tools tab.
Select the NDK (Side by side) and CMake checkboxes.
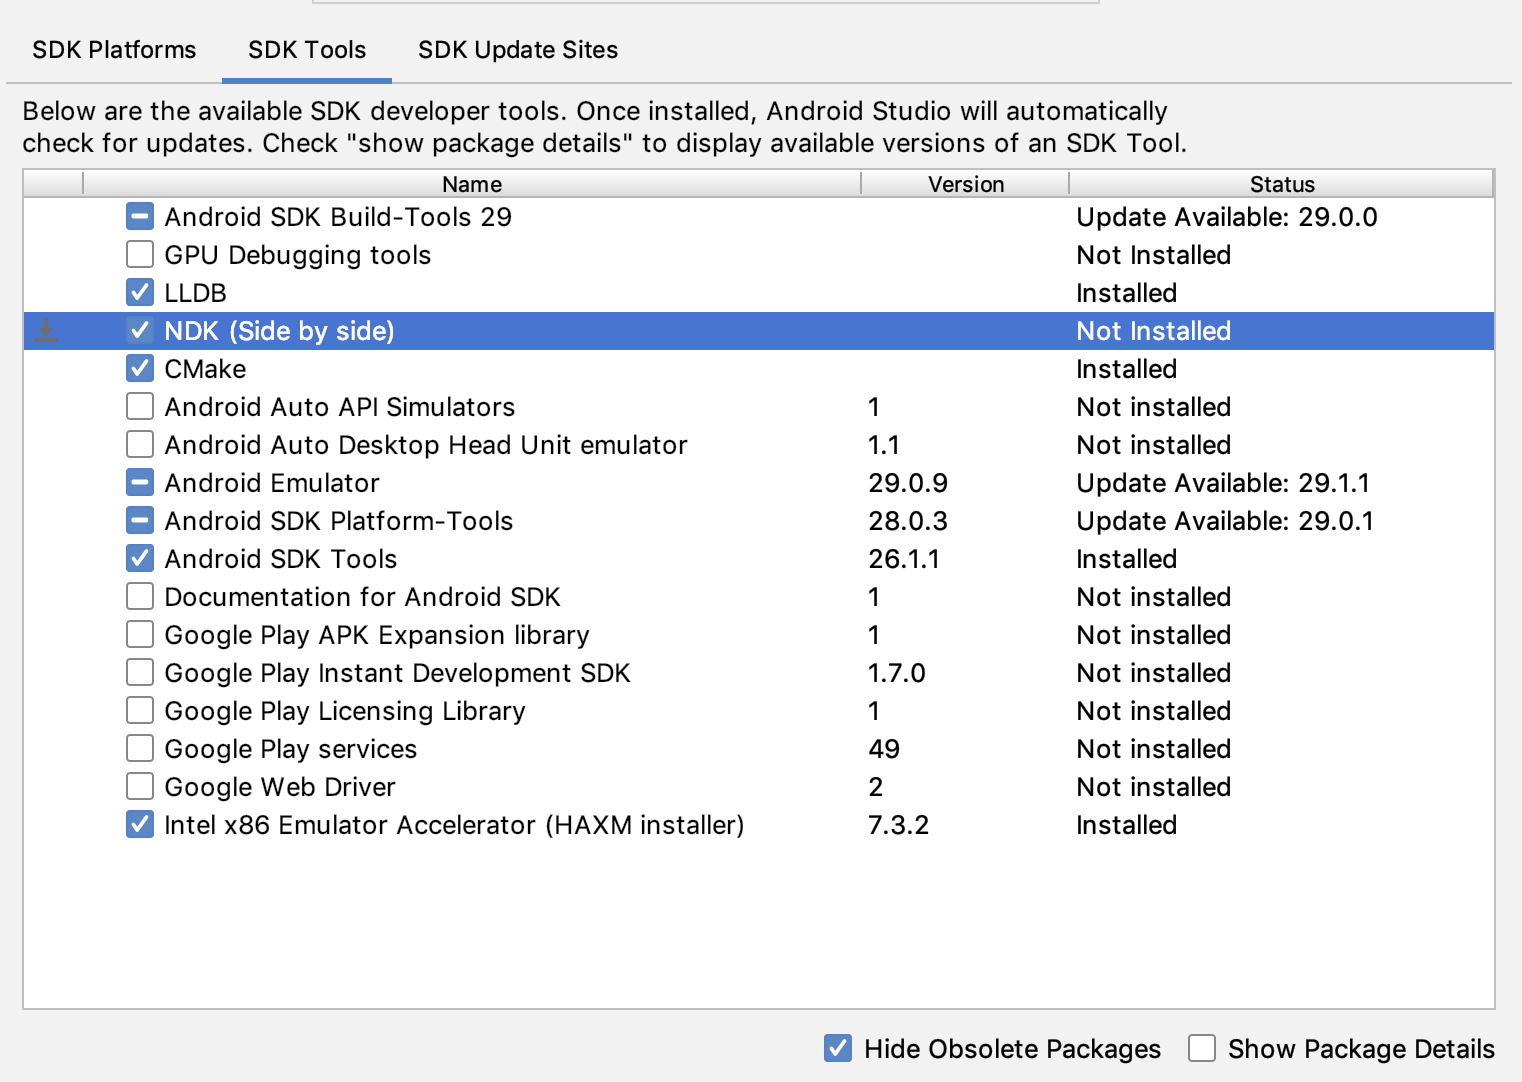 Figure 1: The SDK Tools window showing the NDK (Side by side) option
Click OK.
A dialog box tells you how much space the NDK package consumes on disk.
Click OK.
When the installation is complete, click Finish.
Your project automatically syncs the build file and performs a build. Resolve any errors that occur.
Configure a specific version of CMake
The SDK Manager includes the 3.6.0 forked version of CMake and version 3.10.2. Projects that don’t set a specific CMake version are built with CMake 3.10.2. To set the CMake version, add the following to your module’s build.gradle file:
Groovy
Kotlin
If you want to use a CMake version that is not included by the SDK Manager, follow these steps:
- Download and install CMake from the official CMake website.
- Specify the CMake version you want Gradle to use in your module’s build.gradle file.
Either add the path to the CMake installation to your PATH environment variable or include it in your project’s local.properties file, as shown. If Gradle is unable to find the version of CMake you specified in your build.gradle file, you get a build error.
If you don’t already have the Ninja build system installed on your workstation, go to the official Ninja website, and download and install the latest version of Ninja available for your OS. Make sure to also add the path to the Ninja installation to your PATH environment variable.
Install a specific version of the NDK
To install a specific version of the NDK, do the following:
With a project open, click Tools > SDK Manager.
Click the SDK Tools tab.
Select the Show Package Details checkbox.
Select the NDK (Side by side) checkbox and the checkboxes below it that correspond to the NDK versions you want to install. Android Studio installs all versions of the NDK in the android-sdk /ndk/ directory.
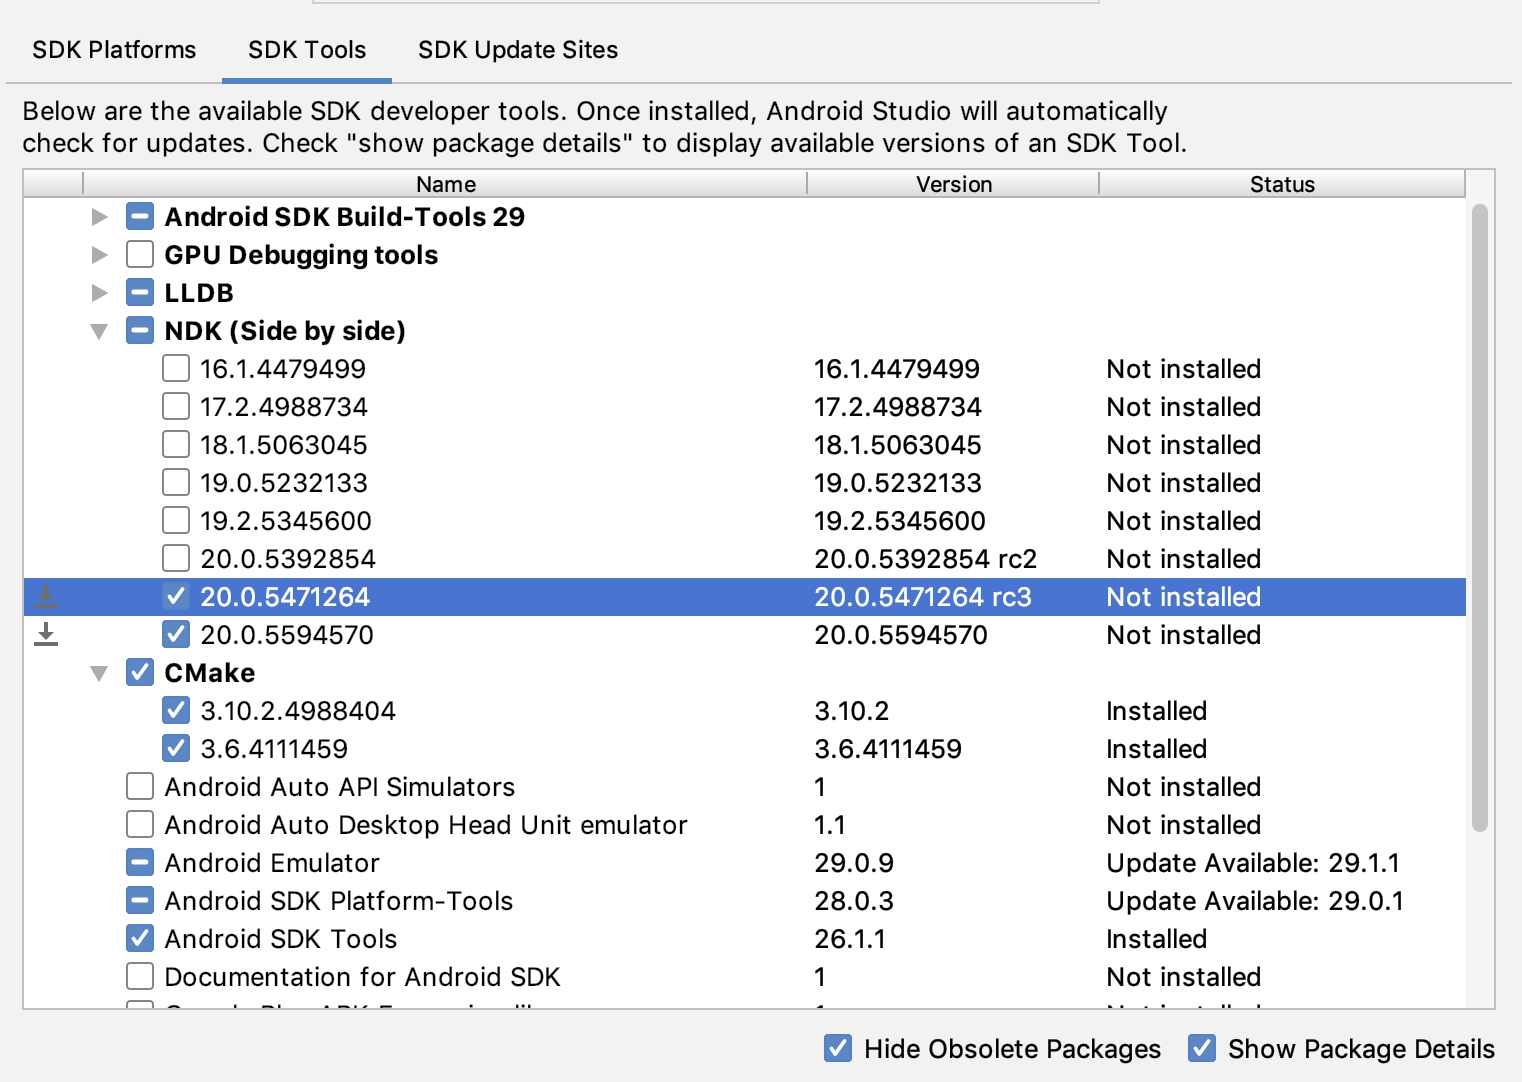 Figure 2: The SDK Tools window showing the NDK (Side by side) options
Click OK.
A dialog box tells you how much space the NDK package(s) consumes.
Click OK.
When the installation is complete, click Finish.
Your project automatically syncs the build file and performs a build. Resolve any errors that occur.
Configure each module with the version of the NDK you want it to use. When using Android Studio 3.6 or higher, if you do not specify the version, the Android Gradle plugin chooses a version that it is known to be compatible with.
Configure specific versions of the NDK in your project
You may need to configure the version of the NDK in your project if one of the following is true:
- Your project is inherited and you need to use specific versions of the NDK and the Android Gradle plugin (AGP). For more information, see Configure the NDK for the Android Gradle plugin.
You have multiple versions of the NDK installed and you want to use a specific one. In this case, specify the version using the android.ndkVersion property in the module’s build.gradle file, as shown in the following code sample.
Groovy
Kotlin
Default NDK version per AGP version
Before release, each AGP version is thoroughly tested with the latest stable NDK release at that time. For AGP version 3.6 and above, that NDK version will be used to build your projects if you do NOT specify an NDK version in the build.gradle file. The default NDK version is documented inside the AGP release notes. The current default NDK versions are listed in the following table:
| Android Studio/Gradle Plugin Version | |||||||
|---|---|---|---|---|---|---|---|
| 7.0 | 4.2 | 4.1 | 4.0 | 3.6 | 3.5 | 3.4 | |
| Default NDK version specified for the version of AGP | 21.4.7075529 | 21.4.7075529 | 21.1.6352462 | 21.0.6113669 | 20.0.5594570 | No default specified | |
Content and code samples on this page are subject to the licenses described in the Content License. Java is a registered trademark of Oracle and/or its affiliates.
Источник
Setting Up Android SDK and NDK for Unreal
How to set up your Android development environment for Unreal 4.25 and later
Unreal Engine 4.25 and later uses the Android Software Development Kit (SDK) distributed with Android Studio for all essential Android development components, including the Android Native Development Kit (NDK). This page provides a walkthrough for setting up Android Studio and ensuring that Unreal Engine recognizes these components correctly, and some troubleshooting tips for managing NDK installations and earlier engine builds.
Recommended Setup
You should make sure that the Unreal Editor and the Epic Games Launcher are both closed to ensure that there are no problems with either the installation of NDK components or setting your environment variables for the engine.
If you are moving to Unreal 4.25 from 4.24 or earlier, we recommend that you uninstall CodeWorks for Android and any existing NDK components, and delete the folder CodeWorks was installed to. Otherwise, Android Studio will continue to use the previous CodeWorks installation folder for SDK updates.
The default installation directory for CodeWorks is C:/NVPACK. Make sure this folder is deleted when you finish uninstalling CodeWorks.
If you need to support an earlier installation of Unreal Engine while also maintaining an installation of Unreal 4.25 or later, refer to the sections on Manually Targeting SDK Paths and Android NDK Compatibility below.
1. Installing Android Studio
Before setting up the required SDK and NDK components on your computer, you need to install Android Studio version 3.5.3.
Navigate to the Android Studio Archive in your web browser. Scroll down to Android Studio 3.5.3, click to unfold the dropdown, and download the appropriate installer or zip file for your operating system.
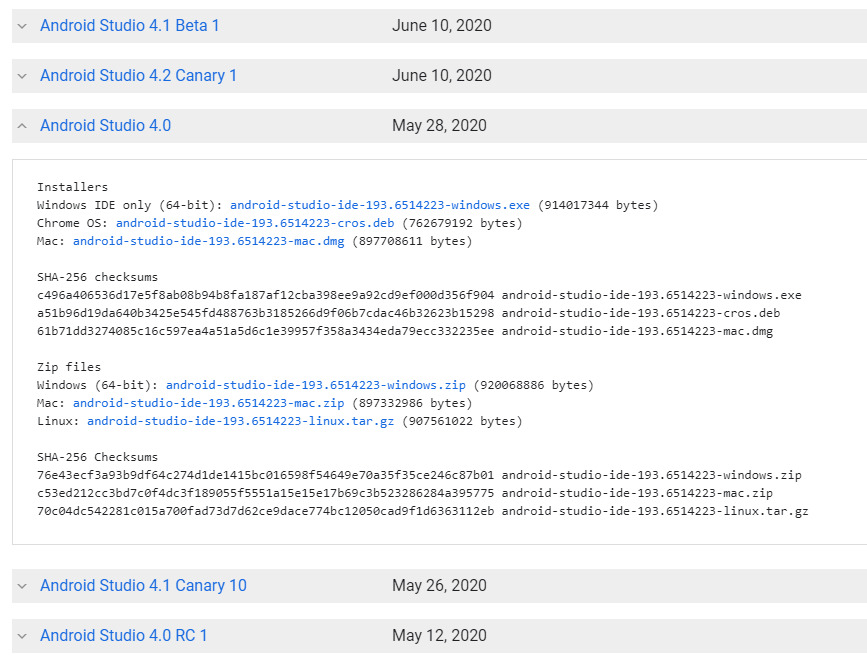
Click image for full size.
Run the Android Studio installer. In the Welcome to Android Studio Setup dialog, click Next to continue.
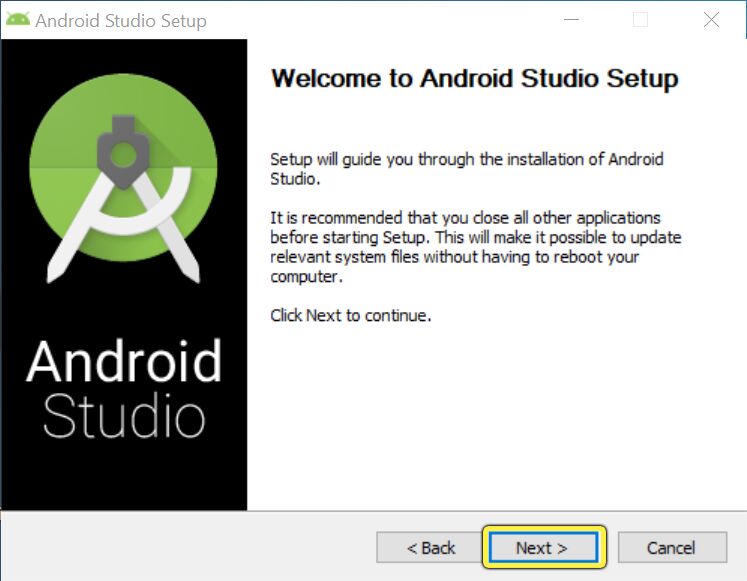
Click image for full size.
In the Choose Components dialog, click Next to continue. You can leave the default components enabled.

Click image for full size.
In the Configuration Settings dialog, select an appropriate install location and click Next to continue. We recommend using the default location.

Click image for full size.
In the Choose Start Menu Folder, click Install to begin the installation process.
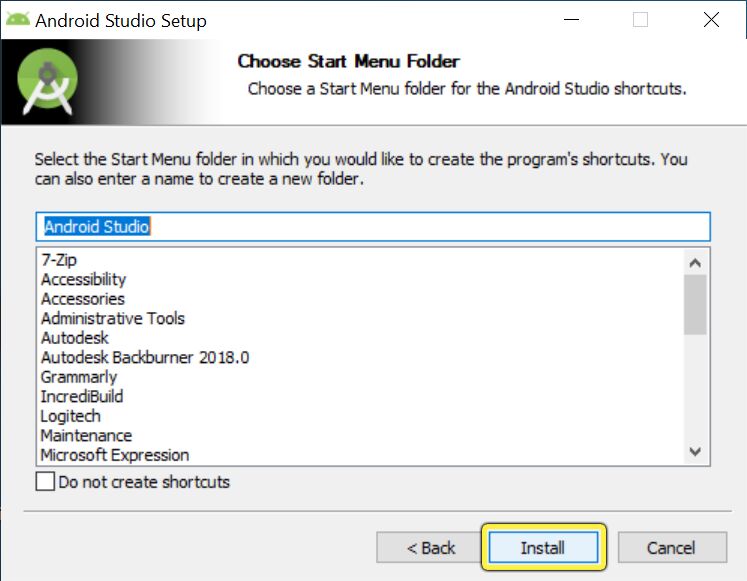
Click image for full size.
When the installation finishes, click Next to begin setting up components.

Click image for full size.
When setup completes, make sure the Start Android Studio box is checked and click Finish to exit the installer.
2. Setting Up Android Studio for First-Time Use
When you start your new install of Android Studio for the first time, follow these steps:
When the Import Android Studio Settings dialog appears, select do not import settings, then click OK to continue.

When the Data Sharing dialog appears, choose whether or not you want to send usage statistics to Google. This is an option you may choose at your discretion, and either choice will continue to the next step.

Click image for full size.
The Android Studio Setup Wizard will appear. Click Next to continue. If you are prompted for an update, click the X button to dismiss the prompt, as you need to specifically install version 3.5.3.

Click image for full size.
In the Install Type dialog, select Custom and click Next.

Click image for full size.
In the Select UI Theme dialog, choose your preferred theme and click Next.

Click image for full size.
In the Verify Settings dialog, check to make sure that you are using the default SDK path. Click Finish to finalize your setup and begin downloading components.
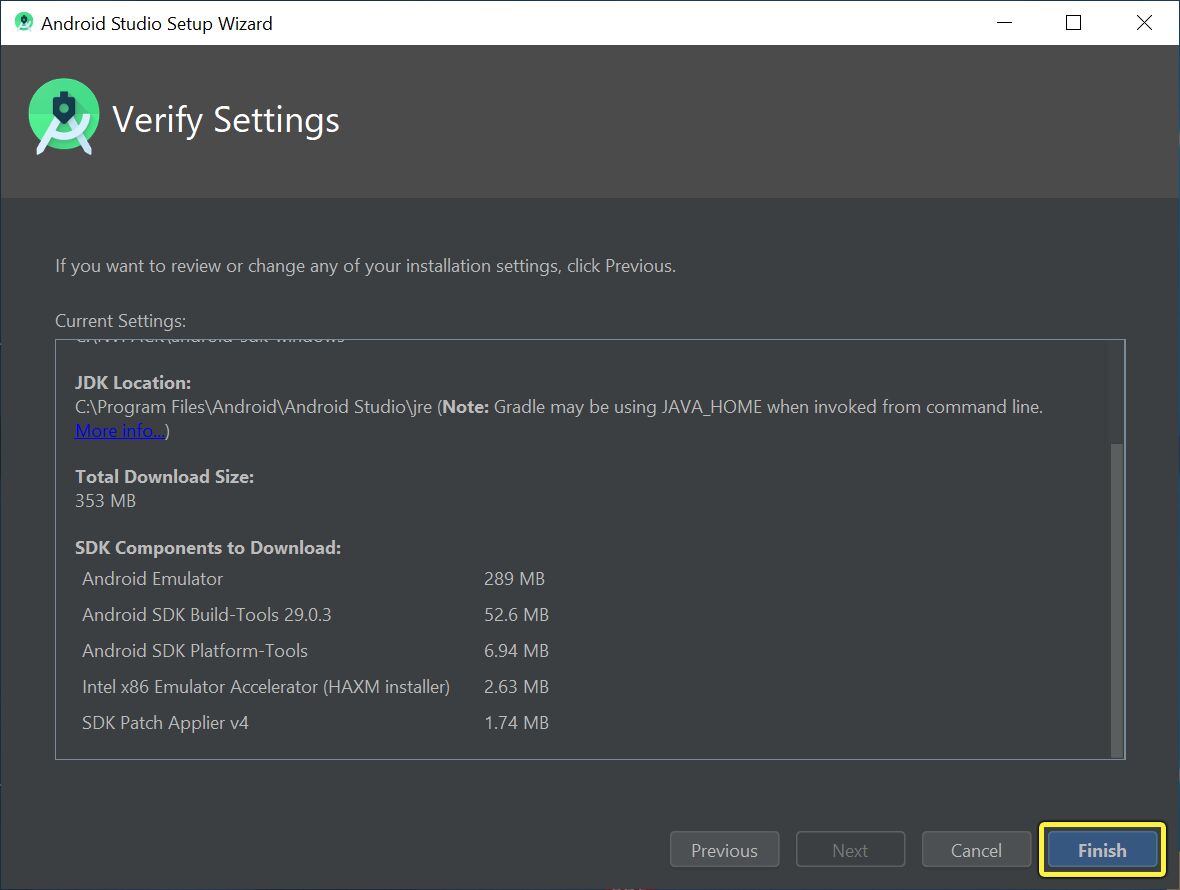
Click image for full size.
If you do not use the default SDK path, it is possible for SetupAndroid.bat to fail during a later step, as it will be unable to locate needed files.
When components are finished downloading, click Finish again to end setup.
Finalizing Android Studio Installation on Your OS
If you are on Windows, restart your computer.
If you are on Linux, close your terminal window and reopen it.
If you are on MacOS, you can either close your terminal window and reopen it, or log out and log back in.
3. Setting Up Unreal to Use Android NDK r21b
Navigate to your Unreal Engine 4 install directory — for example, C:/Program Files/Epic Games/UE_4.25.
Open Engine/Extras/Android.
Inside this directory, run the SetupAndroid script appropriate for your operating system. SetupAndroid.bat is for Windows, SetupAndroid.command is for Mac, and SetupAndroid.sh is for Linux.

Click image for full size.
You will be prompted to accept the Android SDK license agreement. Type Y and press Enter to accept.
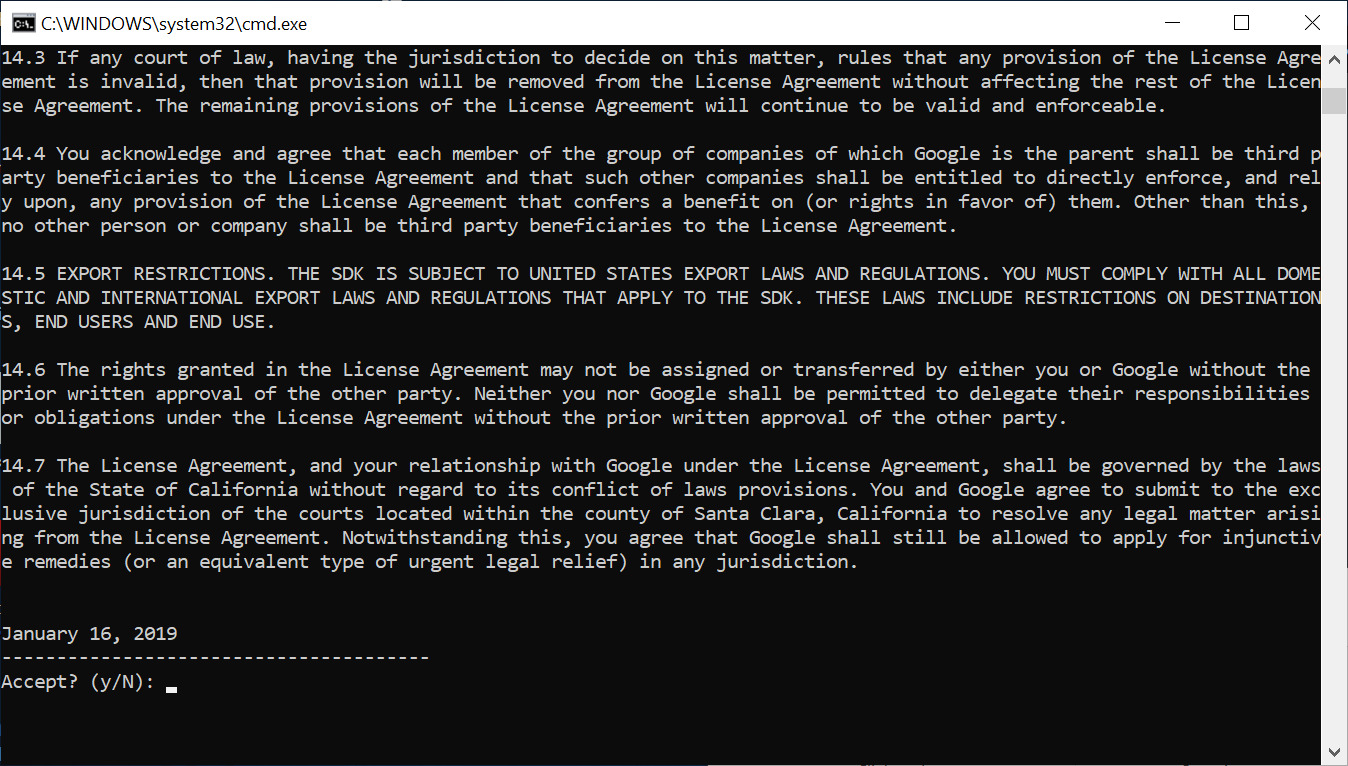
Click image for full size.
When the installation completes, press any key to dismiss the command prompt.
Restart your computer for all changes to take effect.
This script will download and install NDK r21b for you in your Android home directory. The install directory for NDK should be C:/Users/[Username]/AppData/Local/Android/SDK/ndk/, where «username» is your login name for your computer. You should see a folder containing NDK r21b.
In the event that you receive an error stating that repositories.cfg cannot be loaded, navigate to the folder where it is expected (usually C:/Users/[Username].android/repositories ) and create an empty repositories.cfg file. Android setup should then proceed normally.
If you receive an error stating that a package called lldb;3.1 could not be loaded, open the SetupAndroid script with a text editor, and locate the line of code that reads:
Remove the entry in this list for lldb;3.1 , but leave the others. This will enable setup to run normally. This issue is addressed in 4.25.1.
Manually Targeting SDK Paths
If you followed the above how-to sections correctly, Unreal Engine will automatically associate the SDK paths for the Android SDK, the current Android NDK version, and the Java Development Kit (JDK). However, if you are using an earlier version of the Unreal Engine alongside Android Studio, you may need to manually target your SDK paths to be compatible. This is most likely to be the case if you have an installation of Unreal Engine 4.25 alongside an earlier version that used CodeWorks.
Do not install CodeWorks and Android Studio at the same time, otherwise you will receive errors. If you need to support an earlier version of Unreal Engine alongside 4.25 or later, use the Android Studio setup in this document, then follow the instructions in this section.
You can find the SDK paths by opening Edit > Project Settings, navigating to the Platforms > Android > Android SDK section.
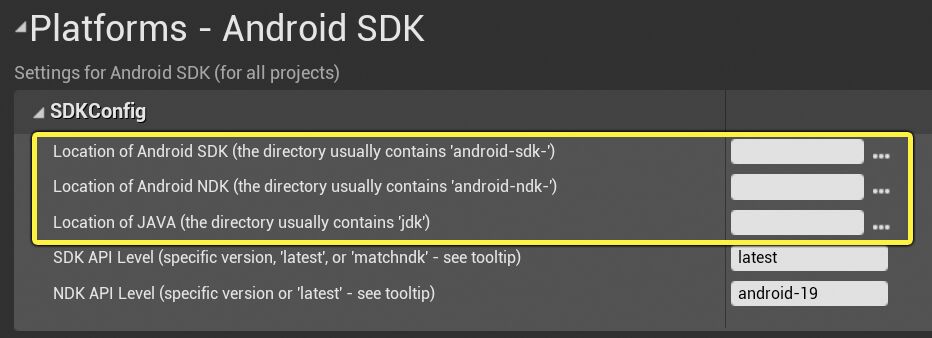
When these fields are left blank, they fall back on a set of default paths used by the installation process in the previous sections. If you have multiple installations of these components, or have installed them in non-standard directories, you can manually provide their paths here. Alternatively, you can open DefaultEngine.ini and provide them under the [/Script/AndroidPlatformEditor.AndroidSDKSettings] section.
If the entries for SDKPath , NDKPath , and JDKPath do not exist in your DefaultEngine.ini, they will use the default path to the Android home directory.
Android NDK Compatibility
The following table shows which NDK versions are required or compatible with different versions of Unreal Engine.
Источник


