- How to Install Android with Google Play Store on Raspberry Pi 4
- Install Android on Raspberry Pi 4 & 3 (2021)
- Basic Requirements
- Essential Downloads
- Install Android on Raspberry Pi
- Install Google Play Store and Services on Android-based Raspberry Pi
- Fix “Device is not Play Protect certified” Error on Android-based Raspberry Pi
- Run Android on Raspberry Pi Without Any Restrictions
- How to Install Android on Raspberry Pi 4? (with Play Store)
- What is LineageOS?
- Introduction
- Does it work on Raspberry Pi?
- Install Android on Raspberry Pi
- Prerequisites
- Flash the SD card
- Boot on LineageOS
- Android configuration
- Install Google Play Store on Android
- Reboot in recovery mode
- Install Google Apps
- Sign in on Play Store
- Video
- Recommended stuff for Android on Raspberry Pi
- Conclusion
- Raspberry Pi Resources
- Recent Posts
- Welcome
- Raspberry Pi Course
- Write For RaspberryTips
How to Install Android with Google Play Store on Raspberry Pi 4
While you can remotely set up and run Raspberry Pi without a monitor or an ethernet cable, you will need a host of wired accessories if you choose to install Android on your Raspberry Pi 4 board. So in this article, we bring you a detailed guide on how to install Android on Raspberry Pi 4 and 3. We have also mentioned a way to run the Android 11 build on Raspberry Pi, but for stability and good performance, we have chosen to stick with Android 10. With that in mind, let’s go ahead and learn how to run Android on Raspberry Pi 4 and RPi 3.
Install Android on Raspberry Pi 4 & 3 (2021)
This is an all-in-one guide for both beginners and experts to get Android running on Raspberry Pi. I would suggest you closely follow the step-by-step instructions, and you will have Android running on your board in no time.
Basic Requirements
1. You will need a separate monitor to set up and install Android on Raspberry Pi.
2. HDMI cable based on your board. Raspberry Pi 4 will need a micro HDMI to HDMI cable whereas Raspberry Pi 3 will require an HDMI to HDMI cable.
2. A microSD card having free space of 16GB or more.
3. Keyboard and mouse. If you have a wireless combo one, that’s even better.
4. A power adapter depending on your board.
Essential Downloads
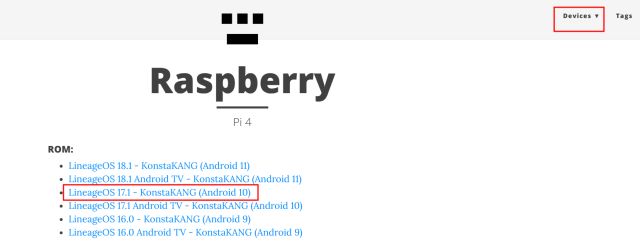
1. First of all, download Android for Raspberry Pi. A developer named KonstaKANG is popular for making Android ROMs for Raspberry Pi 3 and 4. The ROMs are based on Lineage OS and available in many versions, including Android 9, 10, and 11. Depending on your board, download any Android version, but I would recommend Android 10 for stability. You can click here to head over to the download page for RPi 4. If you want to download Android for RPi3, click on the Devices menu at the top-right corner.
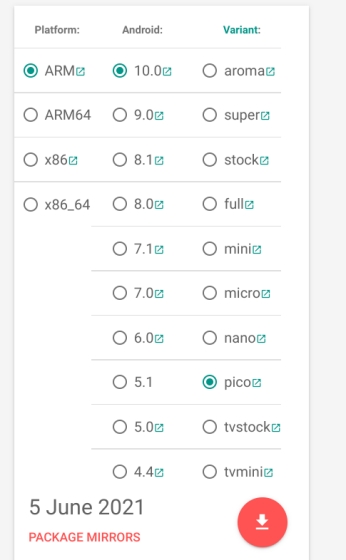
2. Next, you need to download the GApps package as the Android build does not come with Google apps and services. Open this link and choose “ARM” and “Android 10” as we are installing the Android 10 build and “pico” as it’s the bare minimum required for running Google Play Services.
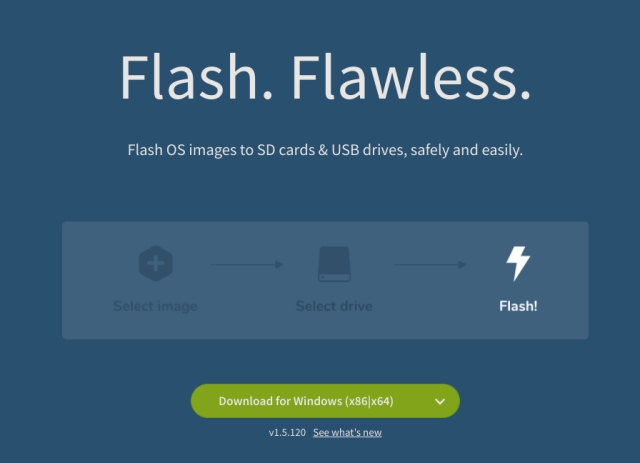
3. Next, you need to download balenaEtcher (Free) to flash Android onto the SD card.
Install Android on Raspberry Pi
1. Once you have downloaded the Android build, extract it, and you will get an IMG file.
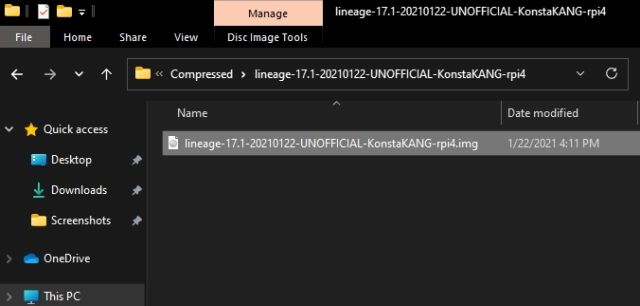
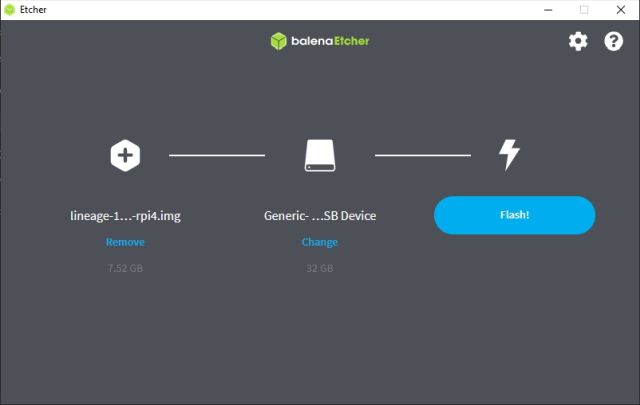
2. Next, open balenaEtcher and select the Android IMG file. In my case, it’s an Android 10 build. After that, choose the SD card and click on “Flash!“.
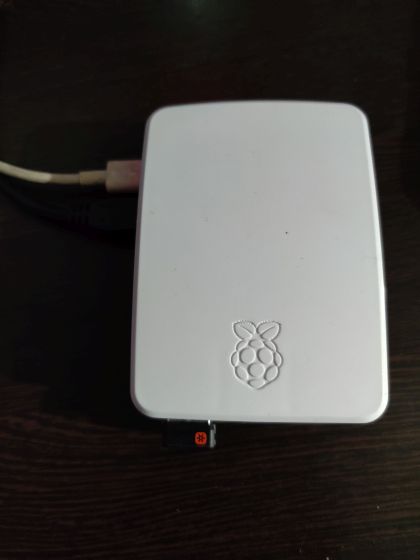
3. Once the flashing process is complete, remove the SD card and insert it into the Raspberry Pi module. In addition, connect a mouse and keyboard. Finally, connect the power source and HDMI cable to the monitor.
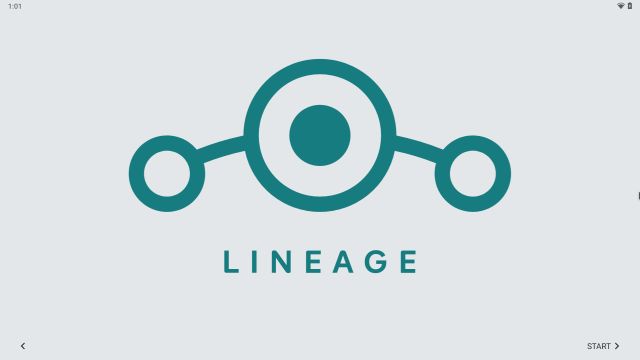
4. Power up the Raspberry Pi, and you will find Lineage OS loading up on the screen within a few seconds.
5. After a while, you will be greeted with the usual Android setup process. Follow the on-screen instructions and make sure to connect to a Wi-Fi network.
Install Google Play Store and Services on Android-based Raspberry Pi
1. Now that you have installed Android on Raspberry Pi, it’s time to add support for Google Play Store and other services. Use a USB drive and move the GApps package to Raspberry Pi from your computer. I tried downloading the GApps package directly on the Raspberry Pi, but that didn’t work. If you can download it on the board itself, it will be easier for you.
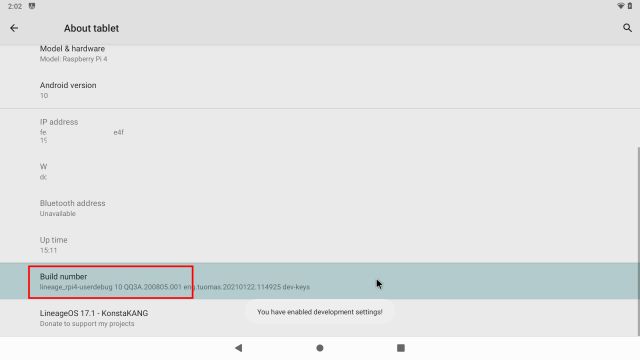
2. Once you have moved the GApps package to the board, open Settings and move to “About tablet”. Here, click on “Build Number” 7-8 times continuously to unlock Developer Options. You can search for “build” on the Settings page if “About tablet” does not appear on the settings page.
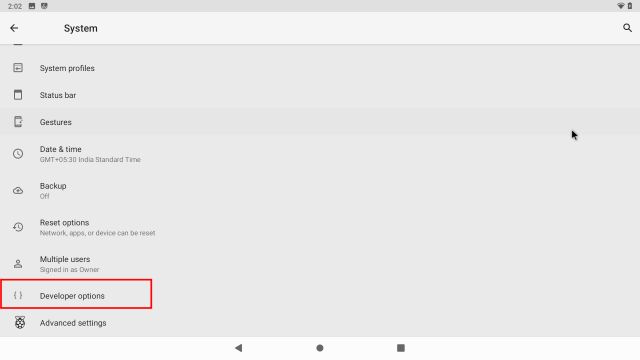
3. Now, move back to the main Settings menu and navigate to System -> Advanced -> Developer Options.
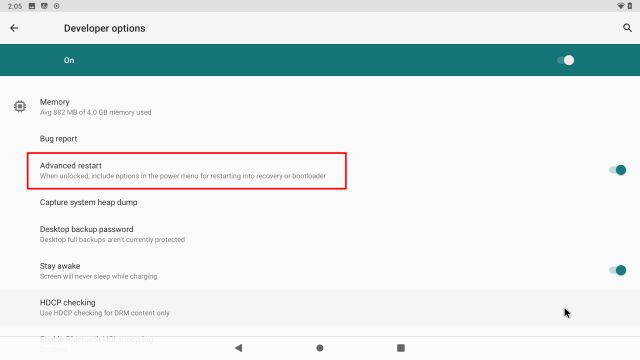
4. Next, turn on “Advanced Restart“.
5. Now, to restart Android on Raspberry Pi, you need to press and hold the “F5” key on the keyboard. Then, click on “Restart” and choose “Recovery”.
Note : Some keyboard shortcuts for Android on Raspberry Pi are as follows: F1 = Home, F2 = Back, F3 = Multi-tasking, F4 = Menu, F5 = Power, F11 = Volume down, and F12 = Volume up.
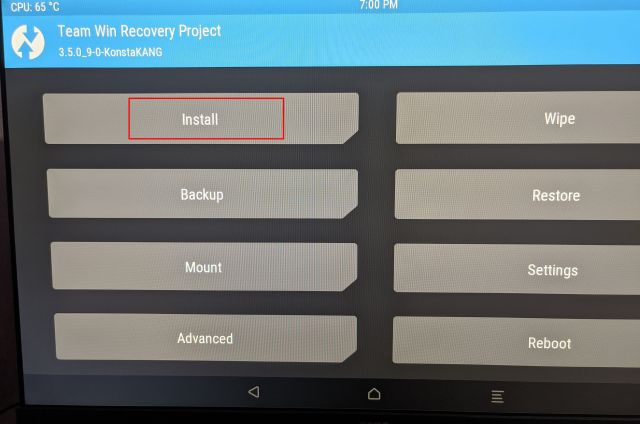
6. You will now boot into the TWRP recovery. If prompted, click on “Swipe to Allow Modifications”. After that, click “Install“.
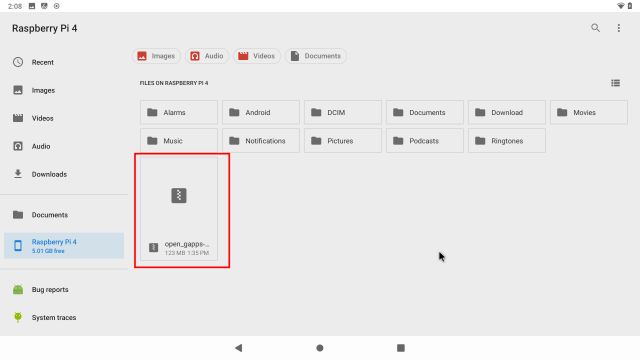
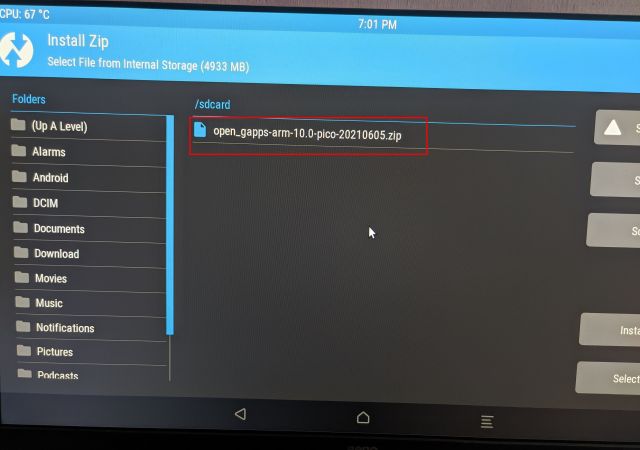
7. Here, choose the GApps package that we transferred to the Raspberry Pi board.
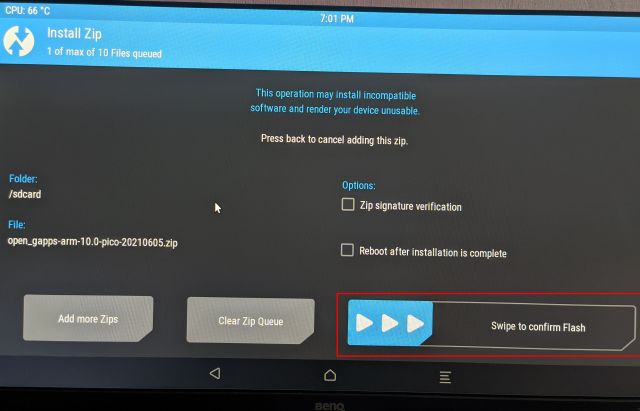
8. Finally, click on “Swipe to confirm Flash“.
9. Now, click on the TWRP icon on the top-left corner, and it will take you to the main menu. This time, navigate to Wipe -> Swipe to Factory Reset.
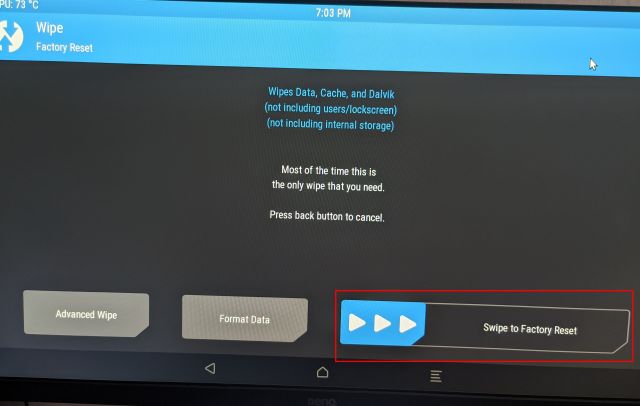
10. Once the reset is complete, click on “Reboot System” on the same page.

11. And voila! You will boot directly into Android on your Raspberry Pi. And this time, you will be prompted with the Google setup. Now, go ahead and follow the on-screen instructions to log into your Google account. I suggest you not to add your primary Google account as Google has been terminating accounts for unknown policy violations of late.
12. So here it is. Google Play Store and all the Google services are now installed on Raspberry Pi and working absolutely fine. In case you are getting a “Device is not Play Protect certified” notification or some apps like Netflix are not available for download, follow the steps below to fix this issue.
Fix “Device is not Play Protect certified” Error on Android-based Raspberry Pi
If you are getting this error on your Android-based Raspberry Pi, there is nothing to worry about. You can manually enroll your Android-based Raspberry Pi on Google’s list of certified devices. To begin with, install the Device ID app by Evozi (Play Store/ APKMirror) on Raspberry Pi. If Play Store is not opening for you, you can sideload the Device ID APK from APKMirror.
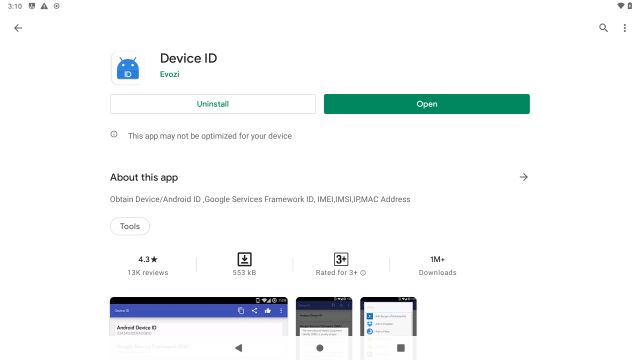
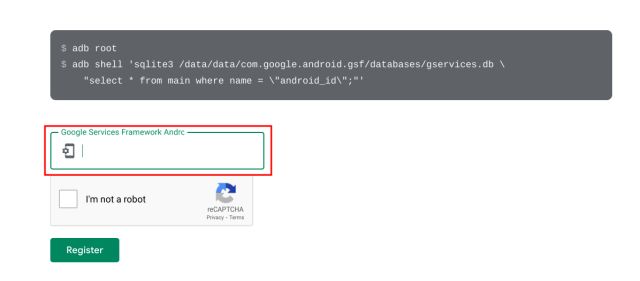
2. Next, open the Device ID app, and it will display the code for Google Service Framework (GSF). Click on it and “copy” the code.

3. Now, open google.com/android/uncertified on your Raspberry Pi and paste the GSF code. After that, click on “Register“. That’s all you need to do to fix the “Device is not Play Protect certified” error. Now, wait for 5-10 minutes, and the notification should be gone. You will be able to access the Google Play Store and all its apps on your Raspberry Pi 4.
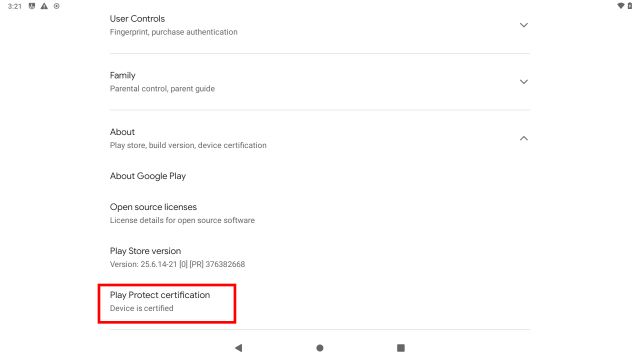
4. If it’s still not working, restart your Android-based Raspberry Pi. Press and hold the F5 key and click on Restart -> System. This time, the error should be gone. You can check your device certification from the Play Store -> Profile menu on the top-right corner -> Settings -> About -> Play Protect certification. Here, it should show the “Device is certified”.
Run Android on Raspberry Pi Without Any Restrictions
So that is how you can install and run Android on a Raspberry Pi. In this guide, I have chosen KonstaKANG’s Android build as it offers more stability and has wider support for older Pi boards. In case you want to run the latest Android 11 build, check out recently released OmniROM builds. That said, it’s only compatible with RPi 4, featuring at least 4GB of RAM. But the good part is that it comes preloaded with Google services.
So for more such interesting tutorials on Raspberry Pi, stay tuned with us. And if you want to use your Raspberry Pi to set up Pi-hole, we have a dedicated guide that provides the instructions from scratch. Finally, if you have any questions, comment them down below and let us know. We will try to help you out.
Источник
How to Install Android on Raspberry Pi 4? (with Play Store)
Installing Android on Raspberry Pi is a dream that is difficult to achieve. Perhaps you’ve already tried, but were unsuccessful. Me too, many times :).
I already created a tutorial on this topic using Emteria and a Raspberry Pi 3. But Emteria is a paid software, and the whole system was a bit slow and unstable on Pi 3.
How does it work now with a better Raspberry Pi and OS? We’ll see learn about this in today’s post.
Konstakang has created a custom image of LineageOS, an open-source version of Android, that can be installed on Raspberry Pi 3 and 4. Google Apps can then be added on the SD card to have a complete Android version running on Raspberry Pi.
In this tutorial, I will guide you through all of the steps with LineageOS, which is a good alternative to run Android on Raspberry Pi 4.
Edit : I recently tested this Android version with a touch screen for Raspberry Pi (I have this one from SunFounder to be precise), and it works very well. Android is designed for touch devices, so it makes sense :).
If you are looking to quickly progress on Raspberry Pi, you can check out my e-book here. It’s a 30-day challenge, where you learn one new thing every day until you become a Raspberry Pi expert. The first third of the book teaches you the basics, but the following chapters include projects you can try on your own.
What is LineageOS?
To view this video please enable JavaScript, and consider upgrading to a web browser that supports HTML5 video
Introduction
LineageOS is a free and open source operating system, like most new systems I introduce on this website.
The first thing to understand, LineageOS is made for smartphones and tablets, it’s not an emulator or something specially dedicated to single board computers.
LineageOS was created in 2016, and is a fork from CyanogenMod.
LineageOS comes with a few basic applications (browser, calendar, calculator, etc.), but it doesn’t com with any Google applications or any useless preinstalled software.
If you are interested, you can get further information on their website.
Does it work on Raspberry Pi?
As you can imagine, I will not write about something that doesn’t work on Raspberry Pi on this site :).
So yes, there is a way to make it work on your Pi, but it’s not with the official release.
As you can see on the download page here, LineageOS is available for many devices (Samsung, Huawei, Sony, etc.), but not for anything other than smartphones and tablets.
However, there is an unofficial version available on this website for Raspberry Pi 4.
It’s not the latest LineageOS version (it’s Android 11 at the time of writing), but it’s good enough for the moment.
So, I’ll show you how to install this version on your Raspberry Pi 4.
There is also a version available for Raspberry Pi 3 if you use this model.
One good idea is to use it with a touch screen.
This way you can get a real Android tablet for cheap.
As explained in the Introduction, I have tested it with a 7″ one from SunFounder, and it works really well (you can read my review here).
Install Android on Raspberry Pi
Here are the required steps to install Android on Raspberry Pi:
- Download the LineageOS version for Raspberry Pi from Konstakang.
- Download OpenGapps and save it on a USB key.
- Flash the LineageOS image on a SD card and start the Raspberry Pi.
- Reboot in recovery mode to install the Google apps.
I will now explain each step in detail.
Prerequisites
Ok, so you’ll need to download several things before starting the installation process.
It’s not always easy to download it directly from Raspberry Pi, so I recommend downloading it from your computer.
I will explain what to do with each file later.
So, download all these files on your computer:
- Balena Etcher.
We’ll use it to flash the SD card. It’s available on any operating system.
You may already have it or prefer another tool, which isn’t a problem.
Raspberry Pi Imager will work, you just need to choose “custom OS” in the OS selection menu. - LineageOS for Raspberry Pi 4 or LineageOS for Raspberry Pi 3.
Download it from the Konstakang website, take the latest version available for your device: - OpenGapps.
The alternative to install Google Apps on a custom Android device.
Choose the ARM platform, the corresponding Android version and the “pico” variant:
I recommend copying the “OpenGapps” file to a USB key.
It’s easier than downloading it from the Android system. I’ll show you in the last part how to install them.
Attention: make sure the USB key is formatted in FAT32. It won’t work with another file format.
Note: At the time I’m updating this article, OpenGapps is not yet available for Android 12, so you need to stay with the previous version of LineageOS (Android 11) if you want to use the Play Store.
An alternative is to use the Gapps from another developer. I tried NikGapps, and it worked fine (here is the website).
Flash the SD card
Next, we need to prepare the SD card.
As usual, I’m using Etcher to do this:
- Install Etcher if not already done.
- Start it, you’ll get something like this:
- On the left, pick the LineageOS image file from your Downloads directory.
Then insert your SD card in your computer, Etcher should select it automatically.
And finally click on “Flash!” to start the copy.
A few minutes later, your SD is ready and you can insert it in your Raspberry Pi.
Boot on LineageOS
Start your Raspberry Pi.
The first boot will take a bit longer, as the system initialize the configuration in the background.
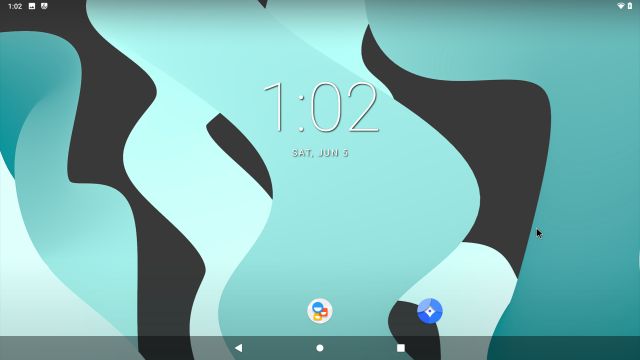
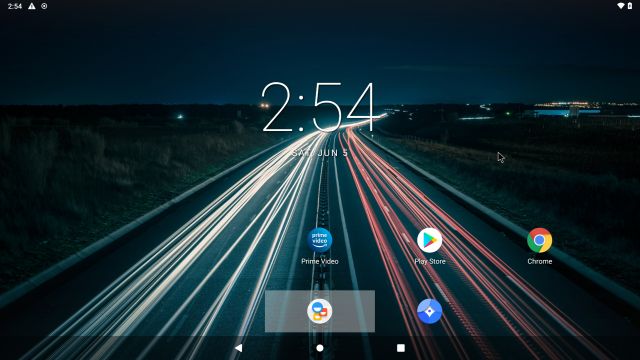
Then, you’ll access directly the Android desktop. There is no longer any setup wizard as with the older versions:
Depending on your goal, you can start working with the basic apps (browser, file browse, etc.).
To access them, scroll up the bottom bar.
But you’re probably not here to only use the email and browser apps, there is not much you can do with only the default apps. That’s why we’ll quickly move to the Google Play Store installation.
Android configuration
Before going further, now is a good time to adjust the default configuration if needed. As there is no wizard anymore to guide you with the configuration, you can go to the “Settings” app if needed to configure your Internet connection, language, date/time, etc.
I’m using my Raspberry Pi 4 with the Ethernet cable plugged, but it doesn’t work, I have no network. If you are in the same situation, start by configuring the Wi-Fi network. It will then synchronize with the time server and fix the date/time for you.
Install Google Play Store on Android
This is always the most complex part on an Android installation, for any device or system.
As we don’t use an official Android image and device, there are additional steps to enable Google Play Store. But Konstakang has made this really simpler now, and you’ll quickly have everything your need on your device.
Reboot in recovery mode
We’ll need to boot in recovery mode to install OpenGapps.
To do this, we need to unlock the access to this mode by enabling the advanced restart.
Here is how to do this:
- Open the “Settings” app.
- Go to “System” > “Advanced settings”
- Enable the first option “Reboot to recovery”
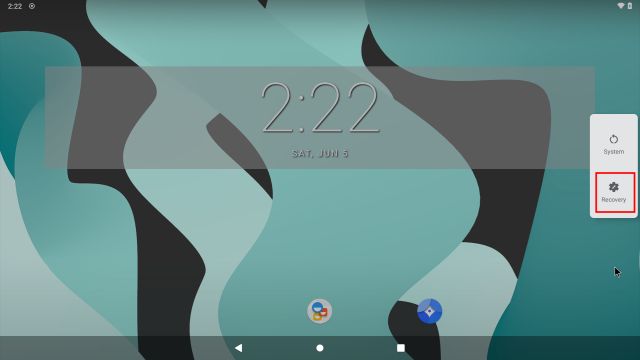
- Scroll down the notification bar and click on the power icon.
Then click on Restart:
In theory, F5 should work to display this screen, but it doesn’t work anymore once the reboot to recovery enabled.
Plug your USB key with OpenGapps on it, and wait a few second for the recovery mode to start.
The system will now reboot on recovery mode.
We can now move to the Google Apps installation.
Install Google Apps
Once in recovery mode, follow this procedure:
- Click on “Mount”.
This is where you can choose which partition to mount.
We need to mount the USB key, so check the USB item in the list. - Then, back on the main menu, click on “Install”.
- Click on “Select Storage” and choose the USB key.
- Finally, your files appear.
Click on the Open Gapps file to install it:
Swipe to confirm, there is nothing else to change.
If everything is OK, you can now restart in normal mode, choose “System” in the menu when you click on Reboot.
That’s it, your Raspberry Pi will now restart in normal mode.
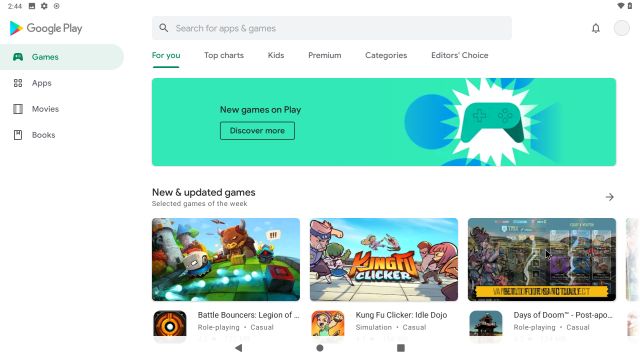
Once on the Android desktop, you can see that Play Store is available in the apps.
Sign in on Play Store
The last step is to sign in on Google Play, as you would for any Android device.
Open the Play Store app and try to sign in with your Google account:
You may get some error messages during this process, asking if you want to close or wait:
Keep choosing “Wait” until you manage to log in.
Once logged in, you can close the app and reboot the device.
After the reboot, everything should be fine.
You can now install any app or game you want on your Raspberry Pi :).
Video
I have recorded the whole process in video simultaneously. You can watch it here if you want:
Subscribe to the RaspberryTips YouTube channel to receive new videos directly in your feed:
Recommended stuff for Android on Raspberry Pi
- Raspberry Pi 4: If you don’t have one yet, I highly recommend switching to the fastest Raspberry Pi model available. Android is still a bit slow on any other model.
- SSD drive: If you want better performances, a Raspberry Pi and a SSD allows you to run systems really fast. My favorite model is this one. SSD drives are now really affordable, go for it! (USB adapter included).
- Touch screen: Android is built to use on a tactile screen, this one is cheap and allow you to have a better experience with your new Android system.
- RasPad 3: This has been my best experience so far. A “real” tablet with a battery and a touchscreen, it’s perfect to use with this Android build. Check the link for more details.
Conclusion
That’s, we finally found a way to have Android working better than ever on Raspberry Pi
And it’s not so difficult to install, we don’t need any account (except from Google), and it’s free 🙂
Support us: Join the community on Patreon to show your support, get behind-the-scenes content and other awesome perks!
Raspberry Pi Resources
Not sure where to start?
Understand everything about the Raspberry Pi, stop searching for help all the time, and finally enjoy completing your projects.
Watch the Raspberry Pi Bootcamp course now
Master your Raspberry Pi in 30 days
Don’t want the basic stuff only? If you are looking for the best tips to become an expert on Raspberry Pi, this book is for you. Learn useful Linux skills and practice multiples projects with step-by-step guides.
Download the e-book
VIP Community
If you just want to hang out with me and show your support, you can also join the Patreon community. I share behind-the-scenes content there and give you early access to my content. You’ll also get a shoutout when you join.
More details here
Need help to build something with Python?
Create, understand and improve any Python script for your Raspberry Pi.
Learn the essentials, step-by-step, without losing time understanding useless concepts.
Get the e-book now
You can also find all my recommendations for tools and hardware on this page.
I’m the lead author and owner of RaspberryTips.com. My goal is to help you with your Raspberry Pi problems using detailed guides and tutorials. In real life, I’m a Linux system administrator with a web developer experience.
Recent Posts
Kodi is a great tool for Raspberry Pi, it allows you to use it as a media center (Videos, Music, Pictures and Games).However, it’s not always easy to find the add-on you want to watch your favorite.
Do you enjoy Retropie and small games on Raspberry Pi? ProbablyAre you running the last PC games on your Raspberry Pi? NopeBut since December 2018, it’s possible to play Steam games on your $35.
Welcome
Hi, I’m Patrick. I am a Linux system administrator, and I am passionate about the Raspberry Pi and all projects on this topic.
I created this site to share with you what I learned about it.
Raspberry Pi Course
Sale: 10% off today.
Get started the right way on Raspberry Pi, follow my tips and save a lot of time by doing your first steps with me.
Write For RaspberryTips
If you’d like to get paid for your Raspberry Pi and Linux knowledge, and earn a little extra to pay for your hobby, then this is a great opportunity.
Источник


