- Как установить Android SDK Manager на Ubuntu 18.04
- Установите пакет инструментов Android SDK
- Использование Android SDK Manager из терминала
- Установка, обновление и удаление пакетов с помощью sdkmanager
- Ubuntu Documentation
- Preparation and Installation
- Downloading the SDK Starter Package
- Setting up Java
- Downloading the SDK platform tools
- Post-Installation Configuration
- Modifying the PATH Environment Variable
- Preparing Hardware
- How To Install Android SDK Tools On Ubuntu 18.04
- Download SDK Tools
- Install SDK Tools
- Download and Install Platform Tools
- Configure Environment Variable
- Using the SDK Manager
- Using the Emulator and AVD Manager
- Summary
Как установить Android SDK Manager на Ubuntu 18.04
Sdkmanager – это инструмент CLI, который позволяет пользователям просматривать, устанавливать, обновлять и удалять доступные пакеты для Android SDK.
В этой статье рассказывается, как установить Android SDK Manager на Ubuntu 18.04 с помощью терминала.
Если вы уже используете Android Studio, вам не нужно использовать sdkmanager, так как вы можете управлять пакетами SDK из среды IDE.
Инструмент sdkmanager предоставляется в пакете Android SDK Tools, поэтому мы собираемся установить последний, чтобы использовать sdkmanager.
Установите пакет инструментов Android SDK
Перед установкой предпочтительного инструмента нам необходимо обновить все пакеты и установить JAVA, так как Android SDK требует его запуска.
Для этого вы можете выполнить следующие команды в порядке, указанном ниже:
Как только JAVA установлен на машине, мы можем запустить следующую команду, чтобы проверить версию java и убедиться, что она установлена правильно:
Результат должен выглядеть так:
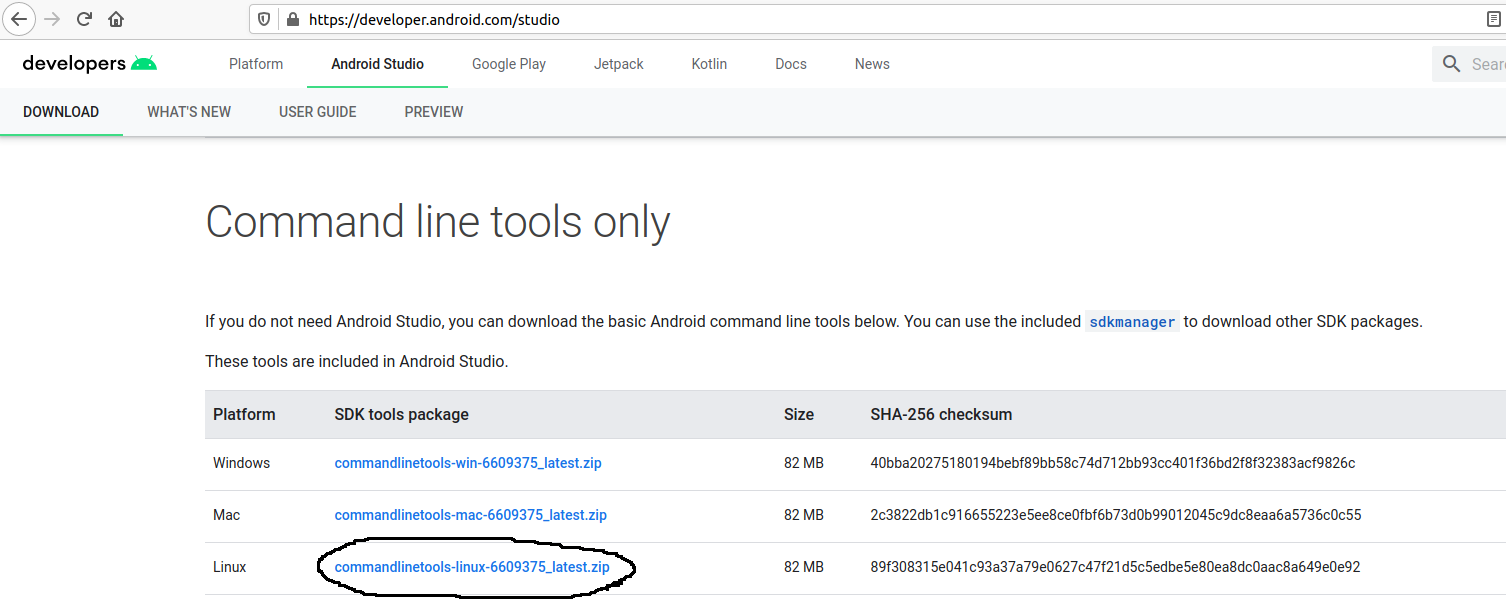
После успешной установки JAVA мы можем приступить к установке Android SDK. Нам нужно загрузить двоичные файлы с сайта разработчиков Android.
Если вы открываете ссылку выше в браузере, вы можете найти доступные zip-файлы в разделе «Только для командной строки».
Чтобы загрузить двоичные файлы из терминала, запустите следующую команду:
Как только он будет установлен, разархивируйте следующую команду
Будет создан новый каталог с именем tools.
Для завершения установки нам необходимо добавить следующие пути к нашей переменной среды PATH.
Для этого вы можете запустить следующую команду:
Использование Android SDK Manager из терминала
После установки Android SDK мы можем использовать инструмент sdkmanager для просмотра, установки, обновления и удаления пакетов для Android SDK с терминала.
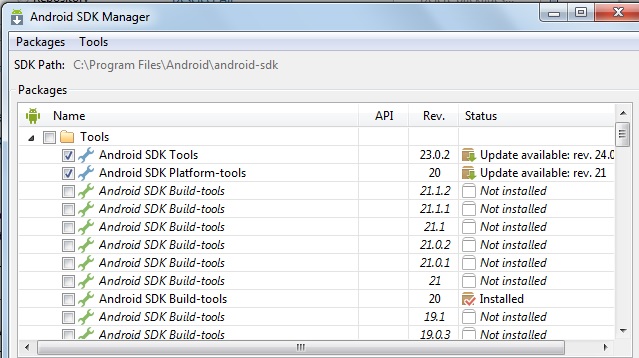
Список установленных, доступных пакетов и обновлений
Чтобы просмотреть все установленные, доступные пакеты и те, которые имеют обновление, мы можем запустить:
Результат будет выглядеть следующим образом:
При выполнении этой команды могут возникнуть проблемы.
Например. вывод команды может быть ошибкой, подобной приведенной ниже:
Чтобы устранить эту проблему, отредактируйте скрипт sdkamanger, который находится в папке bin папки установки (в нашем случае полный путь к файлу был / home / ubuntu / tools / bin / sdkamanager) и добавить следующее в 31 строку:
После того как вы отредактировали файл и сохранили, вы можете снова запустить команду sdkmanager –list.
Отобразятся только установленные пакеты и появится другое сообщение об ошибке, которое будет выглядеть следующим образом:
Чтобы исправить ошибки, мы создаем файл repositories.cfg (так как он не был создан по умолчанию) и запускаем команду sdkmanager -list с флагом –no_https.
Выполните следующие команды в следующем порядке:
Установка, обновление и удаление пакетов с помощью sdkmanager
Чтобы установить пакет, выполните следующую команду:
Если вы хотите удалить несколько пакетов, вы можете добавить их в файл и использовать флаг –package_file. Например
Обратите внимание, что имя_пакета должно быть из списка доступных пакетов, и если вы не используете флаг no_https, он выдает ту же ошибку, когда мы запускаем команду sdkmanager -list.
Чтобы обновить все пакеты, вы можете запустить:
Обратите внимание: если вы обновите инструменты SDK, вам нужно снова отредактировать файл / home / ubuntu / tools / bin / sdkamanager и добавить в 31 строку строку -XX: + IgnoreUnrecognizedVMOptions –add-modules java.se.ee, как упомянутый выше файл будет извлечен с сервера и станет стандартным.
Чтобы удалить пакет, выполните следующую команду:
Установка самого Android SDK Manager очень проста, но во время процесса вы можете столкнуться с различными проблемами, связанными с JAVA.
Тем не менее, есть обходные пути, описанные для типов проблем, с которыми вы можете столкнуться. Поэтому, используя этот учебник, вы можете быть уверены, что установите его!
Источник
Ubuntu Documentation
This is a general overview of what the Android SDK is, what it does, and how it can benefit you. This guide also contains instructions on how to set up the Android SDK on Ubuntu 10.04 onwards.
The Android Software Development Kit (AKA SDK) is a software suite for the Android mobile operating system that allows you to write applications for Android in the Java programming language. Most people who use the Android SDK either develop applications for the Android operating system OR they use it for other purposes, such as obtaining elevated privileges on an Android device with the help of third-party software or use it for diagnostic purposes in case of malfunctioning.
The vast majority of Android users probably won’t have to make use of the Android SDK, however, it is useful if you wish to learn more about the Android operating system and even then it’s still a handy tool to have in case something goes wrong.
This tutorial covers Ubuntu 10.04 Lucid Lynx onwards. For anything prior to Lucid, you will have to find it yourself.
Preparation and Installation
Before we set up the SDK, we have some preparation to do. Due to some major changes in the Android SDK made in the last couple of months, setting up the Android SDK is not as easy as it was two years ago, when Android was starting to take off. Setting up the SDK itself is relatively easy once the preparation has been done.
Downloading the SDK Starter Package
First things first, we have to obtain the starter package. The SDK starter package can be obtained at http://developer.android.com/sdk/index.html.
Download the one for Linux (.tgz file) and once it’s finished downloading, extract it to somewhere safe and easy to reach. For example, the home folder. To do so, open up a terminal, navigate to the directory where the SDK was downloaded and enter the following command:
$ tar -xvzf android-sdk_rXX-linux.tgz && mv android-sdk-linux
As of 12 May 2012, the Android SDK is currently up to r18, however that is set to change in the near future, and as such, replace XX with the version of your SDK.
Setting up Java
Prior to SDK r08, everything you’ll need to develop applications was included on a 100-200MB .tgz archive. However, with the release of SDK r08, the tools necessary for creating and building applications was removed and can be obtained by using the Android SDK and AVD Manager which is located in the / /tools folder.
However, you should not execute the Android SDK and AVD manager just yet, as you’ll most likely get a Parse: XML error notice. The reason for this is that after SDK r08, it’s now required to have Java installed before you set up the SDK. To do this, we’ll download the OpenJDK and the Icedtea browser plugin. In a terminal window, enter the following command:
$ sudo apt-get install openjdk-6-jre openjdk-6-jdk icedtea6-plugin
This will download and install the OpenJDK implementation of Java, which will be sufficient enough for us to download the SDK platform tools.
Downloading the SDK platform tools
This is pretty much the actual «installation» of the SDK’s platform tools. One key reason why this step is important is that it contains an important protocol called the Android Debug Bridge (ADB).
ADB comes bundled with the SDK platform tools. It is a command-line tool used to communicate with and control the device over a USB link from a computer. The tool comes bundled with the Android SDK and is commonly used for diagnosing problems with the device. Once you have ADB installed, you can use ADB to copy files to and from the device’s internal memory, install apps, run commands, see logs and more. This makes it an invaluable tool if your device is running into some trouble that might warrant a new device.
Now, in order to obtain the SDK platform tools, we’ll need to initialize the Android SDK and AVD Manager that I mentioned earlier. To do so, enter the following commands in a terminal. The first command will direct you to where the Android SDK and AVD Manager is located, and the second will execute said program.
/android-sdk-linux/tools
Once you do that, a new window will pop up, which is the actual Android SDK and AVD Manager. Click on «Available Packages» and you will be presented with two boxes. One is the Android Repository and the other is the Third-party Add-ons. Click on «Android Repository» then click on Install Selected. A confirmation window will pop up. Click on «Accept All» and then click on the Install button to install the SDK platform tools. It’s quite a bit to download so make sure you have at least 512MB to 2GB of hard drive space available. Once the download has finished, you’ll get a notice saying that the ADB daemon needs to be restarted. Click on «Yes» and everything will finish downloading.
Post-Installation Configuration
Now once the download has finished, or while you’re waiting for the download to finish, we have to configure Ubuntu a little to meet our needs. First, we have to set up the PATH variable to include ADB and other SDK tools, and we have to make sure our hardware will be detected once we initialize ADB.
Modifying the PATH Environment Variable
In the days before Android 2.2, a good number of people used to place their various projects and applications in the directories where the necessary tools they used existed. This was in itself a very flawed method because it cluttered up the directories, and while cleaning up the SDK, one might accidentally delete a crucial file, which will cause the SDK to fail and having to completely reinstall everything.
Modifying the PATH Environment Variable will help out immensely when it comes down to making use of SDK tools like ADB. Doing this will also allow you to execute certain protocols like ADB from ANY location. So if you’re operating from the Desktop, you don’t have to redirect to the SDK’s platform-tools folder to make use of ADB if you need to make use of it.
Enough chatter, let’s get busy. To modify the PATH variable of your system, you need to edit your .bashrc file. To do so, in a terminal, execute the following command:
You will now have the Nano text editor enabled on the terminal. Now, at the very top of the file, enter the following:
/android-sdk-linux/tools
/android-sdk-linux/platform-tools
Once you’re finished, press CTRL + X, Y, and then hit Enter to save your changes and exit the Nano text editor.
Preparing Hardware
Now that we have our PATH variable set up, we need to make sure our hardware will be detected once we initialize ADB. However, up until Natty, udev in Ubuntu wouldn’t allow ADB access to the Android phone via USB. This was fixed in udev version 165-0ubuntu1 — if you are running an earlier version ( apt-cache policy udev will tell you whether you are), you’ll need need to create a new udev rule file as root.
In a terminal, execute the following command that will create the rule file. This will utilize the graphical sudo command, so that we can still have control over the file if we’re not a root user.
$ gksudo gedit /etc/udev/rules.d/51-android.rules
Copy and paste the following udev rules in the text editor that opened up which contains the new rule file we created. The rules included should work with most if not all Android devices across multiple manufacturers, such as HTC, Motorola, LGE, and so forth.
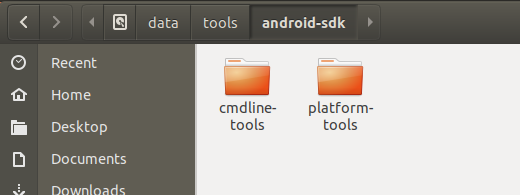
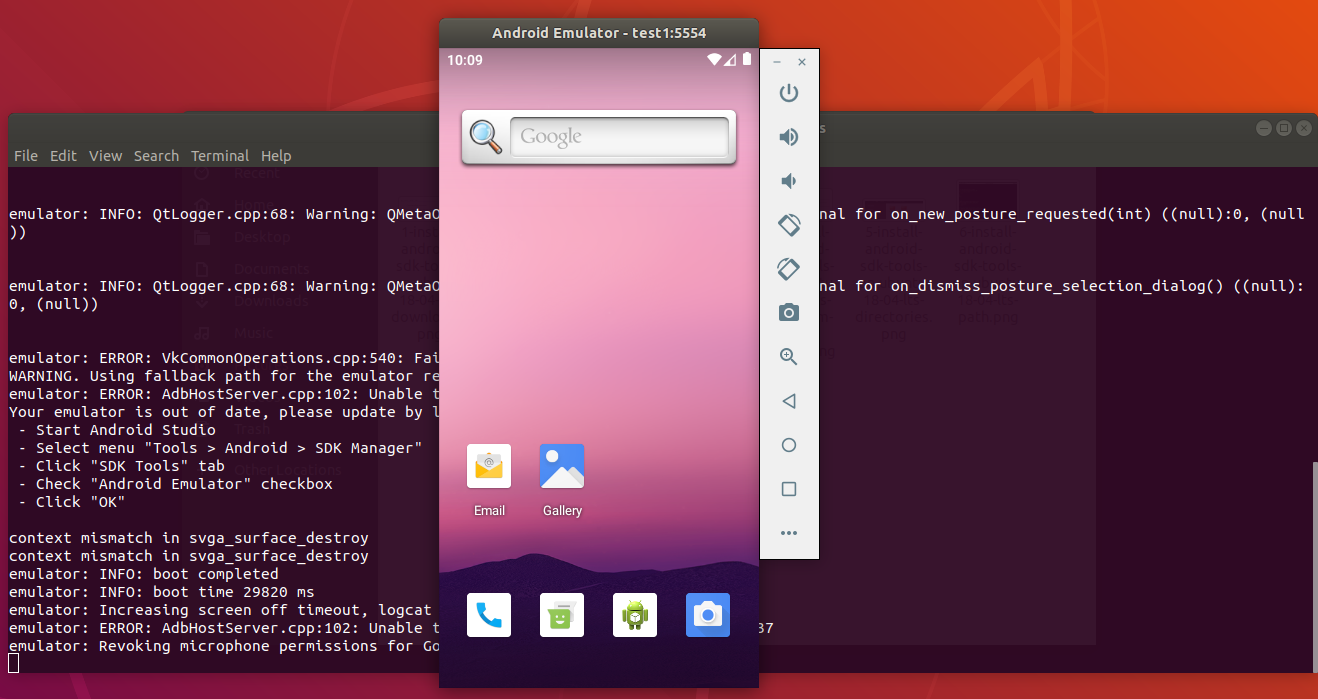
SUBSYSTEM==»usb», ATTRS SUBSYSTEM==»usb», ATTRS SUBSYSTEM==»usb», ATTRS SUBSYSTEM==»usb», ATTRS SUBSYSTEM==»usb», ATTRS SUBSYSTEM==»usb», ATTRS SUBSYSTEM==»usb», ATTRS SUBSYSTEM==»usb», ATTRS SUBSYSTEM==»usb», ATTRS SUBSYSTEM==»usb», ATTRS Once you’ve copied and pasted the udev rules in the text editor which contains your newly created rule file, save your changes and quit. Now that you’ve set your udev rules you have to reboot so that ADB will be in your path. To test your changes, open up a terminal and execute the following: $ adb devices Note: You may need to enable USB debugging mode on your phone first in order for it to be recognised. This will give you two messages: 1) It will tell you it’s initializing the ADB daemon. 2) It should show you a list of connected devices. If all went well you should see your device’s serial number under the list of connected devices. If you see a message like: List of connected devices . No permissions This means your hardware was detected, however you made a mistake in configuring Ubuntu or the udev rule for your phone’s manufacturer was not listed. AndroidSDK (последним исправлял пользователь uusijani 2012-07-28 15:47:15) The material on this wiki is available under a free license, see Copyright / License for details Источник It provides all the steps required to install Android SDK Tools on Ubuntu 18.04 LTS without using Android Studio. In this tutorial, we will discuss all the steps required to install Android SDK Tools, SDK Manager, and AVD Manager on the popular Linux distribution i.e. Ubuntu 18.04 with Java 15. This tutorial provides the steps to install Android SDK Tools on Ubuntu 18.04 LTS, though the steps should be the same for other versions of Ubuntu and Linux systems. This post is useful for the developers using Android SDK Tools with other IDEs without installing Android Studio for the use cases including hybrid app development using Ionic. It also assumes that a valid JAVA_HOME environment variable exists pointing to the installation directory of Java. You may follow the Java installation tutorials written by us including How To Install Java 8 On Ubuntu, How To Install Java 15 On Ubuntu, and How To Install OpenJDK 15 On Ubuntu. In case you are interested in developing Android applications using Android Studio, you can also follow the other tutorials written by us including How To Install Android SDK Tools On Windows, How To Install Android Studio On Windows, and How To Install Android Studio On Ubuntu 18.04. You may also be required to execute the below-mentioned command in case you have set the options previously for Java 9 or Java 10. Notes: The Ubuntu 20.04 LTS version of this tutorial is available at — How To Install Android SDK Tools On Ubuntu 20.04. You may continue this tutorial for Ubuntu 18.04 LTS. Open the download tab of Android Studio and scroll down to the Command line tools only section. This section shows various options to download the SDK tools as shown in Fig 1. Click on the Download Link as highlighted in Fig 1. It will ask to accept the Terms and Conditions as shown in Fig 2. Go through the details, agree to the terms and conditions, and click the Download Button to start the download. In this step, we will install the Android SDK Tools on Ubuntu. Create a directory having the name set to android-sdk and extract the content of the downloaded SDK Tools zip to this directory. Create another directory android-sdk/cmdline-tools to store the platform-tools. Make sure that the tools directory is available directly within the android-sdk/cmdline-tools directory created by us. In this step, we will install the Android Platform Tools on Ubuntu. Follow the same steps similar to Android SDK Tools as shown in Fig 3, Fig 4, and Fig 5 to install Android Platform Tools using the download link. Make sure that the platform-tools content is available within the directory platform-tools. The directory structure should be similar to: In this step, we will configure the environment variable to use the SDK tools installed by us. There are two ways to do it. In the first approach, we can update the .bashrc file of the user account. Another approach is to update /etc/profile file which works for all the accounts. Update .bashrc file of the user account. Notes: Replace the android sdk path based on your installation directory. Update /etc/profile file. Scroll down by pressing the Page Down Button and add at the end of this file: Make sure that you provide the correct path to the android-sdk directory. Now press Ctrl + O and press Enter to write our change. Press Ctrl + X to exit the nano editor. The nano editor should look like the one shown in Fig 6. Notes: Approach B didn’t work for me. Now test the Android SDK installed by us using the environment variables configured by us. Update SDK Manager — Update the SDK manager using the below-mentioned command. List — We can list the installed and available packages and images using the list command as shown below. Install Platform — Use the below-mentioned command to install the Android 10 (API level 29) using the SDK manager. It will ask to accept the terms and conditions. Enter y and hit Enter Key to accept the terms and conditions. This command creates the directories licenses and platforms within android-sdk and installs the package android-30 within the platforms directory having all the required files to run the emulator for Android 11. If we again check the installed packages, the list command shows the installed options as shown below. After installing the platforms, the directory structure should be: Add System Image — We can add system image from available images shown by the list command using the SDK manager as shown below. We are adding the most recent default 64-bit system image. Accept the License Agreement to complete the download. There are several projects which need Google Play Services. We need system images specific to Google Play Services as shown below. Now again use the command list as shown below. After installing the default system image, the directory structure should be: Install Emulator — You might be required to install the emulator before creating the AVD using SDK Manager. The emulator gets installed while adding the system images in the previous steps. Install Build Tools — Install the most recent build tool listed by the list command. After installing the build tools, the directory structure should be: Now again use the command list as shown below. Create AVD — Create the AVD using the system image downloaded in the previous step as shown below. Replace with actual name. The above commands ask a bunch of questions to configure the AVD if we choose the custom hardware profile option. We have excluded the details of these options from this tutorial since these configuration details depend on the actual needs. After completing all the configurations, it creates the AVD using the name provided by us while configuring it. List AVDs — Now go to the tools directory(only required in case you have omitted to add tools path to PATH while configuring environment variables) on the command line and check the installed platform as shown below. It will list all the AVDs installed by us. Launch AVD — We can launch the AVD using the emulator as shown below. The above command might show an error specific to the qt library. We can execute the emulator from the Android SDK Tools directory in such a case. The emulator will take some time to completely launch the AVD. The final results should look similar to the one shown in Fig 7. Notes: I have used Ubuntu 18.04 LTS installed as VM using VMware Workstation Player, hence I have enabled the Virtualization for my Virtual Machine. Delete Emulator — We can also delete an existing emulator as shown below. This tutorial provided all the steps required to install Android SDK Tools and Android Platform Tools on Ubuntu 18.04 LTS. It also provided the steps required to launch the first AVD using the Android Emulator. Источник
You can contribute to this wiki, see Wiki Guide for detailsHow To Install Android SDK Tools On Ubuntu 18.04
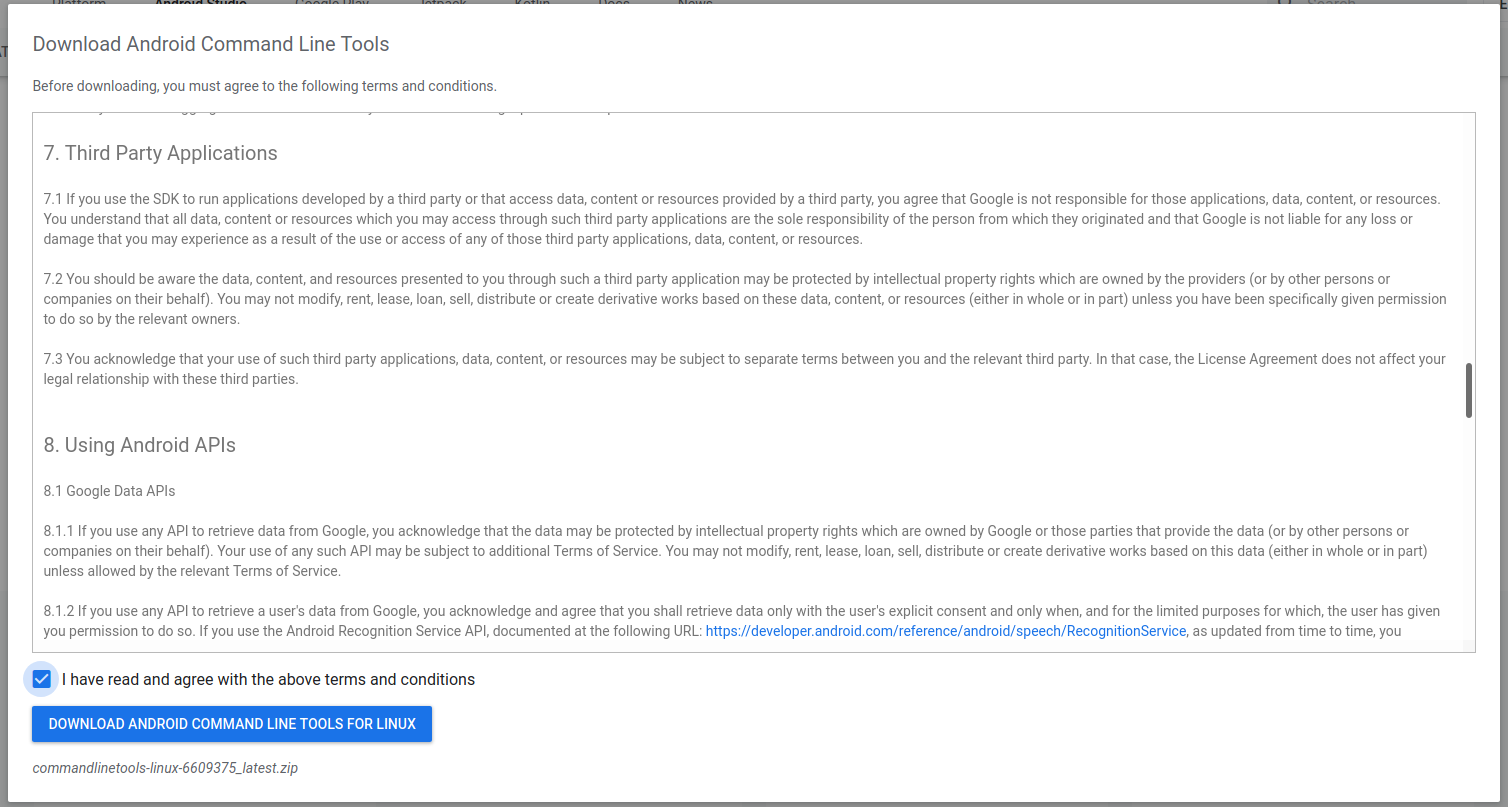
Download SDK Tools
Install SDK Tools
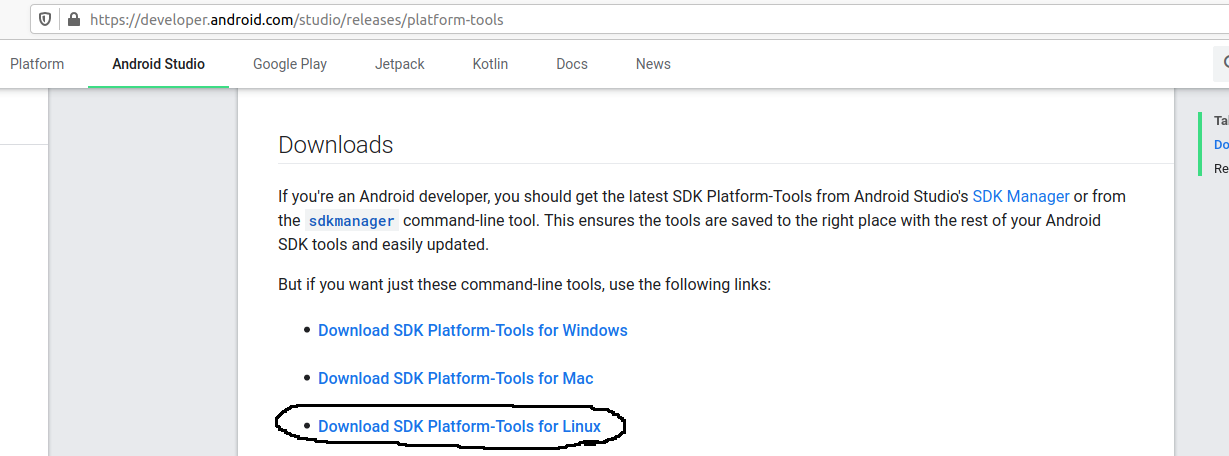
Download and Install Platform Tools

Configure Environment Variable
Approach A
Approach B

Using the SDK Manager
Using the Emulator and AVD Manager
Summary


