- Инструкция: устанавливаем Windows Subsystem for Android на любой сборке Windows 11
- Инструкция
- Установка Windows Subsystem for Android
- Установка APK-файлов
- Install the Google Play Store on Windows 11 with this Windows Subsystem for Android hack
- Share this:
- Sideloading apps with the Windows Subsystem for Android
- Method 1: Install Google Play with ADeltaX WSAGAScript
- Method 2: Root and install Google Play with MagiskOnWSA
- Support Liliputing
- Contribute to our Patreon campaign
- Contribute via PayPal
- Установка Google сервисов на Windows Subsystem for Android
Инструкция: устанавливаем Windows Subsystem for Android на любой сборке Windows 11
Несколько дней назад Microsoft начала тестирование подсистемы Windows Subsystem for Android (WSA), которая позволяет запускать Android-приложения в Windows 11.
Сейчас функция доступна только участникам программы Windows Insider на канале Beta, что несколько удивительно, так как обычно все новшества вначале появляются на канале Dev. Но даже если вы используете канал Beta, то для установки подсистемы из Microsoft Store потребуется сменить регион на США в самой Windows 11.
Microsoft обещает, что инсайдеры на канале Dev также вскоре получат доступ к Windows Subsystem for Android, но какие-либо конкретные сроки не называются. Если вы не хотите ждать, то можете установить подсистему вручную. Для этого вам потребуются прямые руки и небольшие навыки работы в PowerShell.
Важно! Все действия вы делаете на свой страх и риск.
Благодарим aleks242007 и участников чата Community в Telegram за помощь в составлении инструкции.
Инструкция
Установка Windows Subsystem for Android
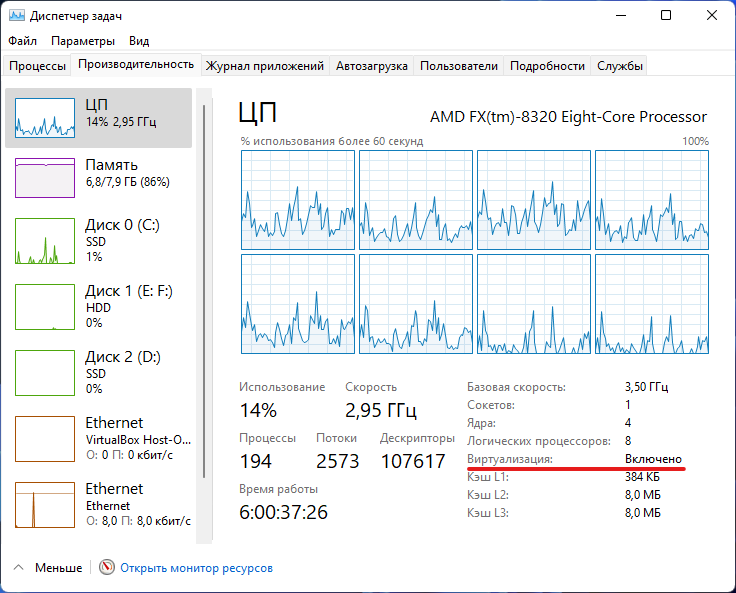
- Для начала убедитесь, что ваш компьютер поддерживает виртуализацию. Для этого откройте «Диспетчер задач», перейдите на вкладку «Производительность», выберите CPU и посмотрите текст под графиком. Там должно было указано: «Виртуализация: Включено».

- Если виртуализация отключена, то вам необходимо включить её в BIOS. У разных производителей настройка может располагаться в разных разделах и называться по-разному, так что можно поискать информацию в Google для вашего конкретного устройства.
- Если в BIOS настройка отсутствует или значение в «Диспетчере задач» не меняется, то вы вряд ли сможете запустить Windows Subsystem for Android на своём компьютере.
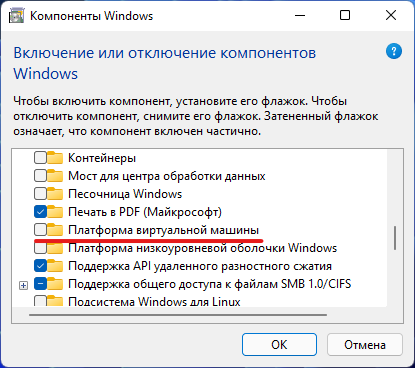
- Следом откройте меню «Пуск», введите в поле поиска «Включение или отключение компонентов Windows» и выберите соответствующий результат.
- В открывшемся окне установите галочку напротив пункта «Платформа виртуальной машины», нажмите «ОК», дождитесь применения изменений и перезагрузите ПК.
- Далее нам потребуется скачать установщик Windows Subsystem for Android в формате MSIXBUNDLE с сервера Microsoft Store:
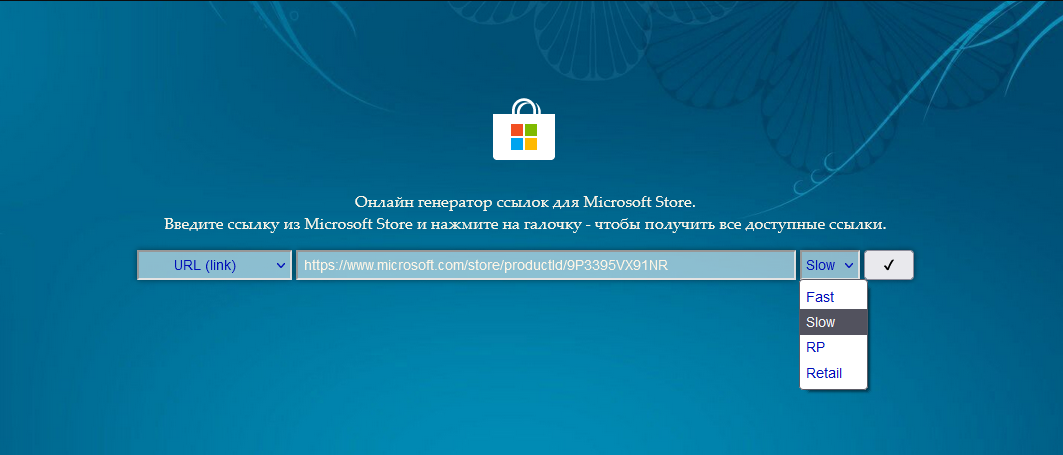
- Перейдите на сайт Microsoft Store — Generation Project (от rgadguard) по этой ссылке.
- В поле на сайте вставьте следующую ссылку:
- Справа от поля в выпадающем меню выберите Slow и нажмите на галочку.
- В появившемся списке найдите файл с примерно таким названием (номер версии может отличаться):
- Нажмите на название этого файла и сохраните файл в любой папке на вашем компьютере. Обратите внимание, что файл должен быть в формате .MSIXBUNDLE. Если это не так, то просто смените расширение файла на нужное. Файл должен весить примерно 1,2 ГБ.
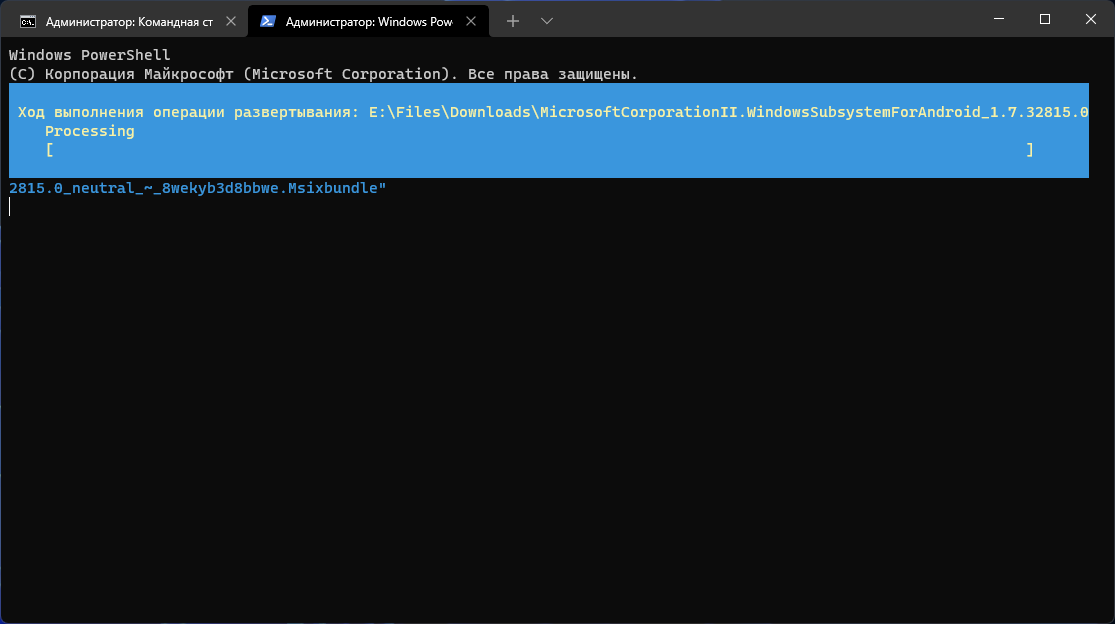
- Запустите PowerShell или Windows Terminal (нужна вкладка с PowerShell) от имени администратора.
- Введите в консоль следующую команду:
- «C:\Users\user1\Desktop\MyApp.msix» — путь к файлу MSIXBUNDLE, сохранённому на шаге 4. Чтобы быстро его получить, вы можете нажать правой кнопкой мыши по файлу в «Проводнике» и выбрать пункт «Копировать как путь».
- Решение ошибки:
Если вы увидели такое сообщение в PowerShell, то введите следующую команду:
После этого вновь введите команду Add-AppxPackage из шага 6.
- Нажмите Enter и дождитесь завершения установки.
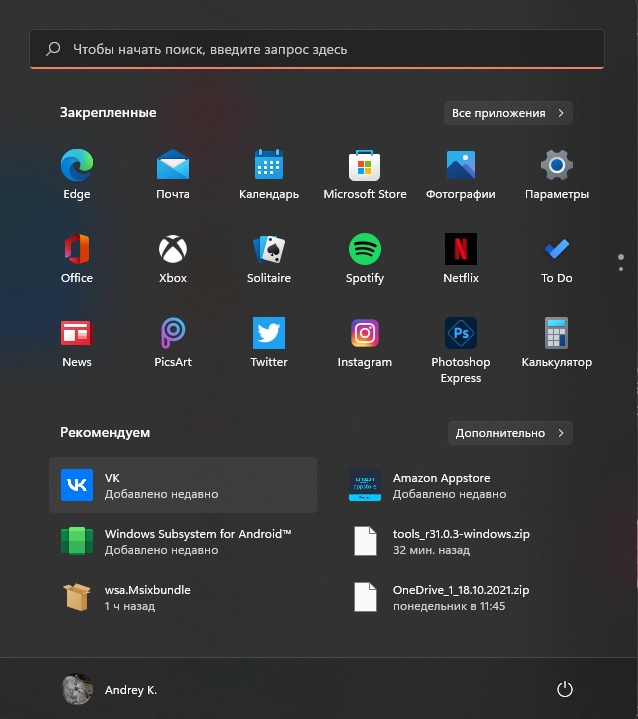
- Если всё прошло успешно, то в меню «Пуск» появится приложение под названием Windows Subsystem for Android.
Установка APK-файлов
Теперь подсистема Windows Subsystem for Android работает, однако с установкой приложений есть некоторые сложности. Как вы уже знаете, вместо Google Play здесь используется Amazon Appstore. Причём отображаются там лишь приложения, которые Microsoft и Amazon протестировали на работоспособность в подсистеме.
Правда воспользоваться Amazon Appstore всё равно не получится. Приложение не только требует учётную запись Amazon, но и проверяет ваше местоположение. Можно, конечно, подключить VPN, но есть ли в этом смысл?
К счастью, Windows Subsystem for Android поддерживает установку приложений с помощью APK-файлов. Вы можете воспользоваться либо утилитой WSATools, о которой мы рассказали в статье по этой ссылке, либо устанавливать вручную с помощью командной строки по инструкции ниже.
- Скачайте SDK Platform Tools для Windows с сайта Android, перейдя по этой ссылке.
- Извлеките папку platform-tools , например, в корень диска C (рядом с папками Windows, Program Files и т. д.)
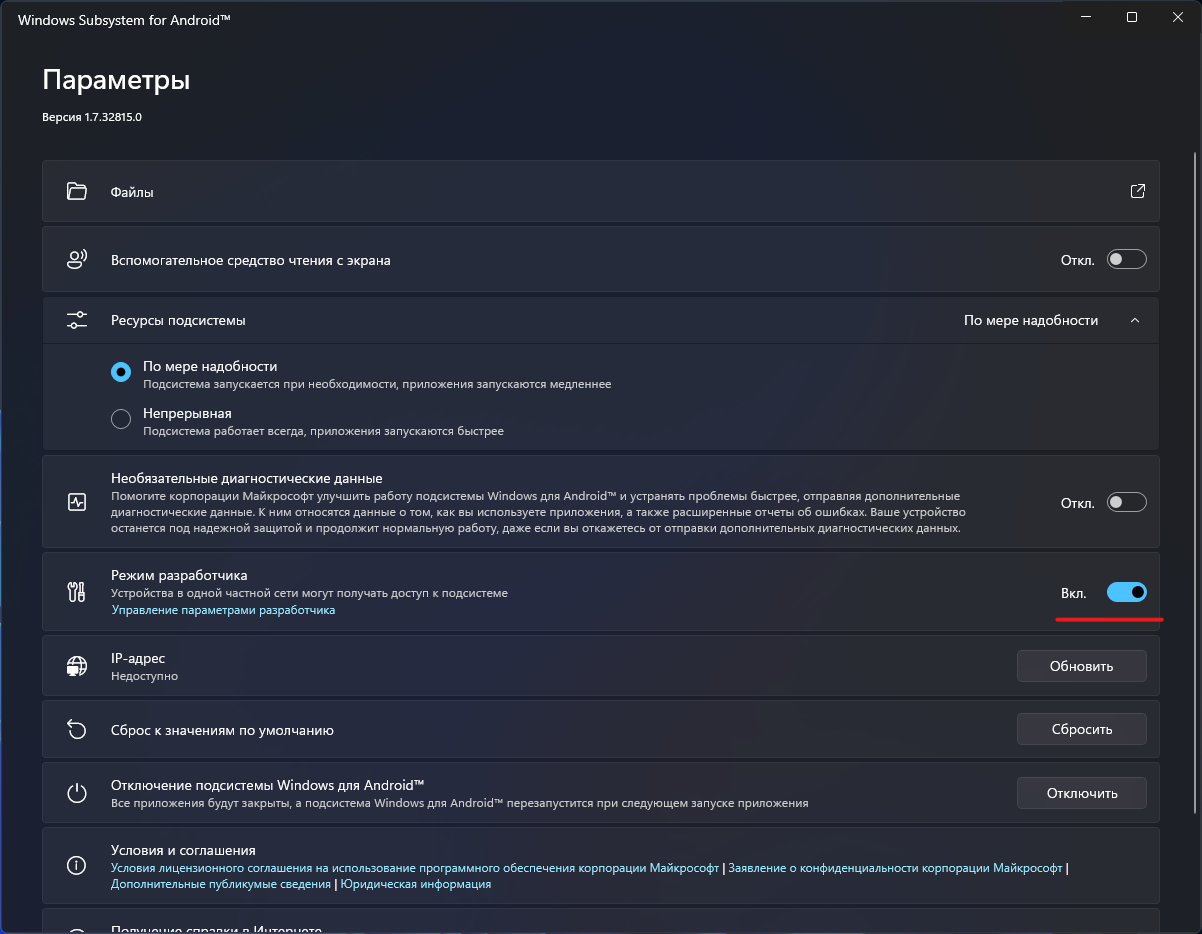
- Откройте приложение Windows Subsystem for Android и включите «Режим разработчика».
- Нажмите на кнопку рядом с элементом «Файлы». Начнётся запуск подсистемы Windows Subsystem for Android.
- Нажмите на кнопку «Обновить» рядом с элементом «IP-адрес».
- В описании для элемента «Режим разработчика» появится IP-адрес, который мы будем использовать для подключения к подсистеме с помощью ADB.
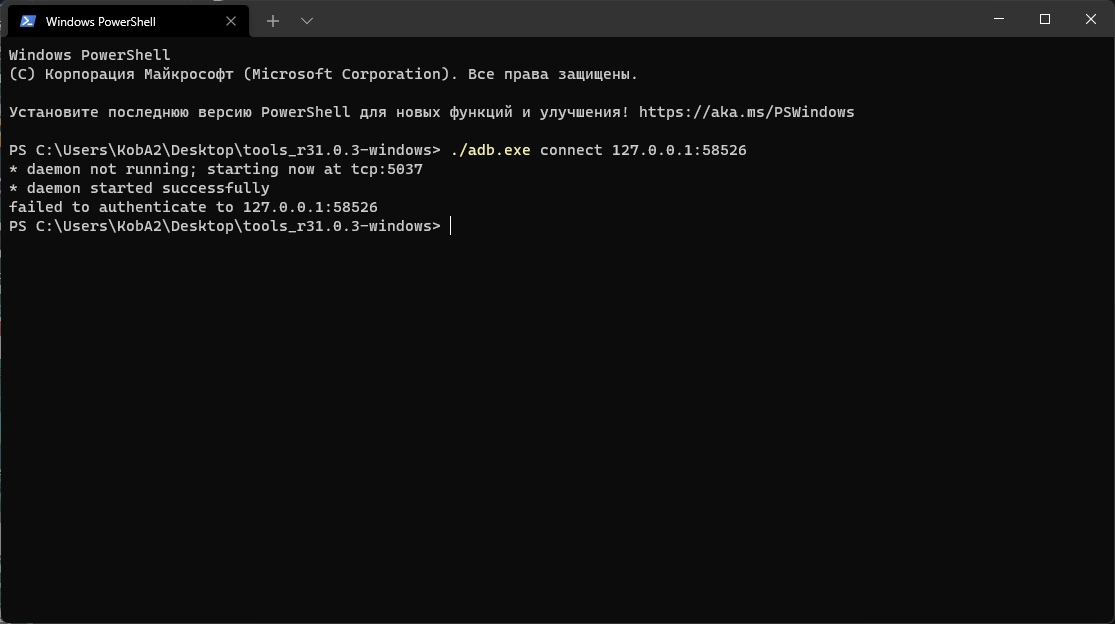
- Откройте командную строку (или Windows Terminal) и перейдите в папку с установленным SDK Platform Tools, подставив нужный путь к папке:
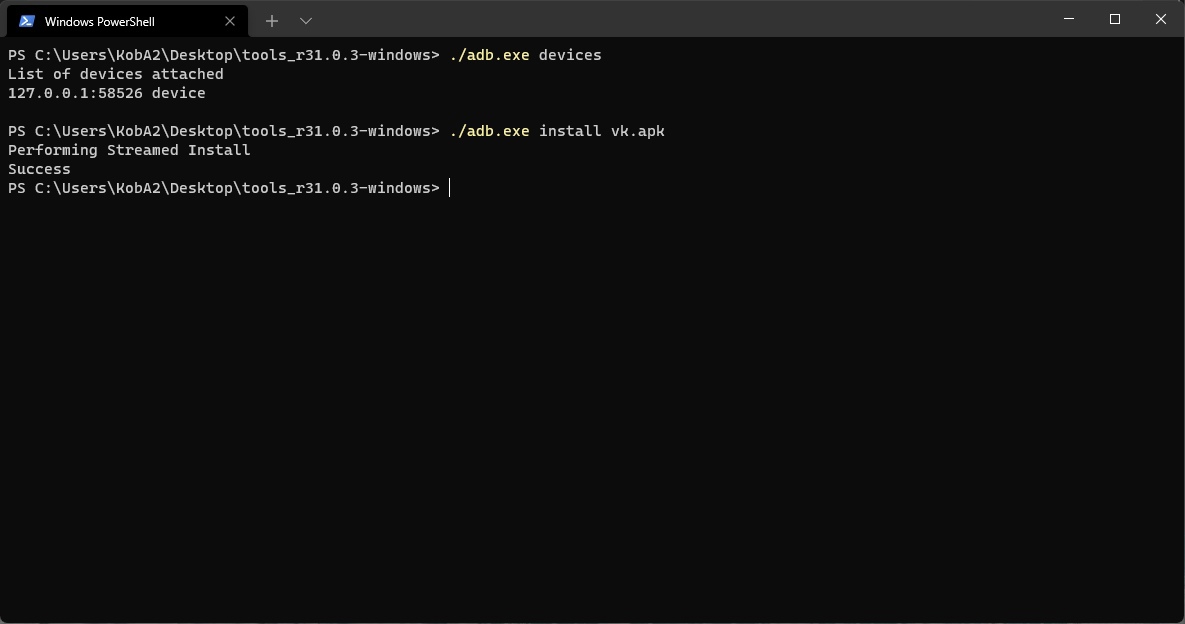
- Введите следующую команду, подставив в неё IP-адрес из предыдущего пункта:
Примечание. Если выполнять команды через PowerShell, то перед ADB следует прописать ./
Чтобы быстро скопировать путь к файлу, нажмите по нему правой кнопкой мыши и выберите «Копировать как путь». Затем вставьте его после adb.exe install и нажмите Enter.
Поделиться впечатлениями о работе Windows Subsystem for Android и обсудить сценарии её использования вы можете в нашем чате в Telegram. Там же можете задавать вопросы, если возникли какие-либо сложности с установкой подсистемы или Android-приложений.
Поскольку далеко не все Android-приложения корректно работают в подсистеме, пользователи решили составить таблицу с информацией о работоспособности приложений в WSA. Найти и внести свой вклад вы можете на GitHub.
Источник
Install the Google Play Store on Windows 11 with this Windows Subsystem for Android hack
Share this:
The new Windows Subsystem for Android is designed to let you run Android apps on Windows 11 computers. The official way to get apps is through the Microsoft Store and/or Amazon Appstore. Unofficially you can sideload apps from any source (we have a guide for doing that).
But what if you want to install the Google Play Store so you can access all the apps and services you may have already paid for on your phone, tablet, or other devices? Now you can do that too… although getting everything up and running is a little tricky. Update: There’s a second method which may be a little easier for some users. See below for more details about both methods.

Sideloading apps with the Windows Subsystem for Android
Microsoft released an initial build of the Windows Subsystem for Android (WSA) to members of the Windows Insiders Preview program this week, and while it’s officially tied to the Amazon Appstore with only 50 apps available at launch, users have already figured out how to:
- Sideload apps from other sources (including third-party app stores like F-Droid and the Aurora Store).
- Install Windows Subsystem for Android on the stable branch of Windows 11.
- Bypass the Amazon Appstore region lock to use it outside of the United States.
Unfortunately when I first tried using the same method to install the full Google Play Store that I’ve used countless times with Amazon Fire tablets, I ran into a roadblock: I could install and even launch the Play Store, but I was unable to login. Pressing the sign-in button did nothing.
But now there are at least two ways to install Google apps and services including tthe Google Play Store on the Windows Subsystem for Android.
Method 1: Install Google Play with ADeltaX WSAGAScript
Developer ADeltaX has released a tool called WSAGAScript that smashes its way through that roadblock… although it does it in a way that feels a little risky at the moment.
That’s because WSAGAScript involves downloading the Windows Subsystem for Android installer package, modifying its contents by changing partition sizes, adding Google Apps, and modifying permissions. You also need to replace the kernel with a modified, pre-rooted one that allows you to adjust SELinux settings in order to actually login to the Google Play Store (otherwise you’ll get the same unable to sign in problem that I encountered).
After you’ve done that, you should be able to restore the original kernel, which should theoretically be more secure and reliable and allow you to receive updates to the Windows Subsystem for Android from Microsoft without breaking anything.
But seeing as Microsoft has only released one build of WSA so far, there’s no guarantee that everything will continue working after an update.
Plus, you have to jump through a bunch of hoops to use WSAGAScripts, including downloading and modifying that Windows Subsystem for Android installer, installing the Windows Subsystem for Linux so that you can run some Linux-only commands, and more.
Of course, it’s possible that WSAGAScript will also be updated in the future and/or that other tools that are easier to use will emerge. But for now, using WSAGAScript takes a fair amount of work.
If that doesn’t scare you off, you can find the script and written instructions at the WSAGAScript GitHub project page or check out a video walkthrough that shows the entire process from start to finish in about 10 minutes:
Method 2: Root and install Google Play with MagiskOnWSA
Developer LSPosed has come up with a way to root the Windows Subsystem for Android, install Magisk, and load the Google Play Store and other Google apps in just a few clicks.

At a high level, the LSPosed MagiskOnWSA method is doing the same thing as the WSAGAScript method, but with less user intervention required. You don’t need to install the Windows Subsystem for Linux and you don’t need to do as much in the command line.
But it does still take a little bit of work, as you’ll need to:
- Have a GitHub account.
- Fork the LSPosed MagiskOnWSA repo.
- Run an action on GitHub to create a pre-rooted Windows Subsystem for Android file with Google Apps pre-installed (you can choose which version of Open GApps to use – I picked “micro” for the Play Store plus a few other key apps).
- Download and unzip the file created in the previous step.
- Enable Developer mode on Windows 11.
- Run PowerShell as an administrator and run one line to install the modified Windows Subsystem for Android build that you just downloaded.
If that sounds daunting, then this might not be the method for you, but I did actually find it a little simpler to follow than the WSAGAScript method, and I’m now running a version of the Windows Subsystem for Android with Google Play enabled on my PC.
Note that you will have to uninstall any previously-installed instance of WSA before beginning, and that will remove any Android apps you may have already installed. But with the Google Play Store, you should be able to re-install them.
Also bear in mind that it’s still early days for the Windows Subsystem for Android, and it’s unclear if rooting or installing officially unsupported apps like the Google Services Framework and Google Play Store will cause problems moving forward. But it’s still pretty cool that within days of Microsoft releasing the first beta builds of WSA, independent developers have figured out how to sidestep some of its key limitations.
does not require installing the Windows Subsystem for Linux, but you do still need to run a few commands in Windows PowerShell.
You can find step-by-step instructions at GitHubt for using the LSPosed MagiskOnWSA method for installing the Play Store on WSA.
This article was originally published October 23, 2021 and last updated October 28, 2021.
Support Liliputing
Liliputing’s primary sources of revenue are advertising and affiliate links (if you click the «Shop» button at the top of the page and buy something on Amazon, for example, we’ll get a small commission).
But there are several ways you can support the site directly even if you’re using an ad blocker* and hate online shopping.
Contribute to our Patreon campaign
Contribute via PayPal
* If you are using an ad blocker like uBlock Origin and seeing a pop-up message at the bottom of the screen, we have a guide that may help you disable it.
Источник
Установка Google сервисов на Windows Subsystem for Android
Энтузиаст смог установить Google сервисы и приложения на WSA . Оригинал тут.
Я же попробую описать это в виде инструкции, и предоставить готовый архив, для тех кому лень вводить кучу команд в терминал или устанавливать WSL .
Остальная установка интуитивно понятна и в комментариях не нуждается
Скачивание файлов:
Скачиваем WSA подробнее тут, в конце статьи в разделе UPD1 (далее файл_1)
Скачиваем репозиторий в виде архива .zip (далее файл_2)
Переходим на сайт opengapps , выбираем параметры platform: x86_64, android: 11, variant: pico и скачиваем архив. (далее файл_3)
Подготовка установочных файлов:
Создаем папку C:\WindowsSubsystemAndroid
Открываем архиватором файл_1. Находим в архиве файл вида «WsaPackage_XXX_x64_Release-Nightly.msix» размер более 700мб, у меня находился в самом конце списка. И открываем этот файл так же архиватором
В открывшемся архиве выделяем все файлы и папки, снимаем выделение с папки AppxMetadata и файлов [Content_Types].xml AppxBlockMap.xml AppxSignature.p7x выделенное копируем и вставляем в папку C:\WindowsSubsystemAndroid
Создаем папку C:\GAppsWSA и разархивируем туда репозиторий файл_2 из пункта скачивания файлов
Переходим в директорию C:\GAppsWSA\#GAPPS и кладем туда архив файл_3. ВНИМАНИЕ, разархивировать не нужно!
Переходим в директорию C:\WindowsSubsystemAndroid копируем из нее 4 файла: product.img vendor.img system_ext.img system.img в папку C:\GAppsWSA\#IMAGES
Вводим команду: sudo su
Меняем в консоли директорию на C:\GAppsWSA (команды cd)
Выполняем команду sudo apt-get update
Выполняем команду sudo apt-get install unzip lzip
Выполняем команду apt install lzip unzip
Выполняем команду apt install dos2unix
Выполняем команду dos2unix apply.sh
Выполняем команду dos2unix extend_and_mount_images.sh
Выполняем команду dos2unix extract_gapps_pico.sh
Выполняем команду dos2unix unmount_images.sh
Выполняем команду dos2unix VARIABLES.sh
Выполняем команду ./extract_gapps_pico.sh
Выполняем команду ./extend_and_mount_images.sh
Выполняем команду ./apply.sh
Выполняем команду ./unmount_images.sh
Переходим в директорию C:\GAppsWSA\#IMAGES копируем из нее 4 файла product.img vendor.img system_ext.img system.img в папку C:\WindowsSubsystemAndroid
Переходим в директорию C:\WindowsSubsystemAndroid\Tools переименовываем файл kernel в kernel_bak
Копируем файл kernel из C:\GAppsWSA\misc в C:\WindowsSubsystemAndroid\Tools
Для дальнейшей установки необходимо включить developer mode в Windows. Как включить посмотреть можно тут
Запускаем PowerShell от имени администратора
Выполняем команду Add-AppxPackage -Register C:\WindowsSubsystemAndroid\AppxManifest.xml

Скачиваем ADBKit и разархивируем его в папку C:\ADBKit
В PowerShell переходим в директорию C:\ADBKit. Далее выполняем команды
.\adb.exe connect 127.0.0.1:58526
После этого можно авторизовываться в Google.
Осталось пару шагов.
Переходим в директорию C:\WindowsSubsystemAndroid\Tools
Файл kernel переименовываем в kernel_root
Файл kernel_bak переименовываем в kernel
Можно пользоваться Google Play и устанавливать оттуда приложения. Полноценно оценить какие работают а какие нет — еще не успел, возможно разберу позже
Надеюсь помог тем кто хотел это опробовать)
P.S устройство определяется как Google Pixel 5
Источник


