- Mastering Shadows in Android
- What is 3D?
- What is Depth in Android?
- What is Z-value in Android?
- Android — Image Effects
- Example
- Android: Changing app theme at runtime
- Changing the theme at runtime
- Possible issues
- Recursively change attributes on all your Views
- Possible issues
- There is a third option?
- What I recommend
- Do you know a better way of doing this?
- How to create custom views in android?
Mastering Shadows in Android

Jan 9, 2018 · 6 min read
If we want to create better apps, I believe that we need to follow material design guideline.In general terms, Material design is a three-dimensional environment containing light, material, and cast shadows. Light and Shadow are important for us if we want to follow material design guideline in our application development process.
I will try to explain following topics in this article.
- 3D in Android
- Depth
- Z value, elevation and Translation Z
- Light
- Button state (Pressed and Resting)
- Outline
- Custom Outline with ViewOutlineProvider
Before deep dive into shadow and light, I want to show you what our environment is.
What is 3D?
The material environmen t is a 3D space, which means all objects have x, y, and z dimensions. The z-axis is perpendicularly aligned to the plane of the display, with the positive z-axis extending towards the viewer. In Material Design world, every object has 1 dp thickness.

What is Depth in Android?
Material design differs from other design guides because It has depth. We can say that depth defines view’s importance level in user interface. We can think there is a paper layer in our desk. If we put another paper on it, our eyes will perceive that it has a depth.
Let’s imagine it with an app screenshot from the material design guideline.
Let’s see our elements in the screen.
- Screen (Surface layer — 0 depth)
- Cardviews
- Appbar Layout
- Floating Action Button
Every element has a priority to another. Cardviews can scroll in its recyclerview. So we can say that our first layer is scrollable content. The second layer is appbar layout. The third layer (Top layer) is the floating action button.
So how do we define the order? How do we make the user feel the depth? Answer: Z- value.
What is Z-value in Android?
The Z value for a view has two components:
- Elevation: The static component.
- Translation Z: The dynamic component used for animations.
I always wonder that what is the difference between elevation and translation.
Elevation is static. So you don’t change it dynamically. If you want to animate your view in Z-axis (like pressing and resting) you need to use translation-Z attribute.
Translation Z is dynamic. In your empty project, If you create a button and press it, you will see that shadow gets bigger with an animation. Actually, elevation value is not changing. Translation Z property is changing. Android is using default state list animator changes translation Z property of the view.
Z-Value = Elevation + TranslationZ
What if we change the value of Z of two views that intersect. Does Android handle the order on the screen? Yes. Let me show you that with a diagram that I designed.
Источник
Android — Image Effects
Android allows you to manipulate images by adding different kinds of effects on the images. You can easily apply image processing techniques to add certain kinds of effects on images. The effects could be brightness,darkness, grayscale conversion e.t.c.
Android provides Bitmap class to handle images. This can be found under android.graphics.bitmap. There are many ways through which you can instantiate bitmap. We are creating a bitmap of image from the imageView.
Now we will create bitmap by calling getBitmap() function of BitmapDrawable class. Its syntax is given below −
An image is nothing but a two dimensional matrix. Same way you will handle a bitmap. An image consist of pixels. So you will get pixels from this bitmap and apply processing to it. Its syntax is as follows −
The getWidth() and getHeight() functions returns the height and width of the matrix. The getPixel() method returns the pixel at the specified index. Once you got the pixel, you can easily manipulate it according to your needs.
Apart from these methods, there are other methods that helps us manipulate images more better.
| Sr.No | Method & description | |||||||||
|---|---|---|---|---|---|---|---|---|---|---|
| 1 |
| Steps | Description |
|---|---|
| 1 | You will use Android studio to create an Android application under a package com.example.sairamkrishna.myapplication. |
| 2 | Modify src/MainActivity.java file to add necessary code. |
| 3 | Modify the res/layout/activity_main to add respective XML components |
| 4 | Run the application and choose a running android device and install the application on it and verify the results |
Following is the content of the modified MainActivity.java.
Following is the modified content of the xml res/layout/activity_main.xml.
Here abc indicates about logo of tutorialspoint.com
Following is the content of AndroidManifest.xml file.
Let’s try to run our application we just modified. I assume you had created your AVD while doing environment setup. To run the app from Android studio, open one of your project’s activity files and click Run  icon from the toolbar. Android studio installs the app on your AVD and starts it and if everything is fine with your setup and application, it will display following Emulator window −
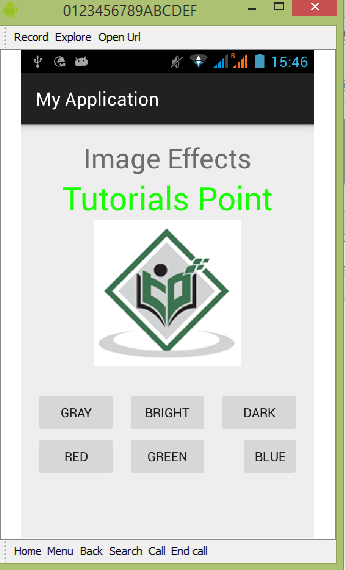
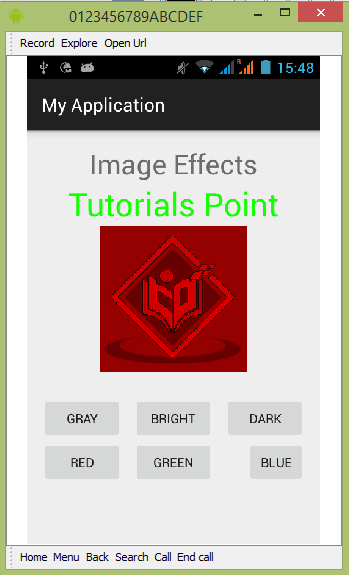
Now if you will look at your device screen , you will see the an image of android along with three buttons.
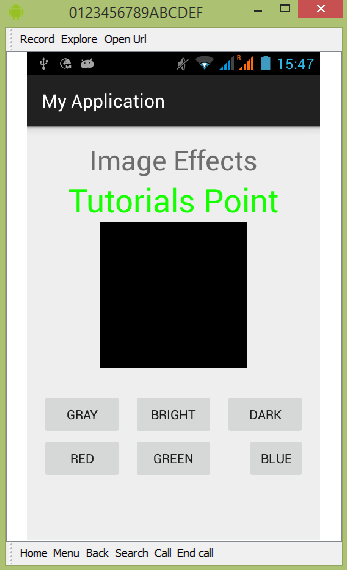
Now just select the Gray button that will convert your image into grayscale and will update the UI. It is shown below −
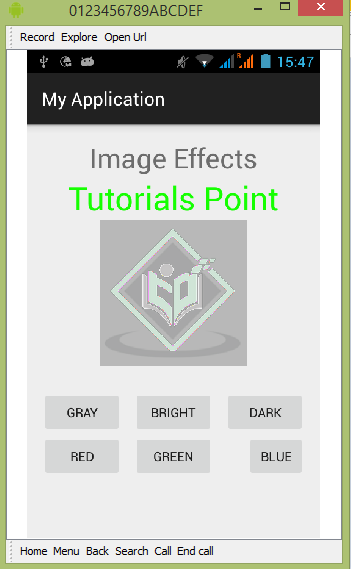
Now tap on the bright button, that will add some value to each pixel of the image and thus makes an illusion of brightness. It is shown below −
Now tap on the dark button, that will subtract some value to each pixel of the image and thus makes an illusion of dark. It is shown below −
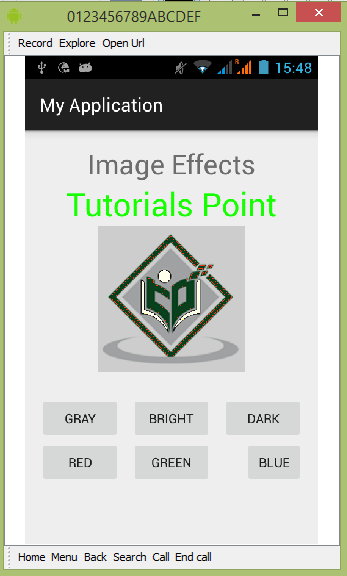
Now tap on the red button, that will subtract some value to each pixel of the image and thus makes an illusion of dark. It is shown below −
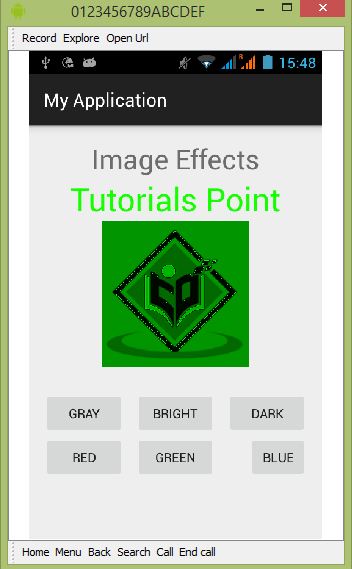
Now tap on the green button, that will subtract some value to each pixel of the image and thus makes an illusion of dark. It is shown below −
Now tap on the blue button, that will subtract some value to each pixel of the image and thus makes an illusion of dark. It is shown below −
Источник
Android: Changing app theme at runtime

Jun 28, 2015 · 5 min read
Every so often, I see a question posted on StackOverflow which is effectively asks how to change the themes of an app at runtime. The use case is often that there is a setting, button or check box which can switch between different colour themes or between something like day and night mode.
Every time such a requirement comes up, the fir s t thing a quick Google search shows is that it’s not possible to change themes at runtime. That being said, it is possible to change the theme of an Activity, however only in the`onCreate` method and only before `super` is called.
This is problematic because it’s hard to provide a seamless experience to the user if you have to restart the app or Activity in order to change the theme. So our second option is to recursively loop through all of our views and set their attributes each time an Activity or Fragment is created. This way, when the theme is changed, you can loop through all the Views again and change the attributes to reflect the new theme. Neither of these options is ideal, you may even want to consider a hybrid of these two approaches. I’ve provided an example implementation of each of these methods below.
Changing the theme at runtime
As mentioned before, it’s only possible to change the theme of an Activity in the `onCreate` method and that to only before `super` has been called. Changing the theme is fairly straight forward, something like below should do it:
This is pretty straight forward, however this works when an activity is first created and has no effect on the current open Activity or any backgrounded Activities. In order to affect change on the current Activity, we’ll have save the state of the current Activity and relaunch the activity, in order to make this experience seamless for the user, you have 2 options, either remove all transition animations for Activities or change them to provide a nice fade in effect. The result of this approach is shown in the video below.
As you can see, the approach produces a pretty nice result. If you don’t want a fade in effect, remove all animations for Activity transition and you should have a sudden change.
The code to achieve this is in my gist “Transition themes”.
Possible issues
- In order to achieve theme change in this manner, you have to make sure that all your View inherit attributes that matter from the theme and do not in-line any attributes that matter like background colour or text colour.
- Saving your Activity state and relaunching it may not be as smooth as in my example above. This depends a lot of how heavy your Activity and it’s layouts are. Some elements may need to be reloaded.
- Any Activities that are already open in the background will not have the theme change applied to it when you go back to them. The easiest solution to this is to close all the backgrounded Activities, or else, you’ll have to save their state, close them and relaunch them in `onStart` or `onResume`.
Recursively change attributes on all your Views
As much as we hope that the theme can contain all our formatting, we invariably need to override a text colour or background colour in-line in our layout or an in a style attribute and this needs to be changed programmatically. In this scenario, you would likely have to check the appropriate Views or all Views to see if they are consistent with your set theme. If you know which Views are likely to be affected and can check them directly, nothing could be better. If not, you will have to loop through all the View in your layout and check them. The code to do this depends heavily on your project and it’s requirements, however, the skeleton code for checking all your Views be something like this:
Possible issues
- Depending on how complex your screens are, your code for checking each View can become quite complex. An alternate solution can be to set the Views theme related attributes when we build our Activity, Fragment or Layout. This will still add to the complexity of your code.
- There is a time and performance cost to doing this for each layout.
There is a third option?
You could bundle duplicate layouts for each of your themes where the only difference between each layout is that the style or in-line style related attributes are different. Then in your code, depending on the selected theme you inflate or set the appropriate layout. This approach while very simple, however it has the same issues as the first option.
What I recommend
If this is a requirement for your app, I recommend you research what is possible before you try any of these approaches. If all you want to do is change some text colour and the colour of the Toolbar and tabs, this is possible without having to change the theme. I would take a look at the Design Support Library.
If you are going to do down one of the routes I have talked about above, I would recommend not getting too attached to any one approach and to combine all three approaches above. Find the best fit for your particular situation.
Also, if you’re going to need to change the colour of your drawable assets, my article on how to change the colour of drawable assets may help.
Do you know a better way of doing this?
I’m honestly asking the readers, if there are any out there, to chime in and tell me if there is a better way to handle runtime theme changes. It’s a topic I have researched and Google’d, however, I’m just not happy with what I’ve found so far. If you have a better approach or some advice on the matter, I’d love to hear it.
For more Android development article or follow me on LinkedIn, Twitter or Google+.
Источник
How to create custom views in android?
Before diving into the process of creating a custom view, It would be worth stating why we may need to create custom views.
- Uniqueness: Create something that cannot be done by ordinary views.
- Optimisation: A lot of times we tend to add multiple views or constraints to create the desired view that can be optimized drastically in terms of draw, measure or layout time.
The best way to start would be to understand how android manages view groups and lays out views on the screen. Let us take a look at the diagram below.

onMeasure(widthMeasureSpec: Int, heightMeasureSpec: Int)
Every parent view passes a height and width constraint to its child view based on which the child view decides how big it wants to be. The child view then calls setMeasuredDimension() to store its measured width and height.
How are these constraints passed?
Android uses a 32-bit int called the measure spec to pack a dimension and its mode. The mode is a constraint and can be of 3 types:
- MeasureSpec.EXACTLY: A view should be absolutely the same size as dimension passed along with spec. Eg. layout_width= “100dp”, layout_width=”match_parent”,layout_weight=”1″.
- MeasureSpec.AT_MOST: A view can have maximum height/width of dimension passed. However, it can be also smaller if it wishes to be. Eg android:layout_width=”wrap_content”
- MeasureSpec.UNSPECIFIED: A view can be of any size. This is passed when we are using a ScrollView or ListView as our parent.
onLayout(changed: Boolean, left: Int, top: Int, right: Int, bottom: Int)
Android applies any offsets or margins and calls this method to inform your view about where exactly it would be placed on the screen. Unlike onMeasure, it is called only once during the traversal. So it is recommended to perform any complex calculations in this method.
onDraw(canvas: Canvas)
Finally, Android provides you with a 2D drawing surface i.e the canvas on which you can draw using a paint object.
The UI thread then passes display lists to render thread which does a lot of optimizations and finally GPU process the data passed to it by render thread.
How to define attributes for your view?
Declaring XML attributes is simple. You just need to add a declarable-style in your attrs.xml and declare a format for every attribute.
For instance, if you are creating a simple view which displays a circle with its label. Your attributes may look like this.
The same is referenced while creating a view in the following manner.
Now, we have to parse these attributes in your java or kotlin class.
- Create your view class which extends the android.view class
- Obtain a reference to the attributes declared in XML. While attrs is passed in the constructor, the second parameter is a reference to the styleable we just declared. The latter two are used for getting default style attributes in theme or supplying a default style attributes.
- Parsing the attribute arguments
Android automatically handles the process of converting dp or sp to the right amount of pixels according to screen size when parsing a dimension attribute. But, You need to ensure that the fallback value is converted to appropriate pixel value since android returns fallback value without any conversions if an attribute value is not defined in XML.
While parsing all other attributes is quite straightforward. I will brief you about how to parse flags. Declaring flags attributes can be really useful sometimes since we can check for multiple properties using a single attribute. This is the same way android handles the visibility flag.
colorType here is an integer which represents a flagSet. Now, since every bit in an integer can be used to represent an indication. We can check if a flag exists and perform our operations accordingly. To check if a flag type stroke exits, we can simply perform an or operation on flagSet with the stroke value. If the result stays the same that means the flag actually exists in the flagSet.
- Finally, recycle the typed array to be used by the later caller.
Initialising your objects
It is always better to initialize your paint and path objects or other variables in the constructor itself. Since declaring it any other traversal method may result in the meaningless creation of objects again and again.
Calculating your view size
Calculating view size can be really challenging sometimes. You have to make sure that your view does not take any extra pixel or request any less pixel as it may end up showing extra white space or not showing complete view respectively. These are the basic steps that you need to follow to calculate the size of your view.
- Calculate how much width and height your view requires. For instance, if you are drawing a simple circle with its label below the circle. The suggested width would be :
(circle diameter+ any extra width if occupied by the label). - Calculate the desired width by adding the suggested width with paddingStart and paddingEnd. Similarly, desiredHeight would be suggested height plus paddingTop & paddingBottom.
- Calculate actual size respecting the constraints. To calculate this, you simply need to pass measure spec passed to you in onMeasure() and your desired dimension in this method called resolveSize(). This method would tell you closest possible dimension to your desired width or height while still respecting its parent’s constraints.
- Most importantly, you need to set the final width and height in onMeasure method by calling setMeasuredDimension(measuredWidth,measuredHeight) to store the measured width and height of this view otherwise, you might see your view crashing with an IllegalStateException.
Positioning your views
We can position our child views by using the onLayoutMethod. The code simply may involve iterating over any child views and assigning them a left, top, right and a bottom bound depending on measured widths and heights.
Drawing your view
Before using the canvas there are few things that we need to understand:
- Paint: The Paint class holds the style and color information about how to draw geometries, text, and bitmaps. Here is how we create a paint object.
You can read about more about the properties here.
- Drawing Shapes: You can directly draw shapes like a line, arc, circle etc on the canvas. Let us take a look at the diagram below to gain a better understanding.

Using Paths: Drawing complex shapes with the above methods may get a bit complex so android offers a Path class. With the Path class, you can imagine that you are holding a pen and you can draw a shape, then maybe move to a different position and draw another shape. Finally, when you are done creating a path. You can simply draw the path on the canvas like this. Also, when using paths you can also use different path effects (discussed below in detail). Below, is an example of the shape created using paths.

- Path Effects: If you also apply a Corner path effect to your paint object with a certain radius the polygon will look like this. You can also use other path effects like DashPathEffect, DiscretePath etc. To combine two different path effects you can use the ComposePathEffect.

bitmap: Bitmap that you want to draw on canvas
src: It takes a rect object which specifies the portion of the bitmap you want to draw. This can be null if you want to draw the complete bitmap.
dest: A rect object which tells how much area do you want to cover on the canvas with the bitmap
paint: The paint object with which you want to draw the bitmap
Android automatically does all the necessary scaling or translation to fit the source on destination area.
You can also draw drawables on canvas.
Before drawing a drawable, you would need to set bounds to your drawable. The left, top, right and bottom describe the drawable’s size and its position on the canvas. You can find the preferred size for Drawables using getIntrinsicHeight() and getIntrinsicWidth() methods and decide bounds accordingly.
Drawing Texts: Drawing texts can be a bit of pain. Not the drawing itself, but the alignment or measurement of text. This occurs because different characters have different heights and to make it more worse there can be different typefaces too. So to measure a text’s height you would need to calculate specific text bounds for your text like this.
Then, the rect object passed in the end would then contain the text bounds of actual text to be drawn. This way you can calculate the actual height of text to be drawn and set a correct baseline y for your text. To calculate the width of your text you should use textPaint.measureText() as it is more accurate than the width given by paint text bounds (because of the way these methods are implemented in skia library). Alternatively, for ensuring the text is centered horizontally on the canvas you can just set your paint’s alignment to TextAlign.CENTER and pass center point of your canvas in the x coordinate.
Drawing multiline text: If you want to handle line breaks (\n) or If you have a fixed width to draw a text you can use Static Layout or Dynamic Layout. This would automatically handle all the word breaks or line breaks and also tell you how much height would be needed to draw a text in given width.
- Saving & Restoring Canvas: As you might have noticed, we need to save the canvas and translate it before drawing on it and finally we have to restore the canvas. A lot of times we need to draw something with a different setting such as rotating the canvas, translating it, or clipping a certain part of canvas while drawing a shape. In this case, we can call canvas.save() which would save our current canvas settings on a stack. After this, we change canvas settings ( translation etc) and then draw whatever we want to with these settings. Finally, when we are done drawing we can call canvas.restore() which would restore canvas to the previous configuration that we had saved.
- Handling User Inputs: Finally, you have created your own custom view using XML attributes, BUT what if you want to change any property at runtime such as the radius of the circle, text color etc. You would need to inform Android API’s to reflect the changes. Now, if any change in property affects the size of your view you will set the variable and call requestLayout() which would recalculate your view’s size and redraw it. However, if a property like a text color is changed you would only need to redraw it with new text paint color and in this case, it would be wise to just call invalidate().
Additional Note: Now if your view has a lot of attributes, there may be a lot of times you would have to write invalidate()/requestLayout after every setter. This problem can be solved by using kotlin’s delegates. Let us take a look a the example below to be more clear.
Now, If I know that a property if changed should only redraw the view, I would initialize it using OnValidateProp but if it can affect the size of the view I would initialize by creating a new OnLayoutProp delegate.
Finally! You can start by creating your own custom views. If you are interested to see what an actual custom view code looks like. You can check out the library that I just published. It displays steps along with the descriptions and covers most of the things that I have discussed in this article.
Источник


