- Access Control Center on your iPhone and iPod touch
- How to open and close Control Center
- iPhone X and later
- iPhone SE, iPhone 8 and earlier, and iPod touch
- How to customize your settings
- Set up your iPhone, iPad, or iPod touch
- If you’re switching to a new device
- If you’re setting up your first iOS device
- Turn on your device
- If you have another device, use Quick Start
- Activate your device
- Set up Face ID or Touch ID and create a passcode
- Restore or transfer your information and data
- Sign in with your Apple ID
- Turn on automatic updates and set up other features
- Set up Siri and other services
- Set up Screen Time and more display options
- Finish up
- Use iTunes to sync your iPhone, iPad, or iPod with your computer
- What you can sync with iTunes
- Sync or remove content using iTunes
- Sync your content using Wi-Fi
- How to open ZIP files on your iPhone, iPad, or iPod touch
- On iPhone or iPod touch
- How to create a ZIP file on your iPhone or iPod touch
- How to open a ZIP file on your iPhone or iPod touch
- On iPad
- Unlock your iPhone with Apple Watch when you’re wearing a face mask or sunglasses
- What you need
- How to set up Unlock with Apple Watch
- How to unlock your iPhone with your Apple Watch
- If you didn’t mean to unlock your iPhone
Access Control Center on your iPhone and iPod touch
Control Center gives you instant access to the things you do the most. You can use Control Center to quickly take a picture, turn on Wi-Fi, control your Apple TV, and more.
How to open and close Control Center
The way you open and close Control Center depends on the type of device that you have. Find your device model below, then follow the steps. Or learn how to open Control Center on your iPad.
iPhone X and later
- To open Control Center, swipe down from the top-right corner of your screen.
- To close Control Center, swipe up from the bottom of the screen or tap the screen.
If you swipe too close to the top-center of your screen, you might open Notification Center instead of Control Center.
![]()
iPhone SE, iPhone 8 and earlier, and iPod touch
- To open Control Center, swipe up from the bottom edge of any screen.
- To close Control Center, tap the top of the screen or press the Home button.
![]()
How to customize your settings
Need to quickly adjust the brightness of your display or change the volume? You can customize your Control Center settings to get to your apps, settings, and features with just a few taps.
Not sure what you can use from Control Center? Check out the list of apps, setting, and features.
Источник
Set up your iPhone, iPad, or iPod touch
Learn how to set up your iPhone, iPad, or iPod touch.
If you’re switching to a new device
If you want to transfer your information from another device to your new iPhone, iPad, or iPod touch, follow these steps:
Make sure that you back up your previous iOS device so that you can transfer the content to the new device.

If you’re setting up your first iOS device
If you already set up your new device but want to start over, learn how to erase your iPhone, iPad, or iPod touch.
Otherwise, follow these steps:
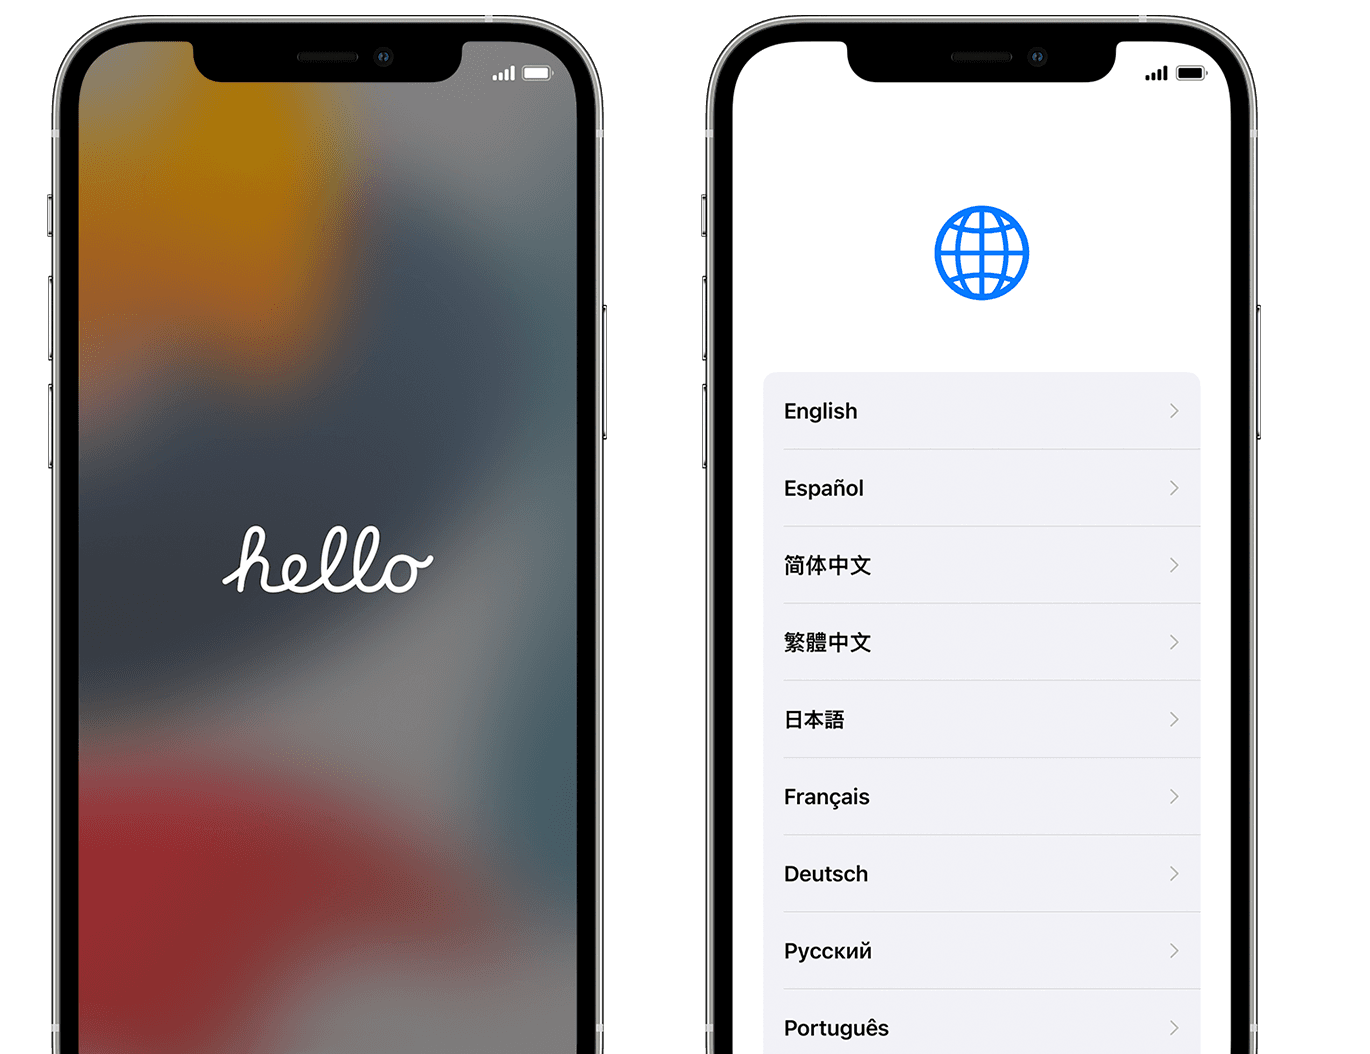
Turn on your device
Press and hold the device’s power button until you see the Apple logo. You’ll then see «Hello» in many languages. Follow the steps to get started. If you’re blind or have low vision, you can turn on VoiceOver or Zoom from the Hello screen.
When asked, choose your language. Then tap your country or region. This affects how information looks on your device, including date, time, contacts, and more. At this point, you can tap the blue accessibility button to set up Accessibility Options that can optimize your setup experience and the use of your new device.
If you have another device, use Quick Start
If you have another device, you can use it to automatically set up your new device with Quick Start. Bring the two devices close together, and then follow the instructions.
If you don’t have another device, tap «Set Up Manually» to continue.

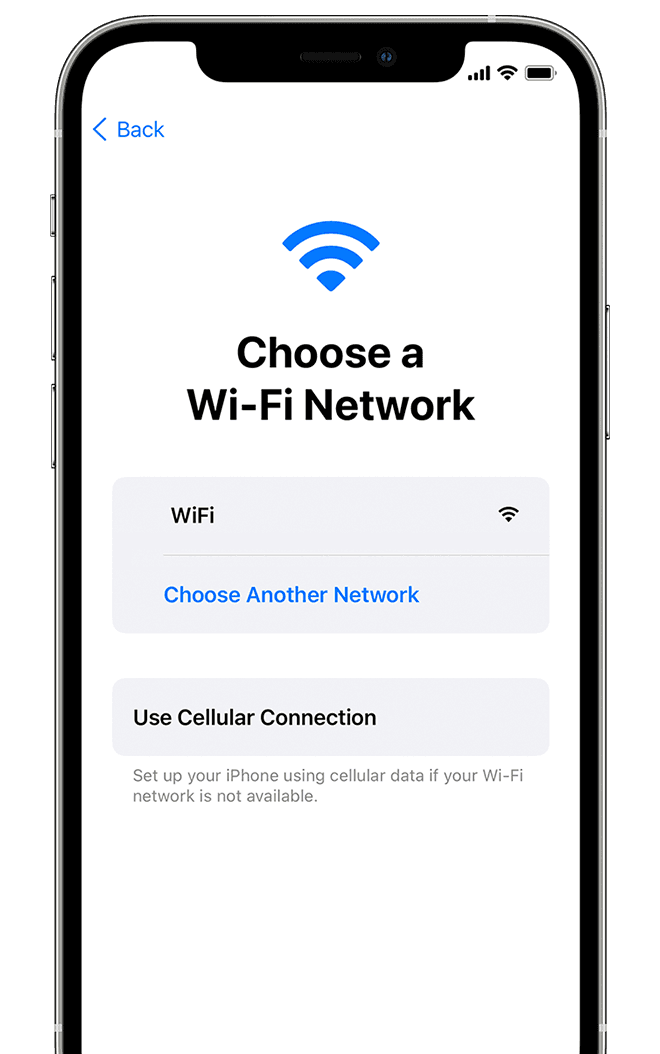
Activate your device
You need to connect to a Wi-Fi network, a cellular network, or iTunes to activate and continue setting up your device.
Tap the Wi-Fi network that you want to use or select a different option. If you’re setting up an iPhone or iPad (Wi-Fi + Cellular), you might need to insert your iPhone SIM card or iPad SIM card first.
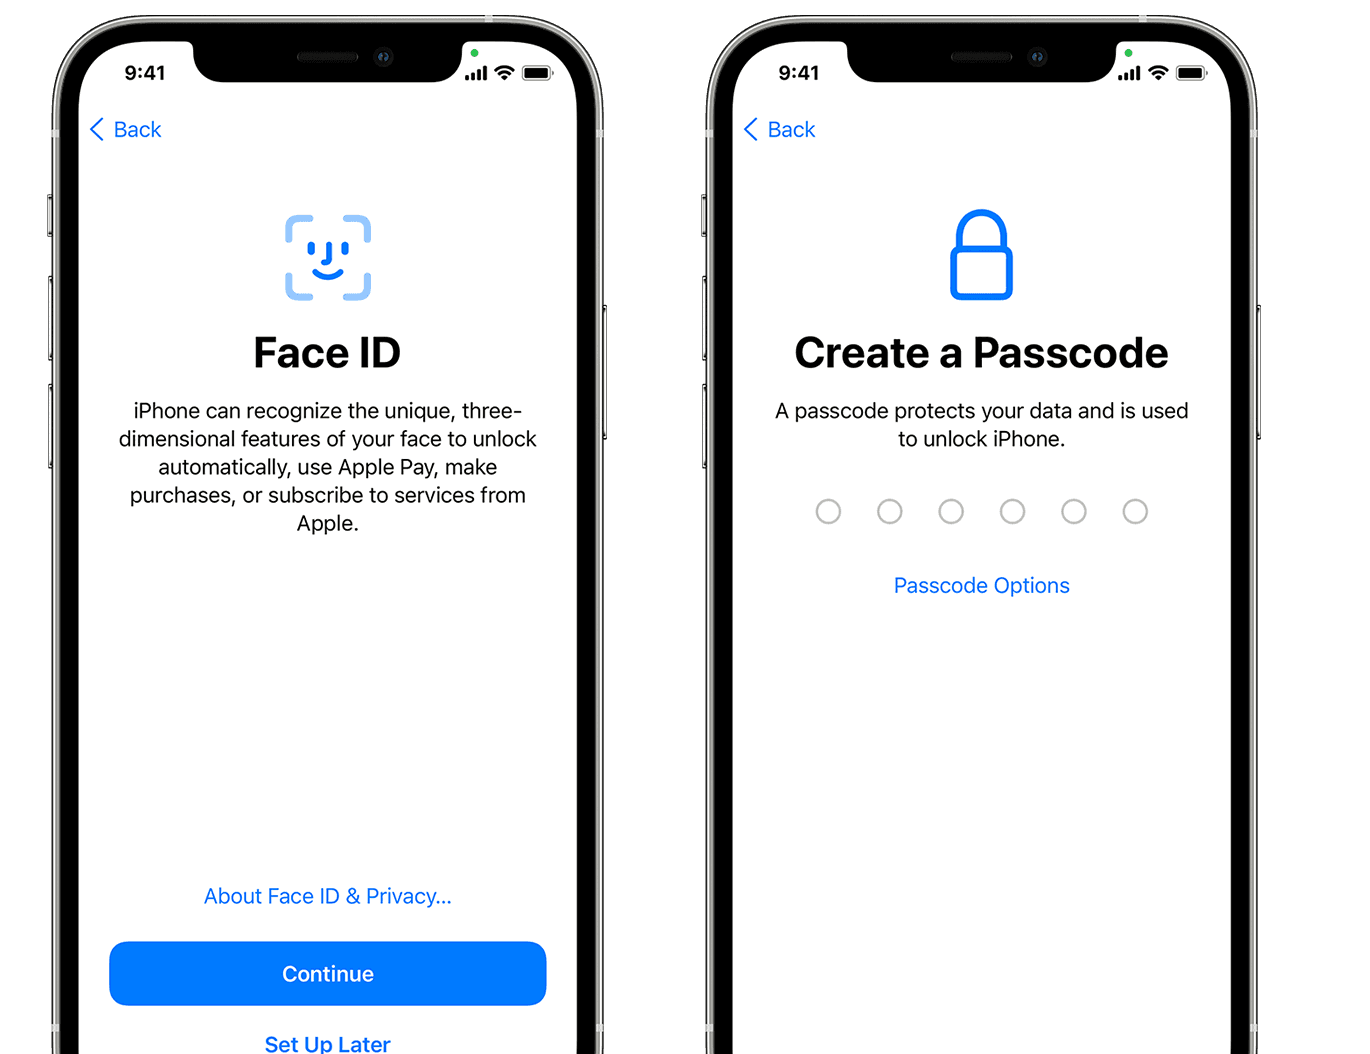
Set up Face ID or Touch ID and create a passcode
On some devices, you can set up Face ID or Touch ID. With these features, you can use face recognition or your fingerprint to unlock your device and make purchases. Tap Continue and follow the instructions, or tap «Set Up Later in Settings.»
Next, set a six-digit passcode to help protect your data. You need a passcode to use features like Face ID, Touch ID, and Apple Pay. If you’d like a four-digit passcode, custom passcode, or no passcode, tap «Passcode Options.»
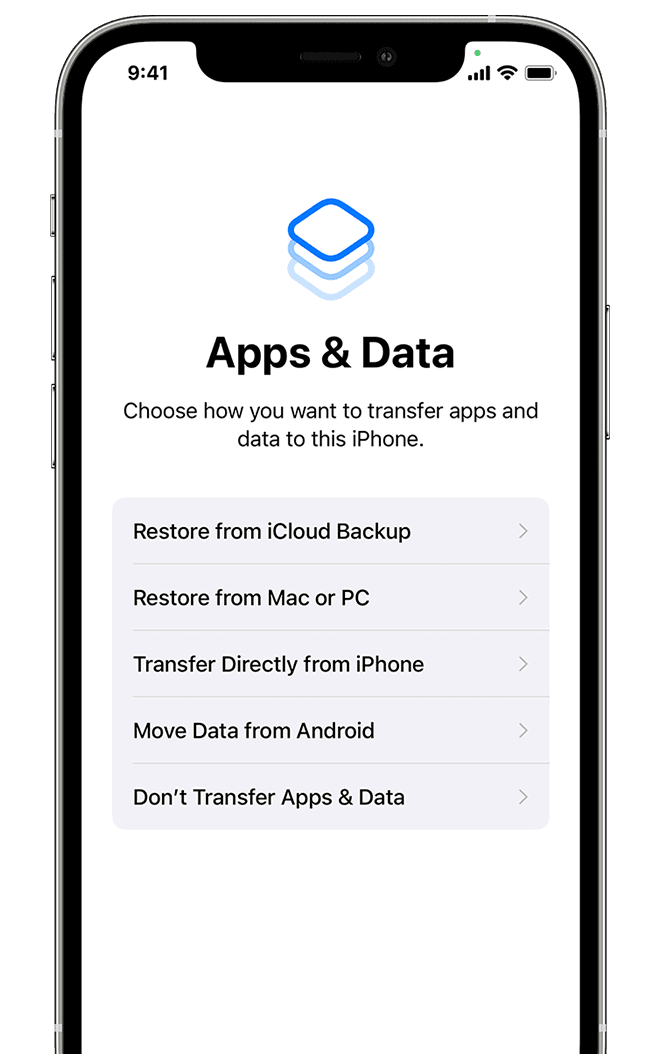
Restore or transfer your information and data
If you have an iCloud backup or a backup made from your computer or an Android device, you can restore or transfer your data from your old device to your new device.
If you don’t have a backup or another device, select Don’t Transfer Apps & Data.
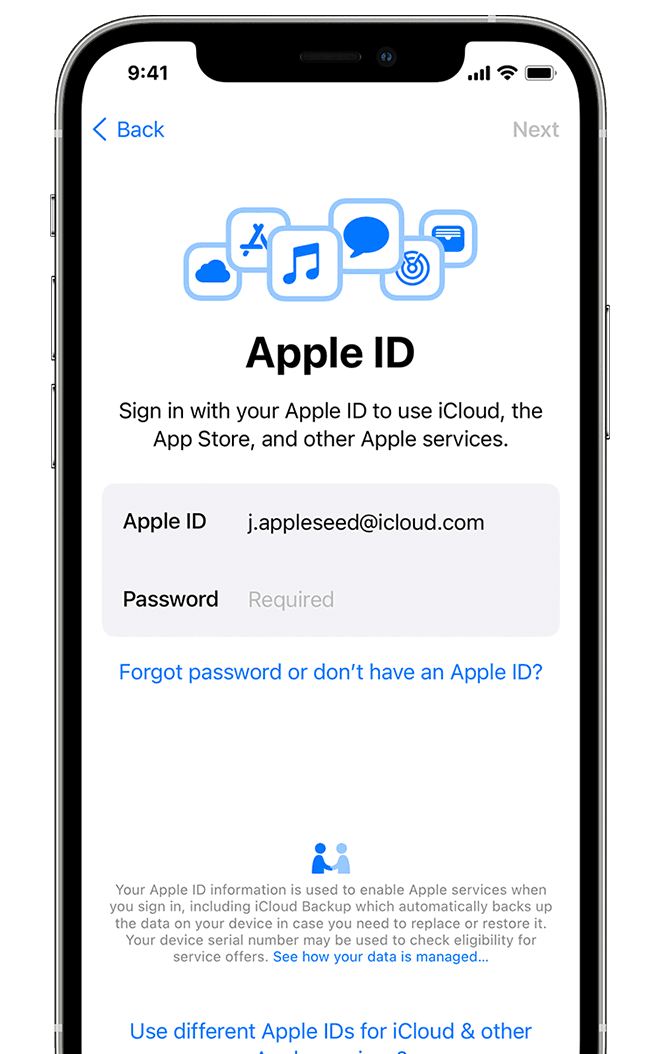
Sign in with your Apple ID
Enter your Apple ID and password, or tap «Forgot password or don’t have an Apple ID?» From there, you can recover your Apple ID or password, create an Apple ID, or set it up later. If you use more than one Apple ID, tap «Use different Apple IDs for iCloud and iTunes?»
When you sign in with your Apple ID, you might be prompted for a verification code from your previous device.
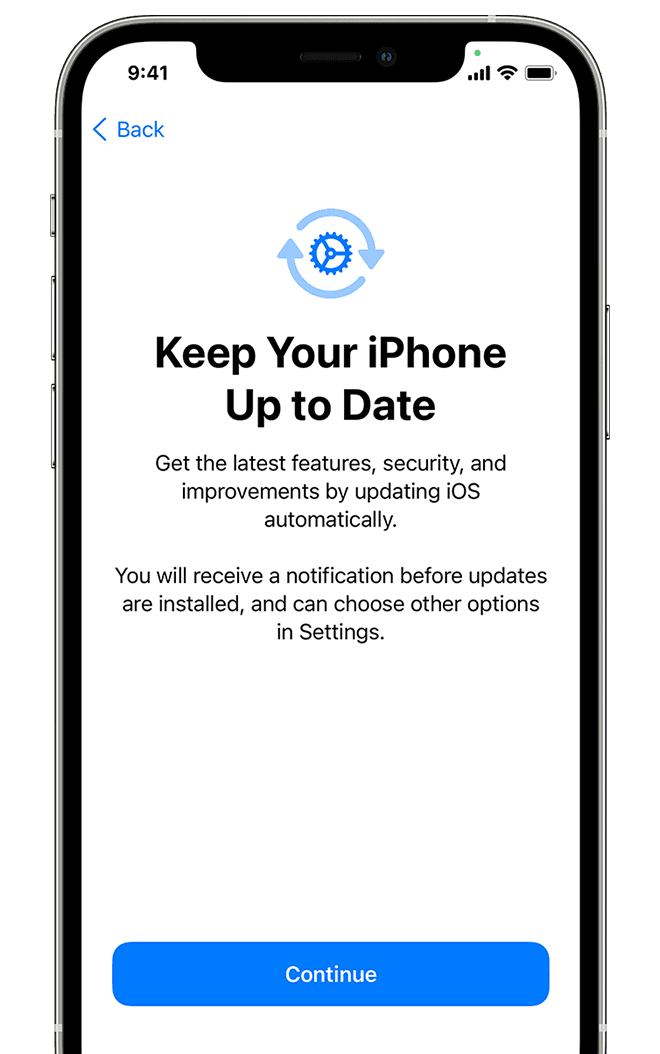
Turn on automatic updates and set up other features
On the next screens, you can decide whether to share information with app developers and allow iOS to update automatically.
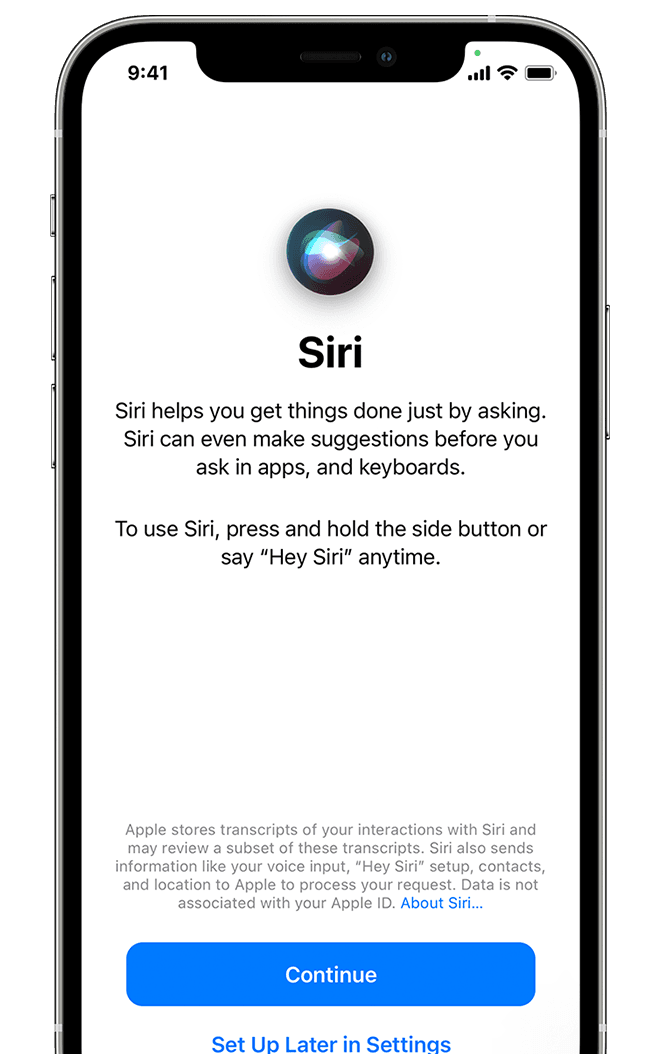
Set up Siri and other services
Next, you’ll be asked to set up or enable services and features, like Siri. On some devices, you’ll be asked to speak a few phrases so that Siri can get to know your voice.
If you signed in with your Apple ID, follow the steps to set up Apple Pay and iCloud Keychain.
Set up Screen Time and more display options
Screen Time gives you insight into how much time you and your kids spend on your devices. It also lets you set time limits for daily app use. After you set up Screen Time, you can turn on True Tone if your device supports it, and use Display Zoom to adjust the size of icons and text on your Home screen.
If you have an iPhone X or later, learn more about using gestures to navigate your device. If you have an iPhone with a Home button, you can adjust the click for your Home button.

Finish up
Tap «Get Started» to begin using your device. Make a safe copy of your data by backing up, and learn about more features in the user guide for your iPhone, iPad, or iPod touch.
Information about products not manufactured by Apple, or independent websites not controlled or tested by Apple, is provided without recommendation or endorsement. Apple assumes no responsibility with regard to the selection, performance, or use of third-party websites or products. Apple makes no representations regarding third-party website accuracy or reliability. Contact the vendor for additional information.
Источник
Use iTunes to sync your iPhone, iPad, or iPod with your computer
Learn how to sync music, movies, and more using iTunes on your Mac or PC.
If you’re using macOS Mojave or earlier or a Windows PC, use iTunes to sync content to your devices. Before you use iTunes to sync content to your iOS or iPadOS device, consider using iCloud, Apple Music, or similar services to keep content from your Mac or PC in the cloud. This way, you can access your music, photos, and more on your devices when you aren’t near your computer. Learn more about using Apple Music or iCloud Photos instead of iTunes.
If you use iCloud or other services like Apple Music to keep your content up-to-date across all of your devices, some syncing features through iTunes might be turned off.
What you can sync with iTunes
- Albums, songs, playlists, movies, TV shows, podcasts, and audiobooks.
- Photos and videos.
- Contacts and calendars.
iTunes features might vary by country or region.
Sync or remove content using iTunes
- Open iTunes and connect your device to your computer with a USB cable.
- Click the device icon in the upper-left corner of the iTunes window. Learn what to do if you don’t see the icon.

- From the list under Settings on the left side of the iTunes window, click the type of content that you want to sync or remove. * To turn syncing on for a content type, select the checkbox next to Sync.
- Select the checkbox next to each item that you want to sync.
- Click the Apply button in the lower-right corner of the window. If syncing doesn’t start automatically, click the Sync button.


* You can only sync your device with one iTunes library at a time. If you see a message that your device is synced with another iTunes library, your device was previously connected to another computer. If you click «Erase and Sync» in that message, all content of the selected type on your device will be erased and replaced with content from this computer.
Sync your content using Wi-Fi
After you set up syncing with iTunes using USB, you can set up iTunes to sync to your device with Wi-Fi instead of USB.
- Connect your device to your computer with a USB cable, then open iTunes and select your device. Learn what to do if your device doesn’t appear on your computer.
- Click Summary on the left side of the iTunes window.
- Select «Sync with this [device] over Wi-Fi.»
- Click Apply.
When the computer and the device are on the same Wi-Fi network, the device appears in iTunes. The device syncs automatically whenever it’s plugged in to power and iTunes is open on the computer.
Источник
How to open ZIP files on your iPhone, iPad, or iPod touch
If you need to email a large file or create an archive, a ZIP file can help save space. Follow these steps to compress files, uncompress a ZIP file, and more.
On iPhone or iPod touch
If you need to share a large file or multiple files, a compressed file takes up less storage space and can be sent faster because of its smaller file size. Learn how to compress or uncompress files on your iPhone or iPod touch.
How to create a ZIP file on your iPhone or iPod touch
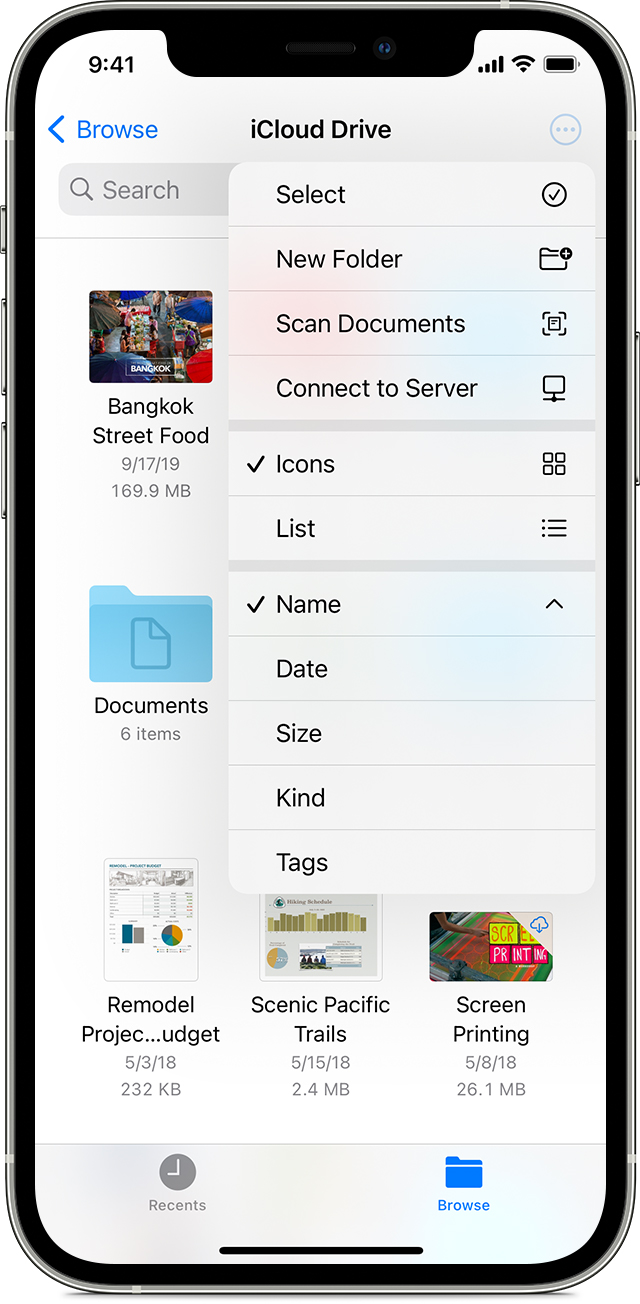
- Open the Files app, then choose a location like On My iPhone or iCloud Drive.
- Tap the more button , then tap Select. Choose one or more files.
- Tap the more button in the lower right, then tap Compress.
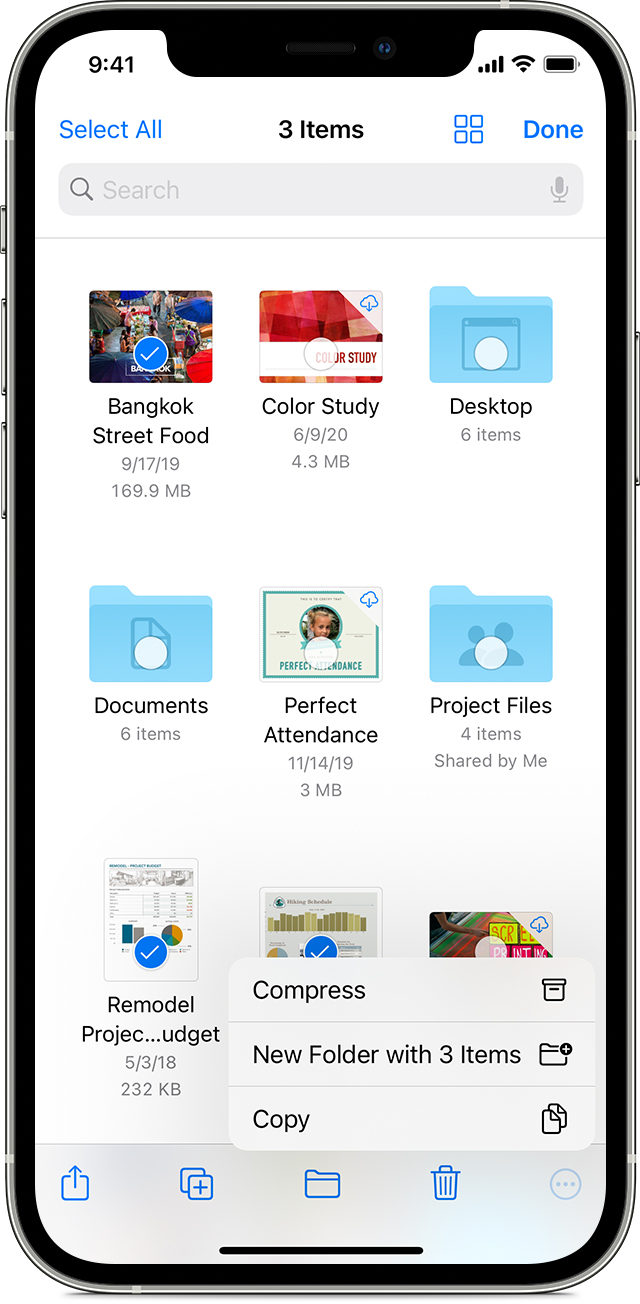
If you selected one file, a ZIP file with the same filename saves to that folder. If you selected multiple files, a ZIP archive named Archive.zip saves to that folder. To change its name, touch and hold on the ZIP archive, then select Rename.
How to open a ZIP file on your iPhone or iPod touch
- Open the Files app, then find the ZIP file or archive you want to uncompress.
- Tap the ZIP file or archive.
- A folder is created containing the files. To change its name, touch and hold on the folder, then tap Rename.
- Tap to open the folder.
On iPad
If you need to share a large file or multiple files, a compressed file takes up less storage space and can be sent faster because of its smaller file size. Learn how to compress or uncompress files on your iPad.
Источник
Unlock your iPhone with Apple Watch when you’re wearing a face mask or sunglasses
When you’re wearing a mask or sunglasses and your Apple Watch, you can simply raise and glance at your iPhone to unlock it. Learn how to set up and use the feature.
What you need
Unlocking your iPhone with your Apple Watch requires these devices:
- An iPhone that uses Face ID (iPhone X or later) and has iOS 14.5 or later
- An Apple Watch Series 3 or later with watchOS 7.4 or later
The feature also has these requirements:
- Your Apple Watch needs to be paired with your iPhone.
- Your iPhone and Apple Watch need to have Wi-Fi and Bluetooth turned on. (You don’t need to be connected to a Wi-Fi network.)
- Your Apple Watch needs to have a passcode, and wrist detection must be turned on.
- Your Apple Watch needs to be on your wrist and unlocked.
- You need to be wearing a mask that covers your mouth and nose, or sunglasses or ski goggles that cover your eyes.

How to set up Unlock with Apple Watch
- Open the Settings app on your iPhone.
- Tap Face ID & Passcode, then type your passcode.
- Scroll down to Unlock with Apple Watch, then turn on the feature next to your watch’s name. If your watch doesn’t have wrist detection enabled, you’re asked to turn it on.
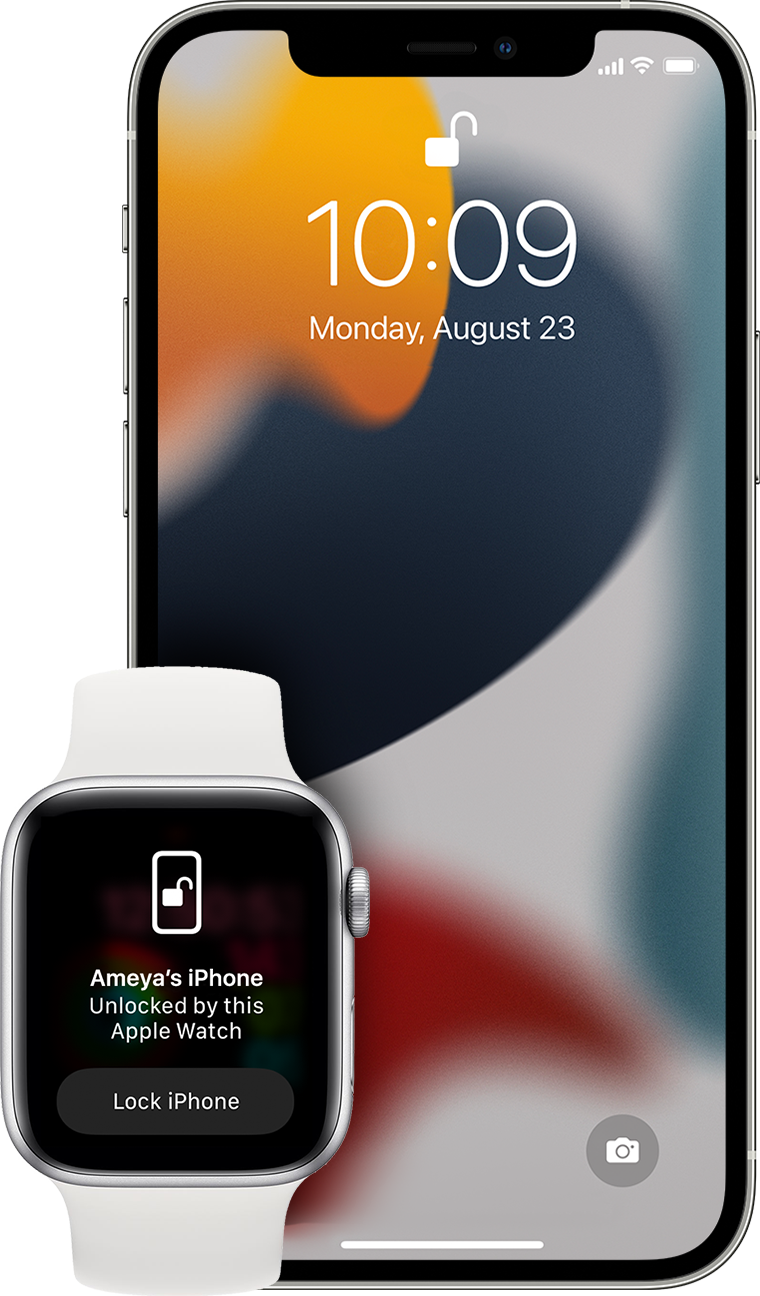
How to unlock your iPhone with your Apple Watch
- Make sure that you’re wearing a mask, sunglasses, or ski goggles and that your Apple Watch is on your wrist and unlocked.
- Wake your iPhone by raising it or tapping its screen.
- Glance at your iPhone to unlock it. Then you can swipe up from the bottom of your iPhone screen to begin using it.
If you didn’t mean to unlock your iPhone
When your Apple Watch unlocks your iPhone successfully, your watch gives haptic feedback and shows an alert. If you didn’t mean to unlock your iPhone, tap the Lock iPhone button on your Apple Watch screen.
The next time you unlock your iPhone after tapping this button, your iPhone requires that you type your passcode.
Источник


