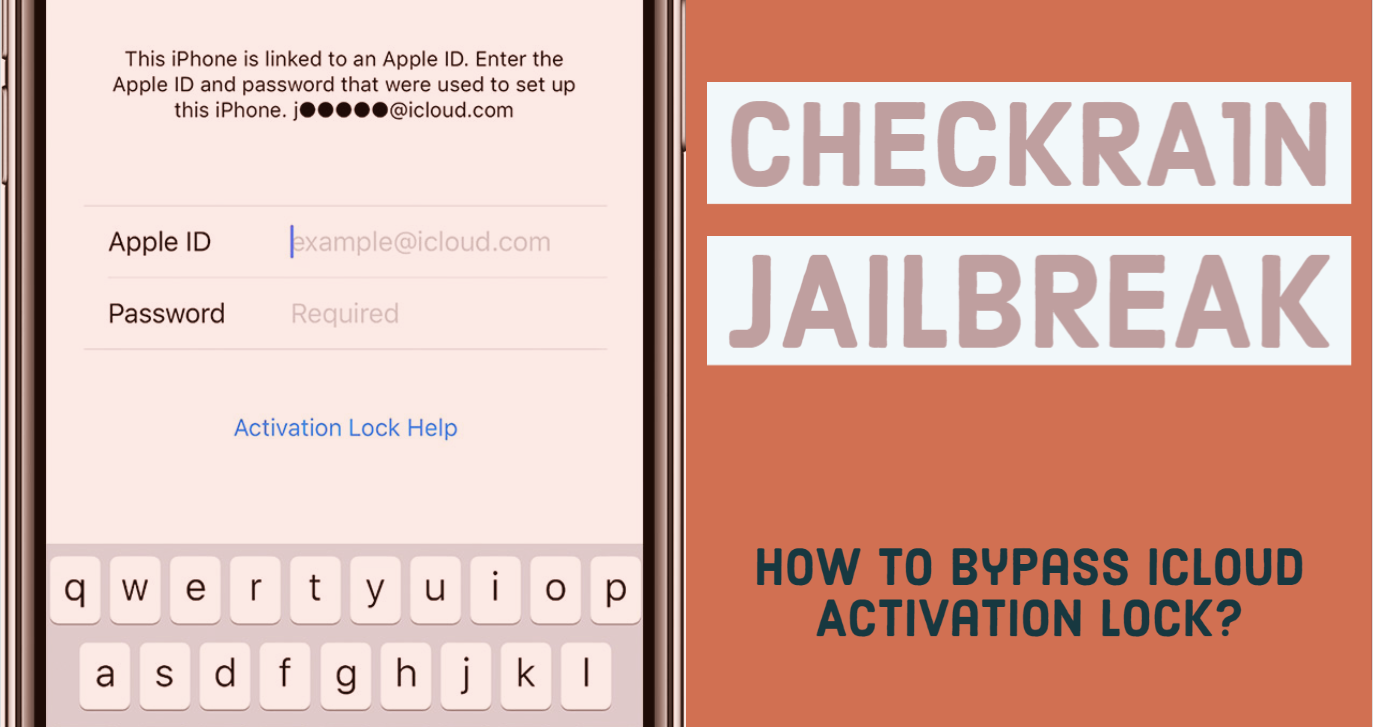
- How to bypass iCloud Activation Lock using Checkra1n jailbreak
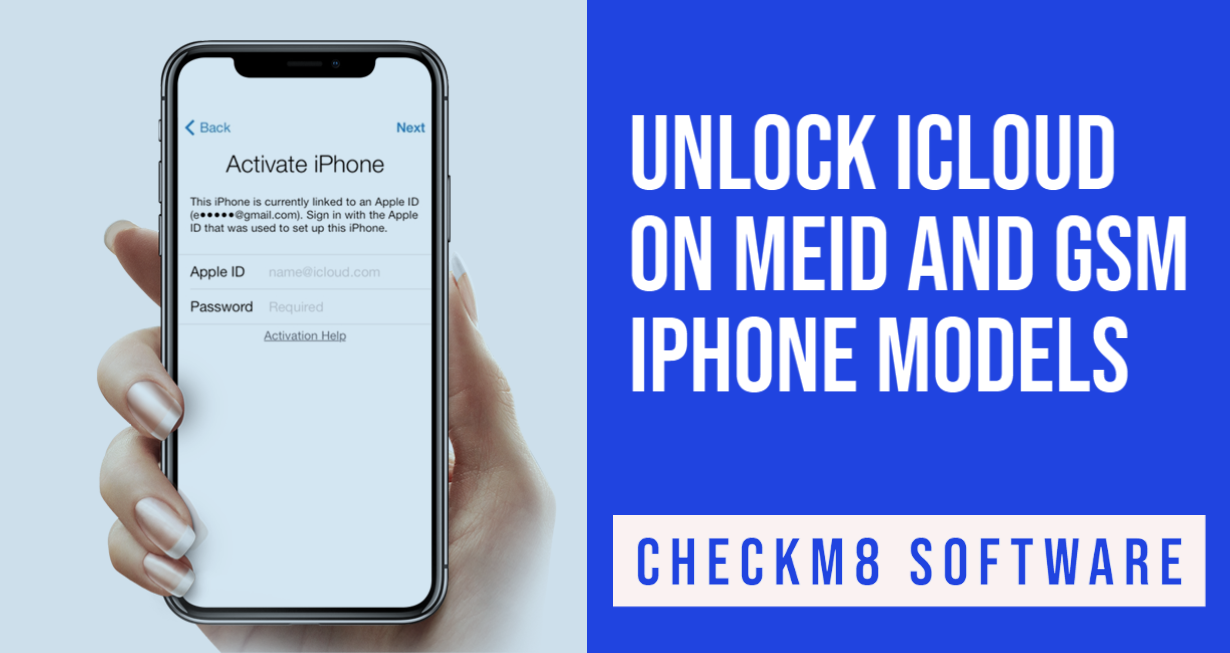
- Unlock iCloud on iPhone with Signal [GSM & MEID]
- Unlock iCloud on MEID and GSM iPhone models
- Unlock iCloud on iPhone with Signal
- How to Unlock iCloud Activation Lock on MEID and GSM versions of iPhone with Signal
- About CheckM8
- How to Bypass iCloud Activation Lock with Jailbreak
- Super Easy Way to Bypass iCloud Activation Lock with Jailbreak
- How to Bypass Activation Lock Bypass with Jailbreak Using Checkra1n
- Conclusion
How to bypass iCloud Activation Lock using Checkra1n jailbreak
Today , I will show you how to use checkra1n jailbreak to bypass iCloud on any device from iPhone 5s to iPhone X. The idea is to do SSH via USB, as checkra1n uses SSH ramdisk , and delete /rename or patch the Setup.app running iCloud activation screen on your device.
This method is different from the Custom Firmware restore iCloud bypass method but the idea i s the same => patch or invalidate setup.app to bypass activation screen.
Unfortunately, deleting Setup.app will force your device to get the baseband activation status to UNACTIVATED so the following services won’t work on your device:
- No SIM signal (no service issue)
- No iMessage
- No Facetime
- Not able to add new iCloud account
- Not able to use with iTunes (it will show device activation screen in iTunes)
Even if you patch setup.app config to show the completed setup process like:
The device will still be unactivated as the lockdownd (the iOS d ae mon running the activation process) won’t be able to find a valid activation ticket on your device. Also , the device needs to receive a valid wildcard wicket to properly activate the baseband.
iCloud Bypass Guide [MacOS Only]
You need MacOS for this guide as Checkra1n jailbreak is compatible with mac system only at this time. This guide is just for training purposes, use it at your own risk. I am using Mac OS 10.14.6 for this guide.
Supported Devices:
- A5 – iPad 2, iPhone 4S, iPad Mini (1st generation)
- A5X – iPad (3rd generation)
- A6 – iPhone 5, iPhone 5C
- A6X – iPad (4th generation)
- A7 – iPhone 5S, iPad Air, iPad Mini 2, iPad Mini 3
- A8 – Phone 6, iPhone 6 Plus, iPad mini 4
- A8X – iPad Air 2 (not supported)
- A9 – iPhone 6S, iPhone 6S Plus, iPhone SE, iPad (2017) 5th Generation (not supported)
- A9X – iPad Pro (12.9 in.) 1st generation (not supported), iPad Pro (9.7 in.)
- A10 – iPhone 7 and iPhone 7 Plus, iPad (2018, 6th generation), iPad (2019, 7th generation)
- A10X – iPad Pro 10.5″ (2017), iPad Pro 12.9″ 2nd Gen (2017)
- A11 – iPhone 8, iPhone 8 Plus, and iPhone X
Step 1: Download Checkra1n tethered jailbreak. Then install brew and usbmuxd (open terminal app on mac and type)
If you have fresh Mac OS , the building process installation can take a while . S o be pa t ient and don ’ t interrupt the process.
Step 2: Boot device into DFU mode (black screen)
Step 3: Run Checkra1n and jailbreak your device. Device should boot to normal mode after jailbreak is done.
Step 4: Run iproxy service which is a part of usbmuxd and make a tunnel from your MacBook port 2222 to the jailbroken device port 44 (you can try 22 port as well). Also, you can use many other tools to make SSH work via USB connection.
DON’T CLOSE the iproxy terminal window . Otherwise, it will terminate the TCP connection.
Step 5: Open new terminal tab (Command + T) and SSH into your device.
Password: alpine
Step 6: Mount the device file system as read-write so we can delete or patch the Setup.app
Step 7: Rename Setup.app to any other filename like Setup.bak
You can also completely delete the Setup.app using this command
Step 8: Clear Setup.app activation screen cache ( otherwise, it will be shown on device screen). This process can take a while and device will respring.
Step 9: Terminate all system processes related to Springboard
iCloud Activation screen bypass is done.
Don’t forget to support checkra1n developers as they put so much efforts to bring us jailbreak and iCloud freedom.
Источник
Unlock iCloud on iPhone with Signal [GSM & MEID]
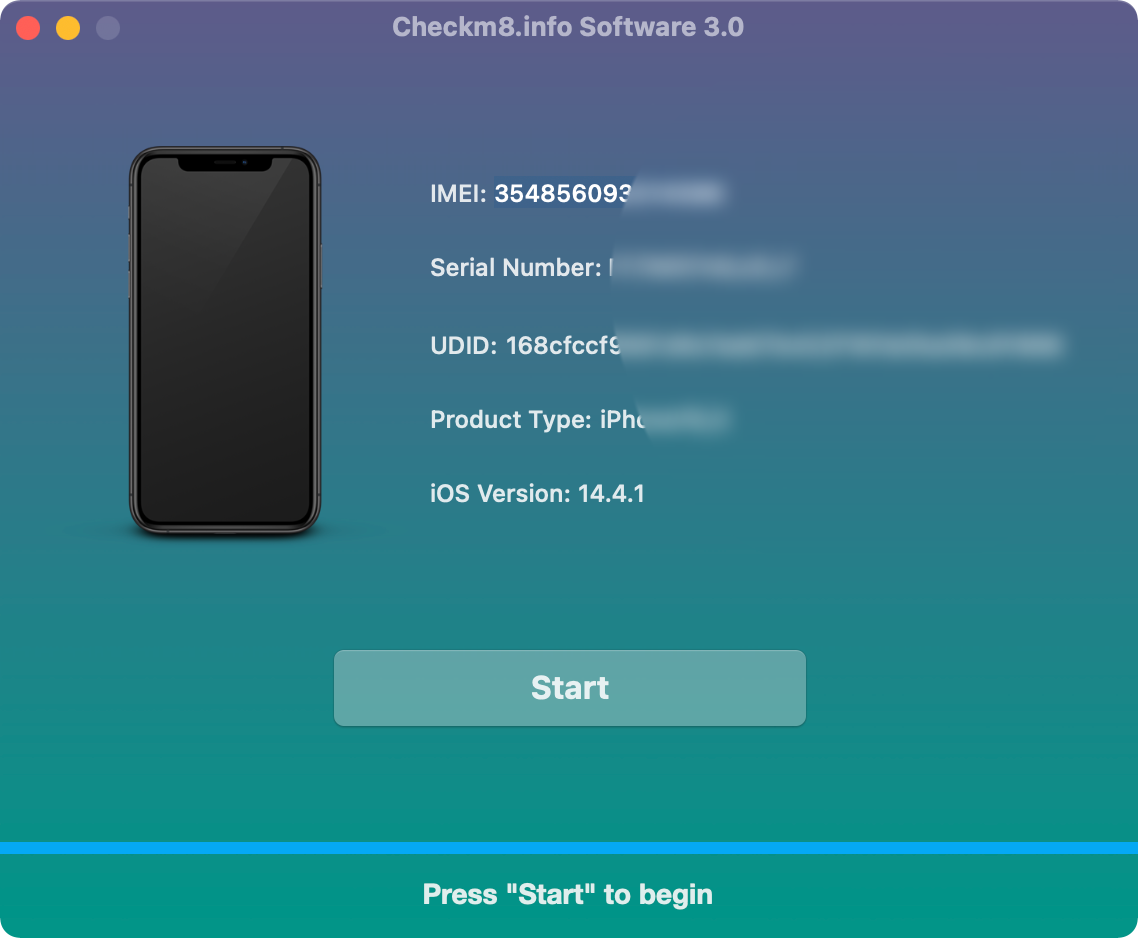
Updated CheckM8 software will quickly bypass Activation Lock and Unlock iCloud locked iPhone [GSM & MEID] with a signal. This trusty tool can bring back all iOS features along with phone calls and SMS messages. The CheckM8 bypass tool supports iPhone 5S — X and iOS 12.0 — 14.x.x.
Unlock iCloud on MEID and GSM iPhone models
The tool works remotely. It is designed to unlock iCloud Activation Lock on iPhone [GSM & MEID] with a signal in the fastest and most reliable way.
The list of features impresses:
- Unlock iPhone [GSM & MEID] models with a signal are supported: 5S, 8 Plus, 8, X, 7 Plus, 7, 6S, 6S Plus, 6, 6 Plus;
- These iOS versions are supported: iOS 12.0 up to 14.x.x;
- SIM-locked iPhone models are supported;
- No Apple ID or password is required for unlock the iCloud Activation Lock;
- GSM module is activated after bypass;
- All iOS features become available after unlock.
Unlock iCloud on iPhone with Signal
When a user enables the Find My Activation Lock feature, the iPhone can be useless and make no calls even with a signal. To unlock all the features, a user must enter the Apple ID and password linked to the iCloud account with the Find My app.
Forgetting the password, Apple ID, or getting a used iPhone with an Activation Lock results in a locked screen. But you can always use reliable software to bypass iCloud Activation Lock on iPhone [GSM & MEID] with a signal and without Apple ID/password.
CheckM8 is based on the Checkm8 exploit, which allows through the Checkra1n Jailbreak to remove Apple’s iOS restrictions from iPhone 5S — X. The CheckM8 bypass software comes with Checkra1n, required to use if you wish to bypass Activation Lock.
The software runs on macOS. It is compatible with iOS 12.0 — 14.x.x and iPhone 5S, 8 Plus, 8, X, 7 Plus, 7, 6S, 6S Plus, 6, 6 Plus. The tool does not support blacklisted smartphones.
How to Unlock iCloud Activation Lock on MEID and GSM versions of iPhone with Signal
Removing the iCloud-locked screen is fast with CheckM8 software, which requires just three simple steps:
- Check if you are eligible to use the service.
- Place your order.
- Start the bypass and enjoy the result.
Using the software is easy. When CheckM8 is downloaded on macOS, you can run it to check if your iPhone and the iOS version qualify. Then you order a lifetime License that guarantees the unrestricted reuse of the software in the future on the same eligible iPhone 5S — X. In the end, you finally unlock the screen and can use all iOS 12.0 — 14.x.x features.
After iCloud Activation Lock bypass on iPhone [GSM & MEID] with a signal, you will make calls, send messages, download iTunes apps, use iCloud, etc.
About CheckM8
The CheckM8 developers created a unique software that distantly removes iCloud and other locks from iPhone. The company’s mission is to help users in hopeless situations, return all functions to the phone, and give a second chance to old and used devices.
Источник
How to Bypass iCloud Activation Lock with Jailbreak
This article will help you figure out how to bypass iCloud Activation Lock with jialbreak. However, jailbreaking is not an easy task for most iOS users. Our main aim is to breakdown the often-complicated process of jailbreaking your device and make it easy for you to use jailbreaking to unlock the device. These solutions have worked to unlock devices for most of our users, let’s begin with iToolab UnlockGO!
Super Easy Way to Bypass iCloud Activation Lock with Jailbreak
With iToolab UnlockGo, you can easily implement iPhone activation lock bypass jailbreak. This software allows you jailbreak iPhone in a few minutes and you don’t need to down,load and install other tools on your computer. After bypassing iCloud Activation Lock, you can also make a phone call and add a new Apple ID in Apple Store and Settings and it can’t be done with other tools.
To use it to bypass iCloud Activation Lock on both Windows and Mac, follow these simple steps:
Step 1: Download and install UnlockGo on your computer and then run the program after a successful installation.
Step 2: In the main window, select “Remove iCloud Activation Lock” and then click “Start”. Connect the device to the computer.
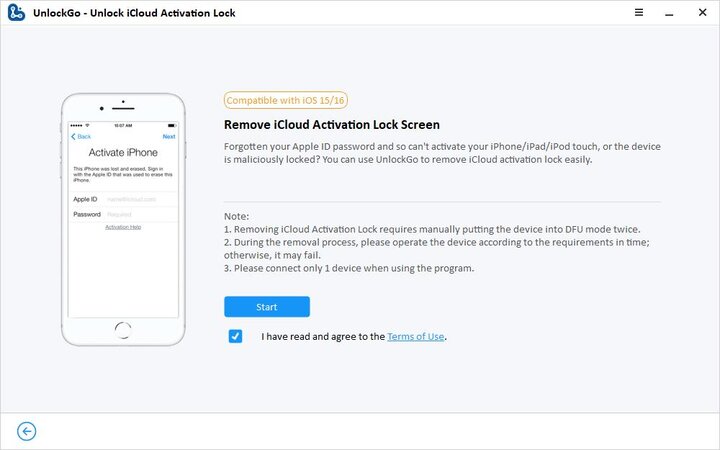
Step 3: UnlockGo will need to jailbreak the device in order to unlock it. There is nothing that you need to do here, the program will begin downloading the jailbreak package that you need. As soon as the download is complete, click “Jailbreak” and then follow the on-screen instructions to put the device in DFU mode.
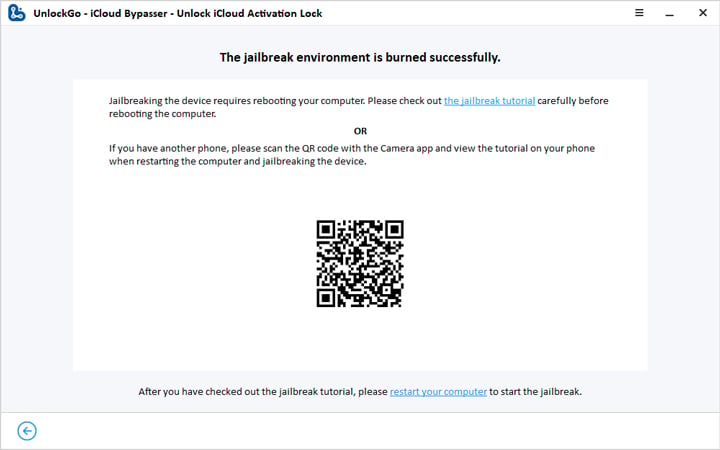
Step 4: UnlockGo will begin jailbreaking the device. When the jailbreak is complete, click “Remove” and UnlockGo will begin removing the iCloud Activation Lock.
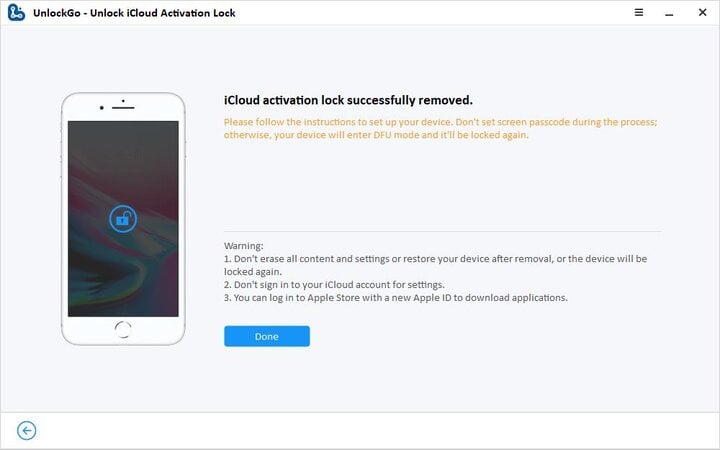
Once the process is complete, you should be able to easily access the device and its features and apps. That’s how you use UnlockGo to bypass iCloud Activation Lock with jailbreak. Here is another way which is checkra1n iCloud bypass with jailbrak. But, the steps is a little complicated. Let’s take a look!
How to Bypass Activation Lock Bypass with Jailbreak Using Checkra1n
Checkra1n is a jailbreak solution that you can use to jailbreak even the latest version of iOS. As an iCloud bypass utility, it can be used with Silver to easily bypass the ativati0ob lock on any device. The process to use Checkra1n will be different on Mac and Windows. The following is a description of how to use Checkra1n to bypass iCloud activation for both Mac and Windows:
How to Bypass Activation Lock by Checkra1n iCloud Bypass on Mac
Step 1: Go to https://checkra.in/#release to download Checkra1n on to Mac. Install it and then open the terminal and type:
/usr/bin/ruby -e “$(curl -fsSL https://raw.githubusercontent.com/Homebrew/install…)”
brew install usbmuxd
The building process installation can take quite a while particularly if you have a fresh Mac OS. Just wait for it to be completed and avoid interrupting the process.
Step 2: Now boot the iPhone in DFU Mode.
Step 3: Connect the device to the computer and run Checkra1n. The tool will begin jailbreaking the device and the device should restart in normal mode after the jailbreak is complete.
Step 4: Then run the iproxy service which is a part of the usbmuxd. This will make a tunnel from your MacBook Port 2222 to the jailbroken device port 44. Do not close the iproxy window or the TCP connection will be terminated.
Step 5: Now open a new terminal window and SSH into your device using the following credentials:
ssh [email protected] -p 2222
Password: alpine
Step 6: To make it easy to delete pr patch the Setup.app, use the following command to mount the device’s file system:
mount -o rw,union,update /
Step 7: Rename the Setup.app for to any other name such as “Setup.bak using the following command:
mv /Applications/Setup.app /Applications/Setup.bak
You can also enter the following command if you would like to delete the app completely:
rm -rf /Applications/Setup.app
Step 8: Enter the following command to clear the Setup.app activation screen cache. This process may take a while and the device will respring.
uicache –all
Step 9: Use the following command to terminate all system processes related to the Springboard.
killall backboardd
Once this is done, the iCloud Activation screen should be removed and you can then access the device.
How to Bypass Activation Lock by Checkra1n iCloud Bypass on Windows
Follow these simple steps to use Checkra1n iCloud Bypass to remove iCloud activation lock on Windows:
Step 1: To begin, you will need to download a number of programs. Go to https://shrinke.me/sliverWin to download the latest version of Silver. Then go to http://unetbootin.github.io/ to download the latest version of UNetbootin Software to facilitate double booting.
Once those two are installed, go to https://ubuntu.com/download/desktop to download the Ubuntu ISO file. Put all three programs on the desktop.
Step 2: Open the UNetbootin program and then on it select the Ubuntu ISO file. In the “Type” dropdown, select the “Hard Disk” and then click “OK” to begin the installation. You may have to choose where you will install Ubuntu.
We are installing Ubuntu because Checkra1n cannot be installed on the Windows system yet.
Step 3: When the installation is complete, press exit and then restart the computer. You should see a screen asking you to choose the operating system you would like to use. Choose the “UNetbootin” and you will be booted into the Linux OS.
Step 4: Connect to Wi-Fi from the top right corner of the screen. Once you are connected, open Firefox and then go to https://checkra.in/releases/0.10.1-beta#all-downloads and download the second file.
Step 5: Open the Terminal and Files in Linux. You can do that by clicking on the “Show Applications button” at the bottom left corner of the screen and then searching for them.
In the terminal, type in the command below and then drag and drop the downloaded Checkra1n file in the front of the command and press enter:
chmod +x (drag and drop checkra1n file)
Then type in the following command and drag and drop the Checkra1n file in front of the command.
sudo (drag and drop checkra1n file)
Step 6: Now connect the device to the computer and then put the device in DFU mode. Checkra1n should show that the device is in DFU Mode.
Follow these steps to put the device in DFU mode depending on the model:
iPhone 8 or Later:
Step 1: Connect the iPhone to the PC or Mac and make sure that iTunes or Finder (macOS Catalina and Later) is running
Step 2: Quickly press the volume up button and then quickly press the volume down button. Press and hold the “Side” button and then drag the slider to turn off the device.
Step 3: Now, press and hold the Power button on the right side of the device for about 3 seconds
Step 4: While still holding the Power button, press, and hold the volume down button. Keep holding both buttons for at least 10 seconds (If the Apple Logo appears, you’ve held them for too long and you need t to start over)
Step 5: Let go of the Power button, but continue to hold the volume down button for another 5 seconds (if you see the connect to iTunes icon appear on the screen, you’ve held them for too long and you need to start over)
Step 6: If the screen goes black, you’ve successfully entered DFU mode.
iPhone 7 and 7 Plus:
Step 1: Connect the iPhone to the computer and open iTunes or Finder (macOS Catalina and later)
Step 2: Turn off the device. To do that, press and hold the side button for at least 3 seconds and then swipe the “power off” slider to the right.
Step 3: Now press and hold the side button for at least 3 seconds
Step 4: While holding the side button, press, and hold the home button (at the front of the device). Keep holding both buttons for at least 10 seconds. (If the Apple Logo appears, you’ve held them for too long and you’ll need to start over).
Step 5: If the screen remains black, you will have successfully entered DFU mode.
iPhone 6, 6 Plus or earlier:
Step 1: Connect the iPhone to the computer and open iTunes or Finder (macOS Catalina and later)
Step 2: Press and hold the power button for at least 3 seconds and then swipe the slide to the right to turn off the device completely.
Step 3: Once the device is completely off, press and hold the “Power” button for about 3 seconds
Step 4: While still holding the Power button, press and hold the Home button and keep holding both buttons for about 10 seconds. (If the Apple Logo appears, you’ve held the buttons for too long and you need to start over)
Step 5: Release the Power button, but continue to hold the Home button for another 5 seconds. (If you see the connect to iTunes logo on the screen, you’ve held the buttons for too long and you need to start all over again)
Step 6: If after 5 seconds the screen is still black, the device is successfully in DFU mode.
Step 7: When the jailbreak process is complete, close Checkra1n, and then close the terminal. Restart the computer (you can do that using the top-right menus), but don’t disconnect the device from the computer. Once the computer restarts, boot it back in Windows this time.
Step 8: If you get the notification on the device to trust the computer, tap “Continue” on your device, connect to iTunes, and then tap “Continue.” Tap the back button to go back to the Wi-Fi screen.
Step 9: Go to https://www.appletech752.com/Downloads/Sliver12.4.7.zip to download this iCloud activation lock removal tool on to your computer. Open the tool and you should see a popup saying that the device has been activated. On the device, tap “Connect to iTunes” and then “Continue” to go to the passcode page and you should be on the home screen.
Conclusion
After reading this article, you’ve known the best two ways on how to bypass iPhone 12/11/Xr activation lock with jailbreak. You can choose the way you like to bypass icloud activation lock. But, we don’t recommend you use other onliner service to do that cause there are many scam. If you think this article is helpful don’t forget share it with your friends.
Источник


