- Create a Custom Keyboard on Android
- Premium Option
- 1. Prerequisites
- 2. Create a New Project
- 3. Edit the Manifest
- 4. Create method.xml
- 5. Edit strings.xml
- 6. Define the Keyboard Layout
- 6. Define the Keyboard Keys
- 7. Create a Service Class
- 8. Testing the Keyboard
- Working with the Soft Keyboard
- How to use Android devices as Windows 10 PC keyboard
- How to use Android as PC keyboard – 5 apps to use
- 1. USB Keyboard
- 2. Intel Remote Keyboard
- 3. Remote Mouse
- 4. Mouse & Keyboard Remote
- 5. MouseMote AirRemote Full
Create a Custom Keyboard on Android
Most Android devices don’t have a physical keyboard. Instead, they rely on a virtual or soft keyboard to accept user input. If you’re into Android personalization, knowing how to build a custom, soft keyboard can take your hobby to a whole new level.
Using the Android SDK, you can quickly create a soft keyboard with surprisingly few lines of code, because the SDK takes care of a lot of the low level tasks, such as recognizing key touches, drawing the keyboard, and establishing connections between the keyboard and input fields.
In this tutorial, you will learn how to create a fully functional soft keyboard that can serve as your Android device’s default keyboard.
Premium Option
If you’re in a hurry, check out Android Keyboard Themes, a ready-to-use solution from Envato Market.
The app gives you the flexibility to choose one of the 22 built-in keyboard themes or create your own custom theme.
Or you could hire a freelancer on Envato Studio. Just browse through our Mobile & Apps section and you’re sure to find an expert who can help you.

 Mobile & app developers on Envato Studio
If you prefer to build your own, read on to find out how.
1. Prerequisites
You will need the Eclipse ADT Bundle installed. You can download it from the Android Developer website.
2. Create a New Project
Fire up Eclipse and create a new Android application. Call this application, SimpleKeyboard. Make sure you choose a unique package name. Set the minimum required SDK to Android 2.2 and set the target SDK to Android 4.4.


This app will have no activities so deselect Create Activity and click Finish.


3. Edit the Manifest
A soft keyboard is considered as an Input Method Editor (IME) by the Android operating system. An IME is declared as a Service in AndroidManifest.xml that uses the BIND_INPUT_METHOD permission, and responds to the action android.view.InputMethod .
Add the following lines to the application tag of the manifest:
4. Create method.xml
The service tag in the manifest file containes a meta-data tag that references an XML file named method.xml. Without this file, the Android operating system won’t recognize our Service as a valid IME service. The file contains details about the input method and its subtypes. For our keyboard, we define a single subtype for the en_US locale. Create the directory res/xml if it doesn’t exist, and add the file method.xml to it. The contents of the file should be:
5. Edit strings.xml
The strings that this app uses are defined in the res/values/strings.xml file. We’re going to need three strings:
- the name of the app
- the label of the IME
- the label of the IME’s subtype
Update your strings.xml so that it has the following contents:
6. Define the Keyboard Layout
The layout of our keyboard contains only a KeyboardView . The layout_alignParentBottom attribute is set to true so that keyboard appears at the bottom of the screen.
Create a file named res/layout/keyboard.xml and replace its contents with the following:
The keyPreviewLayout is the layout of the short-lived pop-up that shows up whenever a key on the keyboard is pressed. It contains a single TextView . Create a file named res/layout/preview.xml and add the following to it:
6. Define the Keyboard Keys
The details of the keyboard keys and their positions are specified in an XML file. Every key has the following attributes:
- keyLabel : This attribute contains the text that is displayed on the key.
- codes : This attribute contains the unicode values of the characters that the key represents.
For example, to define a key for the letter A, the codes attribute should have the value 97 and the keyLabel attribute should be set to A.
If more than one code is associated with a key, then the character that the key represents will depend on the number of taps the key receives. For example, if a key has the codes 63, 33, and 58:
- a single tap on the key results in the character ?
- two taps in quick succession results in the character !
- three taps in quick succession results in the character :
A key can also have a few optional attributes:
- keyEdgeFlags : This attribute can take the value left or right . This attribute is usually added to the leftmost and rightmost keys of a row.
- keyWidth : This attribute defines the width of a key. It’s usually defined as a percentage value.
- isRepeatable : If this attribute is set to true , long-pressing the key will repeat the action of the key multiple times. It is usually set to true for the delete and spacebar keys.
The keys of a keyboard are grouped as rows. It’s good practice to limit the number of keys on a row to a maximum of ten, with each key having a width equal to 10% of the keyboard. The height of the keys is set to 60dp in this tutorial. This value can be adjusted, but values less than 48dp are not recommended. Our keyboard will have five rows of keys.
We can now go ahead and design the keyboard. Create a new file named res/xml/qwerty.xml and replace its contents with the following:
You may have noticed that some keys have negative values for the codes attribute. Negative values are equal to predefined constants in the Keyboard class. For example, the value -5 is equal to the value of Keyboard.KEYCODE_DELETE .
7. Create a Service Class
Create a new Java class and call it SimpleIME.java. The class should extend InputMethodService class and implement the OnKeyboardActionListener interface. The OnKeyboardActionListener interface contains the methods that are called when keys of the soft keyboard are tapped or pressed.
The SimpleIME class should have three member variables:
- a KeyboardView referencing the view defined in the layout
- a Keyboard instance that is assigned to the KeyboardView
- a boolean telling us if the caps lock is enabled
After declaring these variables and adding the methods of the OnKeyboardActionListener interface, the SimpleIME class should look like this:
When the keyboard is created, the onCreateInputView method is called. All the member variables of the Service can be initialized here. Update the implementation of the onCreateInputView method as shown below:
Next, we create a method that plays a sound when a key is pressed. We use the AudioManager class to play the sounds. The Android SDK includes a few default sound effects for key presses and those are used in the playClick method.
Finally, update the onKey method so that our keyboard app can communicate with input fields (usually EditText views) of other applications.
The getCurrentInputConnection method is used to get a connection to the input field of another application. Once we have the connection, we can use the following methods:
- commitText to add one or more characters to the input field
- deleteSurroundingText to delete one or more characters of the input field
- sendKeyEvent to send events, like KEYCODE_ENTER , to the external application
Whenever a user presses a key on the soft keyboard, the onKey method is called with the unicode value of the key as one of its parameters. Based on this value, the keyboard performs one of the following actions:
- If the code is KEYCODE_DELETE , one character to the left of the cursor is deleted using the deleteSurroundingText method.
- If the code is KEYCODE_DONE , a KEYCODE_ENTER key event is fired.
- If the code is KEYCODE_SHIFT , the value of the caps variable is changed and the shift state of the keyboard is updated using the setShifted method. The keyboard needs to be redrawn when the state changes so that the labels of the keys are updated. The invalidateAllKeys method is used to redraw all keys.
- For all other codes, the code is simply converted into a character and sent to the input field. If the code represents a letter of the alphabet and the caps variable is set to true , then the character is converted to uppercase.
Update the onKey method so that it looks like this:
8. Testing the Keyboard
The soft keyboard is now ready to be tested. Compile and run it on an Android device. This app doesn’t have an Activity , which means that it won’t show up in the launcher. To use it, it should first be activated in the device’s Settings.


After activating Simple IME, open any app that allows text input (for example, any messaging app) and click on one of its input fields. You should see a keyboard icon appear in the notifications area. Depending on your device, you can either click on that icon or drag the notification bar down and select Simple IME as the input method. You should now be able to type using your new keyboard.
Источник
Working with the Soft Keyboard
The Android system shows an on-screen keyboard, known as a soft input method, when a text field in your UI receives focus. To provide the best user experience, you can specify characteristics about the type of input you expect (such as whether it’s a phone number or email address) and how the input method should behave (such as whether it performs auto-correct for spelling mistakes).

By default, the soft keyboard may not appear on the emulator. If you want to test with the soft keyboard, be sure to open up the Android Virtual Device Manager ( Tools => Android => AVD Manager ) and uncheck «Enable Keyboard Input» for your emulator.

Now restart the emulator. See these screenshots for a visual reference.
The following code will reveal the soft keyboard focused on a specified view:
You can force Android to hide the virtual keyboard using the InputMethodManager, calling hideSoftInputFromWindow, passing in the token of the window containing your edit field.
This will force the keyboard to be hidden in all situations.
In the keyboard, you can hide the «Next» key and add «Done» instead by adding the following to the imeOptions for the EditText view:
See the EditText documentation for a more detailed look at imeOptions .
The soft keyboard can be configured for each activity within the AndroidManifest.xml file using the android:windowSoftInputMode attribute to adjust both default visibility and also how the keyboard affects the UI when displayed.
Although Android gives focus to the first text field in your layout when the activity starts, it does not show the soft keyboard. To show the keyboard when your activity starts, add the android:windowSoftInputMode attribute to the element with the «stateVisible» value within the Android manifest. Check out this guide for more details. Within the AndroidManifest.xml file:
The options for the mode include two aspects: visibility of the keyboard and adjustment of the UI. Visibility options include stateUnchanged , stateHidden , stateVisible and several others listed here.
The virtual keyboard reduces the amount of space available for your app’s UI. We can also use this same android:windowSoftInputMode property within the node to change the way that the soft keyboard displays the view elements when appearing within the AndroidManifest.xml file:
The options for the mode include two aspects: visibility and adjustment. Adjustment options include adjustResize , adjustPan , and adjustUnspecified and are listed in full here. Both visibility and adjustment can be combined with:
See the guide on keyboard visibility for more details.
To avoid incorrect Toolbar height calculations, you can add android:fitsSystemWindows=»true» (learn more) to the parent layout of the Toolbar . In many cases, this should resolve the issue.
Источник
How to use Android devices as Windows 10 PC keyboard


As we all know, sometimes finding the right time-management tools can turn out to be a real challenge, even when certain solutions can be right in front of us.
If we discuss about useful ways in which you can smartly use your Windows 10 PC, then we must outline into our debate the products that can be connected with your computer and which can make your life easier.
And yes, as you might have already guessed, your Android-based portable devices can help you smartly use your Windows 10 PC so that you can better schedule your daily plans and projects.
Thus, in that matter, today in this tutorial we will talk about how you can use your Android smartphone or tablet as a dedicated keyboard for your Windows 10 machine.
As you will see, there are different solutions that can be applied and which can let you control your computer through your own Android featured handset.
These solutions are related with software platforms, some paid other free-distributed.
However, the main idea is that a specialized program must be used as otherwise the Windows 10 system cannot recognize the virtual keyboard featured on your Android device.
So, in the following lines we will review the best apps that can be used on both Android and Windows for letting you use Android as a dedicated PC keyboard instrument.
How to use Android as PC keyboard – 5 apps to use
1. USB Keyboard
 This is a free app that isn’t requiring any driver on your computer – as you will see, the apps from below can work only if on your computer you first configure a server client.
So, unlike most of the other similar platforms, USB keyboard will work inside BIOS, inside bootloader, with any OS, and with any hardware that has an USB socket enabled and available.
On your Android device, the app will have to add keyboard and mouse functions to the USB port.
Unfortunately, that process cannot be completed by the app itself unless you first prepare a few additional things.
In that respect, you will have to use a rooted smartphone (there are different one-click-root solutions that can be used for almost all Android-based devices out there, so ensuring root shouldn’t be a problem).
Moreover, you will need to flash a dedicated custom kernel within the Android core system that powers your handset – this flashing operation can be completed if a custom recovery image is running on your device (I recommend you to use the latest version of TWRP recovery for making things work from your first attempt).
So, before using the USB keyboard tool, root your Android device and install TWRP recovery. Then, go to GitHub and download the custom kernel that must be applied on your handset.
And finally, run USB keyboard and connect your smartphone or tablet with your computer via USB cable in order to control your computer through your portable devices.
You can download USB Keyboard from here.
2. Intel Remote Keyboard
 This is dedicated software developed by Intel and available for Windows 8.1 and Windows 10 computers. The app will let you control your computer through your Android based smartphone or tablet.
Shortly, the app will pair the Android device with the Windows computer, through a wireless connection, so that you can use your portable device as a virtual keyboard and mouse.
Once the software is installed and configured on your Android device you will be able to use the keyboard app for controlling your Windows 10 PC. Therefore, you can control your computer from a distance as long as your wireless network will allow.
First, you will have to install the Intel Host app on your computer – you can download the latest Remote Keyboard Host software from this page. Then, follow on-screen prompts install this program on your PC.
Afterwards, go to Google Play (the download link can be accessed here) and download / install the Intel® Remote Keyboard app on your smartphone or tablet.
In the end, run the tool and pair your Android device with your computer – that’s basically everything that must be done.
One last thing – Intel Remote Keyboard is a free-distributed program, so you have nothing to worry about.
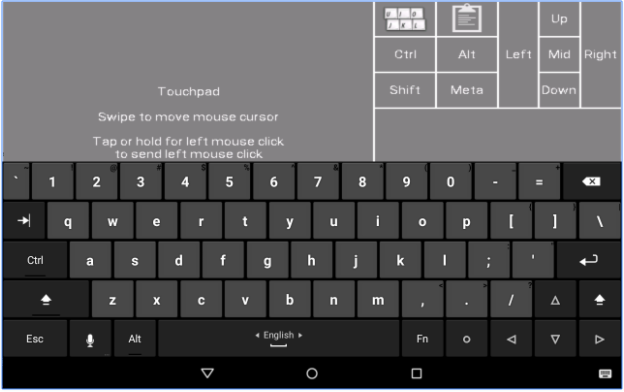
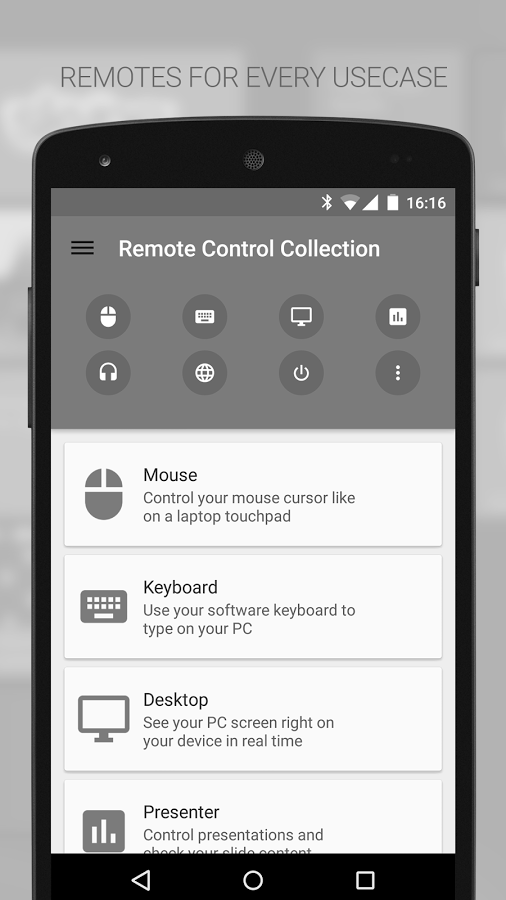
3. Remote Mouse
 Even though the app is called Remote Mouse you will be able to use it for controlling your Windows 10 PC through a dedicated Android keyboard.
Of course, additionally you can use a fully simulated touchpad which can be afterwards easily customizable.
The app brings some useful remote features that will help you better use your PC through a remove mouse and keyboard and everything while using your Android based smartphone or tablet.
The app received good reviews on Google Play and currently has a 4.1 rating status, which is good especially since we are discussing about a third party app that’s not developed by Intel or by Google.
Using Remote Mouse is quite similar with what we already explained during the section from above.
You will need to install the app on your Android device while on your computer you will have to install the Remote Mouse server.
When the app is configured on both devices you can start the pair process.
Now, beside from using the virtual keyboard feature you will also be able to: shut down, restart, log off or put your computer to sleep; move your mouse cursor by simply waving your phone in the air; use Android’s native speech recognition feature; and lot more.
Remote Mouse is also available for free – you can download this app from here.
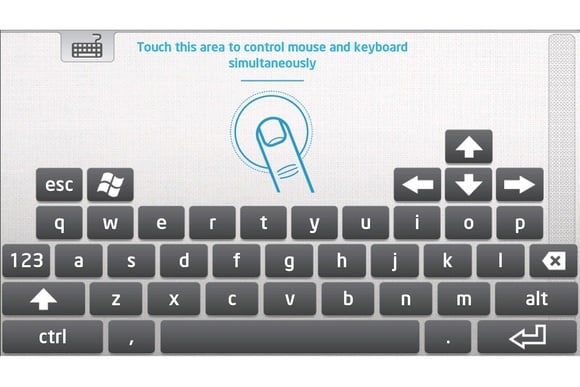
4. Mouse & Keyboard Remote
 Mouse & Keyboard Remote is a good app that will let you use Android as PC keyboard.
However, it won’t have so many features as the apps already reviewed above and will display ads within the app functionality if you choose the free version.
With this software you will be able to control the mouse through a virtual touchpad and type text with the Android software keyboard or a built-in hardware keyboard.
Other additional remote features aren’t included, so you will actually get only basic functionality.
The app has a ranking score of 3.9 on Google Play – the reviews are saying that the keyboard isn’t always working properly, so some restarts might be required from time to time; the virtual touchpad is working like a charm though.
You can download Mouse & Keyboard Remote from here – the server app for your Windows 10 PC is also available on the app’s official Google Play page.
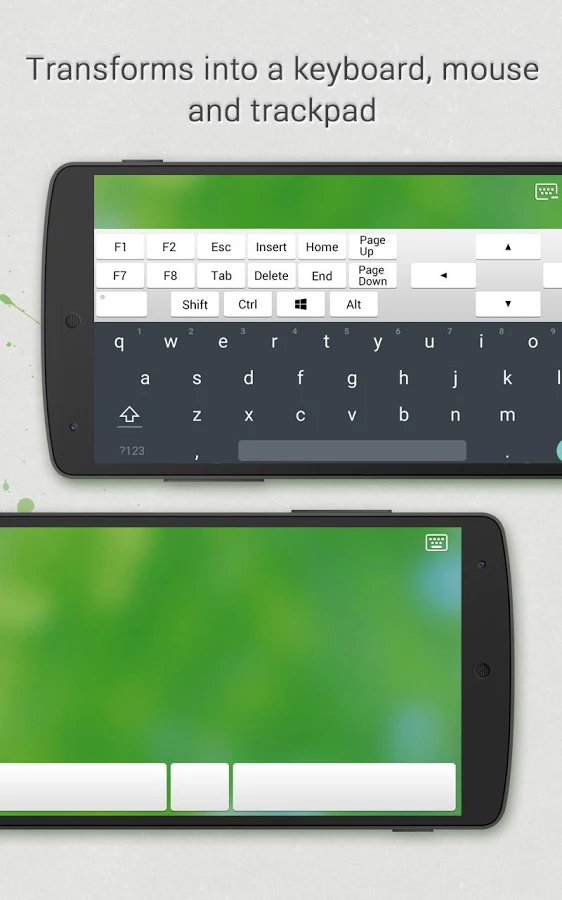
5. MouseMote AirRemote Full
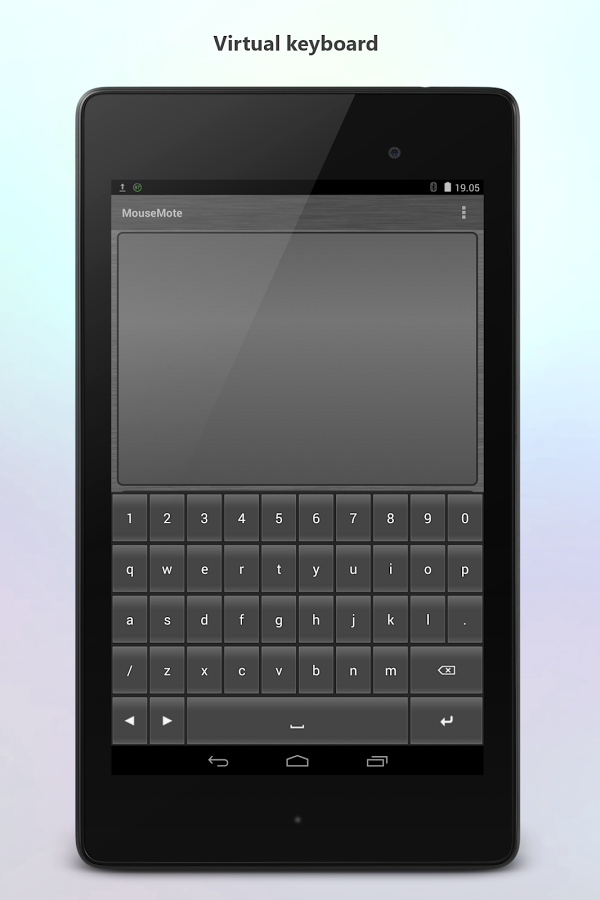 MouseMote AirRemote Full is similar with Mouse & Keyboard Remote in term of basic functionality and built-in features.
However, this is a paid app so you won’t experience any ads while using the virtual keyboard or touchpad or while trying to control your Windows 10 PC through your Android smartphone or tablet.
The app uses gesture controls, can be connected through Bluetooth or Wi-Fi, has a Web browser mode and comes with PowerPoint mode and integrated media player controls.
As already outlined, this is a paid app and it’s priced at $2.31. You can download and install the tool from this page – from there you can also install the dedicated server app for your Windows 10 PC.
Final thoughts
So, if you want to use your Android portable device as PC keyboard and / or touchpad you can use one of the apps that were reviewed above.
In case you already tested other similar platforms that let you control your Windows 10 computer from a distance, share your experience with us and with our readers – based on your observations we will update this tutorial accordingly.
Of course, you will receive all the credits so, use the comments field from below without hesitation.
RELATED STORIES TO CHECK OUT:
Источник


