- What you should know if you have an iPhone 6 (it will be obsolete soon)
- The iPhone 6 meet the requirement of a “vintage” product
- What does this mean if you have an iPhone 6?
- How to Fix When iPhone Won’t Charge
- How to Fix When iPhone Won’t Charge: 5 Ways
- 1. Hard Reset Your iPhone
- 2. Check Your Lightning Cable For Any Damage
- 3. A Good Ol’ Brush.
- 4. Dropping your iPhone into Water.
- 5. DFU Mode.
- 6. Time to call the geeks.
- My iPhone Won’t Charge! Here’s The Real Fix.
- Know This Before You Begin
- Wireless Charging: A Temporary Fix
- How To Fix An iPhone That Won’t Charge
- 1. Hard Reset Your iPhone
- How To Hard Reset Your iPhone
- 2. Check Your Lightning Cable For Damage
- How can I tell whether my lightning cable is the reason why my iPhone won’t charge?
- Don’t forget about your iPhone’s warranty!
- 3rd-party cables can charge iPhone charging problems
- High quality, less-expensive cables do exist!
- 3. Try A Different iPhone Charger
- How can I tell whether my charger is the reason why my iPhone won’t charge?
- There are high-quality fast chargers out there, but you have to be careful
- 4. Brush The Gunk Out Of Your iPhone’s Charging Port
- Dealing with liquid damage
- 5. Put Your iPhone Into DFU Mode And Restore
- 6. Repair Your iPhone
- iPhone Charging Again!
- About Author
What you should know if you have an iPhone 6 (it will be obsolete soon)
Last week we learned that Apple will declare the iPhone 6 and 6 Plus vintage at the end of the month, thus adding to the list of obsolete Apple products. Interestingly, the iPhone 5s that predates these is not yet on the list. Why, then, is it that these are going to be included? What will happen if you have one?
The iPhone 6 meet the requirement of a “vintage” product
Although the term vintage sounds more like products from many decades ago, in technological terms they tend to be much more recent. From Apple they have a premise by which, any device, is added to that list. This occurs when a device stopped being sold more than 5 years ago and less than 7 years ago , also having to meet the requirement of not having been manufactured during that time . Therefore, the iPhone 5s does not comply with this, but the iPhone 6 and 6 Plus if they were officially sold and manufactured in 2015 with the release of the ‘6s’.
What does this mean if you have an iPhone 6?
First of all, don’t worry. Your iPhone 6 or 6 Plus is not going to stop working overnight. You will not see any messages on the screen alerting you to anything. In fact, you can continue using it normally . They are two phones that have had several years of updates until they remain in iOS 12 as the latest version of iOS available, so despite not having the latest features, it still has an advanced system.

In fact, it is possible that you continue to receive security updates in specific cases where it is required, as has happened recently, even for iPhone 4s. It is true that at some point these phones will stop having access to certain applications because developers already require more advanced hardware, but that moment with the main apps still seems a long way off.
Therefore, if you are still a carrier of one of these, you can breathe a sigh of relief. The only thing you will not have access to is official repairs at Apple , since they will no longer have parts and therefore they will only offer you recycling options. Although there are many other third-party technical services that will continue to offer it. So if you take good care of your smartphone and are not yet interested in getting a newer one, you can still continue to use it normally for several more years.
Источник
How to Fix When iPhone Won’t Charge

You grab your iPhone, you grab your charging cable and you try plugging in to charge your phone. But wait…
You keep trying, switching and twisting your charging cable each time hoping it might make a difference.
You may be thinking,
“I swear it was charging alright this morning (or yesterday) but I don’t know why but my iPhone won’t charge.”
Well, look, y ou haven’t tried everything. At least not just yet. 🧐
Let’s jump right in.
How to Fix When iPhone Won’t Charge: 5 Ways
1. Hard Reset Your iPhone
The very first thing you should always do, if you find that your iPhone won’t charge, is to hard reset your iPhone. By performing a hard reset on your iPhone, you can check for any software malfunction before jumping into checking any of the hardware. This is because it is your iPhone’s software that allows it to charge not it’s hardware.
Here’s how you can hard reset your iPhone.
If you’re on an iPhone 8, 8 Plus, X, XR or XS Max.
- Press and quickly release the Volume Up button.
- Next, do the same for the Volume Down button. Quickly press and release the Volume Down button.
- Lastly, press and hold down on your Power button to the side until you see an Apple logo appear on your iPhone’s screen. Once you see the logo on your iPhone’s screen, you can then let go.
If you’re on an iPhone 7 or 7 Plus.
- Simply, press and hold down on both your Power button and the Volume Down buttons until you see the Apple logo. Once you see the logo on your iPhone’s screen, you can then let go.
If you’re on an iPhone 6S, 6S Plus, SE, or an older model.
- Press and hold down on both the Power button and the Home button. Keep holding both of it down together until you see the Apple logo appear on your screen, then let go.
Now try charging your iPhone once again. If you still find that your iPhone won’t charge, then move on to the next few methods.
2. Check Your Lightning Cable For Any Damage
Go on grab your iPhone’s charging cable.
Got it? Alright now take a very close look at both sides of that one end of the cable you use to plug into your iPhone to charge it with.
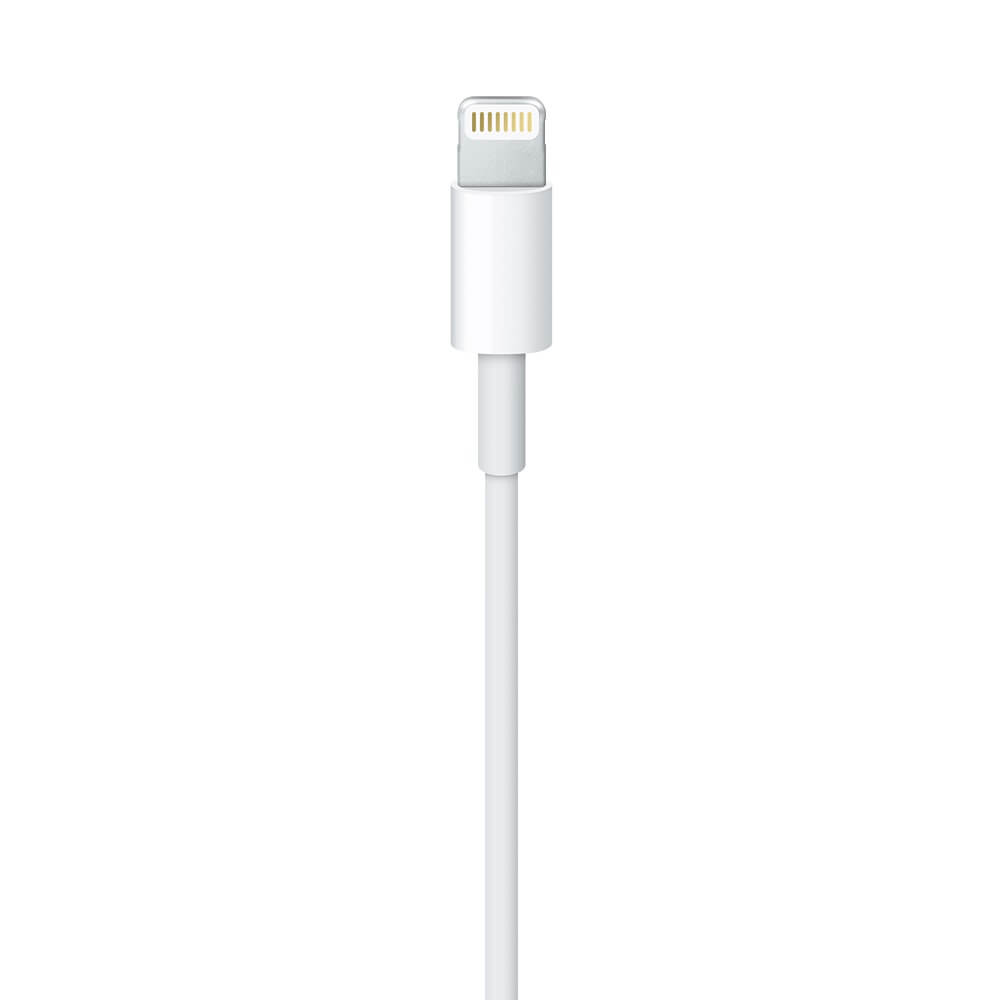 That golden strip should not have scratches or dents.
Now, I know, you may be asking, “How do I tell if my lightning cable is what’s causing my iPhone to not charge?”
Well as long you’ve made sure the charging cable does not have any scratches, dents or a broken tip, then you can put your question to the test by trying out a few things:
- Try connecting your iPhone using your charger to your PC and see if your iPhone charges. If your iPhone won’t charge, then it’s most likely the charger itself that’s causing the problem.
- Connect your iPhone using your charger to your car and see if your iPhone charges. Again, if your iPhone will not charge, then it’s because the charger has a problem.
- Charging your iPhone in many different locations around your house. Say you may have a socket in your bedroom to charge or your living room. Give it a go a few times.
- Charging your iPhone using your friend’s cable. Your friend may have an iPhone and a charger to go with it. Try asking him or her to see if you can charge your iPhone using their charging cable. If it works with theirs and not with yours, then you know what to do.
Once you’ve tried the list of tests above, you can pinpoint whether the issue really lies with the charger itself or the iPhone.
If the issue with the charger, then it’s time for you to get a new Lightning cable . However, if chances are the issue is with your iPhone, I can still help you try a few other things that may help your iPhone. 🙂
3. A Good Ol’ Brush.
One other good trick to do is to simply grab a flashlight and have a look inside your charging port.
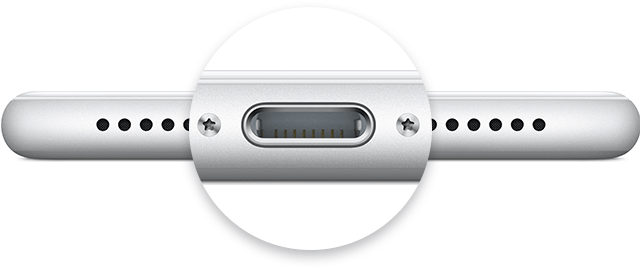 This is your iPhone’s charging port.
Now if you see any lint, dirt, or stuff in there, then that might be what’s stopping your lightning cable from connecting with your iPhone. This is what causes the iPhone to not charge because it simply is blocked from receiving the charging input due to all the gunk in there.
Also, your iPhone’s charging port has about 9 connectors in there. The problem is if at any time any one of these “connectors” is blocked by junk or debris that has accumulated inside the charging port then iPhone won’t charge at all.
It’s a pretty sensitive area to your iPhone.

Let’s get back to our issue, what you need to do is clean your charging port by brushing it gently with the softest brush you can find. I’ll show you how
Got your brush? Alright, let’s get this over with.
- Grab your soft brush and then gently brush out your iPhone’s charging port. Take all the time you need.
- Take a moment to use your handy flashlight to see if there are any junk left inside your charging port.
- Repeat.
Once you’re done brushing all the dirt out, try charging your iPhone again.
4. Dropping your iPhone into Water.
Now, this does not matter if your iPhone is waterproof which would be an iPhone 7 or any newer models.
As Apple suggests , if your iPhone is older than the iPhone 7 and you dropped it into the water, t hen there’s a pretty high chance it could be liquid damage.
You see, remember the whole “9 connectors inside your charging port” topic that we were discussing earlier?
Yup, the problem is, i f any liquid touches these connections, you basically just roasted your connections faster than Ross and Rachel from breaking up.
So even if you tried drying the charging port or putting it into a bowl of rice, you can’t do anything about because these connections are spoilt.
If this is the case, then it’s best that you meet up with your nearest Apple store and pray to Steve Jobs that you’re still on some sort of warranty.
5. DFU Mode.
This is still one last option that may still work and it is useful particularly if you found there is nothing wrong with your iPhone’s charger and you are sure that it’s not liquid damaged.
Note
Make sure that you backup your iPhone into iTunes before going any further.
What you’re going to do is a method called DFU Restore. (It’s a fancy term for factory reset, basically resets your iPhone back to how you first got it). Yes, that does mean all your data on your iPhone will get erased so it may be wise to backup your iPhone before jumping ship to factory reset it.
Now again you might hesitate to what I say, saying
“I’m sure the guys over at the Apple Store knows how to fix this without erasing all of my data.”
The thing is every time no matter what the problem you bring to them is, if they see it as a damaged iPhone they’ll always resort to factory resetting the device before proceeding with the hardware fix.
Also, it sucks because most of the time they’ll charge you an outrageous fee for just doing something you could have done back home.
So you might as well save your precious time and the cost of a trip to the store by doing it yourself. It’s really simple and just involves 5 steps.
- Go ahead and plug in your iPhone into your computer and open your iTunes. (It doesn’t matter if your iPhone is on or off)
- Press and hold the Power button and your Home button together for 8 seconds.
- After the 8 seconds, release the Power button but continue to keep holding down the Home button until you see that iTunes shows “iTunes has detected an iPhone in recovery mode”.
- Now let go of the Home button. Your iPhone’s screen should be completely black, which means that you’ve successfully entered DFU Mode. (If it is not, try again from the beginning)
- From here, you can restore your iPhone using iTunes.

6. Time to call the geeks.
If you have tried all of the above and you still find that it does not charge, then you really should pay a visit to your nearest Apple Store or an Apple Authorized Service Provider to get your iPhone repaired.
Источник
My iPhone Won’t Charge! Here’s The Real Fix.
When an iPhone won’t charge, it’s a big deal. I’m a former Apple employee, and during my time in the Apple Store, fixing iPhone charging problems was a big part of my daily work. The good news is that the majority of iPhone charging problems can be fixed at home. In this article, I’ll show you how to fix an iPhone that won’t charge, step-by-step.
Table Of Contents
Know This Before You Begin
One of the most common questions Apple techs receive when an iPhone won’t charge is this: “If my iPhone won’t charge, do I need a new battery?”
In spite of what you’ll read on many websites, the answer to this question is no! There’s a lot of misinformation out there, and that was one of the main reasons I wanted to write this article.
As a former Apple tech with experience working with hundreds of iPhones that wouldn’t charge, I can tell you that replacing a battery is the absolute wrong thing to do.
The truth is that most of the time, it’s your iPhone’s software — not hardware — that’s preventing your iPhone from charging. If your iPhone won’t charge, 99% of the time, replacing the battery will have zero effect!
And, if there is a hardware problem, it’s much more likely that the issue is with the charging port itself — but we’re not there yet.
Wireless Charging: A Temporary Fix
While you work on fixing your iPhone, you may still be able to charge it wirelessly. Every iPhone since the iPhone 8 supports wireless charging with Qi-certified chargers. Place your iPhone on the center of a Qi wireless charger and see if starts charging.
If it does — that’s great! However, we still need to address the problem preventing your iPhone from charging with a wired connection.
If your iPhone won’t charge wirelessly either, follow the step-by-step guide below, or check out our other article on how to fix wireless charging problems.
How To Fix An iPhone That Won’t Charge
1. Hard Reset Your iPhone
Sometimes the solution is as simple as hard resetting your iPhone. That’s the first thing an Apple tech would do in the Apple Store, and it’s easy to do at home. Here’s how:
How To Hard Reset Your iPhone
| Phone | How To Hard Reset |
|---|---|
| iPhone 6S, SE, and older models | Press and hold the power button and the Home button together until the Apple logo appears on the screen, and then let go. |
| iPhone 7 and 7 Plus | Press and hold the power button and the volume down button together until the Apple logo appears on the screen, and then let go. |
| iPhone 8, X, SE 2, and newer models | There are three steps: 1. Quickly press and release the volume up button. 2. Quickly press and release the volume down button. 3. Press and hold the power button (called the “side button” on iPhone X) until the Apple logo appears on the display, and then let go. |
Apple tech tip: The #1 mistake people make while trying to hard reset their iPhone is that they don’t hold the buttons down for long enough. On iPhone 8 or newer, however, make sure you are pressing the first two buttons very quickly and holding the power button down for a long time. Sometimes the process can take 20 seconds or more!
If that doesn’t work, don’t worry! We’ll dive into the hardware fixes in the next step.
2. Check Your Lightning Cable For Damage
Take a very close look at both ends of the USB cable you use to charge your iPhone. Apple’s lightning cables are prone to fraying, especially at the end that connects to your iPhone. If you see visible signs of wear, it might be time for a new cable.
How can I tell whether my lightning cable is the reason why my iPhone won’t charge?
If there is no visible damage to the outside of the cable, try plugging your iPhone into a USB port on your computer to charge instead of using the wall adapter that came with your iPhone. If you already charge your iPhone using your computer, try using the wall adapter. If it works in one place and not the other, your cable isn’t the issue.
This might seem obvious, but sometimes the best way to determine whether you have a “bad cable” is to try charging your iPhone using a friend’s cable. If your iPhone suddenly springs back to life after you plug it in, you’ve identified the reason why your iPhone won’t charge — a faulty cable.
Don’t forget about your iPhone’s warranty!
If your iPhone is still under warranty, the USB cable (and everything else in the iPhone box) is covered! Apple will replace your lightning cable for free, as long as it’s in decent shape.
You can set up a return on Apple’s support website or call your local Apple Store to make an appointment with the Genius Bar. If you decide to go to the Apple Store, it’s always a good idea to have an appointment at the Genius Bar before you go in. That way, you won’t have to wait in line — at least not for long.
3rd-party cables can charge iPhone charging problems
One of the most common reasons why an iPhone won’t charge comes from low-quality 3rd-party iPhone charger cables that people buy in gas stations. Yes, Apple cables are expensive, but in my experience, those $5 knockoffs never hold up like the real thing. There are good ones out there — you just have to know which ones to choose.
High quality, less-expensive cables do exist!
If you’re looking for a high-quality replacement iPhone charging cable that’s more durable than Apple’s, check out our favorites on Amazon. These aren’t cheap gas station cables that are going to break in a week. I love the 6-foot Lightning cable because it’s long enough for me to be able to use my iPhone in bed.
3. Try A Different iPhone Charger
Do you charge your iPhone by plugging it into the wall, using a car charger, in a speaker dock, in your laptop, or some other way? There are a lot of different ways to charge an iPhone.
Remember that it’s your iPhone software that says ‘Yes’ or ‘No’ to charging when your iPhone connects to an accessory. If the software detects power fluctuations, it will prevent your iPhone from charging as a protective measure.
How can I tell whether my charger is the reason why my iPhone won’t charge?
We’ll do the same thing we did when we inspected your Lightning cable. The simplest way to find out whether your charger is bad is to try another one. Make sure you try more than one because chargers can be very finicky.
If your iPhone won’t charge with the wall adapter, try plugging it into a USB port on your computer. If it won’t charge in the computer, try plugging it into the wall — or try a different USB port on the computer. If your iPhone charges with one adapter and not the other, then your charger is the problem.
There are high-quality fast chargers out there, but you have to be careful
If you need a new charger, check out the chargers we recommend using the same link as above (for the cable). The maximum Apple-approved amperage for iPhone chargers is 2.1 amps. Unlike many third-party chargers that can damage your iPhone, these ones will charge your iPhone quickly and safely.
(The iPad charger is 2.1A and Apple says it’s OK for iPhones.)
Hint: If you’re trying to charge using an Apple keyboard or USB hub, try plugging your iPhone directly into one of your computer’s USB ports. All the devices plugged into USB hubs (and keyboards) share a limited supply of power. I have personally seen iPhone charging problems occur because there wasn’t enough power to go around.
4. Brush The Gunk Out Of Your iPhone’s Charging Port
Use a flashlight and take a close look at the charging port in the bottom of your iPhone. If you see any debris or gunk in there, it might be preventing the lightning cable from making a solid connection to your iPhone. There are lots of connectors down there (the lightning cable has 9), and if the wrong one is blocked off, your iPhone won’t charge at all.
If you find lint, gunk, or other debris in the charging port of your iPhone, it’s time to brush it out. You need something that won’t conduct an electric charge or damage the electronics in the bottom of your iPhone. Here’s the trick:
Grab a toothbrush (one you’ve never used before) and gently brush out your iPhone’s charging port. When I was at Apple, we used fancy anti-static brushes to do this (which you can get on Amazon for next to nothing), but toothbrushes work just as well.
Dealing with liquid damage
One of the most common reasons why an iPhone won’t charge is liquid damage. Liquid damage can short out the connections in the charging port of your iPhone cause all sorts of problems with your iPhone. Even if you’ve dried out the port and brushed out the gunk, sometimes the damage has already been done.
5. Put Your iPhone Into DFU Mode And Restore
Even if your iPhone won’t charge, a DFU restore may still work! You’ve eliminated the possibility of a simple software problem and taken a look at your USB cable, charger, and the iPhone itself, so it’s time for a last-ditch effort — the DFU restore. A DFU restore is a special kind of restore (when you restore your iPhone, you erase everything on it and restore it to factory settings) that can solve severe software issues — if they exist.
Check out my article about how to DFU restore an iPhone to learn how to put your iPhone into DFU mode, and cross your fingers before you try. When I worked for Apple, this is the first thing I’d try, even when the phone appeared to be damaged. There’s a small chance that a DFU restore will bring a non-functional iPhone back to life.
If it doesn’t work, come back here to learn about some great repair options you may not be aware of.
6. Repair Your iPhone
If you go to an Apple Store to repair your iPhone and there has been liquid or physical damage to phone, the only option they can offer is to replace your entire iPhone. If you don’t have AppleCare+, this can get expensive, fast.
If you had pictures, videos, or other personal information on your iPhone and your iPhone won’t charge, Apple will say they’re gone forever. Get in touch with an Apple representative and see what they can do. If all they can do is replace your iPhone, you may want to consider visiting a local mom and pop repair shop.
iPhone Charging Again!
I hope your iPhone has sprung back to life and you’re on your way back to a full charge. I’d love to hear from you about your experiences fixing the iPhone charging problem, and I’m here to help along the way.
About Author
I’m a former Apple employee and the founder of Payette Forward, and I’m here to help you with your iPhone.
Источник


