- iMyFone D-Back (Android)
- User Guide of iMyFone D-Back (Android)
- Part 1: Android Data Recovery/Broken Android Data Extraction
- Step 1: Launch D-Back (Android) And Choose A Recovery Mode to Start
- Step 2: Select Your Device Information And Download Data Package
- Step 3: Connect Your Android Device to PC And Enter Downloading Mode
- Step 4: Select The File Types and Scan
- Step 5: Choose Your Needed Files to Recover
- Part 2: Recover Data from Google Backup
- Step 1: Launch D-Back (Android) and Choose a Recovery Mode
- Step 2: Log in Google Account and Download Your Google Backup
- Step 3: Preview and Recover Data from Google Backup
- Android Data Recovery
- iMyFone D-Back: восстановление данных с потерянного или неработающего iPhone
- Что это и зачем?
- Какие данные можно восстановить?
- В каком виде сохраняются данные?
- Как это работает?
iMyFone D-Back (Android)
iMyFone D-Back (Android) 2.5.5 LATEST
Windows 7 / Windows 8 / Windows 10 / Windows 7 64 / Windows 8 64 / Windows 10 64
iMyFone D-Back (Android) 2021 full offline installer setup for PC 32bit/64bit
With iMyFone D-Back (Android) Edition, you can recover all your lost files from Android phones/tablets, even for broken ones. Support multiple file types recovery: photos, messages, contacts, videos, audios, WhatsApp, call history, and documents. 100% safe. The high success rate to recover anything you need.
There are various scenarios that may cause you to lose important data from your Android phone or tablet. Luckily, this powerful Android data recovery software can easily get back any lost files, for any reason. Accidental Deletion, System Crash, Water Damage, Virus Attack, Forgotten Password, System Root.
No matter what kinds of files you’ve lost, D-Back (Android) can recover all of them with no hassle, including contacts, text messages, photos, WhatsApp messages & attachments, audios, videos, call history, and documents.
If you have lost WhatsApp data by accident, do not worry! This Android data recovery tool can help you retrieve those lost WhatsApp messages & attachments in no time.
D-Back for Android tool allows you to recover all your deleted or lost WhatsApp data, like photos, messages, voice recordings, videos, documents, and stickers. You can rescue these treasured files from your WhatsApp in minutes, even without a backup.
What Makes D-Back for Android (PC version) A Professional Data Savior
High-speed Data Recovery
Scan your Android device automatically and retrieve anything you’ve lost in a flash.
Device & SD Card Recovery
Allow you to recover any file you need both from internal memory and SD/TF card.
Filter and Preview Feature
Selectively preview and check the files whether they are your needed ones.
Root & Unrooted Androids
Bring your lost data back from both rooted and unrooted Android devices.
100% Safe to Use
No personal info leaking and never lost your data after recovery.
Export to Computer
Recover and export lost data in CSV, HTML, and VCF formats to PC.
Most Samsung devices running Android 2.0 to Android 10.0, including the Samsung Galaxy Note series, S series, and Tab series, are compatible with D-Back Android Version. The number of supported devices continues to rise.
Only 3 Simple Steps to Recover Android Data
1. Choose
Launch D-Back (Android) on your computer and choose a recovery mode to continue.
2. Connect
Connect your Android phone or tablet to the computer via a USB cable.
3. Recover
Follow the on-screen instructions on D-Back (Android) to recover all the lost files from your Android device.
Note: Limited functionality in the demo version.
Источник
User Guide of iMyFone D-Back (Android)
D-Back (Android) comes with three recovery modes for you to choose from: Android Data Recovery, Broken Android Data Extraction and Recover Data from Google Backup.
The former two modes allow you to recover lost photos, videos, audios, WhatsApp messages& attachments, text messages, contacts, call logs, and documents from Android phones and tablets, even for broken Android devices. For the third mode, if you have backed up the Android data to your Google account, it is easy for you to selectively recover data from Google backup to your computer.
Part 1: Android Data Recovery/Broken Android Data Extraction
Step 1: Launch D-Back (Android) And Choose A Recovery Mode to Start
Download and launch D-Back (Android) on your PC, then select a recovery mode you needed to start. The steps to use these two modes are exactly the same, so we will take one of them as a example to show you the whole process. Let’s choose the ” Android Data Recovery” mode and go on.

Step 2: Select Your Device Information And Download Data Package
Click «Start» button on the “Android Data Recovery” tab, then the app will ask you to confirm if your device is Samsung. For the present version of this app only supports Samsung devices. Then you need to select the correct name and model of your Samsung in the list offered.

Next the app will automatically download the matching data package on your Android device. (Important: please keep your computer connected to the Internet during the process.)

Step 3: Connect Your Android Device to PC And Enter Downloading Mode
After downloading the data package, you need to connect your Android device to PC using a USB cable. Then D-Back (Android) will guide you to put your device into Downloading mode in 3 simple steps.

Step 4: Select The File Types and Scan
After the device is set in Downloading mode, the app will lead you to the recovery interface and choose the files types that you want to recover, then click «Next» to analyze those files you selected.

As analysis process completes, it will begin scanning for your device.

Step 5: Choose Your Needed Files to Recover
Then all the lost files on your Android phone/tablet will be listed in detail after scanning, so you can preview them and choose those certain files you need. After that, just click the «Recover» button to retrieve all the selected ones efficiently. Then all the recovered files will be saved on your computer, which is very convenient for you to copy them to another device.

Part 2: Recover Data from Google Backup
Step 1: Launch D-Back (Android) and Choose a Recovery Mode
After you launch D-Back for Android, you will be asked to select a data recovery mode. In this case, let’s select the Recover Data from Google Backup option on the main screen.
To proceed, please click the Start button to search for the lost data from your Google account.

Step 2: Log in Google Account and Download Your Google Backup
Here, you will need to log in to your Google account. Make sure that the account sign-in details are correct and click Sign in. Please be assured that this process is completely safe and your account details will be protected.

After successfully logging in to your Google account, the software will show a list of all the available data types that can be recovered from your Google account. Select the data type you would like to restore or check Select All. Then click Next in the lower right corner.

D-Back for Android will then begin scanning the data on your Google Account. It will take a while so please don’t disconnect your device while the scan is happening.

Step 3: Preview and Recover Data from Google Backup
After the scan is finished, the recovered data will be listed in an organized manner. You can tick the boxes next to data types on the left panel and view your data on the right, or you can use the search bar to find specific data you want to recover. From here, select the data you want to extract and click the Recover button.
Источник
Android Data Recovery
Recover lost or deleted messages, photos, contacts, notes and more in various scenarios from Android: accidental deletion, broken screen, factory reset, locked/disabled, water/damaged, etc.
Recover photos, messages, contacts, videos, WhatsApp, call history, and more from Android phones and tablets.
Preview and recover deleted/lost data from Android devices
Export Android data into CSV/HTML
We all know the WhatsApp App which is a annular instant messaging app for all ages. Because bf this, communication has became very easy for.
![]()
WhatsApp is undoubtedly the most used messaging app worldwide. It has an approximate monthly user of 2 billion. Due to its popularity, it has been.
![]()
Question My flatmate deleted a contact and the phone number from WhatsApp when she was angry. She’s now wanting to recover it, if she.
![]()
WhatsApp has asserted itself as the leading messaging app in the world. But what is an effective chat without imagery? Sight is essential to human.
![]()
It can sometimes be a headache if you’ve accidentally deleted data from your phone and can’t find a way to recover it. It goes for.
![]()
Accidentally deleting text messages is something a lot of Android smartphone users do, and it’s frustrating to think that there’s no way of getting.
![]()
So my dumbass thought that I backed my videos up on my computer (turns out that I didn’t). I realized that some were saved internal.
![]()
If you have been trying to flash your Samsung, you may be stuck on «Downloading» do not turn off target». Alternatively, you may have randomly.
![]()
Losing contacts and phone numbers on your smartphones can be really frustrating. Many times the contacts get deleted due to our own errors. However.
![]()
«Hello, Good day. While going through my audio list today, I discovered a few of my audio files were missing. I can’t recall deleting.
Источник
iMyFone D-Back: восстановление данных с потерянного или неработающего iPhone
Идеальной техники не существует. Даже если на ней логотип в виде надкушенного яблока. Да и человеческий фактор никто не отменял – любой смартфон или планшет можно уронить, утопить, потерять или превратить в «кирпич» во время перепрошивки или джейлбрейка. Устройство, купленное за немалые деньги, конечно, жаль, но часто информация, хранящася в нём, может оказаться дороже «железа». Вы скажете – какие проблемы, информация никуда не денется, она же сохраняется в резервных копиях на компьютере или в облачном хранилище. Так-то оно так, но не всегда есть возможность оперативно починить iPhone или купить новый и восстановить информацию из бэкапа. А контакты, сообщения или фото могут потребоваться вот прямо сейчас. И что тогда делать? Найти файл с резервной копией, конечно, можно – но данные в нем хранятся в зашифрованном виде, их нельзя просто открыть и прочесть, как табличку в Экселе.
Ответ на вопрос «что делать?» дают разработчики приложения iMyFone D-Back.
Что это и зачем?
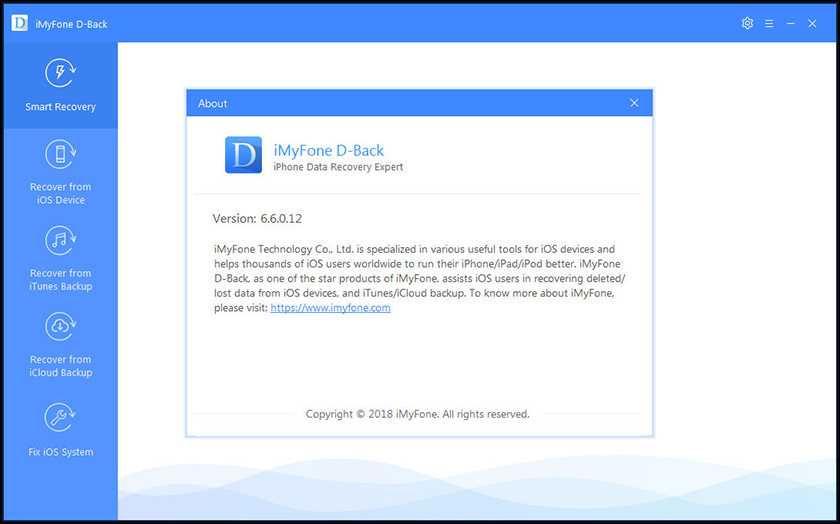
Это приложение для компьютера под управлением MacOS или Windows, предназначенное для простого извлечения данных из iPhone, iPad или iPod Touch, а также для восстановления iOS-устройств при зависании в процессе загрузки и в некоторых других случаях. Компания-разработчик iMyFone создана в 2015 году и имеет в активе несколько приложений с пользовательской базой более 2 миллионов человек. Мы тестировали версию iMyFone D-Back для Windows.
iMyFone D-Back может работать практически на любом ПК, даже довольно старом — аппаратные требования весьма скромны:
Windows 10, 8 или 7
1 ГГц (32- или 64-битный)
Оперативная память (RAM)
Не менее 256 МБ (рекомендуется 1 ГБ)
Свободное место на жёстком диске
Не менее 200 МБ
При этом само устройство должно иметь версию iOS не ниже 7.0
Какие данные можно восстановить?
Приложение для Windows поддерживает более 20 форматов данных, включая контакты, заметки, историю звонков, напоминания, переписку в месседжерах, фото и видео, историю и закладки браузера Safari:
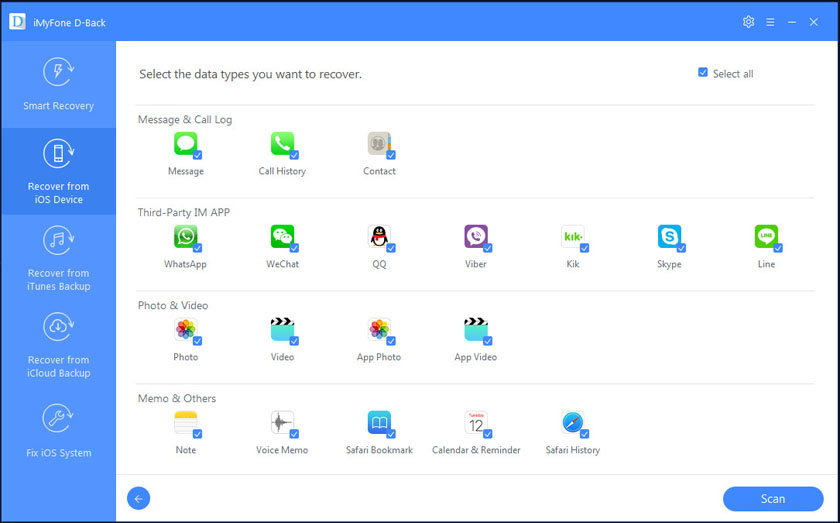
Если с вашим устройством всё в порядке, но вы случайно удалили какие-то данные – их тоже можно попытаться восстановить, как из бэкапа, так и из самого устройства.
В каком виде сохраняются данные?
Аудио- и видеофайлы сохраняются как есть, а текстовая информация может быть сохранена в виде HTML-файлов или таблиц XLS. Первый вариант позволяет просматривать информацию просто в браузере, не требуя установленного MS Office, второй же дает больше возможностей для работы с данными (фильтрация, сортировка, экспорт в другие форматы). Например, контакты из XLS-файла можно экспортировать в формат CSV для последующего импорта в учетную запись Google или в адресную книгу телефона с другой ОС.
Как это работает?
После краткого знакомства пришло время протестировать приложение «живьём». Для теста были использованы редакционный iPad Air и ПК под управлением Windows 7. Приложение iMyFone D-Back можно загрузить с официального сайта www.imyfone.com. Пробная версия бесплатна для загрузки и позволяет пройти процедуру восстановления вплоть до предварительного просмотра файлов, а для их выгрузки на компьютер нужно купить лицензию (о стоимости и условиях использования позже). Приложение (как и сайт компании) не имеет русского или украинского интерфейса, поэтому пришлось работать с англоязычной версией. Тестировалась полноценная (не пробная) версия D-Back.
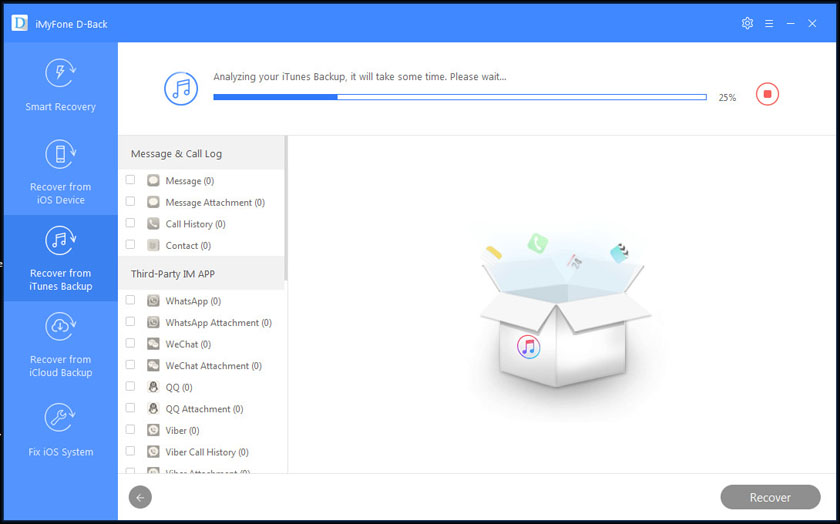
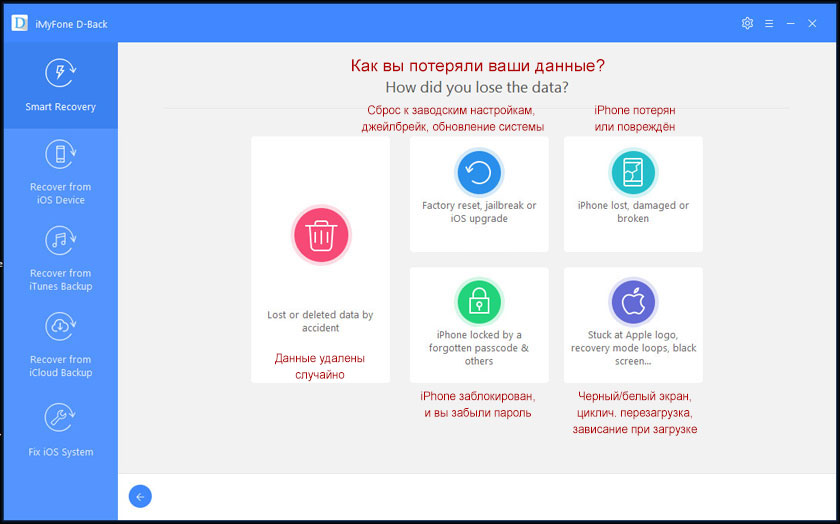
Говоря строго, слово «восстановление» не совсем точно описывает работу приложения. Ведь «восстановить» – значит «вернуть, как было», а в данном случае утраченные данные не восстанавливаются на iPhone или iPad, а извлекаются на жесткий диск компьютера. Приложение предлагает на выбор три режима извлечения данных: из памяти устройства, из резервной копии на компьютере и из резервной копии в iCloud. Если вы не уверены, какой способ вам нужен – выбирайте первый пункт «Smart Recovery» и укажите, как именно вы потеряли информацию. В зависимости от этого D-Back выберет наиболее подходящий режим. Если файлы были удалены с iPhone или iPad, приложение пытается их восстановить с самого устройства. Если же устройство утеряно или не включается, значит, остается только искать самый свежий бэкап – на компьютере или в облаке.
При сканировании любого из источников можно искать все типы информации или выбрать только некоторые. Удалённые файлы в результатах поиска отмечаются иконкой в виде корзины, а в выпадающем меню вверху окна можно выбрать, какие файлы отображать – только удаленные, только имеющиеся на устройстве или все. После выбора нужных данных нажимаем Recover, и на диске ПК практически мгновенно создаются папки с файлами. Явно здесь применено какое-то хитрое кеширование – такого быстрого копирования данных я еще не видел.
Источник


