- Setting up Unity IAP
- Overview
- Getting Started
- Next Steps
- Define your In-App Purchase strategy
- In App Purchasing
- Description
- Version information
- Verified for Unity
- Compatible with Unity
- Configuring for Google Play Store
- Introduction
- Google Play Store
- Getting Started
- Register the Application
- Add In-App Purchases
- Test IAP
- IAP в Unity3D
- Unity3D 5.3
- Интеграция в проект
- In-App Manager
- Использование в игре
Setting up Unity IAP
Note: Screen shots and menu choices may differ between release versions.
Overview
This document explains how to activate In-App Purchasing (IAP).
The Unity IAP Abbreviation of Unity In App Purchase
See in Glossary package provides coded and codeless approaches that you set up to: — Allow users to buy items in your games. — Connect to stores so that you can obtain revenue from these purchases.
Here is an overview of the steps:
- Define your In-app purchase strategy for this game.
- Setup your project as a Unity service.
- Activate IAP to automatically install the package.
- Configure settings.
- Create and catalog your the in-game items that you want to sell.
- Use the Codeless IAP button to give users a way to buy items. Then, once you have the logic working, consider customizing the button look and feel. Or use the scripted IAP for a rich API to enhance this process.
- Connect your app to the relevant app-stores, such as Google, Apple, or Android.
- Add items to the stores.
Put it all together:
- Configure your IAP using guidance from this doc, support, and the IAP forum.
- Test everything.
- Make it live.
You can also do many of these steps, or fine tune what you create, with the In-App Purchasing API.
Getting Started
Note: The Samsung Galaxy store is now obsolete and is no longer supported in the Unity In-App Purchasing package 4.0.0 and higher. This guide to configure the Samsung Galaxy store only applies to the IAP package version 3.1.0 and earlier. If you’re using the Unity IAP package 4.0.0 and higher and want to implement a Samsung Galaxy store, use the Unity Distribution Platform instead.
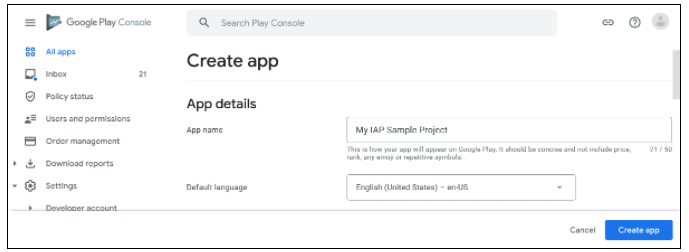
- Open your Unity project in the Unity Editor.
- Choose Window\General\Services. The services window will appear.
- Create a Project ID, then connect the project to an organization.
- Answer the COPPA (Children’s Online Privacy Protection Act) COPPA is a US law that applies to apps that collect personal information and are targeted to children under the age of 14. More info
See in Glossary compliance questions. - The services window will display a list of services. Click In-App Purchasing.
 Services
- The Project Settings window appears.
 Project Settings
- Click the toggle next to In-App Purchasing Settings to ON.
This will automatically install the IAP package from the package manager, providing you with new features and menu items to help you manage IAP.
Next Steps
Define your In-App Purchase strategy
Your task will be to create items for players to buy and obtain their identifiers.
To make this happen behind the scenes A Scene contains the environments and menus of your game. Think of each unique Scene file as a unique level. In each Scene, you place your environments, obstacles, and decorations, essentially designing and building your game in pieces. More info
See in Glossary , you must tie product identifiers (strings) to each item you are selling, using a specified format. Some stores require that you customize the Product ID for their stores.
Источник
In App Purchasing
com.unity.purchasing
Description
IMPORTANT UPGRADE NOTES:
If updating from Unity IAP (com.unity.purchasing + the Asset Store plugin) versions 2.x to version 3.x, complete the following actions in order to resolve compilation errors:
1. Move IAPProductCatalog.json and BillingMode.json
FROM: Assets/Plugins/UnityPurchasing/Resources/
TO: Assets/Resources/.
2. Move AppleTangle.cs and GooglePlayTangle.cs
FROM: Assets/Plugins/UnityPurchasing/generated
TO: Assets/Scripts/UnityPurchasing/generated.
3. Remove all remaining Asset Store plugin folders and files in Assets/Plugins/UnityPurchasing from your project.
With Unity IAP, setting up in-app purchases for your game across multiple app stores has never been easier.
This package provides:
• One common API to access all stores for free so you can fully understand and optimize your in-game economy
• Automatic coupling with Unity Analytics to enable monitoring and decision-making based on trends in your revenue and purchase data across multiple platforms
• Support for iOS, Mac, tvOS, Google Play, Windows, and Amazon app stores(*).
• Support to work with the Unity Distribution Portal to synchronize catalogs and transactions with other app stores
• Client-side receipt validation for Apple App Store and Google Play
After installing this package, open the Services Window to enable In-App Purchasing to use these features.
Version information
Verified for Unity
Package version 4.0.3 is verified for Unity Editor version 2020.3.
Compatible with Unity
These package versions are available in Unity version 2020.3:
Источник
Configuring for Google Play Store
Introduction
This guide describes the process of establishing the digital records and relationships necessary for a Unity game to interact with an In-App Purchase Store. The Unity IAP Abbreviation of Unity In App Purchase
See in Glossary purchasing API is targeted.
In-App Purchase (IAP) is the process of transacting money for digital goods. A platform’s Store allows the purchase of Products, representing digital goods. These Products have an Identifier, typically of string datatype. Products have Types to represent their durability: subscription, consumable (capable of being rebought), and non-consumable (capable of being bought once) are the most common.
Google Play Store
Getting Started
Keep the game’s product identifiers on-hand for Google Play Developer Console use later.

TIP: Make sure you safely store your keystore An Android system that lets you store cryptographic key entries for enhanced device security. More info
See in Glossary file. The original keystore is always required to update a published Google Play application.
TIP: Reuse the Bundle Version Code from your last uploaded APK The Android Package format output by Unity. An APK is automatically deployed to your device when you select File > Build & Run. More info
See in Glossary during local testing to permit side-loading without first being required to upload the changed APK to the Developer Console. See the settings for the Android platform Player.
Register the Application
From the Google Account that will publish the game, register the Android application with the Google Play Developer Console.
NOTE: This guide uses the Google Play Alpha/Beta Testing approach for testing in-app purchase integration.
NOTE: A restriction against using the publisher’s Google Account for testing exists, because Google payments does not let you buy items from yourself. Therefore you will need to create a non-publisher Google Account for testing.
Choose Add new application.

Give the application a Title. For configuring application billing, choose “Upload APK” now. The Store Listing will be prepared and populated in a later step.
Navigate to ALPHA TESTING and choose Upload your first APK to Alpha. Select your APK and upload it.

Resolve any issues listed in the Why can’t I publish? popup first, then click Publish app to publish your Alpha application.
TIP: There may be a delay of up to 24 hours while the published Alpha application is made available for download from the Google Play Store. Similarly, there may be a 24-hour delay to published changes to an application’s In-App Purchases (see below).
WARNING: Make sure the published application is the Alpha version. If the Production version is published, the general public will have access to the untested application.

Add In-App Purchases
In the Developer Console, add one or more in-app purchases for the game.
Navigate to In-app Products and choose Add new product.
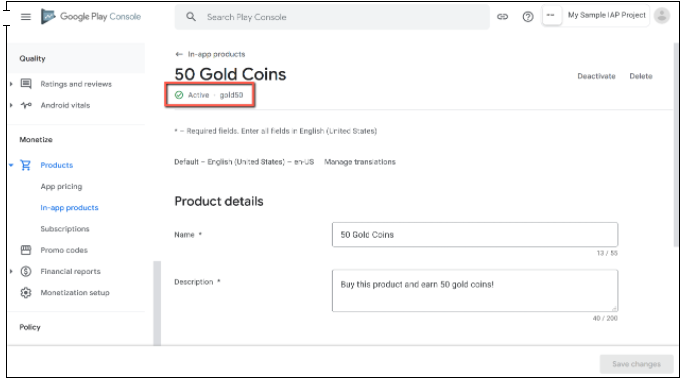
Define the Product ID and choose Continue.
You can specify a consumable or non-consumable Product Type in Managed product. Subscription is also supported by Unity IAP.
NOTE: The “Product ID” here is the same identifier used in the game source code, added to the Unity IAP ConfigurationBuilder instance via AddProduct() or AddProducts() .

Populate the IAP’s Title, Description, and Default price. Then enable it by changing the Inactive button to Active.
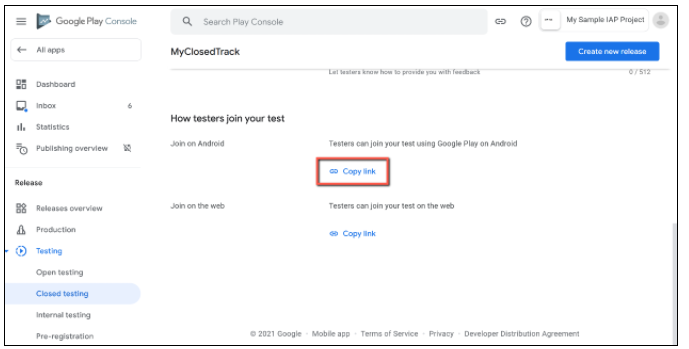

Test IAP
Follow these instructions to assign “test users” to be granted special license testing permissions, allowing them to purchase any IAP for free for this application, and register them as Alpha Testers.
NOTE: Here we used Closed Alpha Testing. Other tester groupings are available.
Add Google Account email addresses for testers who will be granted a license to purchase any IAP for free via the Developer Console’s Settings > Account details > LICENSE TESTING section.
NOTE: There may be a delay of 15 minutes for the license testing setting to become effective.

Establish a list of Alpha Tester Google Account email addresses, from your list of license testing users.

Add each Google Account email address and name the list.

When available (after a multi-hour delay starting from publishing the APK) share the Opt-in URL with the Alpha Testers and have them install the application from the store.
NOTE: To test updates retaining permission to purchase IAP’s for free, one may side-load applications, updating the existing store-downloaded APK install.

To test the IAP, make a purchase on a device logged in with an Alpha Tester Google Account. A modified purchase dialog box appears to confirm the fact this product is under test and is free.
WARNING: If this dialog box does not appear, then the Alpha Tester Google Account will be charged real money for the product.
Источник
IAP в Unity3D
Когда-то давно, во времена Unity 4 добавление внутриигровых покупок вызывало некоторые трудности. Можно было идти двумя путями: использовать какой-либо плагин из уже существующих или реализовывать свою обертку над нативными функциями для каждой платформы. В первом случае было несколько решений: Soomla, OpenIAB, Prime и много-много других. Некоторые из них были платными и стояли довольно дорого: цена Prime составляла около 70$. Некоторые были бесплатными и отказывались работать в iOS: OpenIAB.
Unity3D 5.3
И вот в версии Unity3D 5.3 появилась поддержка in-app purchases как говорится «из коробки». Этот простой инструмент позволяет легко внедрить в приложение покупки для наиболее популярных магазинов приложений.
Сейчас поддерживаются:
- Amazon Apps
- Google Play
- iOS App Store
- Mac App Store
- Samsung GALAXY Apps
- Tizen Store
- Windows Store.
Интеграция в проект
Для начала во вкладке Services необходимо кликнуть по полю In-App Purchasing и включить эту функцию. Также автоматически включается сервис аналитики, в котором потом можно посмотреть Revenue, Average Revenue Per Paying User (ARPPU), Average Revenue Per Daily Active User (ARPDAU).

Далее необходимо нажать на кнопку Import после чего, произойдет импорт всех необходимых ассетов в проект.
In-App Manager
Теперь необходимо добавить код для работы с IAP. Этот C# скрипт содержит в себе следующие функции:
- InitializePurchasing: инициализирует IAP, добавляет предметы, которые доступны для продажи и позволяет обрабатывать необходимые события
- BuyProductID: функция, которая позволяет купить необходимый предмет, используя его индентификатор
- BuyConsumable, BuyNonConsumable, BuySubscription: функции, которые позволяют приобретать покупки разных типов. Многие магазины поддерживают 3 типа покупок:
- Consumable — тип покупки, данные которой могут тратиться игроком в игре (например: монеты, пополнение энергии);
- NonConsumable — тип покупки, данные которой остаются у игрока навсегда (например: уникальный меч, отключение рекламы)
- Subscription — подписка;
Использование в игре
Чтобы было более понятней как применять скрипт, приведу пример. Есть две покупки: одна NonConsumable — отключение рекламы, вторая Consumable — дает игроку 80 монет. Используются две платформы: Google Play, AppStore. Для каждой покупки необходимо объявить три константы, содержащие в себе идентификаторы покупок UnityIAP, Google Play и AppStore.
После этого, в функцию инициализации, необходимо передать эти константы:
Теперь на кнопку покупки предмета, необходимо повесить функцию BuyProductID с передачей ей в качестве параметра идентификатора продаваемого предмета.
А в функции PurchaseProcessingResult добавить действия для каждой из покупок.
Вот и все. Остается только не забыть создать покупки с такими же идентификаторами в AppStore и Google Play.
Источник


