- Get User Input in Android
- 1. Create an Android Project
- App Layout
- 2. Add TextView for Label
- 3. Add EditText for User Input
- 4. Add Button for User Submission
- 5. Button Handler
- 6. Read Input from EditBox Control
- Complete Source Code and Output
- Activityfrm.xml
- FrmActivity.java
- Output
- Popular Articles
- Comments on «Get User Input in Android»
- Android prompt user input dialog example
- 1 Android Layout Files
- 2. Activity
- 3. Demo
- Download Source Code
- References
- Comments
- Поле ввода числовых значений в Android
- Начнем с требований
- Анализ
- Реализация
- Отладка
- Бонус
- Android Login and Register with SQLite Database Tutorial
- What is SQLite?
- Let’s Get it Working
- Step 1) Update build.gradle file.
- Step 2) Update strings.xml.
- Step 3) Update colors.xml.
- Step 4) Update styles.xml.
- Step 5) Add Logo Image.
- Step 6) Create a User model class.
- Step 7) Create a DatabaseHelper class.
- Step 8) Create activity_login.xml.
- Step 8) Create InputValidation class.
- Step 9) Create a LoginActivity class.
- Step 10) Create activity_register.xml.
- Step 11) Create RegisterActivity class.
- Step 12) Create activity_users_list.xml.
- Step 13) Writing the Adapter Class.
- Step 14) Create UsersListActivity class.
- Step 15) Update AndroidManifest.xml.
- To learn this tutorial using KOTLIN Language Click here.
Get User Input in Android
I have written an Android Hello World tutorial some time back. Wouldn’t it be nice if we add some simple user interaction to it. As simple as get a text input from user and display it. This tutorial will help you do that and will serve as an introduction to use of Android form widgets.
1. Create an Android Project
To create an android project,
- Go to File menu, then select new -> project or else click new icon in tool bar.
- Select wizard as Android->Android Application project and click Next.
- Create new Application window will be open. Enter Application Name, Project Name and Package and click Next to continue.
- Select launcher icon for your application and click Next.
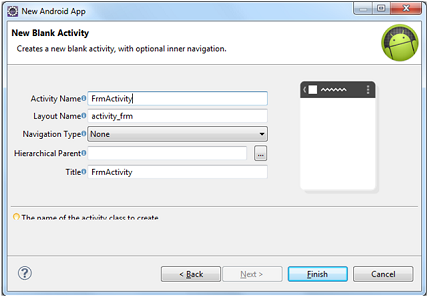
- Select Activity from given two types as Blank activity and Master Details flow activity.
- Enter Activity Name, Layout name and other details to create activity.
- Finally click Finish to complete this step.
The Blank Activity and Master Detail Flow activity is to capture style property to design good looking app quickly.

App Layout
After completing above, the layout is created as a resource file in this path workspace/GetUserInput/res/layout/activity_frm.xml. By default it contains the following code and we need to work on graphical view of the layout to give control with some basic form widgets.
2. Add TextView for Label
Select Graphical layout view and remove default string and follow the steps below,
- Drag and drop two Textview(Large, Medium..) from form widget in left panel (One for label of input and the another one for welcome message)
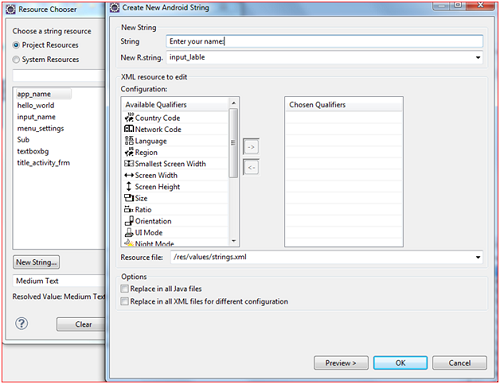
- Select Text property in right panel and Browse to add new String. OnClick browse Resource Chooser window will open.
- Select “New String..” and enter the String to be displayed and resource identifier and click OK.
- Then, choose the newly added resource from ‘Resource Chooser’ and click OK.
Now following code will be created to display Textview,
3. Add EditText for User Input
Similarly drag EditText box from list of Text Fields and put it in layout next to label. This box has the input type of person name. After this, following code will be generated in the xml file.
4. Add Button for User Submission
To add button, the form widget menu has to be expanded and button can be dragged from there. Text, text color and background color of the button is changed by ‘Reference chooser’ window and property bar. After creating the button code will be as follows.
5. Button Handler
Till this step, everything is done with design view. But this step is accomplished by adding a Listener into source file(java) which will be in path workspace/GetUserInput/src/com/javapapers/android/form/FrmActivity.java This is the Activity file.
To add Listener following code has to be added,
- OnClickListener is event handler which will be invoked on clicking the Submit button.
- View class instance is responsible for the handling the event.
6. Read Input from EditBox Control
User input is read by instances of form controls. The input entered by the user is read by getText() method that is called by Editbox instance mEdit.
And then, the instance of Textview is created to show the welcome message. This will be done by the following code.
Complete Source Code and Output
Activityfrm.xml
FrmActivity.java
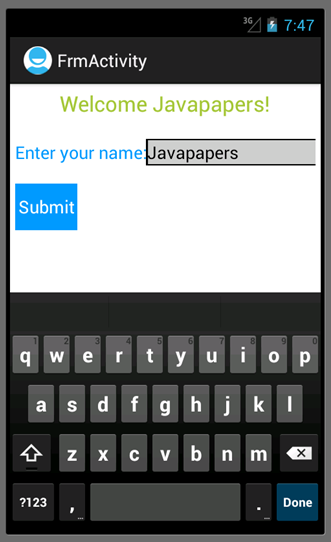
Output


Popular Articles
Comments on «Get User Input in Android»
I am not an expert in java and thought creating android application was difficult.
Also I feared learning mobile application development as it is completely new for me. I don’t have an android mobile too.
With all these, just reading two articles from your blog made HUGE difference. Your android hello world and this article has given me great confidence. So simple easy to understand and create android application.
Already I am feeling that I know the basics of android. Thanks, Thanks.
Hi Sir,
Great tutorial in simple words,
I am new in android but I know java, In android, designing part is difficult for me Its taking too much time.
so please suggest some designing tricks.
thanks
@Deepesh Uniyal,
To align the components, instead of moving around using mouse, I prefer to use the properties padding/margin/width to fix the position. This will be easier to design.
Источник
Android prompt user input dialog example
By mkyong | Last updated: August 29, 2012
Viewed: 343,004 (+61 pv/w)
In this tutorial, we will enchance the previous AlertDialog example, to make it able to accept user input, just like a PromptDialog. More specific, this is a custom AlertDialog example.
See following steps :
- Create a prompt dialog layout (XML file).
- Attach the prompt dialog layout to AlertDialog.Builder .
- Attach the AlertDialog.Builder to AlertDialog .
- Done.
P.S This project is developed in Eclipse 3.7, and tested with Android 2.3.3.
1 Android Layout Files
Two XML files, one for main screen, one for prompt dialog.
2. Activity
Read the comment and demo in next step, it should be self-explorary.
3. Demo
Start it, the “ main.xml ” layout is display a button and edittext (result).
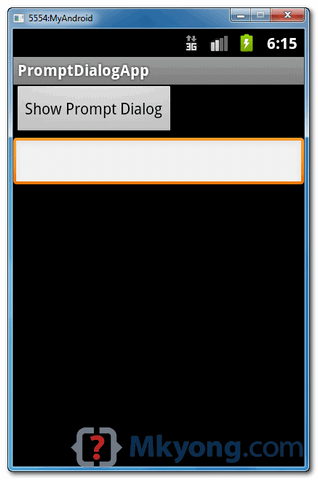
Click on the button, display a prompt dialog “ prompts.xml ” layout, type message “mkyong“, and click on the “OK” button.
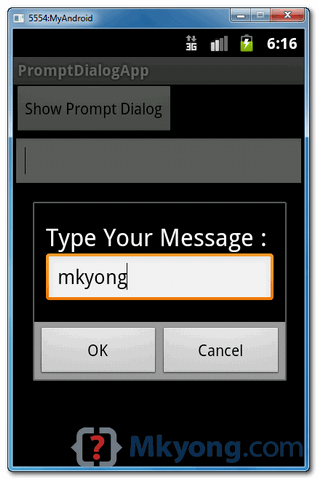
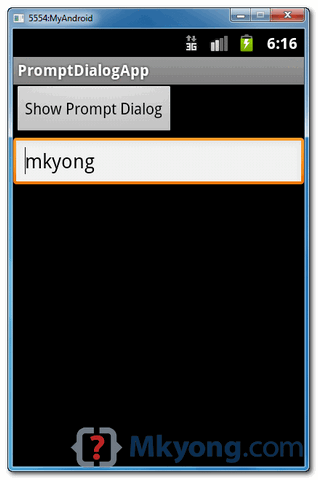
User input “mkyong” will pass to the “ main.xml ” layout, edittext (result), and display it.
Download Source Code
References
mkyong
Founder of Mkyong.com, love Java and open source stuff. Follow him on Twitter. If you like my tutorials, consider make a donation to these charities.
Comments
This really helps me. Thank you..
Great code Thank you so much
very good highly help full,thanks a lot
how to use this in adapter?
Thank You So Much.
Worked. Thank you.
I understood everything but i have one question. How can i disable the “OK” Button if there is nothing in the userInput?
thank you for the tutorial
concise and to the point as usual. great work
sir please show us the advance coding for android
Thank you very much for help, You make my day.
NICE share bro, your article help me to solve problem i got when handling pop up with input dialog рџЂ
Thanks for the articles. I’ve found a lot of interesting and useful things about android here!
great tutorial,like the previous ones.
thanks a lot.
Thank you sir, this post help me alot рџЂ
Thank you very much for all of these awesome tutorials… They have helped me very much.. Keep up this awesome work..
Great demo – thanks for posting
Hey there would you mind letting me know
which web host you’re working with? I’ve loaded your blog in 3 different browsers and I must say
this blog loads a lot faster then most. Can you recommend a
good hosting provider at a fair price? Many thanks, I appreciate it!
Thank you very much.. Simple and understandable.. Suits for all beginners
Can you please explain how can i get java to read an XML file, also how can i make the program to prompt user for files from XML and display them after?? I would be really thankful if you/anyone could help me??
FINALLY! Unlike so many sites with assuemed knowledge tutorials, this one has it down for anyone to try! THANK YOU!!
really thanks it’s helped
Thanks, reading values from inflated custom layout can be a bit tricky..if you try to use findViewById without referencing to the inflated view.
I keep coming here to copy codes for my Android project. Today, I just want to say Thank You.
Very great tutorial … can u plz give the example of custom dialog with “textview” and
“edittext” and a “Button” something should be happen when udser clicks on the button
hii how to runtime set edittext or textview value from sting in this promptview dialog
Источник
Поле ввода числовых значений в Android
Начнем с требований
Анализ
Из всего спектра элементов управления в Android нас интересует виджет EditText .
Обратимся к документации и посмотрим, что нам предлагает Android SDK.
EditText наследуется от TextView , который, в свою очередь, обладает свойствами:
XML-разметка
digits – позволяет установить набор специальных символов, которые может принимать поле и автоматически включает режим ввода чисел.
numeric – задает обработчик ввода чисел.
inputType – с помощью набора константных значений позволяет сгенерировать требуемый обработчик ввода.
Публичные методы класса
setFilters – позволяет задать набор фильтров, которые будут применяться при вводе значений в поле.
digits , numeric и inputType позволяют ограничить набор вводимых символов, но никак не влияют на точность числа, а вот setFilters , как раз то, что нам нужно.
Реализация
Перед созданием собственного фильтра, сделаем так, чтобы в поле можно было вводить только числа и десятичный разделитель.
Теперь зададим собственный фильтр для поля ввода, чтобы принимать только значения соответствующие заданной точности.
Нам потребуется реализовать интерфейс InputFilter , а конкретно переопределить метод filter .
Согласно документации, этот метод вызывается при замене значения в поле ввода (dest) в диапазоне от dstart до dend на текст из буфера (source) в диапазоне от start до end.
Метод возвращает объект класса CharSequence , который будет установлен в поле ввода взамен текущему значению. Если заменять значение поля ввода не требуется, то в методе следует вернуть null .
В конструктор нашего фильтра будем передавать количество символов до и после десятичного разделителя.
Переопределяем метод filter . Алгоритм проверки вводимых значений следующий:
- До помещения буферного значения в поле ввода мы будем вставлять это значение в некоторую переменную.
- Если полученное значение удовлетворяет нашим требованиям точности, то мы разрешаем ввод, вернув null .
- В противном случае возвращаем пустую строку, тем самым отказываясь от вводимого значения.
Формируем будущее значение после ввода пользователя:
Для удобства манипуляция со строкой, создадим экземпляр класса StringBuilder на основе исходного значения поля ввода и произведем необходимые замены с учетом вводимого значения.
В результате в переменной newText будет содержаться будущее значения текстового поля.
Теперь нам следует проверить корректность нового значения.
Оно должно удовлетворять следующим условиям:
- Количество десятичных разделителей не должно превышать 1.
123, 123.45 — верно, 12.3.4 — неверно. - Количество символов целой и дробной частей числа должно удовлетворять заданной точности.
Проверим количество разделителей, для этого мы переберем все символы результирующей строки.
Если найдется десятичный разделитель, то запомним его индекс. В случае повторного нахождения разделителя, ввод считается некорректным и цикл останавливается.
В завершении возвращаем результат.
Если ввод корректный, то возвращаем null , тем самым принимая вводимые значения,
в противном случае возвращаем пустую строку, чтобы не передавать в поле ввода значения.
Отладка

Видим, что приложение корректно обрабатывает целую и дробную части числа, запрещает вводить несколько десятичных разделителей.
Однако наблюдается интересная ситуация, если удалить десятичный разделитель, то мы выходим за границы точности.
Об этом упоминается в документации
Be careful to not to reject 0-length replacements, as this is what happens when you delete text.
Нужно быть осторожным с заменами нулевой длины, как это происходит при удалении текста.
Что же произошло на самом деле?
Наш алгоритм отработал корректно и в условии проверки длины целой части числа выявил, что допустимая точность нарушена и вернул пустую строку. Но само действие удаления символов было применено к исходному значению поля ввода.
Решим эту проблему следующим образом — выявим факт удаления символов. Документация подсказывает, что в этом случае происходит замена с нулевой длиной. Выделим из исходного значения поля ввода удаляемые символы и вернем их в качестве результата нашего метода, тем самым откажемся от удаления.
Нам потребуется изменить блок кода, где возвращается результат
Таким образом контрольный пример выполнен, заданная точность достигнута.
Библиотека успешно используется в продакшене.
Подключить её можно с помощью Gradle
Бонус
Часто бывает необходимым запретить отображение системной клавиатуры для поля ввода.
Например, если используется клавиатура из приложения.
На помощь приходит метод класса EditText, появившийся в Android версии 21 и выше:
setShowSoftInputOnFocus(boolean show)
Вообще-то, этот метод был и в ранних версиях, но был приватным.
public void showSoftInputOnFocusCompat(boolean isShow) <
Источник
Android Login and Register with SQLite Database Tutorial
In software applications, it is mostly required to store users and app data locally. Android SDK provides several APIs for developers to save user and app data, So SQLite is one of the ways of storing data. For many applications, SQLite is the backbone of the app whether it’s used directly or via some third-party wrapper. In this tutorial, we will see how to use SQLite in our app directly.
What is SQLite?
SQLite is a lightweight database that comes with android. It is an Open-Source embedded SQL database engine. This provides a relational database management structure for storing user-defined records in the form of tables.
Key point to understand regarding SQLite :-
– SQLite is a RDBMS (Relational Database Management System)
– SQLite is written in C programming language
– SQLite is embedded within the Android operating system, so you don’t need anything external on Android to use SQLite
– To manipulate data (insert, update, delete) in SQLite database – we’ll use SQL (Structured Query Language)
Let’s Get it Working
In this tutorial we are going to learn how to use SQLite. To really understand the usage of SQLite we will create an app . The App contains simple Login form, Registration form and listing of registered user. This app shows how SQLite database operations are performed. I assume that you have created a new android project. Source Code is available on GitHub.


Step 1) Update build.gradle file.
Before you can use Material Design in your projects you need to add the following compile line to your Gradle dependencies block in your build.gradle file and rebuilt the project .
Step 2) Update strings.xml.
Add the below string values to the string.xml located in res => values => strings.xml.
Step 3) Update colors.xml.
Add the below color values to the colors.xml located in res => values => colors.xml.
Step 4) Update styles.xml.
Add the below style values to the styles.xml located in res => values => styles.xml.
Step 5) Add Logo Image.
Download the below logo image and add it to the drawable folder located in res => drawable.
Android Tutorials Hub Logo
Step 6) Create a User model class.
Create a new package named modal and create a User class with all getter and setter methods to maintain single contact as an object.
Step 7) Create a DatabaseHelper class.
Create a new package named SQL and create a DatabaseHelper class. Extend this class with SQLiteOpenHelper to manage database creation and version management. I have also written some methods to manipulate data in the database.
Methods and functionality
– addUser :- add a user to the database.
– getAllUser :- fetch users data from the database.
– updateUser :- update the user in the database on the basis of the user id.
– deleteUser :- delete user from the database on the basis of the user id.
– checkUser :- check whether the user exists in the database.
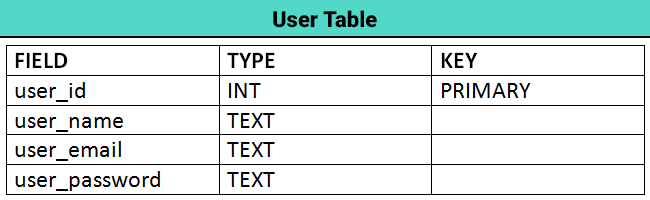
User Table Schema
Step 8) Create activity_login.xml.
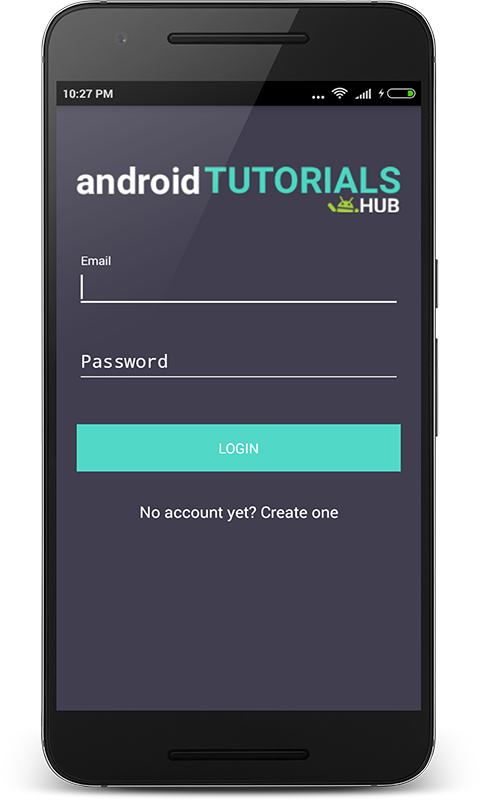
Now create a layout file for the LoginActivity.java i.e activity_login.xml and add the below code in your layout file. The code will create a simple login form containing logo on the top, 2 input fields email and password, login button, and registration screen navigation link.
activity_login.xml would result in a screen like this:
Step 8) Create InputValidation class.
Create a package named helpers and create a class in it named InputValidation.java and add below code in it. The code will create validation methods for the input field. Validation like empty input, valid email and etc.
Step 9) Create a LoginActivity class.
Now create a package named activities and create a class named LoginActivity and add below code. Here i have written the code to validate the input fields Email and Password using the InputValidation class which I described above. Also, code for navigation to registration screen on the click of registration link and to user list screen after clicking on the login button if credentials are valid.
The Screen below shows the login form with input validation display the error message if values entered in input fields are not valid.
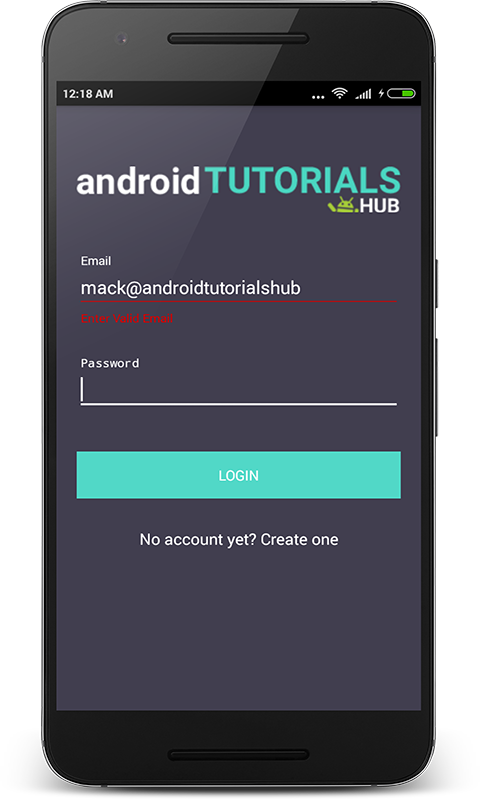
Login Screen with Input Validation
The Screen below shows the login form with input validation display the snack bar with a message if values entered in input fields are not validated from the SQLite database.
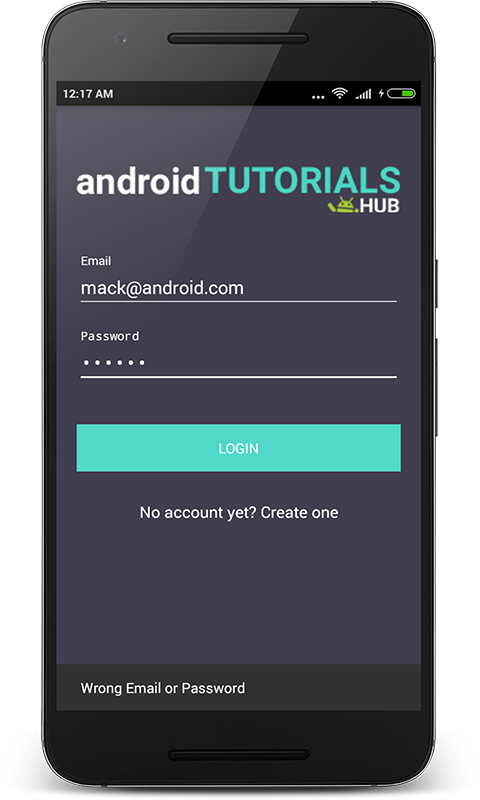
Login Screen With SQLite Validation
Step 10) Create activity_register.xml.
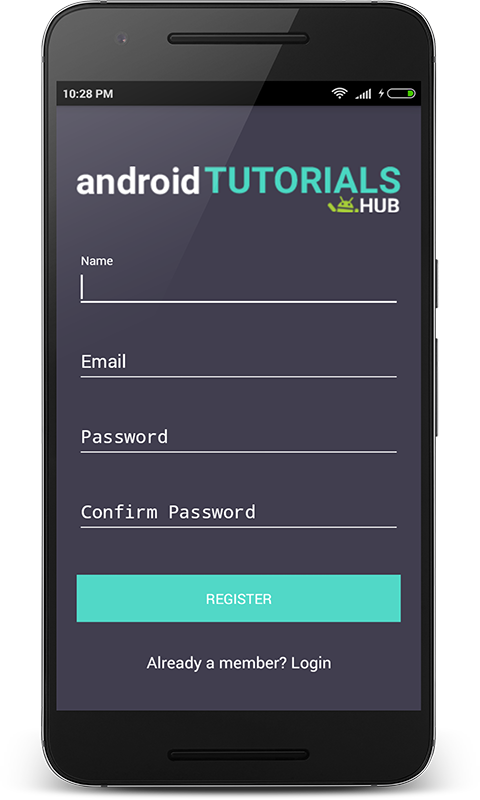
Now create a layout file for the RegisterActivity.java i.e activity_register.xml and add the below code in your layout file. The code will create a simple registration form containing a logo on the top, 4 input fields name, email, password, and confirm password, register button, and login screen navigation link.
activity_register.xml would result in a screen like this:
Step 11) Create RegisterActivity class.
Now create a package named activities and create a class named RegisterActivity and add below code. Here I have written the code to validate the input fields Name, Email, Password, and Confirm Password using the InputValidation class which I described above. Also, code for navigation to the login screen on the click of login link and shows snackbar with success message for registration.
The Screen below shows the registration form with input validation display the error message if values entered in input fields are not valid.
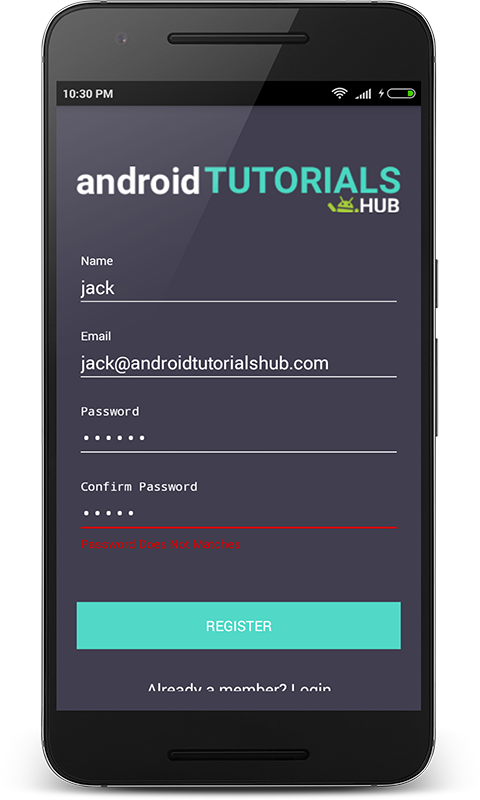
Register Screen with Input Validation
The Screen below shows the filled registration form with valid values.
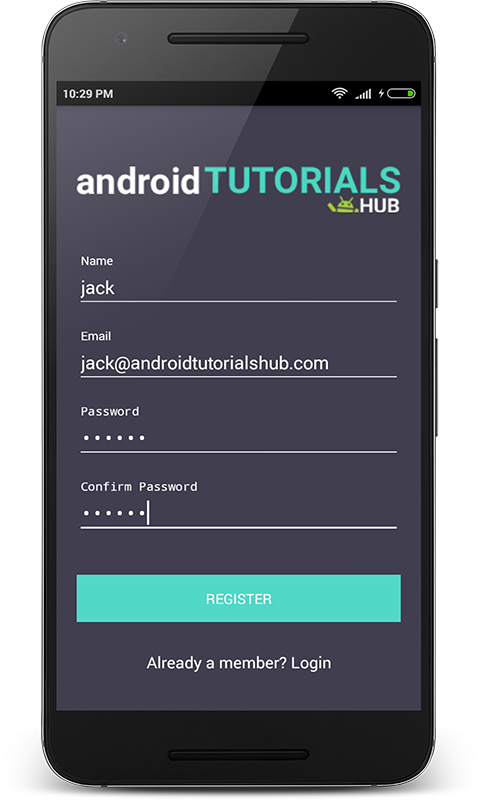
Register Screen with filled input fields
The Screen below shows the register form display the snackbar with the registration success message.
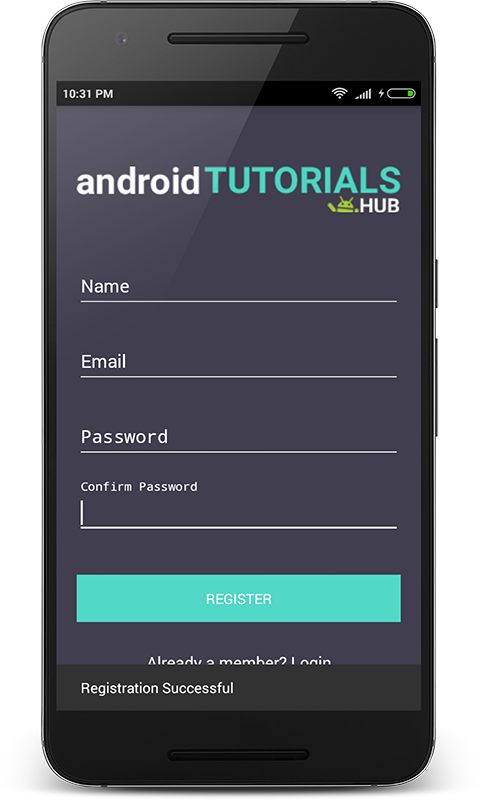
Register Screen with Registration Success Message
Step 12) Create activity_users_list.xml.
Now create a layout file for the UsersListActivity.java i.e activity_users_list.xml and add the below code in your layout file. The code will create a simple view containing two views one view i.e LinearLayout shows the welcome message with email id of the logged in user and another view i.e RecyclerView shows the list of registered users in the app.
activity_users_list.xml would result in a screen like this:
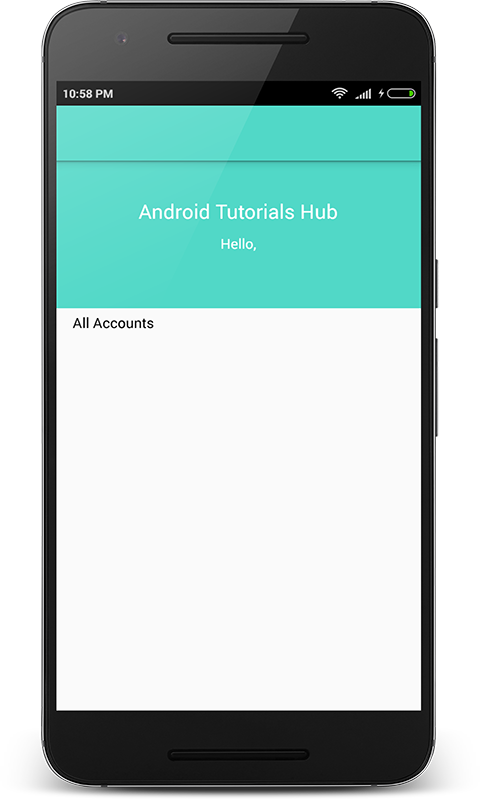
User List Screen
Step 13) Writing the Adapter Class.
Now create a package named adapters and create a class named UsersRecyclerAdapter and add below code. Here onCreateViewHolder() method inflates item_user_recycler.xml. In onBindViewHolder() method the appropriate User data (name, email, and password) set to each row.
item_user_recycler.xml
Step 14) Create UsersListActivity class.
Now create a package named activities and create a class named UsersListActivity and add below code. Here i have written the code to show the email id of the logged in user and the list of registered users.
The Screen below after user login shows the brand name, email id of logged in user, and registered users list.
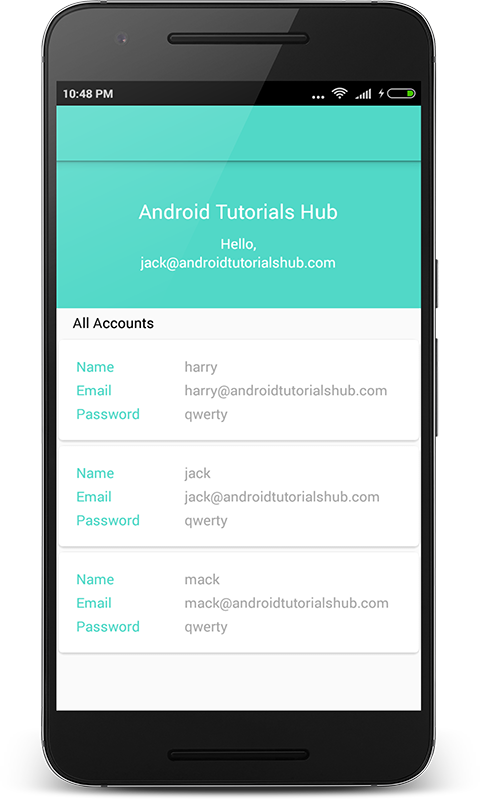
User List Screen After Login
Step 15) Update AndroidManifest.xml.
To learn this tutorial using KOTLIN Language Click here.
Please feel free to comment as well as ask questions. And, yeah! If this post helps you please do share!
Enjoy Coding and Share Knowledge
Источник


