- ИТ База знаний
- Полезно
- Навигация
- Серверные решения
- Телефония
- Корпоративные сети
- Как установить Android в VirtualBox
- Как создать виртуальную машину для Android
- Как установить Android на виртуальную машину
- Использование Android в VirtualBox
- Android-x86
- Run Android on your PC
- VirtualBox How To
- Downloading
- Create a new VM
- Settings
- Install
- Partition
- Advanced
- Custom partitions, SDCard
- Playing music
- Upload files by adb
- Upload files by wget
- Debug with adb
ИТ База знаний
Курс по Asterisk
Полезно
— Узнать IP — адрес компьютера в интернете
— Онлайн генератор устойчивых паролей
— Онлайн калькулятор подсетей
— Калькулятор инсталляции IP — АТС Asterisk
— Руководство администратора FreePBX на русском языке
— Руководство администратора Cisco UCM/CME на русском языке
— Руководство администратора по Linux/Unix
Навигация
Серверные решения
Телефония
FreePBX и Asterisk
Настройка программных телефонов
Корпоративные сети
Протоколы и стандарты
Как установить Android в VirtualBox
Андроид на компьютере
Если вам не терпится попробовать Android, то не обязательно использовать весь компьютер для выполнения этой задачи, лучше всего запустить его с помощью VirtualBox. Его довольно легко настроить, и он предоставит вам полный доступ к Android за несколько минут.
Интенсив по Виртуализации VMware vSphere 7
Самое важное про виртуализацию и VMware vSphere 7 в 2-х часовом онлайн-интесиве от тренера с 30 летним стажем. Для тех, кто начинает знакомство с виртуализацией и хочет быстро погрузиться в предметную область и решения на базе VMware

Для начала вам понадобится несколько вещей:
- VirtualBox: загрузите и установите VirtualBox, если у вас его еще нет — он доступен для Windows, macOS и Linux.
- Android x86 ISO: вам нужно скачать Android x86 ISO для любой версии Android, которую вы хотели бы попробовать. Мы будем использовать Android 6.0 (Marshmallow), она является наиболее стабильной версией.
Прежде чем начать, я также рекомендую убедиться, что в BIOS вашего ПК опции виртуализации включены. В противном случае вы будете сталкиваться с множеством проблем позже, когда все будет работать не так, как должно.
Если у вас все это есть, то вы готовы начать.
Как создать виртуальную машину для Android
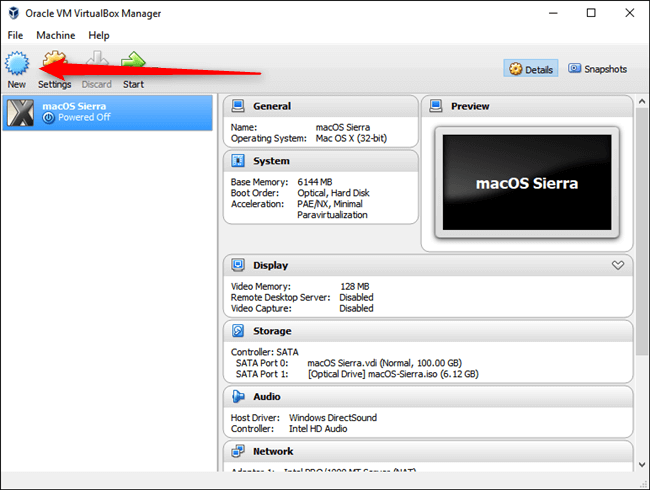
Запустите VirtualBox и нажмите кнопку «Создать» (New), чтобы создать новую ВМ.
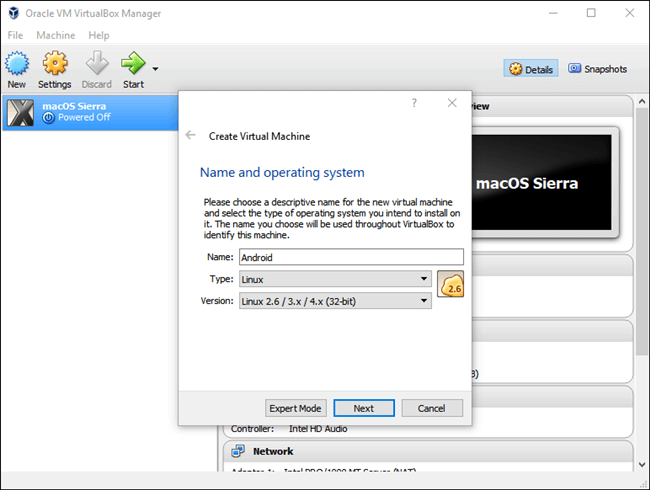
Назовите ВМ как хотите, затем выберите «Linux» в качестве типа и «Linux 2.6 / 3.x / 4.x (32- bit)» как версию. Нажмите кнопку «Далее».
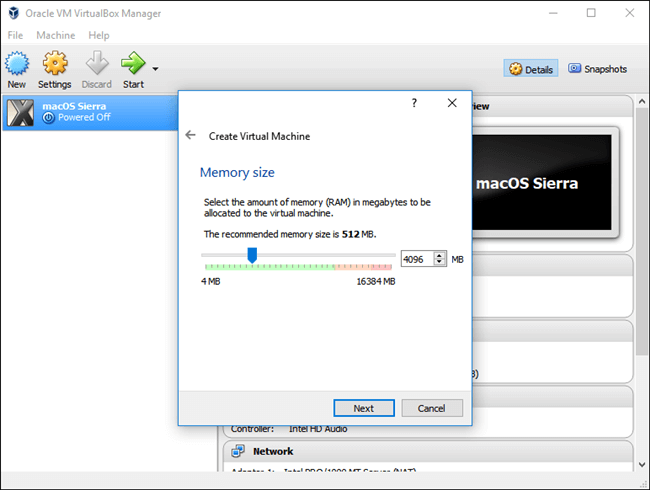
Что касается памяти, я бы выделил ей 2048 МБ, особенно если вы используете 32-разрядную версию Android (она больше ничего не сможет обработать). Если вы используете 64-битную сборку, не бойтесь использовать столько памяти, сколько хотите. Как только вы установите количество памяти, нажмите Далее.
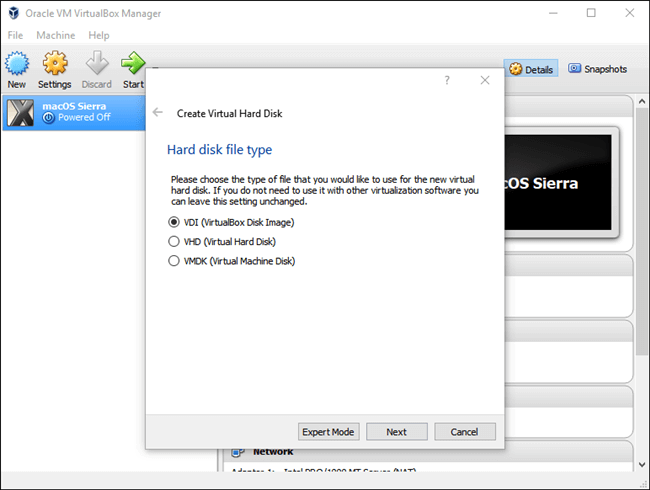
Нажмите «Создать» (Create), чтобы начать сборку вашей ВМ. Для типа жесткого диска оставьте его установленным как VDI.
Оставьте размер жесткого диска установленным как «Динамически распределенный», что позволит виртуальному жесткому диску расти по мере необходимости.
На следующем шаге вы можете выбрать объем хранилища, на котором вы хотите разместить ВМ — даже если она будет динамически изменяться, ей не будет позволено быстро увеличиваться определенного вами здесь. Выберите любой размер, который будет работать лучше для вашей системы. Я оставлю 8 ГБ.
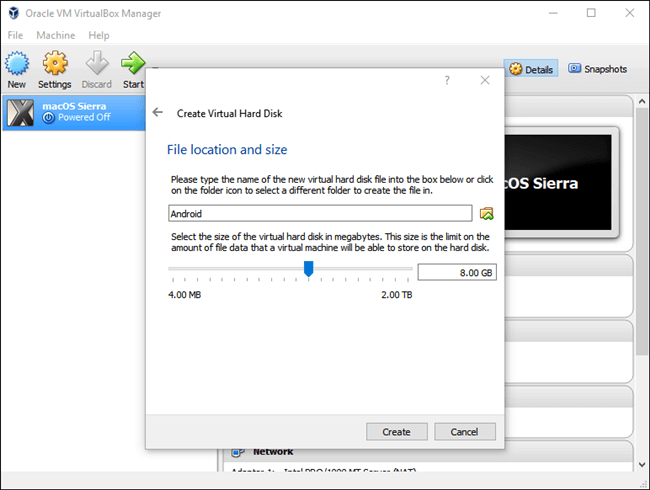
Наконец, нажмите кнопку «Создать» (Create). Пуф! Ваша новая ВМ готова к использованию.
Как установить Android на виртуальную машину
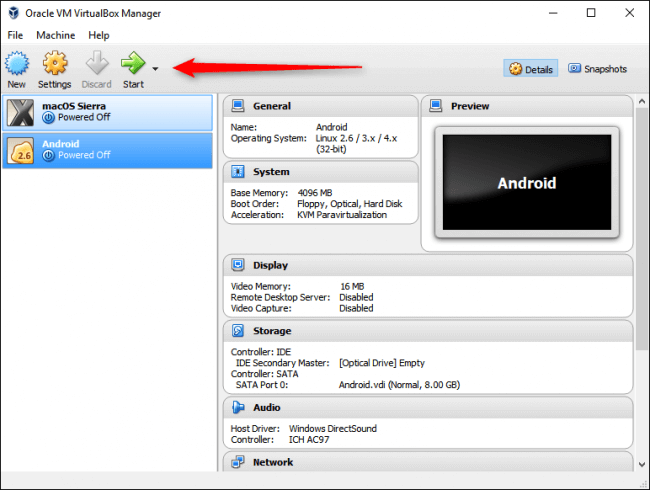
Когда ваша ВМ полностью настроена, выделите её и нажмите Старт сверху.
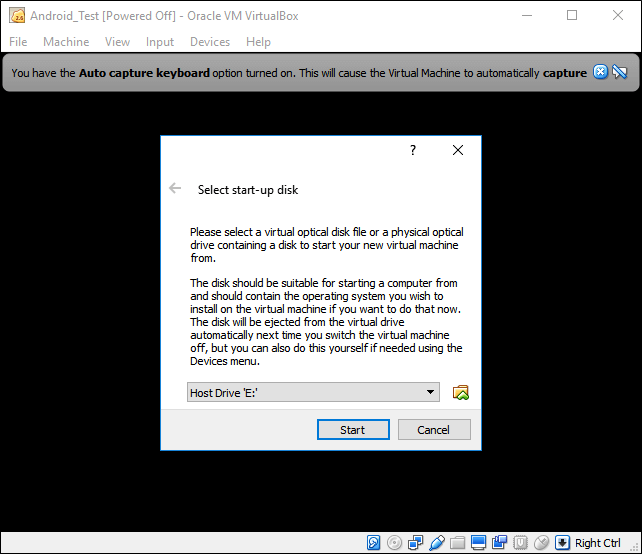
Когда машина запустится, укажите Android, который вы загрузили. Возможность выбора должна появиться, как только вы запустите его, но, если нет, нажмите «Устройства» -> «Оптические приводы» -> «Выберите образ диска» (Devices -> Optical Drives -> Choose Disk Image) и выберите свой Android ISO образ. Затем используйте ВМ -> Перезапустить (Machine -> Reset), чтобы перезапустить виртуальную машину.
ПРИМЕЧАНИЕ. Если щелкнуть на окно VirtualBox, оно автоматически будет использовать мышь и клавиатуру. Чтобы прекратить использование мыши и клавиатуры, просто нажмите правую клавишу Ctrl на клавиатуре.
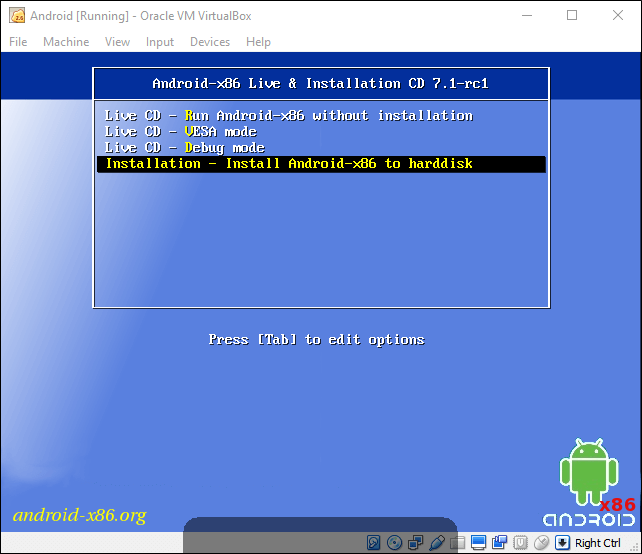
Как только виртуальная машина загрузит ISO, используйте клавиатуру, чтобы прокрутить вниз до «Install» и нажмите Еnter. Это запустит установщик Android.
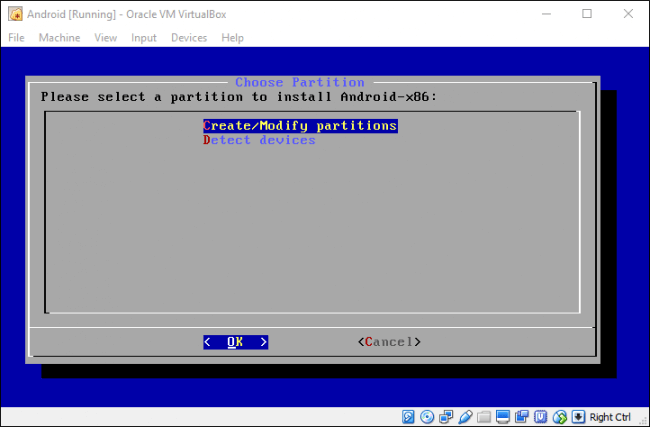
Выберите «Создать/Изменить» (Create/Modify Partitions). На экране GPT просто выберите «Нет».
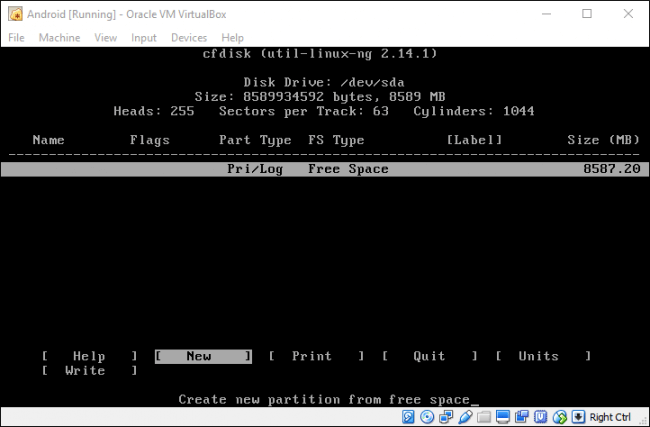
На экране утилиты диска выберите «Новый» (New).
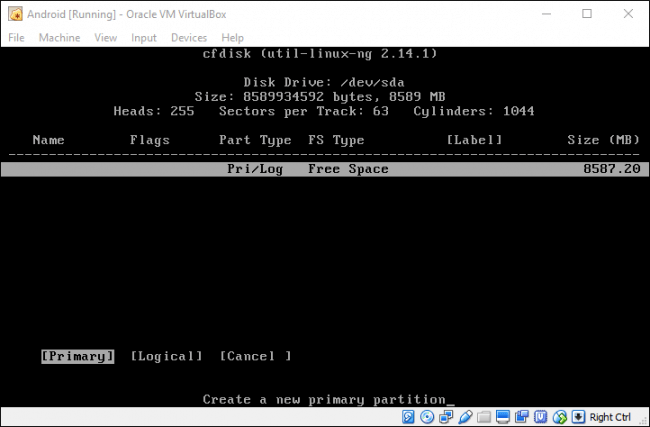
Создайте основной диск (Primary) и разрешите ему использовать все пространство виртуального жесткого диска, которое вы выбрали ранее. В этом случае это 8 ГБ. Это должно быть выбрано по умолчанию.
Нажмите Enter на опции «Bootable», чтобы сделать раздел загрузочным, затем выберите «Write». Нажмите Enter.
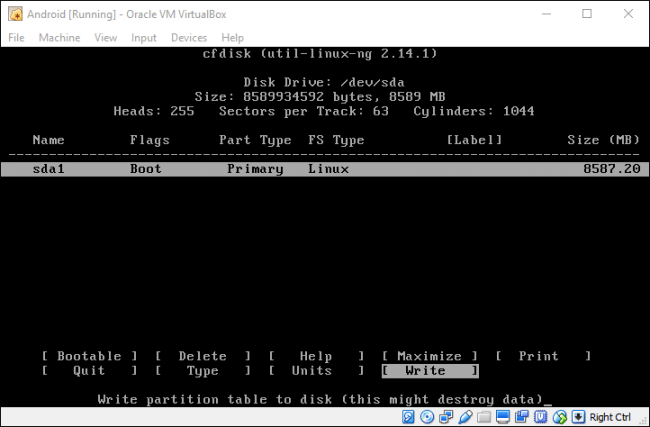
Вам нужно будет ввести «Да» (Yes) и нажать Enter на следующем экране, чтобы убедиться, что вы хотите записать таблицу разделов на диск.

По завершении выделите параметр «Выход» (Quit) и нажмите Enter.

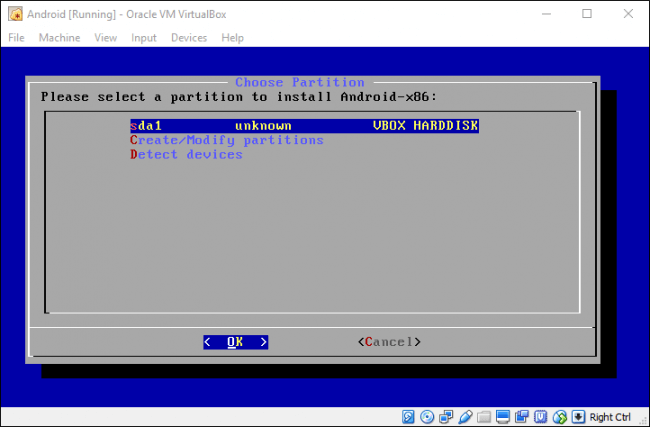
Выберите раздел, который вы только что создали для установки Android, и нажмите Enter.
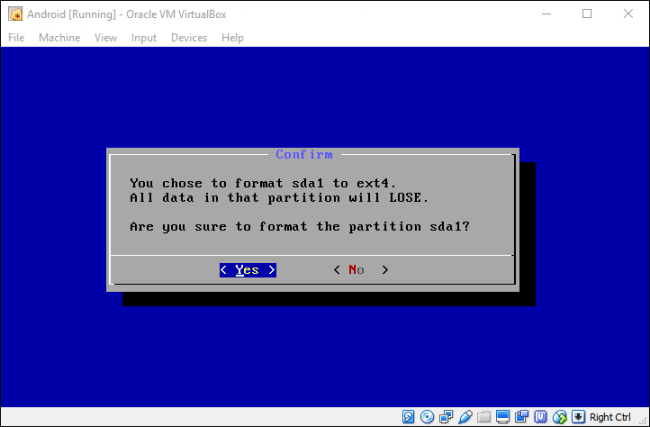
Выберите «ext4» для форматирования раздела. Выберите «Да», и нажмите Enter на следующем экране, чтобы подтвердить.
Выберите «Да» (Yes), чтобы установить загрузчик GRUB.
 Выберите «Да» (Yes), чтобы перезаписать /system folder .
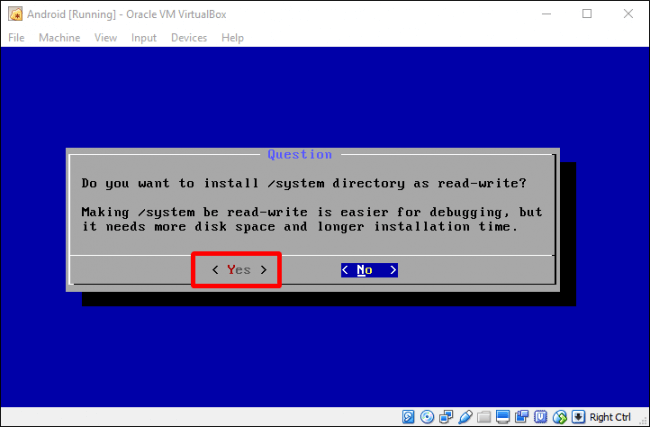
После того, как все закончится, вы можете перезагрузить или сбросить Android, но не забудьте сначала размонтировать файл ISO. В противном случае он просто загрузится обратно в установщик!
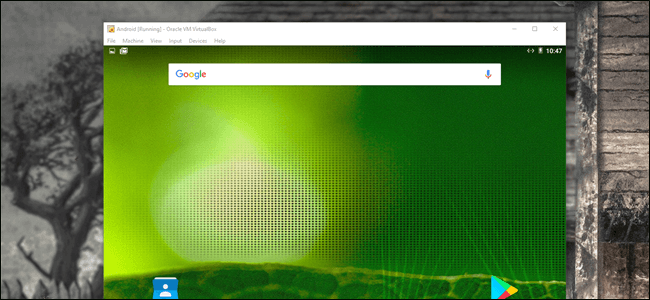
Использование Android в VirtualBox
Процесс установки довольно прост и беспроблемен — вы сможете настроить это, как и любое другое устройство Android, за исключением одного исключения: вы не включаете Wi-Fi. Виртуальная машина будет использовать подключение вашего компьютера.
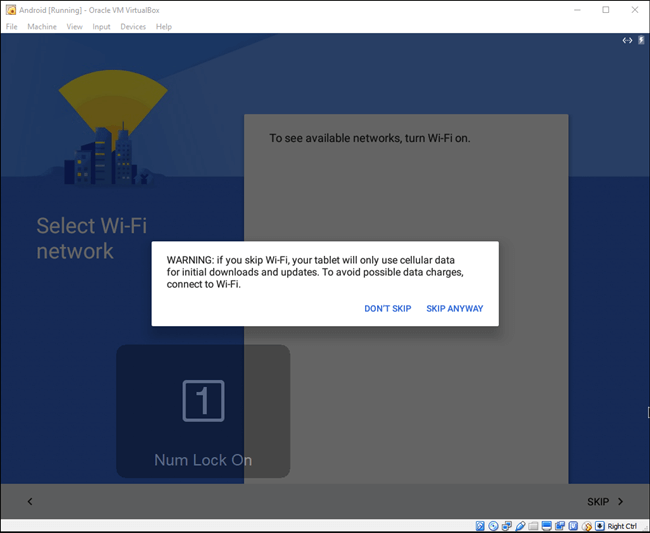
Так что да, просто зайдите и закончите настройку.
Это не самый быстрый способ запуска приложений Android на вашем компьютере — BlueStacks работает быстрее, если все, что вам нужно, это запустить одно или два приложения на вашем ПК с Windows. Тем не менее, Android-x86 обеспечивает доступ к полной системе Android на виртуальной машине. Это отличный способ познакомиться со стандартной системой Android или просто поэкспериментировать с ней, как если бы вы экспериментировали с виртуальной машиной, работающей под управлением любой другой операционной системы.
Интенсив по Виртуализации VMware vSphere 7
Самое важное про виртуализацию и VMware vSphere 7 в 2-х часовом онлайн-интесиве от тренера с 30 летним стажем. Для тех, кто начинает знакомство с виртуализацией и хочет быстро погрузиться в предметную область и решения на базе VMware
Источник
Android-x86
Run Android on your PC


VirtualBox How To
The following are instructions on how to run Android-x86 inside VirtualBox.
Note: For optimal performance, make sure you have enabled either VT-x or AMD-V in your host operating system’s BIOS.
Android-x86 versions tested against Virtualbox versions.
| Date Tested | Virtualbox | Host OS | Android-x86 | Result |
|---|---|---|---|---|
| ?? | 2.2.4 | Windows XP | ?? | Good |
| ?? | 3.0.2 | Fedora 11 | ?? | Good |
| Nov. 2 2017 | 5.2.0 | Windows 10 | 6.0-r3 32/64 bit | Good |
Downloading
Download an ISO of Android-x86 from here.
Caution
Create a new VM
If you have not already created a VirtualBox virtual machine for Android-x86 yet, do so as follows:
- Click the «New» button, and name your new virtual machine however you like. Set Type to Linux, and Version to Linux 2.6 / 3.x / 4.x. Note that you should choose the appropriate bit type for the version of Android-x86 that you downloaded.
- Specify how much RAM will be allocated to your virtual machine when you run it. Android doesn’t specify a bare-minimum requirement for memory, just keep in mind what apps you plan on running. 2GB (2048MB) is a good place to start, and you can change this later if you need to.
- Create a new Hard disk image which will act as your machine’s storage. The recommended starting size of 8GB is enough. Click through the rest of the options for creating your Hard disk.
Your virtual machine has now been created. It still needs to be initially installed at this point.
Settings
Tested on VirtualBox 64-bit for Windows, version 5.2.0. Android-x86 version 6.0-r3, both 32-bit and 64-bit.
Select your machine, then click the Settings button and refer to the below recommended configuration to make sure your settings match.
- [System] Recommended: Processor(s) should be set above 1 if you have more than one virtual processor in your host system. Failure to do so means every single app (like Google Chrome) might crush if you try to use it.
- [Display] :
- Optional: Video Memory may be increased beyond the minimum selected automatically. The affects of this are unknown.
- Mandatory: Unless guest additions are installed [1] , change the default VMSVGA to VBoxVGA .
- Optional: Enable 3D Acceleration may be checked. The Linux Guest Additions must (VirtualBox v6.1+) / may (VirtualBox v6.0 and below) need to be installed [2][1] to get any benefit from this. Failure to do so means you won’t even be able to launch Android-X86 in the first place. [3]
- [Storage] Find the first «Empty» item (this should have an icon of a CD). In the Attributes, click on the CD icon with a small down arrow, and pick «Choose Optical Virtual Disk File. «. Specify the Android-x86 ISO that you downloaded.
- [Audio] Intel HD Audio seems to be natively supported in Android-x86.
- [Network] By default, your installation of Android-x86 will be able to automatically connect to the internet. If not, you can try to enable WiFi in Settings/Network & Internet, and connect to showing VirtWifi. If you do not want to connect to the internet in VirtualBox, uncheck Enable Network Adapter under the Adapter 1 tab.
Install
Click the green Start arrow to power-on your virtual machine. You’ll be presented with a list of options. Use the arrow keys to pick which one you want, then press Enter once the one you want is selected.
- If you don’t want to install Android-x86 yet and just want to test it, pick one of the Live CD options (except for Debug mode).
- Pick the Installation option if you want your system to be installed to the virtual hard drive.
If you want to use higher resolution, you can edit the boot option by pressing TAB, change vga=788 (800×600) to vga=791 (1024×768) or vga=794 (1280×1024), and press Enter. You can also use vga=ask to see all available modes. But please note Android will only work under 16-bit mode.
Partition
When you are prompted to Choose a partition:
- If you upgrade Android-x86 from a previous version, just select the existing partition. Agree to overwrite it when prompted.
- If this is a new VM, choose to Create/Modify partitions. Use Bootable but not GPT! This will cause the GRUB installation to fail later.
You may partition your disk however you see fit. If you just want a simple installation, create one partition taking up the entire disk and format it as ext4 .
Continue through the installation. You should install GRUB when it prompts you to. You may also leave /system as read and write when prompted.
Once the installation is complete, force close/shut down the virtual machine and remove the ISO from the virtual CD drive.
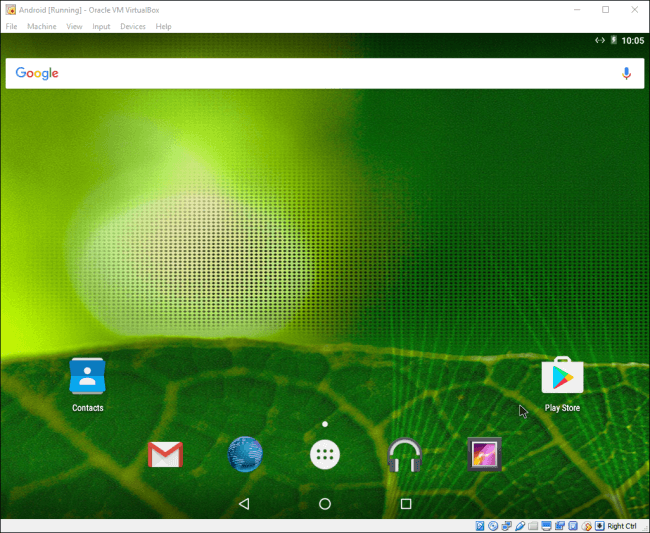
Finaly, start Android-x86. If it’s a new machine, once loaded you can perform the Android setup to begin using your machine.
Advanced
Custom partitions, SDCard
When booting Android-x86, you may specify which partitions represent the data and sdcard. On the boot menu, select an entry you would like to boot from, press TAB, then add the following as it suits your needs:
DATA=sda1 SDCARD=sda2 Press Enter to boot. These options specify user data (your setting, your uploaded applications, . ) go into /dev/sda1, and data saved in sdcard go into /dev/sda2.
If you build the ISO from source, you can add these options to bootable/newinstaller/boot/isolinux/isolinux.cfg.
Here is a note from David when using fdisk:
- Create a new virtual machine with a hard disk.
- Launch the Live ISO in Debug mode (I used android-x86-2.2-generic.iso) to get the commend prompt.
- «fdisk /dev/sda», then type:
- «n» (new partition)
- «p» (primary partition)
- «1» (1st partition)
- «1» (first cylinder)
- «xx» (choose the last cylinder, leaving room for a 2nd partition)
- «w» (write the partition)
- Repeat #3, but call it partition 2, and use the remaining cylinders.
- «mdev -s»
- «mke2fs -j -L DATA /dev/sda1»
- «mke2fs -j -L SDCARD /dev/sda2»
- Reboot («reboot -f»)
- At the boot menu, choose VESA, then hit TAB and type so that the end of the line reads: «DATA=sda1 SDCARD=sda2». (Only need for the generic target images, for VM target images, this is not needed)
- After booting (and of course disabling mouse integration via the machine menu), the SD card is read as unformatted, but you can format it by going to Settings > SD card & phone settings > Format SD Card, then Mount SD card.
- The SD card should now work!
Note: for the step 7, if you want to format to vfat only, then you can do :
Also remember the partition type has to be fat32 (b or c). By using vfat, the step 10 is not needed.
DevTools application has a MediaScanner which (re)indexes your SD card for cases where you manually copied media over. This ensures that you see new images and/or music in the apps without having to reboot.
If you downloaded it from within android, the application asks the relevant service to index new files.
Playing music
This section describes two ways to upload music files into Android running on a vbox so you can play them by the Music app. Of course, you can save the files to the virtual disk mounted at /sdcard, as described above.
Upload files by adb
Adb is Android Debug Bridge, a tool to debug Android system. If you compile from source, it is located in out/host/linux-x86/bin/adb. Otherwise you can get it from Android SDK. Suppose the network of your vbox is OK, you can upload a file from your host by
You need to know the ip of your vbox. You can get it by Alt-F1 and netcfg. You may also need to reboot Android to see the uploaded files. Of course in this way you have to mount /sdcard to a virtual disk partion.
For complex network settings of the VirtualBox VM, you should refer to Debug How To on how to connect adb to the VM.
Upload files by wget
You can also upload files by wget in the debug mode. In the debug mode shell, before entering Android,
Debug with adb
This section describes the way to debug Android with adb via network.
If we want to debug with adb via network, we should ensure the ip of vbox can be accessed by host machine. So we should change the Network Adapter type of vbox to Bridged Adapter. After starting the android-x86, we should follow the above Settings/[Network] section to ensure the network of android-x86 is enabled, and enable USB debugging in Settings/System/Developer Options. Then we can get the device ip from Settings/System/About tablet/IP address. For example, if we see the ip address is 192.168.0.116, then we can use following command to connect android-x86 in vbox from host machine.
Источник


