- Полноценное Python приложение на Android
- isortViewer
- Как это делалось
- Gradle plugin
- Basic setup
- Gradle plugin
- ABI selection
- buildPython
- Development
- Source code
- Startup
- Requirements
- Static proxy generator
- Packaging
- Data files
- Bytecode compilation
- Python standard library
- Unsupported modules
- multiprocessing
- Android Studio plugin
Полноценное Python приложение на Android

В этой статье я хотел бы рассказать о том, как создать полноценное приложение на Python для Android. Нет, это не очередной мануал для создания скрипта для sl4a, это мануал по созданию полноценного приложения с UI, возможностью собрать apk и выложить на Android Market. Заодно я хотел бы похвалиться своим первым приложением на google.play, это не hello world, а полезное приложение для фотографов, хотя и узко специализированное.
Начну рассказ пожалуй с самого приложения и завершу рассказам о том как оно делалось.
isortViewer
Мне как фотографу приходится тратить много времени на сортировку и отбор фотографий. Не всегда хочется сидеть за рабочим компьютером, когда под рукой есть ноутбук, смартфон или планшет, но копировать туда десятки гигабайт raw или jpeg файлов, а потом синхронизировать с рабочим компьютером — сомнительное удовольствие. Именно поэтому я создал программы isortManager и isortViewer, которые значительно облегчили мне работу по сортировке и отбору фотографий. Теперь заниматься отбором и сортировкой фотографий я могу лежа на пляже диване или скучая в пробке 🙂
Копипаст описания и пара скриншотов:
isortViewer — программа для фотографов, которая позволяет легко и быстрой отбирать и сортировать тысячи фотографий (raw или jpg) с фотосессий на ваших android смартфонах и планшетах. При этом, нет необходимости копировать десятки гигабайт jpg или raw файлов на устройство. Просто воспользуйтесь бесплатной программой isortManager для компьютера, которая сохранит все в один небольшой файл проекта:
1. Скачайте и запустите isortManager с официального сайта;
2. Создайте проект и добавьте папки с фотографиями. Поддерживаются форматы: jpg и raw (cr2, nef, orf и т.д.). В итоге у вас получится небольшой файл проекта (примерно 150 мб на несколько тысяч фотографий, будь то jpg или raw формат);
3. Скопируйте на ваше android устройство файл проекта, откройте в isortViewer. Вы можете помечать фотографии «на удаление», а так же, ставить рейтинги от 1 до 5 звезд;
4. После этого, скопируйте файл проекта обратно и примените изменения в isortManager. Кроме удаления выбранных фотографий, вы можете копировать или перемещать отмеченные фотографии. Например, фотографии с «5 звезд» можно скопировать в папку «шедевры», а «1 звезда» переместить в папку «хлам».
Приложение абсолютно бесплатно и доступно на google.play, однако донейты приветствуются.
Исходники доступны на официальном сайте!
Как это делалось
Так как python лучший язык программирования в мире кроме python я ничего не знаю, решено было написать приложение на python.
isortManager
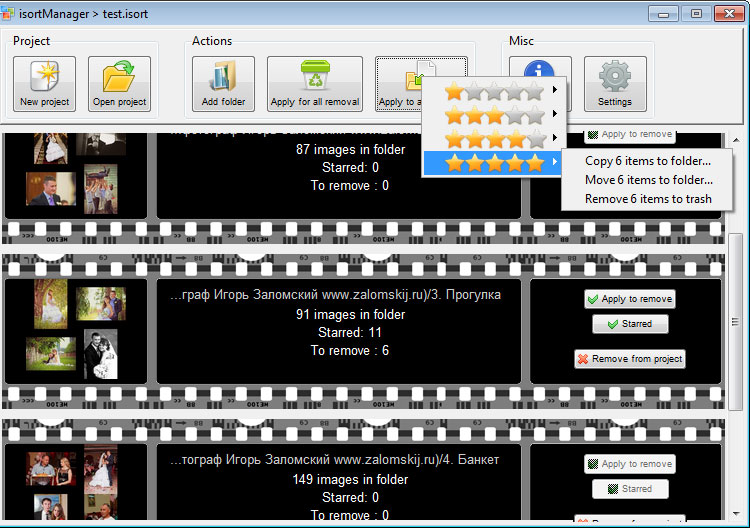
С isortManager для PC проблем не возникло, создание GUI сборки под windows уже давно обкатано и работает он очень просто: с помощью dcraw выдирает jpg превьюшки из raw файлов, ресайзит из с помощью PIL и складывает в один файл с достаточно простой структурой. Был изобретен свой весолипед с контейнером для хранения фотографий и метаданных (полный путь к фотографии, отметка «на удаление» и отметка рейтинга), так как, например, zip или tar формат, не могут изменять один файл в архиве (метаданные), требую перепаковки всех файлов. Файлы просто пишутся один за другим подряд и в блоке метаданных (обычный repr питоновского словаря) в конце сохраняется смещения начала файлов, плюс в конце файла пишется размер блока метаданных. GUI написано на Tkinter (люблю я его за быстроту написания и за малый размер итоговой сборки), вот собственно скриншот:
И да, все это работает и на linux, и даже быстрее чем на windows )
isortViewer для android
Всего я нашел два способа заставить python приложение работать как полноценное приложение на android, это pygame for android и проект kivy.
Pygame — более низкоуровневый, все UI пришлось бы рисовать вручную, что отняло бы много времени, поэтому был выбран фреймворк kivy. Итак:
Это замечательный фрейморк для написания приложение для windows, linux, MacOS, android и iOS. Поддерживается мультитач, UI рисутется через OpenGL, значит должно работать аппаратное ускорение. Увидеть работу виджетов можно установив демонстрационное приложение Kivy Showcase. Есть возможность использования некоторых платформо специфичных функций, например, вибро или акселерометр, с помощью модуля android.
Для разработки я бы рекомендовал использовать linux, тем более, apk собираются именно в этой OS.
Hello World выглядит так:
Причем этот код будет работать на всех заявленных платформах. Пропадает необходимость в тестировании приложения в эмуляторе. Достаточно запустить скрипт на исполнение в своей любимой IDE и увидеть результат на экране компьютера, без задержек на компиляцию, запуск эмулятора и пр. Если вы все же хотите увидеть как это будет выглядеть непосредственно на устройстве, просто установите Kivy Launcher, скопируйте файлы проекта на карту памяти и запустите. Дебажить при этом можно при помощи adb logcat.
Если вы используете библиотеку android, которой нет на PC, но хочется запускать приложение не только на android, воспользуйте такой конструкцией:
Сборка apk достаточно проста и описана на этой странице. После сборки релиза, достаточно подписать свое приложение (я использовал этот мануал) и выложить в google play.
Плюсы kivy:
- Быстрая разработка под различные платформы, практически без доработки кода.
- Доступен широкий выбор виджетов
- Высокая скорость работы. Весь ресурсоемкий вынесен в С модули. Сам интерпретатор python на android работает нативно.
- Фремворк включает в себя множество инструментов, например анимация, кеширование и пр.
- upd: Доступ к камере, буферу обмена, микрофону. Написать свой видеоплеер можно буквально за 20 строк.
Минусы kivy:
- Большой размер apk файла. Проект с 300 кб ресурсов (скрипты, графика) собирается в 7 мб apk. Хотя, думаю, есть возможность это как то оптимизировать.
- Невозможность (пока), восстанавливать работу после сворачивания — приложение закрывается
В следующей своей статье, я расскажу более подробно о процессе написания приложения «с нуля», расжевывая каждую строчку кода.
Хотелось бы сразу пресечь холивары на тему «для android только java, python не нужен». Я считаю, не важно, какие технологии «под капотом», главное чтоб приложение было качественным.
Сфера применения kivy может быть огромной. Сейчас на моем счету несколько приложений, написанных под заказ, где python с фремворком kivy показал себя с хорошей стороны. Например, ровно за один час, было написано приложение, для сети сервисных центров. Приложение работает в режиме киоска и установлено на дешевые китайские планшеты, которые висят в холле. Клиент набирает номер заказа, далее по WiFi планшет соединяется с сервером и сообщает статус заказа.
Источник
Gradle plugin
Chaquopy is distributed as a plugin for Android’s Gradle-based build system. It can be used in any app which meets the following requirements:
In your project’s top-level build.gradle file, the Android Gradle plugin version ( com.android.tools.build:gradle ) should be between 3.6 and 7.0. Older versions as far back as 2.2 are supported by older versions of Chaquopy .
minSdkVersion must be at least 16. Older versions as far back as 15 are supported by older versions of Chaquopy .
Basic setup
Gradle plugin
In the project’s top-level build.gradle file, add the Chaquopy Maven repository and dependency to the end of the existing repositories and dependencies blocks:
Then, in the module-level build.gradle file (usually in the app directory), apply the Chaquopy plugin at the top of the file, but after the Android plugin:
All other configuration will be done in this module-level build.gradle . The examples below will show the configuration within defaultConfig , but it can also be done within a product flavor.
The Chaquopy plugin can also be used in an Android library module (AAR). However, it can only be used in one module in a project: either in the app module, or in exactly one library module. Attempting to use it in multiple modules will give the error “More than one file was found with OS independent path”.
ABI selection
The Python interpreter is a native component, so you must use the abiFilters setting to specify which ABIs you want the app to support. The currently available ABIs are:
armeabi-v7a , supported by virtually all Android devices.
arm64-v8a , supported by most recent Android devices.
x86 , for the Android emulator.
x86_64 , for the Android emulator.
During development you’ll probably want to enable them all, i.e.:
There’s no need to actually install the NDK, as all of Chaquopy’s native libraries are already pre-compiled and stripped.
Each ABI will add several MB to the size of the app, plus the size of any native requirements . If you find this makes your app too large, see the FAQ .
buildPython
Some features require Python 3.5 or later to be available on the build machine. These features are indicated by a note in their documentation sections.
By default, Chaquopy will try to find Python on the PATH with the standard command for your operating system, first with a matching minor version, and then with a matching major version. For example, if Chaquopy’s own Python version is 3.8.x, then:
On Linux and Mac it will try python3.8 , then python3 .
On Windows, it will try py -3.8 , then py -3 .
If this doesn’t work for you, set your Python command using the buildPython setting. For example, on Windows you might use one of the following:
Development
Source code
By default, Chaquopy will look for Python source code in the python subdirectory of each source set. For example, the Python code for the main source set should go in src/main/python .
To include Python source code from other directories, use the android.sourceSets block. For example:
The setRoot method only takes effect on the standard Android directories. If you want to set the Python directory as well, you must do so explicitly, e.g.:
As with Java, it is usually an error if the source directories for a given build variant include multiple copies of the same filename. This is only permitted if the duplicate files are all empty, such as may happen with __init__.py .
Startup
It’s important to structure the app so that Python.start() is always called with an AndroidPlatform before attempting to run Python code. There are two basic ways to achieve this:
If the app always uses Python, then call Python.start() from a location which is guaranteed to run exactly once per process, such as Application.onCreate(). The easiest way to do this is to use PyApplication, or your own subclass of it. Simply add the following attribute to the element in AndroidManifest.xml :
Alternatively, if the app only sometimes uses Python, then call Python.start() after first checking whether it’s already been started:
Requirements
This feature requires Python on the build machine, which can be configured with the buildPython setting.
External Python packages may be built into the app using the pip block in build.gradle . Within this block, add install lines, which can take any of the forms accepted by pip install. For example:
In our most recent tests, Chaquopy could install over 90% of the top 1000 packages on PyPI. This includes almost all pure-Python packages, plus a constantly-growing selection of packages with native components. To see which native packages are currently available, you can browse the repository here. To request a package to be added or updated, or for any other problem with installing requirements, please visit our issue tracker.
To pass options to pip install , give them as a comma-separated list to the options setting. For example:
Any options in the pip documentation may be used, except for those which relate to the target environment, such as —target , —user or -e . If there are multiple options lines, they will be combined in the order given.
Static proxy generator
This feature requires Python on the build machine, which can be configured with the buildPython setting.
The static proxy feature allows a Python class to extend a Java class, or to be referenced directly in Java code or the AndroidManifest.xml file without going through the Java API.
To use this feature, write your Python classes using the syntax described in the “ Static proxy ” section, then list their containing modules in the build.gradle file as follows:
Packaging
Data files
Any data files in your source code and requirements will be automatically built into your app. You can read them at runtime using a path relative to __file__ .
For example, if the data file is in the same directory as the Python file:
You can then pass the filename to open , or any other function which reads a file.
If the data file and the Python file are in different directories, then change the path accordingly. For example, if the Python file is alpha/hello.py , and the data file is bravo/filename.txt , then replace filename.txt above with ../bravo/filename.txt .
Do not write any files to these directories at runtime, as they may be deleted when the app is upgraded. Instead, write files to os.environ[«HOME»] , as described in the “ os ” section.
Data files within a top-level package (i.e. a top-level directory containing an __init__.py file) will not be available until the first time that package is imported. All other data files will be available as soon as Python has started.
Bytecode compilation
This feature requires Python on the build machine, which can be configured with the buildPython setting.
Your app will start up faster if its Python code is compiled to .pyc format, so this is enabled by default.
Compilation prevents source code text from appearing in stack traces, so during development you may wish to disable it. There are individual settings for:
stdlib : the Python standard library
For example, to disable compilation of your local source code:
In the case of src and pip , your buildPython must use the same bytecode format as Chaquopy itself. Usually this means it must have the same minor version, e.g. if Chaquopy’s own Python version is 3.8.x, then buildPython can be any version of Python 3.8.
If the bytecode formats do not match, the build will continue with a warning, unless you’ve explicitly set one of the pyc settings to true . Your app will still work, but its code will have to be compiled on the target device, which means it will start up slower and use more storage space.
Python standard library
Chaquopy supports the entire Python standard library, except for the modules listed below. If you discover a problem with any other module, please let us know.
Unsupported modules
The following modules are unsupported because they require OS features which aren’t available on Android:
The following modules are unsupported because they require libraries which we don’t currently include:
multiprocessing
Because Android doesn’t support POSIX semaphores, most of the multiprocessing APIs will fail with the error “This platform lacks a functioning sem_open implementation”. The simplest solution is to edit your code to use multiprocessing.dummy instead.
os.environ[«HOME»] is set to your app’s internal storage directory. Any files or subdirectories created in this location will persist until the app is uninstalled.
If your app is debuggable, you can also read and write this directory from Android Studio using the Device File Explorer. Its path will be something like /data/data/your.application.id/files .
The ssl module is configured to use a copy of the CA bundle from certifi version 2021.5.30. The system CA store is not used.
sys.stdout and sys.stderr are redirected to the Logcat with the tags python.stdout and python.stderr respectively. The streams will produce one log line for each call to write() , which may result in lines being split up in the log. Lines may also be split if they exceed the Logcat message length limit of approximately 4000 bytes.
By default, sys.stdin always returns EOF. If you want to run some code which takes interactive text input, have a look at the console app template.
Android Studio plugin
To add Python editing suppport to the Android Studio user interface, you may optionally install the “Python Community Edition” plugin. However, Chaquopy isn’t integrated with this plugin, so you’ll see the warning “No Python interpreter configured for the module”, and your code will probably display many error indicators such as “Unresolved reference” and “No module named”. These are harmless: just go ahead and run your app, and if there really is an error, the details will be displayed in the Logcat.
Источник


