- Use AssistiveTouch on your iPhone, iPad, or iPod touch
- Turn on AssistiveTouch
- Use AssistiveTouch instead of gestures
- Use AssistiveTouch instead of pressing buttons
- Use AssistiveTouch for multi-finger gestures
- Customize the AssistiveTouch menu
- Use custom actions
- Create new gestures
- Connect a pointer device with AssistiveTouch
- Learn more
- Iphone buttons on screen
- System Buttons
- Toggle Buttons
- Pop-Up Buttons
- Pull-Down Buttons
Use AssistiveTouch on your iPhone, iPad, or iPod touch
You can use AssistiveTouch to adjust volume, lock your screen, use multi-finger gestures, restart your device, or replace pressing buttons with just a tap.
Turn on AssistiveTouch
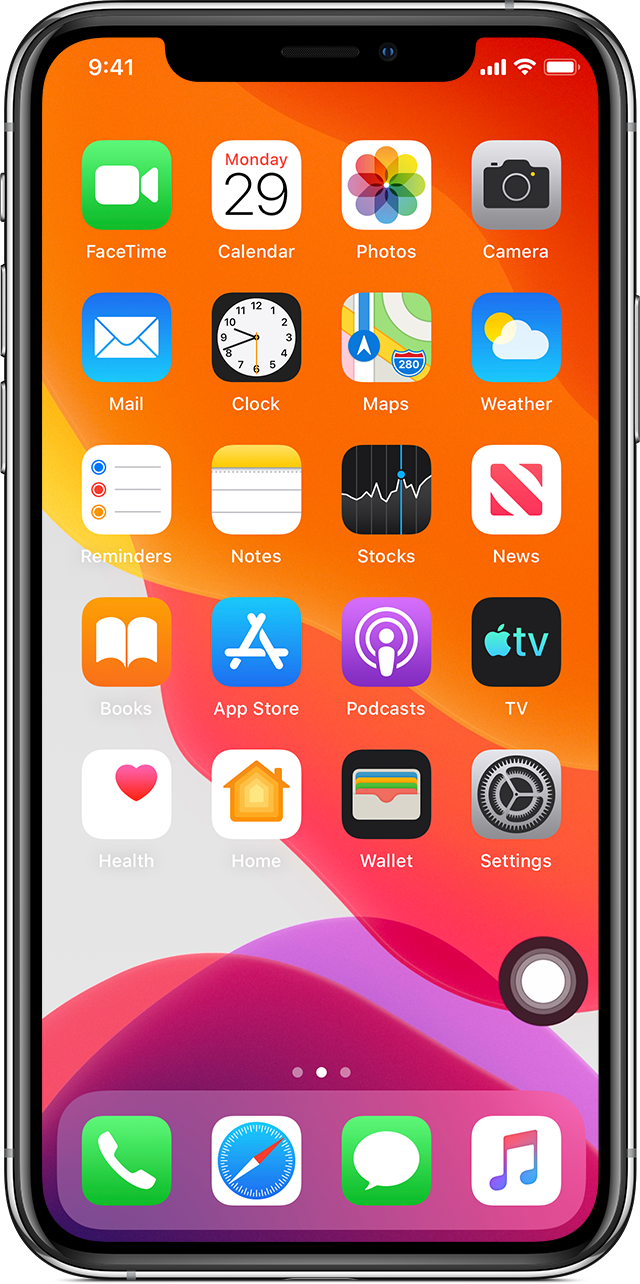
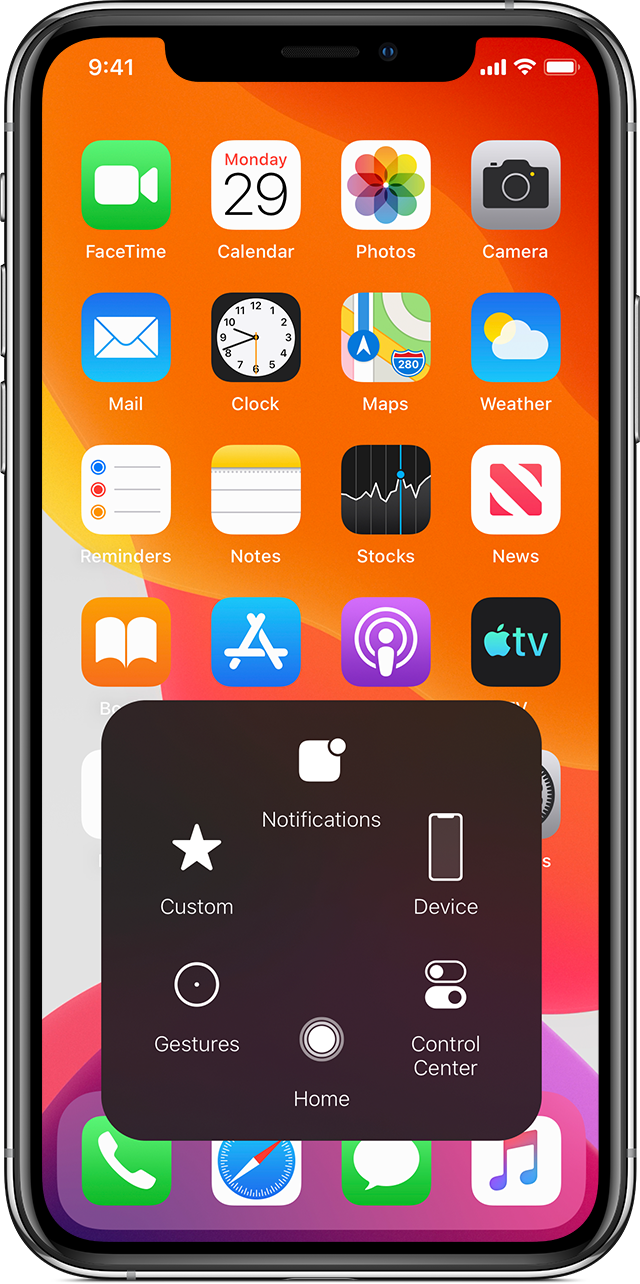
When you turn on AssistiveTouch, you’ll see a button appear onscreen. You can drag it to any edge of the screen, where it will stay until you move it again. By default, tapping the button once will open the AssistiveTouch menu. Tapping once anywhere outside of the menu will close it.
There are a few ways to turn on AssistiveTouch:
- Go to Settings > Accessibility > Touch, then select AssistiveTouch to turn it on.
- Use «Hey Siri» to say, “Turn on AssistiveTouch.”
- Go to Settings > Accessibility > Accessibility Shortcut and turn on AssistiveTouch.
AssistiveTouch can also be added to the Accessibility Shortcut for quick access from Control Center, or you can use the Side or Home button.
Use AssistiveTouch instead of gestures
Access menus and controls that require onscreen gestures like:
- Control Center
- Notification Center
- Spotlight
- Home
- App Switcher
- Speak Screen
Use AssistiveTouch instead of pressing buttons
The menu gives you access to functions that would otherwise be controlled by pressing physical buttons or moving the device. Here’s some of what you can do:
- Activate the Accessibility Shortcut
- Lock the screen
- Adjust the volume
- Summon Siri
- Restart the device
- Capture a screenshot
- Simulate shaking the device
Use AssistiveTouch for multi-finger gestures
- From the AssistiveTouch menu, select Device > More, then select Gestures.
- Choose between 2, 3, 4, or 5 finger input.
After making your selection, multiple dots appear on the screen indicating where the virtual fingertips are touching the screen. Moving one finger around the screen or performing taps will control all virtual fingertips at the same time. The virtual fingertips will automatically go away after a few moments of inactivity.
Customize the AssistiveTouch menu
To change the order, number, and contents of the buttons in the menu:
- Go to Settings > Accessibility > Touch, then select AssistiveTouch.
- Select Customize Top Level Menu, then tap an icon to reassign a different function to its position.
- Use the + and — buttons to change the number of buttons that appear in the menu.
Use the Reset button to erase your changes and restore the default menu settings.
Use custom actions
To assign an AssistiveTouch function to a single-tap, double-tap, or long press of the button:
- Go to Settings > Accessibility > Touch, then select AssistiveTouch.
- Under the Custom Actions heading, choose Single-Tap, Double-Tap, or Long Press.
- Choose an action from the list to assign to the gesture.
- Use the AssistiveTouch button to go back to Settings.
You can adjust the amount of time the actions can perform a double-tap, or how long the button must be held for a long press.
Create new gestures
You can record custom taps and swipes using the touchscreen and save them to the AssistiveTouch menu.
To create a new gesture:
- Go to Settings > Accessibility and select Touch.
- Select AssistiveTouch, then Create New Gesture.
- Recording starts automatically when you touch the ; so you can tap or swipe whenever you’re ready.
- When you’re finished, tap Stop.
To review your recorded gesture, press Play. If you want to re-record your gesture, tap Record. Press Save to name your gesture when you’re ready.
If you’re unable to perform a multi-finger gesture by using multiple fingers at the same time, you can record individual movements, and they’ll be grouped together. For example, draw two horizontal dots on the top half of the screen, and a half circle on the bottom of the screen, then press Stop. When you press play, all dots and lines will play at once.
Connect a pointer device with AssistiveTouch
With AssistiveTouch, you can connect an accessory — like a wired or bluetooth mouse or trackpad — to control the onscreen pointer on your device. Learn how to connect a pointer device to your iPhone, iPad, or iPod touch.
Learn more
Information about products not manufactured by Apple, or independent websites not controlled or tested by Apple, is provided without recommendation or endorsement. Apple assumes no responsibility with regard to the selection, performance, or use of third-party websites or products. Apple makes no representations regarding third-party website accuracy or reliability. Contact the vendor for additional information.
Источник
Iphone buttons on screen
The system offers a range of button styles that support extensive customization while providing built-in interaction states, accessibility support, and appearance adaptation. In addition, there are several system-defined button types — such as toggle, pop-up, and pull-down — that support a variety of specific use cases.
For developer guidance, see UIButton (UIKit) and Button (SwiftUI).
System Buttons
The system defines four button styles, each available in three sizes. Each style has a different level of visual prominence, helping you communicate a hierarchy of actions within your app.
You can configure a system button to use any combination of style and size. By default, a system button uses a size-specific corner radius and your app’s tint color. If necessary, you can change these attributes — in addition to attributes that control content layout and the presence of an activity indicator — in your button configuration. For developer guidance, see UIButton.Configuration.
Create button content that helps people instantly understand what the button does. You can use a glyph (or icon), a title, or both to communicate a button’s purpose. If a glyph makes sense in your button, consider using an existing or customized SF symbol (for guidance, see SF Symbols). To use text, create a short title that succinctly describes what the button does. Use title-style capitalization and a title that starts with a verb to help convey the button’s action — for example, a button that lets people add items to their shopping cart might use the title “Add to Cart.”
Include a subtitle if it provides useful details. A button can display a subtitle below its title. Because the subtitle uses a smaller text size than the title, it works well to communicate secondary information related the button’s action. For example, you might use the subtitle to update an “Add to Cart” button with the number of items in the cart. Avoid using a subtitle to explain more about what the button does; a button’s containing view, title, and image should provide all the information people need to understand its action.
Configure a button to display an activity indicator when you need to provide feedback about an action that doesn’t instantly complete. Displaying an activity indicator within a button can save space in your UI, while clearly communicating the reason for the delay. If it helps clarify what’s happening, you can also configure the button to display a different label alongside the activity indicator. For example, the label “Checkout” could change to “Checking out. ” while the activity indicator is visible. When a delay occurs after people tap your configured button, the system displays the activity indicator next to the original or alternative label, hiding the button image, if there is one. For developer guidance, see showsActivityIndicator.
Use a filled button for the most likely action in a view. The filled style is the most visually prominent, so it helps people quickly identify the action they’re most likely to want. At the same time, avoid using too many filled buttons in a view. Too many filled buttons can increase cognitive load because people must spend time comparing multiple likely options before making a choice.
Use style — not size — to visually distinguish the preferred choice among multiple options. When you use buttons of the same size to offer two or more options, you signal that the options form a coherent set of choices. If you want to highlight the preferred or most likely option in a set, use a more prominent button style for that option and a less prominent style for the remaining ones.
A system button can also have a role, which identifies the button’s semantic meaning within your app. A button can have one of the following roles:
- Normal. No specific meaning.
- Primary. The button is the default button — that is, the button people are most likely to choose.
- Cancel. The button cancels the current action.
- Destructive. The button performs an action that can result in data destruction.
A button’s role can have additional effects on the appearance you configure. For example, the system uses bold text for the title in a primary button, whereas a destructive button includes a red color. For developer guidance, see UIButton.Role (UIKit) and role (SwiftUI).
Assign the primary role to the button people are most likely to choose. A primary button should respond to the Return key, making it easy for people to quickly confirm their choice. In addition, when the button is in a temporary view — such as a sheet, an editing view, or an alert — assigning it the primary role means that the view can automatically close when people choose Return.
Don’t assign the primary role to a button that performs a destructive action, even if that action is the most likely choice. Because of its visual prominence, people sometimes choose a primary button without reading it first. Help people avoid losing content by assigning the primary role to nondestructive buttons.
Toggle Buttons
A toggle button is a type of system button that switches between a pair of opposing states, such as on and off or show and hide. To distinguish the states, a toggle button uses two different visual styles. For example, Calendar uses two background appearances for a toggle button that shows and hides the day’s events in the month view.
Calendar displays a solid background shape behind the toggle’s symbol to indicate that the day’s events are visible.
Calendar removes the solid background shape from the toggle to indicate that the day’s events are hidden.
NOTE A toggle button is similar in function to a switch, but you can use a toggle button outside of a list or table row and you don’t need to provide a label that explains its purpose.
Use a toggle button to help people manage the state of content or a view. In addition to using a toggle button to change the state of something, people expect the button to indicate their current selection. If you need to enable actions other than state management, use a system button or another specific button type, such as a pop-up or pull-down button.
Avoid relying solely on color to communicate a toggle button’s state. By default, a toggle button uses the app’s tint color to show that it’s on, and a different value of the color (or gray) to show that it’s off. If you customize a toggle button, make sure that everyone can perceive visual differences in the button’s state. For example, in addition to using high-contrast color values, you might include other visual changes, such as adding a background shape or varying the button’s content.
Pop-Up Buttons
A pop-up button is a type of system button that can display a menu of mutually exclusive options. After people choose an item from a pop-up button’s menu, the menu closes and the button can update its content to indicate the current selection.
Music uses a pop-up button to let people choose how to sort their playlists.
Use a pop-up button to present a flat list of mutually exclusive options or states. A pop-up button helps people make a choice that affects their content or the surrounding view. If you need to offer a list of actions, let people select multiple items, or provide a submenu, use a pull-down button instead.
Display a useful default selection. A closed pop-up button always displays the current selection, but if people haven’t made a selection yet, it displays the default item you specify. When possible, make the default selection an item that most people are likely to want.
Consider using a pop-up button when space is limited and you don’t need to display all options all the time. Although a segmented control also presents a set of mutually exclusive options, it generally requires more space than a pop-up button because it always displays every item.
Pull-Down Buttons
A pull-down button is a type of system button that can display a menu of items or actions that directly relate to the button’s purpose. After people choose an item in a pull-down button’s menu, the menu closes and your app performs the chosen action. People can also close the menu without choosing an item by tapping elsewhere on the screen. Unlike a pop-up button, a pull-down button always displays the same content, regardless of the menu item people choose.
Messages uses a pull-down button to present common editing actions.
NOTE You can also let people reveal a pull-down menu by performing a specific gesture on a button. For example, in iOS 14 and later, Safari responds to a touch and hold gesture on the Tabs button by displaying a menu of tab-related actions, like New Tab and Close All Tabs.
Use a pull-down button to present items that are directly related to the button’s action. The menu lets you help people clarify the button’s target or customize its behavior without requiring additional buttons in your interface. For example:
- An add button could present a menu that lets people specify the item they want to add.
- A sort button could use a menu to let people select an attribute on which to sort.
- A back button could let people choose a specific location to revisit instead of opening the previous one.
Avoid putting all of a view’s actions in one pull-down button. A view’s primary actions need to be easily discoverable, so you don’t want to hide them in a pull-down button. Putting too many actions in a pull-down button makes it less focused and means that people have to tap at least twice to do anything.
Consider using a More pull-down button to present items that don’t need prominent positions in the main interface. A More button can help you offer a range of items where space is constrained, but it can also hinder discoverability. Although people generally understand that a More button offers additional functionality related to the current context, the ellipsis glyph doesn’t help them predict its contents. To design an effective More button, weigh the convenience of its size against its impact on discoverability to find a balance that works in your app. Create a More button by using the ellipsis.circle symbol (see SF Symbols to learn more about symbols).
Files uses a More pull-down button to offer actions — like adding a folder or scanning a document — in addition to options for viewing and sorting the content.
Let people know when a pull-down button’s menu item is destructive, and ask them to confirm their intent. Menus use red text to highlight actions that you identify as potentially destructive. When people choose a destructive action, the system displays an action sheet (iOS) or popover (iPadOS) in which they can confirm their choice or cancel the action. Because an action sheet appears in a different location from the menu and requires deliberate dismissal, it can help people avoid losing data by mistake.
Use separators to visually group related items in a pull-down button’s menu. Creating visual groupings can help people scan a menu more quickly. For example, the More button in the Files app uses separators to help people distinguish actions that affect the content from items related to viewing and sorting. Using more than three groups in a menu can make it seem difficult to parse.
Include a glyph with a menu item when it provides value. If you need to clarify an item’s meaning, you can display a glyph or image after its title. Using an SF symbol for this purpose can help you provide a familiar experience while ensuring that the symbol remains aligned with the text at every scale.
Display a succinct menu title if it adds meaning. In general, a pull-down button’s content — combined with descriptive menu items — provides all the context people need, making a menu title unnecessary.
Consider using a submenu if it makes the main menu easier to understand and use. A submenu is a menu item that reveals its own menu when people choose it. After people choose an item in a submenu, the submenu closes, leaving the main menu open. Grouping closely related items into a submenu can shorten the main menu and make it easier to scan, although it requires an additional interaction to access the items. If you need to use a submenu, be sure to give it a title or glyph that clearly identifies its items so people don’t have to open it to find out what it contains.
Источник


