- Iphone gestures what do they do
- Standard Gestures
- Use gestures to navigate your iPhone with Face ID
- Learn the basics
- Power on or off
- Wake and sleep
- Use Siri
- Install apps
- Use Apple Pay
- Use intuitive gestures to get around
- Unlock and get to the Home screen
- Multitask
- Find widgets
- How to Track and Improve iPhone Gestures with Heatmaps
- Unresponsive gestures
- First gesture on each screen
- Last gesture on each screen
- Most common gestures per screen
- Least common gestures per screen
- Summary
- Use AssistiveTouch on your iPhone, iPad, or iPod touch
- Turn on AssistiveTouch
- Use AssistiveTouch instead of gestures
- Use AssistiveTouch instead of pressing buttons
- Use AssistiveTouch for multi-finger gestures
- Customize the AssistiveTouch menu
- Use custom actions
- Create new gestures
- Connect a pointer device with AssistiveTouch
- Learn more
Iphone gestures what do they do
People interact with an iOS device by performing gestures on the touchscreen. These gestures elicit a close personal connection with content and enhance the sense of direct manipulation of onscreen objects.
As a general rule, use standard gestures. People are familiar with the standard gestures and don’t appreciate being forced to learn different ways to do the same thing. In games and other immersive apps, custom gestures can be a fun part of the experience. In other apps, it’s best to use standard gestures so extra effort isn’t needed to discover or remember them.
Avoid using standard gestures to perform nonstandard actions. Unless your app is a game in active gameplay, redefining the meaning of standard gestures leads to confusion and complexity.
Avoid interfering with systemwide screen-edge gestures. Depending on the device, screen-edge gestures provide access to the Home screen, app switcher, Notification Center, Control Center, and Dock. People rely on these gestures to work in every app. In rare cases, immersive apps like games might require custom screen-edge gestures that take priority over the system’s gestures—the first swipe invokes the app-specific gesture and a second swipe invokes the system gesture. This behavior (known as edge protect) should be implemented sparingly, as it makes it harder for people to access the system-level actions. For developer guidance, see the preferredScreenEdgesDeferringSystemGestures property of UIViewController.
Offer shortcut gestures to supplement, not replace, interface-based navigation and actions. Whenever possible, offer a simple, visible way to navigate or perform an action, even if it means an extra tap or two. Many system apps include a navigation bar that provides a clear, tappable button back to the previous screen. But users can also navigate back by swiping from the side of the screen. On iPad, people can exit to the Home screen by pressing the Home button, or by using a four-finger pinching gesture.
Use multifinger gestures to enhance the experience of some apps. Although gestures involving multiple fingers at once aren’t appropriate for every app, they can enrich the experience in some apps, such as games and drawing apps. For example, a game might include multiple onscreen controls, such as a joystick and firing buttons, that can be operated simultaneously.
For developer guidance, see UIGestureRecognizer.
Standard Gestures
People generally expect the following standard gestures to work the same across the system and in every app.
Источник
Use gestures to navigate your iPhone with Face ID
Use gestures on your iPhone with Face ID to quickly navigate, multitask, adjust settings, and access all the things you do most.
Learn the basics
Use the Side button to turn on your iPhone, put it to sleep, use Siri, Apple Pay, and more.
Power on or off
To turn on, press and hold the Side button until the Apple Logo appears.
To turn off, simultaneously press and hold the Side button and either volume button until the slider appears, then slide to power off.
Wake and sleep
Raise to wake or tap to wake your iPhone.
To put your iPhone to sleep, press the Side button.
Use Siri
Say «Hey Siri.» Or press and hold the Side button.
Install apps
After selecting an app in the App Store, quickly double-click the Side button to install it.
Use Apple Pay
To authenticate purchases with Apple Pay using Face ID, double-click the Side button, then glance at your iPhone.

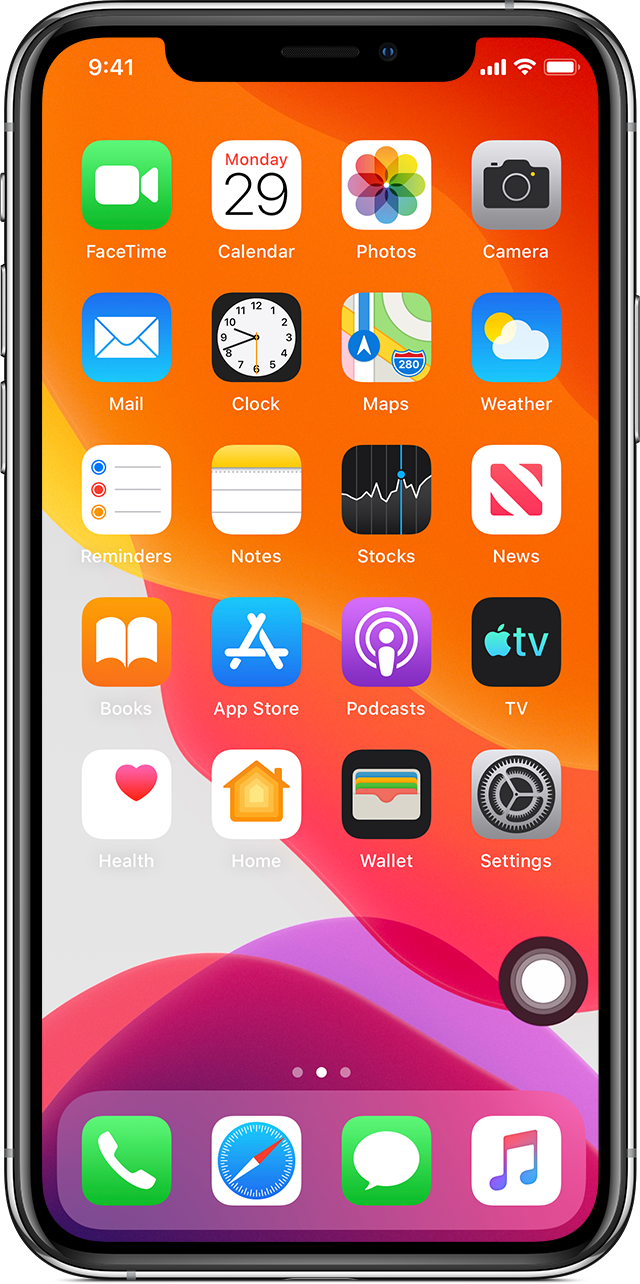
Use intuitive gestures to get around
To create a continuous surface, the Home button has been replaced with new ways to navigate.
Unlock and get to the Home screen
To unlock your iPhone with Face ID, glance at your iPhone, then swipe up from the bottom of the Lock Screen. Or if your iPhone is on a table or other flat surface, you can raise it or tap it to wake it.
To go to the Home Screen at any time, swipe up from the bottom edge of the screen.
![]()
Multitask

Swipe up from the bottom of the screen and pause. If you’re in an app, swipe right along the bottom edge of the screen to switch to another app.
Find widgets

To see information from apps you’ve added to widgets, swipe right from the Home or Lock Screen to go to Today View. You can also find widgets on your Home Screen if you added them there.
Источник
How to Track and Improve iPhone Gestures with Heatmaps

Jan 2, 2019 · 5 min read
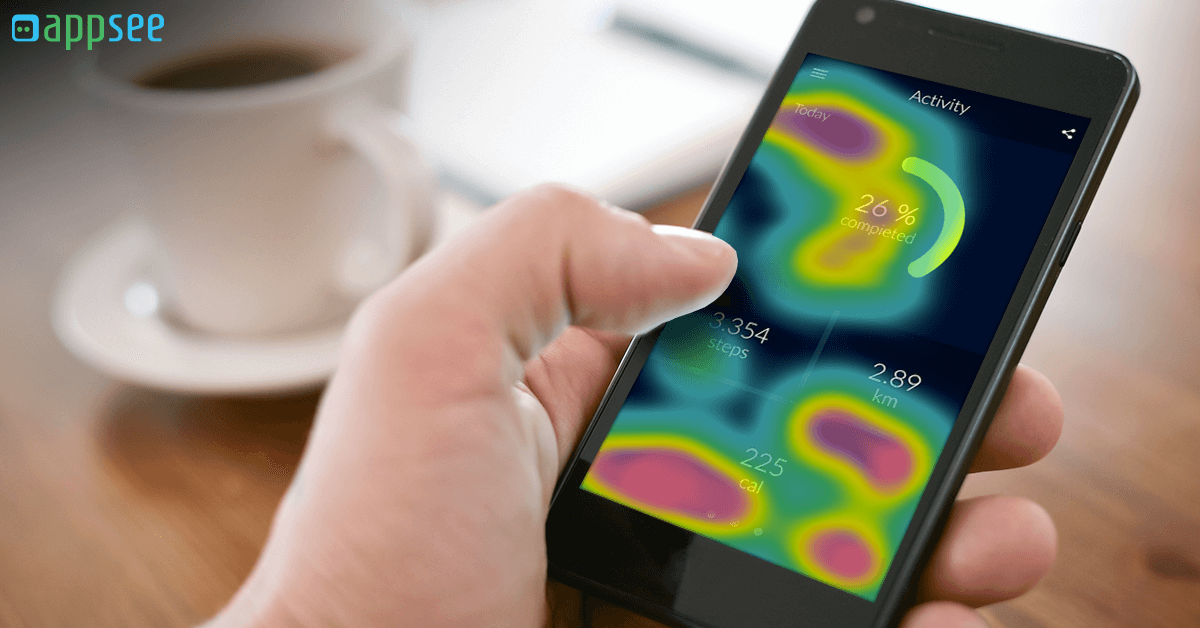
Ever since Apple swiped left on the home button and introduced new gestures instead, iPhone gestures have become more important than ever for mobile app design. Every iPhone gesture means something about your user: whether they know where to tap and how to navigate, what features they’re interested in, and what frustrates them. If you could see and understand these interactions, you’d know exactly how to make your app better and which UI elements need improvement. That’s where touch heatmaps come in.
Touch heatmaps are the mobile industry’s standard for assessing UI and the usability of iPhone gestures. They allow mobile teams to gain an in-depth understanding of user behavior at a glance: what areas users interact with most, what UI elements catch their attention first, and what causes them to quit or abandon the app. In Gartner’s recent Market Guide for Web and Mobile App Analytics, they are called a “struggle detection tool”.
How do mobile touch heatmaps work?
Touch heatmaps collect, measure, and aggregate every touch interaction users made on each screen of the app. Then, this aggregation is displayed on each screen in the form of a visual overlay of a gradient. Areas colored in blue represent areas with low user interaction, and areas colored in red show a high level of user interaction.
Here are five ways to use touch heatmaps to improve your mobile app’s iPhone gestures.
Unresponsive gestures

Unresponsive gestures is one of the most crucial metrics for iPhone gestures and user interface. Only some touch heatmap tools can measure them. Touch heatmaps can be filtered to show you iPhone gestures that were unresponsive and caused user frustration, helping you understand what design flaw is causing the problem. That way you can easily address them before the number of frustrated users grows and starts affecting your reviews and retention rates.
Unresponsive gestures can be a huge detriment to your app’s retention rates. They cause users to quit, kill, and ultimately abandon the app. Unresponsive gestures can happen because of a variety of factors. Sometimes users expect the app to behave in a certain way and their expectations are not met, for example they try to swipe to get to the next screen but the app screen doesn’t include such a function. Sometimes users think a certain element acts as a button when it does not.
First gesture on each screen

First impressions are important. They can make the difference between a first session after which the user abandons the app, or a first session that is the first of many. Understanding the first gesture, especially on onboarding screens, can help understand what users are looking for, improve navigation, and reduce app abandonment.
First gestures can elucidate your users’ natural impulses and the way they navigate and interact with your app’s features. If users’ first gestures on a certain screen are not what you expect, it may indicate a problem with the layout or buttons on that screen. It can also hint to you that users are looking for a specific feature, prompting you to highlight the features users desire most.
Last gesture on each screen

Gesture UX can have a huge effect on your app’s conversion and retention rates. By filtering iPhone gestures on a touch heatmap to show only the last gesture on each screen, you can see what users did just before they either moved on to the next screen, or quit the app. If the most common last gesture on a specific screen is not the one you’d expect or want the user to make, that might indicate a problem with your button design, layout, CTA, or navigation.
For example, in an eCommerce app, you would want users’ last gesture on the “My Cart” screen to be tapping the “pay now” button, to go to the checkout screen and convert. If users are not tapping the “pay now” button as their last gesture, you might want to think about optimizing your CTA button.
Most common gestures per screen

Are users behaving the way you intended them to behave? Without touch heatmaps, this would be a very difficult puzzle to solve. The color gradient of touch heatmaps means you can instantly recognize the most common iPhone gestures on any given screen. This function can tell you what catches users’ attention, what they expect your app to do, and what they think is the easiest way to accomplish the task they came to do. If the most common gesture isn’t what you thought it would be, this can help you improve layout and navigation.
Least common gestures per screen

If there’s one thing mobile apps lack, it’s screen real estate. Even though phones are getting bigger, mobile apps need to pack quite a punch into a relatively small space, but without cramming too many elements onto it. This means that every inch and every pixel of space needs to be carefully planned, designed and optimized. Now imagine that you’re trying to cram design elements onto an already-crowded screen, when your touch heatmap tool tells you that users don’t actually need one of those elements. Suddenly, a whole section of your screen is freed up! With touch heatmaps, you can easily see areas that get less attention.
Summary
Your users’ gestures provide a lot of hidden clues about your app’s usability, user interface, and iPhone gestures. The color spectrums of touch heatmaps illuminate these clues. Touch heatmaps enable you to instantly understand where users are tapping, which buttons are working best, and which parts of the interface are drawing users’ attention.
You can try the industry leading touch heatmaps yourself with Appsee .
To get more hacks for improving your app’s iPhone gestures, download this free Handbook for for Touch Heatmap Analytics .
Want another story? Here‘s one you’ll like:
Источник
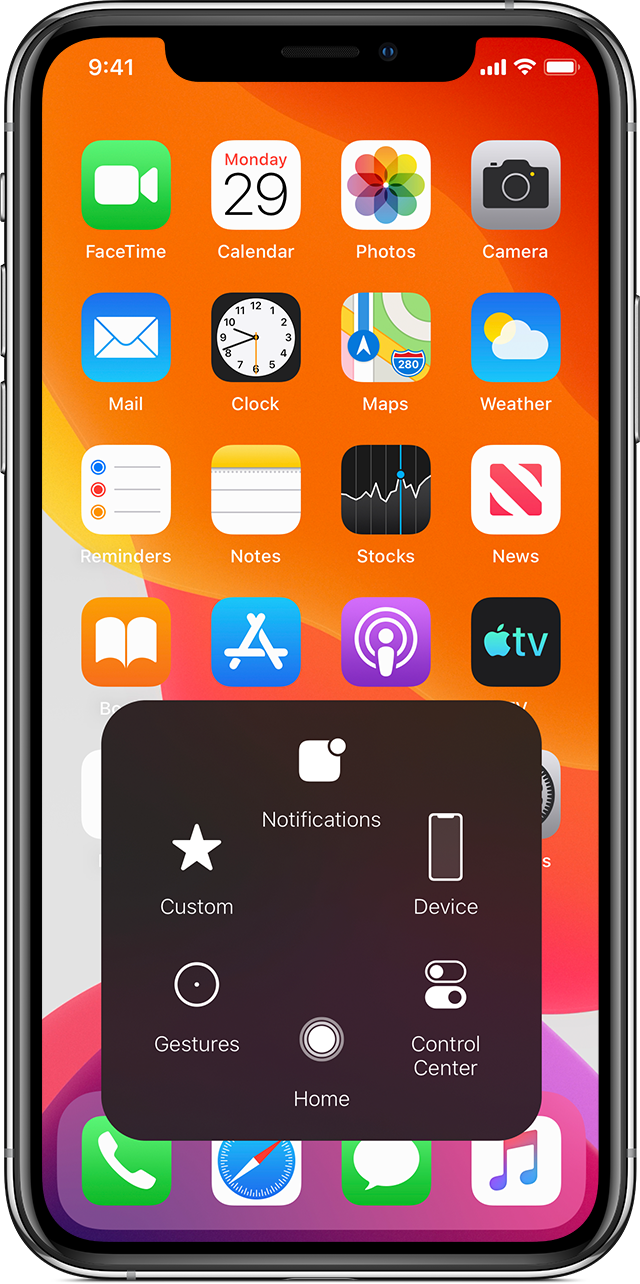
Use AssistiveTouch on your iPhone, iPad, or iPod touch
You can use AssistiveTouch to adjust volume, lock your screen, use multi-finger gestures, restart your device, or replace pressing buttons with just a tap.
Turn on AssistiveTouch
When you turn on AssistiveTouch, you’ll see a button appear onscreen. You can drag it to any edge of the screen, where it will stay until you move it again. By default, tapping the button once will open the AssistiveTouch menu. Tapping once anywhere outside of the menu will close it.
There are a few ways to turn on AssistiveTouch:
- Go to Settings > Accessibility > Touch, then select AssistiveTouch to turn it on.
- Use «Hey Siri» to say, “Turn on AssistiveTouch.”
- Go to Settings > Accessibility > Accessibility Shortcut and turn on AssistiveTouch.
AssistiveTouch can also be added to the Accessibility Shortcut for quick access from Control Center, or you can use the Side or Home button.
Use AssistiveTouch instead of gestures
Access menus and controls that require onscreen gestures like:
- Control Center
- Notification Center
- Spotlight
- Home
- App Switcher
- Speak Screen
Use AssistiveTouch instead of pressing buttons
The menu gives you access to functions that would otherwise be controlled by pressing physical buttons or moving the device. Here’s some of what you can do:
- Activate the Accessibility Shortcut
- Lock the screen
- Adjust the volume
- Summon Siri
- Restart the device
- Capture a screenshot
- Simulate shaking the device
Use AssistiveTouch for multi-finger gestures
- From the AssistiveTouch menu, select Device > More, then select Gestures.
- Choose between 2, 3, 4, or 5 finger input.
After making your selection, multiple dots appear on the screen indicating where the virtual fingertips are touching the screen. Moving one finger around the screen or performing taps will control all virtual fingertips at the same time. The virtual fingertips will automatically go away after a few moments of inactivity.
Customize the AssistiveTouch menu
To change the order, number, and contents of the buttons in the menu:
- Go to Settings > Accessibility > Touch, then select AssistiveTouch.
- Select Customize Top Level Menu, then tap an icon to reassign a different function to its position.
- Use the + and — buttons to change the number of buttons that appear in the menu.
Use the Reset button to erase your changes and restore the default menu settings.
Use custom actions
To assign an AssistiveTouch function to a single-tap, double-tap, or long press of the button:
- Go to Settings > Accessibility > Touch, then select AssistiveTouch.
- Under the Custom Actions heading, choose Single-Tap, Double-Tap, or Long Press.
- Choose an action from the list to assign to the gesture.
- Use the AssistiveTouch button to go back to Settings.
You can adjust the amount of time the actions can perform a double-tap, or how long the button must be held for a long press.
Create new gestures
You can record custom taps and swipes using the touchscreen and save them to the AssistiveTouch menu.
To create a new gesture:
- Go to Settings > Accessibility and select Touch.
- Select AssistiveTouch, then Create New Gesture.
- Recording starts automatically when you touch the ; so you can tap or swipe whenever you’re ready.
- When you’re finished, tap Stop.
To review your recorded gesture, press Play. If you want to re-record your gesture, tap Record. Press Save to name your gesture when you’re ready.
If you’re unable to perform a multi-finger gesture by using multiple fingers at the same time, you can record individual movements, and they’ll be grouped together. For example, draw two horizontal dots on the top half of the screen, and a half circle on the bottom of the screen, then press Stop. When you press play, all dots and lines will play at once.
Connect a pointer device with AssistiveTouch
With AssistiveTouch, you can connect an accessory — like a wired or bluetooth mouse or trackpad — to control the onscreen pointer on your device. Learn how to connect a pointer device to your iPhone, iPad, or iPod touch.
Learn more
Information about products not manufactured by Apple, or independent websites not controlled or tested by Apple, is provided without recommendation or endorsement. Apple assumes no responsibility with regard to the selection, performance, or use of third-party websites or products. Apple makes no representations regarding third-party website accuracy or reliability. Contact the vendor for additional information.
Источник


