- About cellular data roaming options for your iPhone and iPad
- Turn off Data Roaming or prepare for a trip
- Shop roaming plans with your carrier
- Shop roaming plans with eSIM and Apple SIM
- Buy or rent local SIM cards
- Check your data usage
- Get help when you have roaming issues during international travel
- Set up Apple Pay
- How to add a card for Apple Pay on your iPhone
- Add a new card on your iPhone
- Add a previous card on your iPhone
- How to add a card for Apple Pay on your Apple Watch
- Add a card for Apple Pay on your Apple Watch
- Add a card for Apple Pay with the Apple Watch app on your iPhone
- How to add a card for Apple Pay on your Mac or iPad
- What To Do If You Drop Your iPhone In Water
- Question: Q: iPhone X dropped into pool
- All replies
- I dropped my iPhone in the Pool (or toilet)-What should I do?
- Put it in Rice?
- Use a Fan
- Effects of Liquid Exposure
- Coverage Complexities
- Update
About cellular data roaming options for your iPhone and iPad
Turn data roaming on or off, prepare for international trips, and more.
Turn off Data Roaming or prepare for a trip
Need to avoid roaming charges because you arrived at your destination without an international data plan? Turn off Cellular Data and Data Roaming. 1,2 Open Settings and tap Cellular, or Cellular Data, or Mobile Data. Turn off Cellular Data, then tap Cellular Data Options and turn off Data Roaming.
Still planning your trip? Here are three ways to prepare:
Shop roaming plans with your carrier
Before you go: To avoid fees and higher rates, call your carrier or visit online to shop international roaming plans.
After arrival: Open Settings. Tap Cellular, or Cellular Data, or Mobile Data. Then tap Cellular Data Options and turn on Data Roaming and other settings suggested by your carrier.
Shop roaming plans with eSIM and Apple SIM
Before you go: If you have an iPad with an eSIM or Apple SIM, you can browse cellular data plans from select carriers in more than 90 countries, regions, and territories.
After arrival: Go to Settings > Cellular Data and buy a roaming plan that fits your needs.
Buy or rent local SIM cards
Before you go: You can usually 3 buy or rent a SIM card for a specific country or region. Learn more from travel guides and websites related to the country or region.
After arrival: Replace your current iPhone SIM card or iPad SIM card with the new one. You’ll need the original when you return home, so put your original in a safe place.
![]()
- When you turn off Cellular Data and Data Roaming, the cellular-data icon shouldn’t appear in the status bar. Learn more about cellular data settings and usage.
- Apple Watch Series 3 (GPS + Cellular) and Apple Watch Series 4 don’t support data roaming. While using data roaming on your iPhone, Apple Watch Series 3 (GPS + Cellular) or Apple Watch Series 4 will only be able to use Wi-Fi or your iPhone cellular connection.
- To use bought or rented SIM cards, you need an iPad (Wi-Fi + Cellular), unlocked iPhone, or SIM-free iPhone.

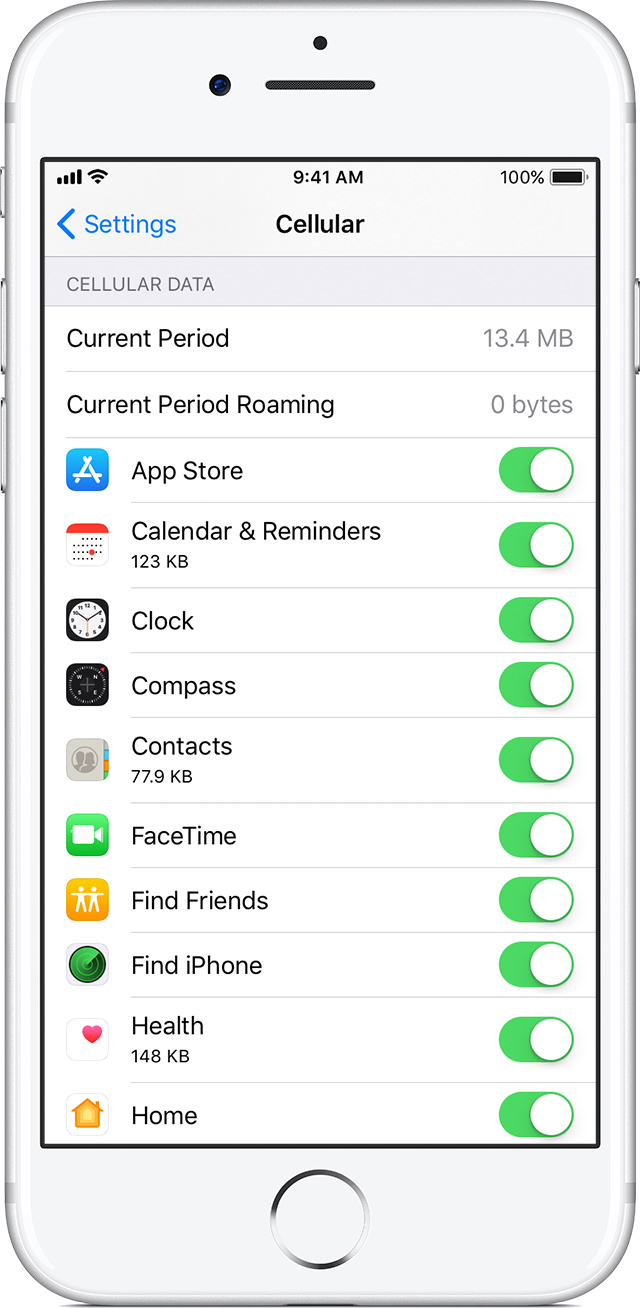
Check your data usage
If you exceed the data-usage limits of your international data plan, you might run out of data or notice slower network speeds. To check data usage, open Settings and tap Cellular, or Cellular Data, or Mobile Data. Then look under the Cellular Data heading.
Get help when you have roaming issues during international travel
- Turn on Airplane Mode for about 30 seconds. Then turn it off again and let your iPhone automatically select the best network.
- If you see No Service in the status bar of your iPhone, open Settings and tap Cellular, or Cellular Data, or Mobile Data. Tap Cellular Data Options and make sure that Data Roaming is on. Then, to check that international roaming is turned on for your account, contact your carrier.
- If the date and time are wrong after you arrive, go to Settings > General > Date & Time. Make sure that Set Automatically is turned on.
Still need help? If so, here’s what to do:
- Go to Settings > Cellular > Cellular Network and turn off Automatic. Wait until available networks appear, which might take two minutes.
- Tap the carrier that you want.
- Go back to the main Settings screen and wait for your iPhone or iPad to connect to the network.
- If you still need help, try a different SIM card or contact your carrier for more information.
Источник
Set up Apple Pay
To set up Apple Pay, add a credit, debit, or prepaid card to the Wallet app on your iPhone, Apple Watch, or other compatible device.
To use Apple Pay, you need:
- A compatible device 1 with the latest version of iOS or iPadOS, watchOS, or macOS.
- A supported card from a participating card issuer.
- An Apple ID signed in to iCloud 2 .
Learn if your country/region supports Apple Pay. To check if your card is compatible with Apple Pay, contact your card issuer.
How to add a card for Apple Pay on your iPhone
Add a new debit or credit card to the Wallet app, or add a card you previously used on a device associated with your Apple ID.
Add a new card on your iPhone
- In the Wallet app, tap the Add button .
- Tap Debit or Credit Card.
- Tap Continue.
- Follow the steps on the screen to add a new card. If prompted, choose your bank or card issuer from the list or find them using the search bar.
- Verify your information with your bank or card issuer. They might ask you to provide additional information or to download an app before approving your card for use with Apple Pay.
- If you have a paired Apple Watch, you have the option to also add the card to your watch.
Add a previous card on your iPhone
- In the Wallet app, tap the Add button .
- Tap Previous Cards to see cards that you previously added to the Wallet app.
- Choose the card or cards that you want to add and tap Continue.
- Follow the steps on the screen to add your card.
- If necessary, verify your information with your bank or card issuer. They might ask you to provide additional information or to download an app before approving your card for use with Apple Pay.
- If you have a paired Apple Watch, you have the option to also add the card to your watch.
Once you’ve added your card, you can start using Apple Pay.
To remove a card from the Previous Cards screen, tap Edit > Remove button > Delete. Then, tap Delete Card to confirm and remove the card from all your devices.
How to add a card for Apple Pay on your Apple Watch
You can add a new debit or credit card, or a card you previously used on a device associated with your Apple ID, directly on your Apple Watch. You can also add a card with the Apple Watch app on your paired iPhone.
Add a card for Apple Pay on your Apple Watch
- On your Apple Watch, open the Wallet app.
- Scroll down and tap Add Card.
- Tap Debit or Credit Card to add a new card, or tap Previous Card to choose a card that you previously added to the Wallet app.
- Tap Continue.
- Follow the steps on the screen to enter your card information and add your card.
- If necessary, verify your information with your bank or card issuer using the Apple Watch app on your paired iPhone. They might ask you to provide additional information or to download an app before approving your card for use with Apple Pay.
Apple Watches managed with Family Setup might not be able to add cards directly on the Apple Watch.
Add a card for Apple Pay with the Apple Watch app on your iPhone
- On your paired iPhone, open the Apple Watch app.
- In the My Watch tab, tap Wallet & Apple Pay.
- Tap Add Card.
- Tap Debit or Credit Card to add a new card, or tap Previous Card to choose a card that you previously added to the Wallet app.
- Tap Continue.
- Follow the steps on the screen to add your card.
- If necessary, verify your information with the bank or card issuer. They might ask you to provide additional information or to download an app before approving your card for use with Apple Pay.
Once you’ve added your card, you can start using Apple Pay.
How to add a card for Apple Pay on your Mac or iPad
- Open Wallet settings on your device.
- On your Mac model with Touch ID, go to System Preferences > Wallet & Apple Pay.
- On your iPad, go to Settings > Wallet & Apple Pay.
- Tap Add Card. 3,4
- Follow the steps on the screen to add a card.
- Verify your information with your bank or card issuer. They might ask for more information.
Once you’ve added your card, you can start using Apple Pay.
On Mac models without built-in Touch ID, you can complete your purchase using Apple Pay on your compatible iPhone or Apple Watch: On your iPhone, go to Settings > Wallet & Apple Pay and turn on Allow Payments on Mac.
![]()
- Make sure that you sign in to iCloud on all your devices. On your iOS device, you need to set up Face ID, Touch ID, or a passcode. On your Apple Watch, you need to set up a passcode. If you sign out of iCloud or remove your passcode, all credit, debit, prepaid, transit, and student ID card will be removed from that device.
- If you’re less than 13 years old, Apple Pay isn’t available and you can’t add a card in the Wallet app. Age varies by country or region.
- In China mainland, you can use Apple Pay on the web in Safari only on compatible iPhone and iPad models using iOS 11.2 or later. In the Netherlands, you can use Apple Pay on the web only on a compatible iPhone or iPad.
- In Italy, you can’t add Maestro cards to iPad or Mac. In Australia, you can’t add eftpos cards to your iPad or Mac. In the Netherlands, you can add Maestro cards to all compatible devices except Mac.
Information about products not manufactured by Apple, or independent websites not controlled or tested by Apple, is provided without recommendation or endorsement. Apple assumes no responsibility with regard to the selection, performance, or use of third-party websites or products. Apple makes no representations regarding third-party website accuracy or reliability. Contact the vendor for additional information.
Источник
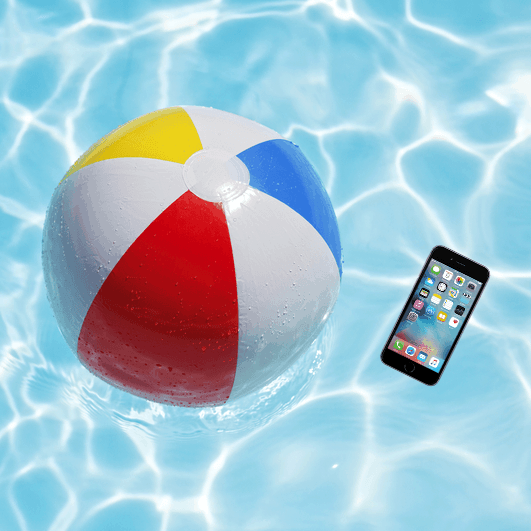
What To Do If You Drop Your iPhone In Water
![]()
If you ever happen to accidentally drop your iPhone in water then you will find the do-it-yourself procedure posted by iFixYouri useful, especially since warranties don’t cover water damage.
According to iFixYouri, a repair shop for iPhones, water damaged iPhone is one of the most common iPhone repair types.
Here is iFixYouri’s do-it-yourself (DIY) procedure:
It is imperative to remove the iPhone out of the water ASAP. Once the iPhone is out of the water, you want to make sure it is powered off.
If you get a white pinwheel on the screen and it won’t turn of, you hold down the power button and home button until it turns off. In the video we failed to record it powering back on after we powered it off. We simply repeated the ‘power off process’ and moved on to the next important step; remove the SIM card.
Once the SIM card is removed you want to put the iPhone in an uncooked bag of rice. Tighten the bag so all extra air is gone and seal it.
Wait 48 to 76 hours after the water exposure and then try it out. If you find at that time it is not functioning properly as a result of the iPhone water damage put back in the rice and mail it to iFixYouri who specialize in fixing water damaged iPhones.
You can also checkout the video demonstration of the procedure:
Hopefully we don’t have to use the procedure but in case you end up accidentally dropping your iPhone in water at least you now know how to deal with it.
Источник
Question: Q: iPhone X dropped into pool
What do I do about my IPhone X that fell into the pool for under a minute? I know they say it is ”waterproof” but I am still worried. I currently have it covered in rice. Any others with experience on this?
Posted on Jul 18, 2018 11:02 AM
It actually splash, water, and dust resistance and not waterproof.
Posted on Jul 18, 2018 11:05 AM
All replies
Loading page content
Page content loaded
no, they do not say it’s «waterproof». Not at all. It is water and splash resistant.
Make an appointment at the genius bar of your local Apple Store. You will have to pay for an out of warranty replacement.
Jul 18, 2018 11:03 AM
It is not waterproof. Nor does Apple claim it is.
It is water resistant to a certain degree and Apple explicitly warns against submerging it. See here:About splash, water, and dust resistance of iPhone 7 and later — Apple Support
To prevent liquid damage, avoid these:
- Swimming or bathing with your iPhone
- Exposing your iPhone to pressurized water or high velocity water, such as when showering, water skiing, wake boarding, surfing, jet skiing, and so on
- Using your iPhone in a sauna or steam room
- Intentionally submerging your iPhone in water
If water has leaked inside, it may have damaged the iPhone.
Water Damage is not covered under warranty.
Other than keeping it in rice for a couple of days, and hoping for the best, not much to do.
Источник
I dropped my iPhone in the Pool (or toilet)-What should I do?
 A colleague recently suffered an accident involving a submerged iPhone. This person had accidental damage coverage from the carrier and was wondering what steps to take upon initial submersion, and what the best options are for replacement.
Put it in Rice?
Rice is commonly recommended as the remedy for liquid-exposed electronics. The idea is that you can minimize or resolve liquid exposure damage by putting the wet device in a bag of rice. Following this strategy, the rice actually does help by drawing moisture out of the surrounding air, which helps the surrounding air absorb more moisture from the device.
The rice immersion technique has some drawbacks, however. It inhibits the circulation of surrounding air, which significantly diminishes the helpfulness of this strategy. In addition, rice dust and tiny rice bits can get in the device and cause potential new problems, especially when this debris interacts with moisture in the device.
On the other hand…it’s been suggested that as a cooking hack you might add phones to rice if you accidentally put too in much water. 😉
Use a Fan
Although Apple has no official recommendation for responding to liquid exposure, many of us who handled a lot of wet iPhones developed the opinion that a fan is a better strategy.
A fan blowing on the device will allow surrounding air to absorb more moisture from the device by constantly replacing the surrounding, moisture-absorbing air. I suppose this may not be as effective when it’s really humid out. In which case, maybe rice would be better. On second thought, maybe still skip the rice and just wait until it’s not so humid out, then use a fan. (It might seem obvious, but never use an oven.)
Apart from a few very small openings, most devices are sealed up relatively well, however, and neither the fan nor the rice will accelerate the drying time very dramatically over just letting the device sit and dry unassisted.
Effects of Liquid Exposure
Ultimately, neither method will likely have much effect on the outcome. The device either shorted when it got wet—in which case, it’s never going to work when it dries out. Or the device didn’t get shorted when it got wet. If it didn’t get shorted, there’s a decent chance it will work when the phone eventually dries out, whether you used a fan, rice or neither.
A short is when the liquid allows electrical current to flow to places where it shouldn’t, which causes damage to one or more of the components. This is the initial concern when an electronic device gets wet. The only way to prevent a short after liquid exposure is to power down the device immediately—not just put it in sleep or standby, but actually powering down. Then you want to make sure the device has dried out completely before trying to power it on again. This may take days. There’s no good way, short of opening the phone, to tell when it’s completely dry. The longer you wait the better. I usually advise several days in front of a fan.
Liquid-exposed components are likely to develop corrosion over time. Even if the phone powers back on after drying, there’s still the danger of corrosion developing in the areas that were exposed to liquid. It’s not uncommon for liquid-exposed devices to work after drying out, then start developing issues weeks or even months later. Speaker issues, charging issues, and other dock-related issues are common outcomes of corrosion that develops down the road after liquid exposure.
Here are a couple additional iPhone-specific points around this topic. Repair technicians can tell if an iPhone has been submerged. iPhones have liquid contact indicators (LCIs) that turn red when exposed to liquid. If you bring an iPhone in for warranty repair and the LCIs are “tripped,” the phone will be considered out of warranty, even if you argue that the phone got wet months ago and has been doing fine ever since it dried out.
If you bring a toilet-submerged iPhone in for help, let the technician know that it’s a “toilet phone” right off the bat. They’ll appreciate it and will know to don the rubber gloves before checking out your phone. They’ll also be more inclined to offer you all the leeway they can muster, in appreciation of your consideration. Technicians can tell if a device got wet. If you offer no explanation, they’ll have to guess what happened, and probably assume it’s a toilet phone you’re not telling them about.
Finally, make sure you know your Apple ID and password if you need to bring an iPhone in. Most phones are locked down with iCloud’s Find My iPhone feature. If you don’t know the Apple ID and password to turn this off, the technician won’t be able to help you recover and/or transfer your phone’s contents to a replacement.
Coverage Complexities
If you get your iPhone wet and you need to get it replaced or repaired, your options can be confusing.
All Apple products come with an automatic one-year warranty, covering issues that aren’t caused by accidental damage. Apple also offers AppleCare extended warranty coverage to extend the warranty to two years on phones and three years on computers. It also entitles you to free tech support for the same period.
It’s important to understand that AppleCare does not cover accidental damage. It’s a warranty extension, not insurance. With iPhones and iPads, it’s a bit different than computers. The iPhone/iPad extended coverage is called AppleCare+ (pronounced AppleCare plus), and it does allow for discounted replacements or repair for accidental damage. Neither AppleCare nor AppleCare+ offers any kind of coverage or discount to replace a lost or stolen phones or computers.
Most iPhone carriers (AT&T, Verizon, Sprint, etc.) also offer their own version of coverage. With these, customers commonly pay a monthly fee of around $10 – $20, which covers iPhones and iPads with discounted replacements or repairs.
Apple’s AppleCare+ will get you up to two replacements for accidental damage for $99 (at last check, this could change), but does not help at all if the phone is lost or stolen. In fact, AppleCare+, and the built-in warranty, are tied to the serial number of the device and not the owner. So people who found or stole an iPhone could still take advantage of the original owner’s AppleCare+.
Most carrier-provided coverage plans allow for a discounted replacement even if the phone is lost or stolen. Average replacement cost is about $199 though. Replacing a lost or stolen phone would otherwise start at $650 for the current-model iPhone.
Another caveat with carrier-provided coverage is what can happen to your Apple warranty if you get your iPhone replaced under this coverage. Many carrier coverage plans replace phones with rebuilt phones. These rebuilt phones commonly have a replacement display or replacement battery. Replacement of parts like this will void the Apple warranty (unless done by Apple or an Authorized Apple Service Provider).
The typical scenario seen at the Apple Store is, within the first year after buying a phone, a person loses his or her phone, or get it wet, and then has it replaced by their carrier’s coverage plan. At some point after replacement, still within the first year of purchase, some non-accidental issue would come up with the replacement phone. The person brings it into the carrier who tells the customer that, since they purchased their phone less than a year previously, they’re still covered by Apple’s warranty, and advises the customer to take it to Apple to have it replaced. The customer brings it to the Apple Store, where they open it and see third-party components and tell the customer that their phone’s warranty is void and that they need to have their carrier address the problem or pay Apple to address the issue out-of-warranty.
Bottom line is, if you get a replacement phone from your carrier, from that point out, you’ll likely have to deal with your carrier for any issues that come up with the phone.
Carrier coverage is nice peace of mind, although pricey. It really pays off if you lose your phone. For most people, however, the best option might be to get AppleCare+ and then deposit $11 per month to a savings account you set up to help pay for a lost or stolen phone should you ever need to.
Update
Starting with the iPhone 7, iPhones are now considered water-resistant. They come with an IP67 water-resistance rating, which means you should be able to submerge the device in up to one meter of water for as long as 30 minutes. So, an iPhone 7, 8, and X should now survive a dunk in the toilet, but there are some things to be aware of.
Apple states that the water-resistance can diminish over time through normal wear, so an older phone may not do as well after a dunking as a newer phone. Apple also advises against intentionally submerging your phone, or exposing it to high pressure water situations like surfing, jet skiing, or showering. In addition, salt water can corrode the seals and other external iPhone parts. The water resistance rating does not apply to salt water.
Be aware that Apple’s warranty does not cover liquid damage to the new water-resistant iPhones. If your phone stops working due to liquid exposure under any circumstances, repair or replacement will not be covered—even if you dunked it in a mere half meter of water for only 15 minutes.
In our original post we mentioned that Apple had no official recommendation for responding to liquid exposure. They do now. In an article describing water-resistance, they also now advise using a fan to dry out the phone.
Источник


