- Sign in with your Apple ID
- Sign in on your iPhone, iPad, or iPod touch
- Sign in on your Mac
- Sign in on Apple TV
- Sign in on apps and other devices
- Sign in to use Apple Music, the Apple TV app, and more on your other devices
- Sign in to use iCloud on your other devices
- Use Sign in with Apple on third-party apps and websites
- Learn more
- Use Live Text and Visual Look Up on your iPhone
- Use Live Text to get information in photos and images
- Copy text within a photo or image
- Make a call or send an email
- Translate text within a photo or image
- Find text on the web
- Use Visual Look Up to learn more about the objects in photos
- Block phone numbers, contacts, and emails on your iPhone, iPad, or iPod touch
- Block a phone number, contact, or email
- Phone
- FaceTime
- Messages
- Manage your blocked phone numbers, contacts, and emails
- Phone
- FaceTime
- Messages
- Filter messages from unknown senders
- Report spam or junk in the Messages app
- Use Memoji on your iPhone or iPad Pro
- How to create your Memoji
- How to create Memoji stickers
- How to use an animated Memoji in Messages
- How to use an animated Memoji in FaceTime
- Manage your Memoji
Sign in with your Apple ID
Your Apple ID is the account that you use to access all Apple services and make all of your devices work together seamlessly. After you log in, you can use the App Store, iCloud, iMessage, Apple Music, Apple TV+, and more.
Want to use Sign in with Apple on third-party apps or websites? Learn how to use Sign in with Apple.
Sign in on your iPhone, iPad, or iPod touch
Sign in on your Mac
Sign in on your Apple TV
Sign in on apps and other devices
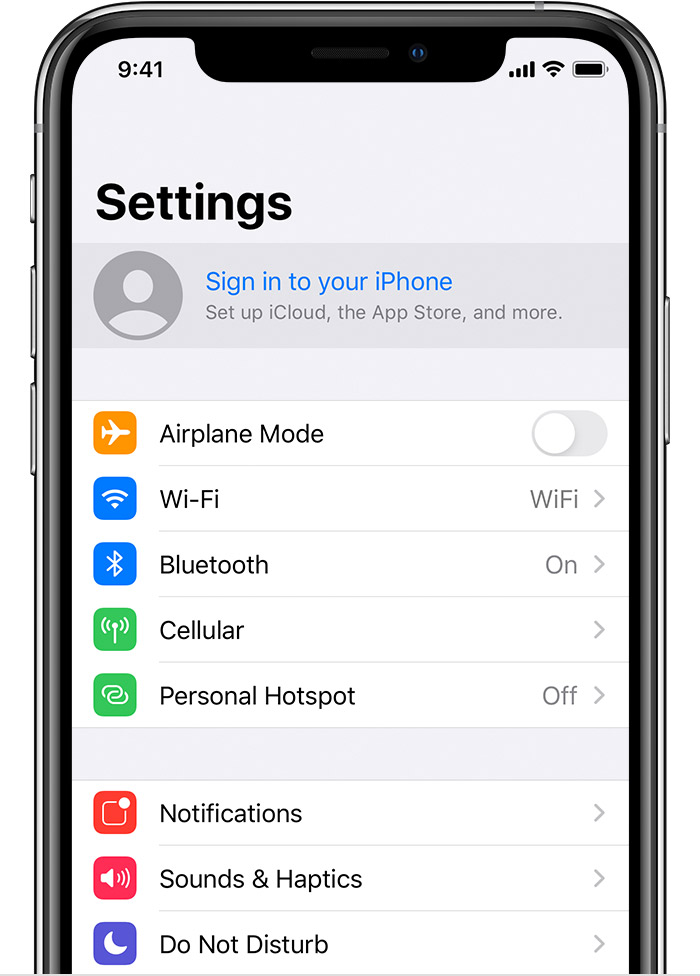
Sign in on your iPhone, iPad, or iPod touch
- Open the Settings app.
- Tap Sign in to your [device].

- Enter your Apple ID and password.
- If prompted, enter the six-digit verification code sent to your trusted device or phone number and complete sign in.
If you’re already signed in to iCloud on the iPhone paired with your Apple Watch, you will automatically be signed in to that Apple ID. Learn more about how to set up and sign in to your Apple Watch.
Sign in on your Mac
- Choose Apple menu > System Preferences.
- Click Sign In.
- Enter your Apple ID and password.
- If prompted, enter the six-digit verification code sent to your trusted device or phone number and complete sign in.
Sign in on Apple TV
- From the Home screen, choose Settings.
- Then choose Users and Accounts and select Add New User…
- Select Enter New…, then follow the on screen instructions.
If you use two-factor authentication on an Apple TV (2nd or 3rd generation), you might need to enter a verification code with your password. Learn how to get a verification code on your trusted device or sent to your trusted phone number.
Sign in on apps and other devices
You can use your Apple ID on some third-party devices to sign in to Apple services like Apple Music, the Apple TV app, and more.
Depending on your device, you might need to use an app-specific password.
Sign in to use Apple Music, the Apple TV app, and more on your other devices
You can sign in to Apple Music on Android, or sign in to the Apple TV app on your smart TV or streaming device.
On your Windows PC, you can sign in to iTunes for Windows to buy movies and TV shows, or listen to songs on Apple Music.
Sign in to use iCloud on your other devices
On your Windows PC, you can set up and sign in to iCloud for Windows to access photos, documents, and more.
You can also sign in to iCloud.com from your browser. Learn which iCloud.com features are available on your device.
Use Sign in with Apple on third-party apps and websites
If you see a Sign in with Apple button on a participating third-party app or website, you can use your existing Apple ID to quickly set up an account and sign in. Learn how to use Sign in with Apple.
When you sign in to the App Store and other media services for the first time, you might need to add a credit card or other payment information. You can’t sign in to the App Store and other media services with more than one Apple ID at the same time, or update the content you buy with a different Apple ID. Depending on how you created your Apple ID, you might be prompted to upgrade to two-factor authentication on an eligible device.
Learn more
- To view and manage your Apple ID account details on the web, sign in to appleid.apple.com.
- Learn more about where you can use your Apple ID.
- Learn how to manage your subscriptions to services like Apple Music or Apple TV+.
- If you have multiple Apple IDs, you can’t merge them.
Information about products not manufactured by Apple, or independent websites not controlled or tested by Apple, is provided without recommendation or endorsement. Apple assumes no responsibility with regard to the selection, performance, or use of third-party websites or products. Apple makes no representations regarding third-party website accuracy or reliability. Contact the vendor for additional information.
Источник
Use Live Text and Visual Look Up on your iPhone
With iOS 15, you can use Live Text to copy and share text within photos, translate languages, make a call, and more. And with Visual Look Up, it’s easy to identify objects found within your photos.
Use Live Text to get information in photos and images
Live Text recognizes useful information within your photos and online images, so you can make a call, send an email, or look up directions with just a tap on the highlighted text in a photo or an online image. You can also use Live Text in the Camera app — just point your iPhone camera at a photo or image with text, then tap the indicator icon . From here, you can quickly do things like make a phone call, translate the text, and more.
To turn on Live Text for all supported languages, go to Settings > General > Language & Region, and enable Live Text.
Live Text is currently supported in English, Chinese, French, Italian, German, Portuguese, and Spanish. You need an iPhone XS, iPhone XR, or later with iOS 15 to use Live Text.

Copy text within a photo or image
- Go to the Photos app and select a photo, or select an image online.
- Touch and hold a word and move the grab points to adjust the selection.
- Tap Copy. To select all the text in the photo, tap Select All.
After you copy text, you can paste it in another app or share it with someone. To highlight all text within a photo or image, select a photo or image, then tap the indicator icon in the lower-right corner of the photo.
![]()
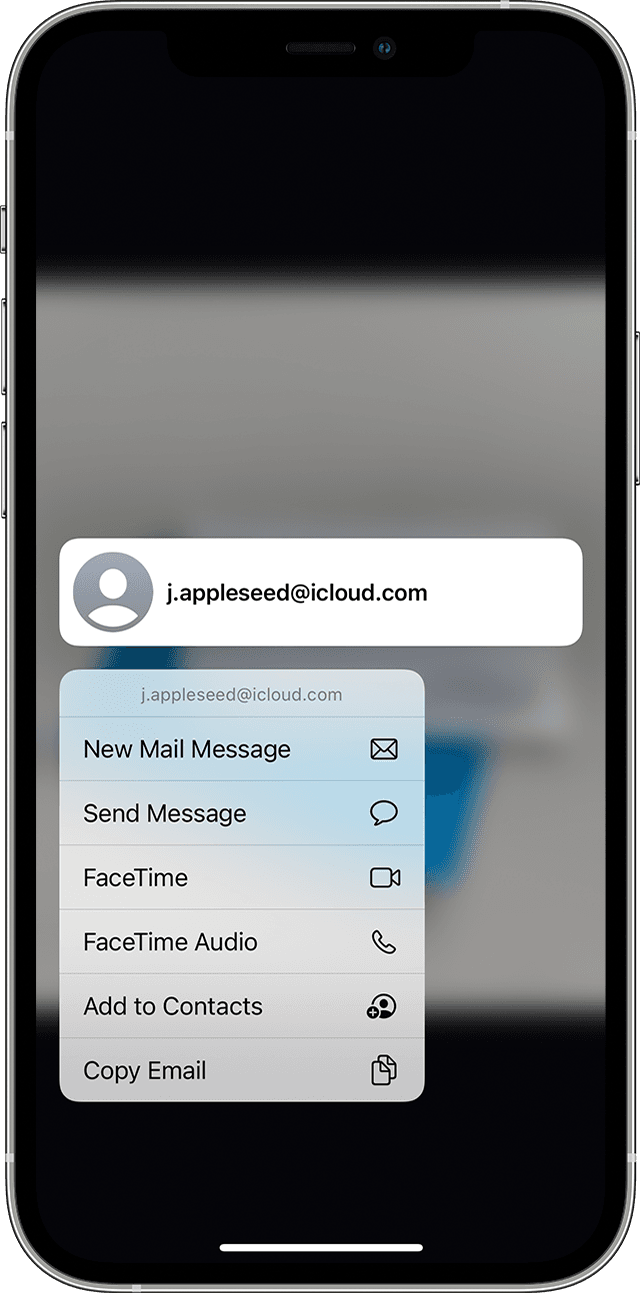
Make a call or send an email
- Go to the Photos app and select a photo, or select an image online.
- Tap the phone number or email address.
- Then tap Call or Send Message. Depending on the photo, image, or website, you might also see an option to Make a FaceTime call or Add to Contacts.
![]()
![]()
Translate text within a photo or image
- Go to the Photos app and select a photo, or select an image online.
- Touch and hold a word and move the grab points to adjust the selection.
- Tap Translate. You may need to tap Continue, then choose a language to translate in, or tap Change Language.
Translate is currently supported in English, Chinese, French, Italian, German, Portuguese, and Spanish.
![]()
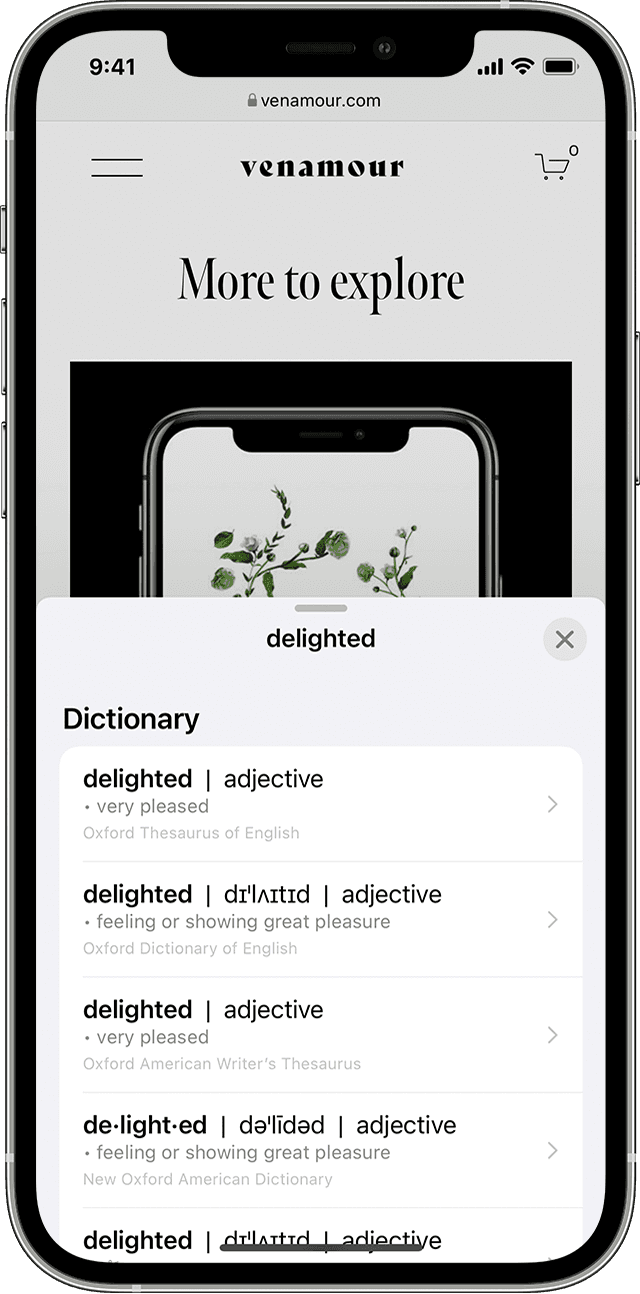
Find text on the web
- Go to the Photos app and select a photo, or select an image online.
- Touch and hold a word and move the grab points to adjust the selection.
- Tap Look Up.
After you tap Look Up, if you selected just one word, a dictionary appears. If you selected more than one word, you’ll see Siri Suggested Websites and other resources for the topic.
![]()
Use Visual Look Up to learn more about the objects in photos
With Visual Look Up, you can quickly learn more about popular landmarks, art, plants, pets, and other objects that appear in your photos or on the web. Here’s how:
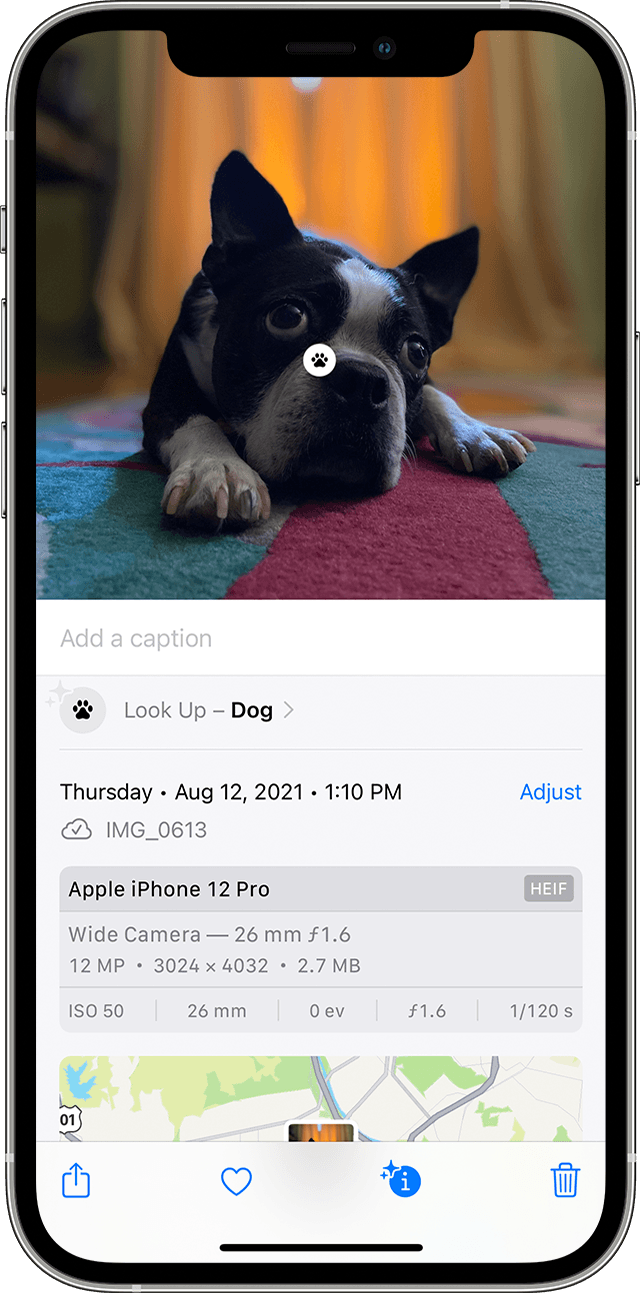
- Open a photo, then tap the Visual Look Up button .
- Tap the icon that appears in the photo or below the photo. For example, you might see a paw print icon for pets and animals, or a leaf icon for plants and flowers.
If you don’t see the Visual Look Up button , Visual Look Up isn’t available for that photo.
Источник
Block phone numbers, contacts, and emails on your iPhone, iPad, or iPod touch
You can block phone numbers, contacts, and emails on your device. You can also filter iMessages from unknown senders and report iMessages that look like spam or junk.
Block a phone number, contact, or email
There are a few ways that you can block phone numbers, contacts, and emails.
Phone
From the Phone app, tap Recents, then tap the Info button next to the phone number or contact that you want to block. Scroll down, then tap Block this Caller.
FaceTime
From the FaceTime app, tap the Info button next to the phone number, contact, or email address that you want to block. Scroll down, then tap Block this Caller.
![]()
Messages
From the Messages app, open the conversation, tap the contact at the top of the conversation. Tap the info button, scroll down, then tap Block this Caller.
From the Mail app, open the email that has the contact that you want to block, then tap the contact at the top. Tap Block this Contact.
When you block a phone number or contact, they can still leave a voicemail, but you won’t get a notification. Messages that are sent or received won’t be delivered. Also, the contact won’t get a notification that the call or message was blocked. When you block an email address from Mail, it goes to the trash folder. Email blocking works across all your Apple devices.

Manage your blocked phone numbers, contacts, and emails
To see the phone numbers, contacts, and email addresses that you’ve blocked from Phone, FaceTime, Messages, or Mail:
Phone
Go to Settings > Phone and tap Blocked Contacts to see the list.
FaceTime
Go to Settings > FaceTime. Under Calls, tap Blocked Contacts.
![]()
Messages
Go to Settings > Messages. Under SMS/MMS, tap Blocked Contacts.
Go to Settings > Mail. Under Threading, tap Blocked.
Filter messages from unknown senders
You can filter messages from people who aren’t saved in your Contacts.
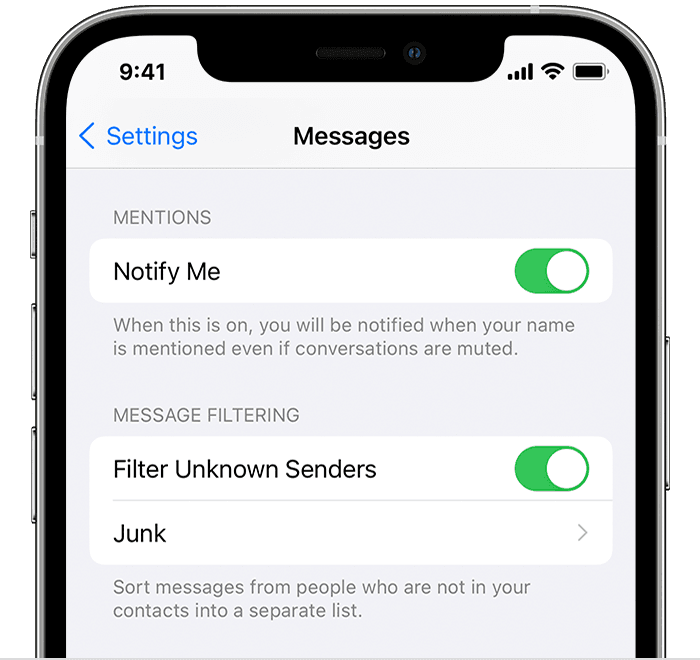
To filter messages, go to Settings > Messages, scroll down and turn on Filter Unknown Senders.
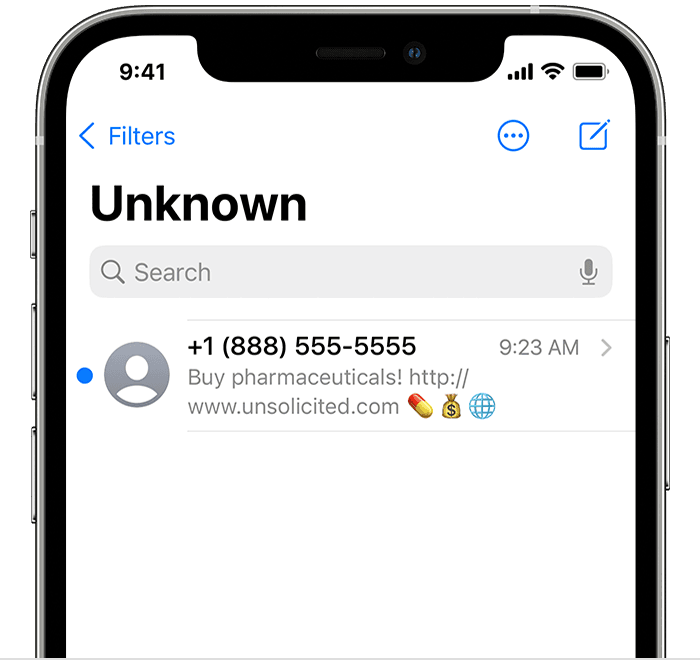
In Messages, tap Filters, then tap Unknown Senders. You won’t get notifications for these messages.
Report spam or junk in the Messages app
You can report iMessages that look like spam or junk from the Messages app. If you get an iMessage from someone who’s not saved in your Contacts, you’ll see a Report Junk link under the message.
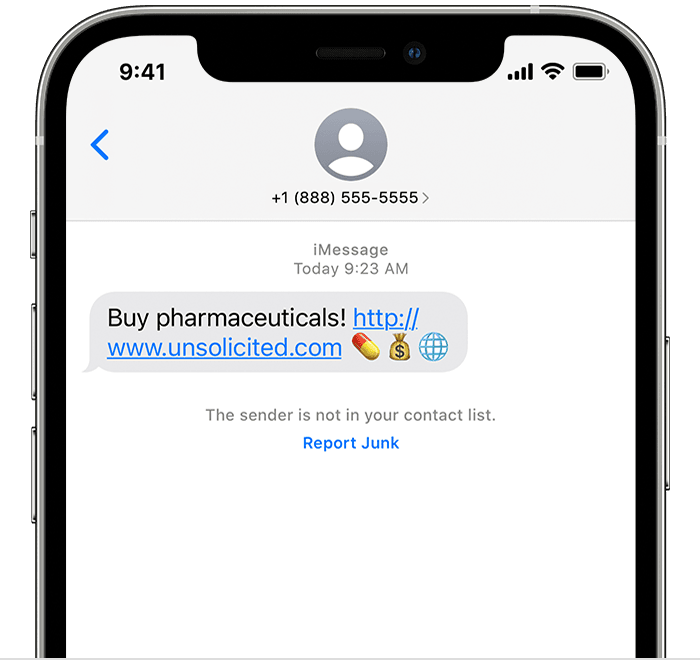
Tap Report Junk, then tap Delete and Report Junk. Messages will forward the sender’s information and the message to Apple, as well as delete the message from your device. You can’t undo deleting a message.
Reporting junk doesn’t block the sender from being able to send another message. If you don’t want to receive these messages, you need to block the contact.
To report SMS and MMS messages, contact your carrier.
Источник
Use Memoji on your iPhone or iPad Pro
You can create a Memoji to match your personality and mood, then send it in Messages and FaceTime. And with a compatible iPhone or iPad Pro, you can create an animated Memoji that uses your voice and mirrors your facial expressions.

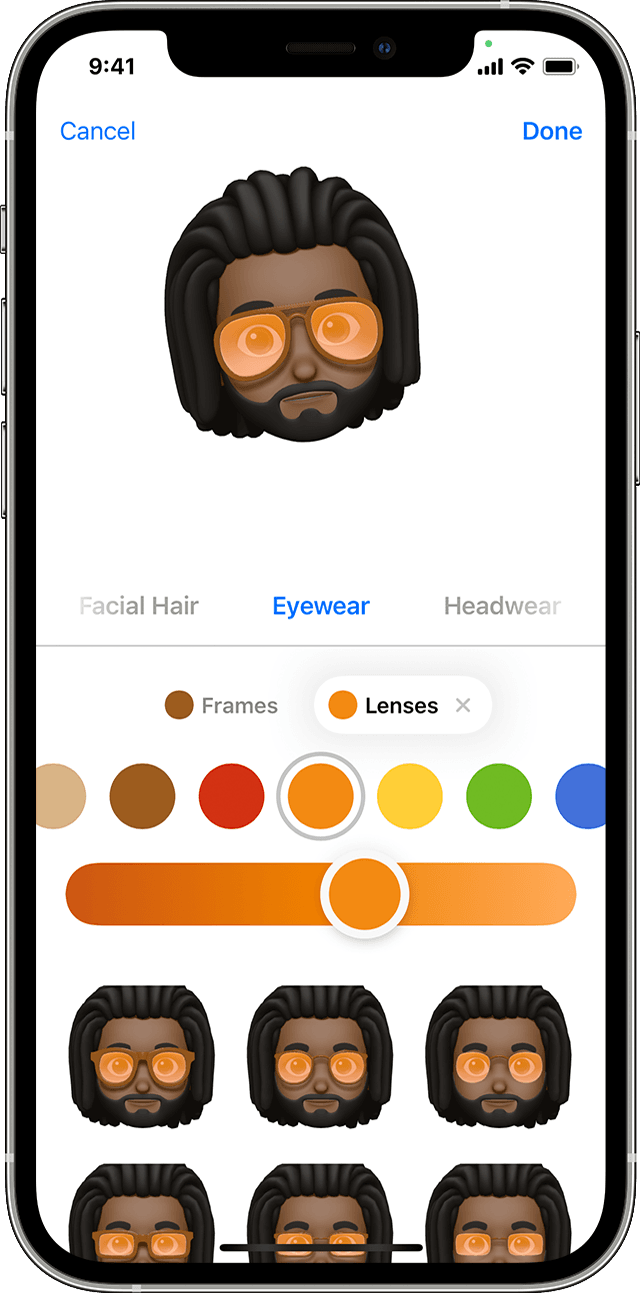
How to create your Memoji
- Open Messages and tap the Compose button to start a new message. Or go to an existing conversation.
- Tap the Memoji button , then swipe right and tap the New Memoji button.
- Customize the features of your memoji — like skin tone, hairstyle, eyes, and more.
- Tap Done.
![]()
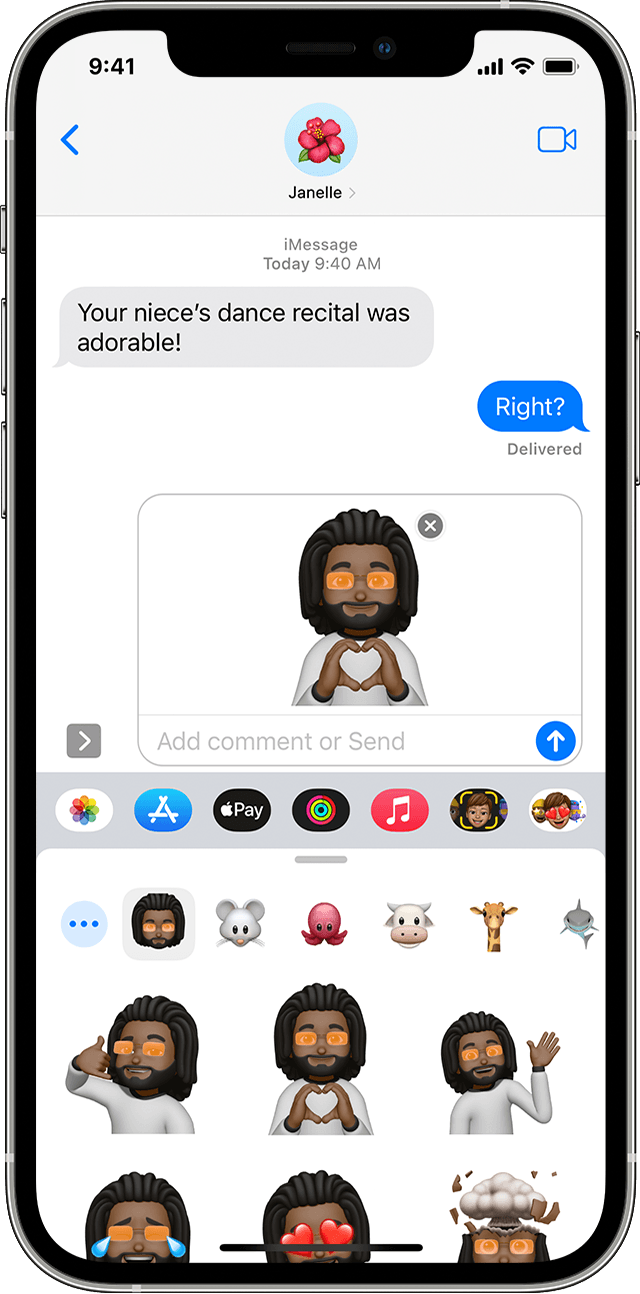
How to create Memoji stickers
Your Memoji automatically become sticker packs that live in your keyboard and you can use them in Messages, Mail, and some third-party apps.
Here’s how to create a Memoji sticker:
- Create your Memoji.
- Open the keyboard, then tap the Memoji Stickers button .
- Select the sticker that you want to send.
- Tap the Send button .
Memoji Stickers aren’t supported on iPad Air 2.
![]()
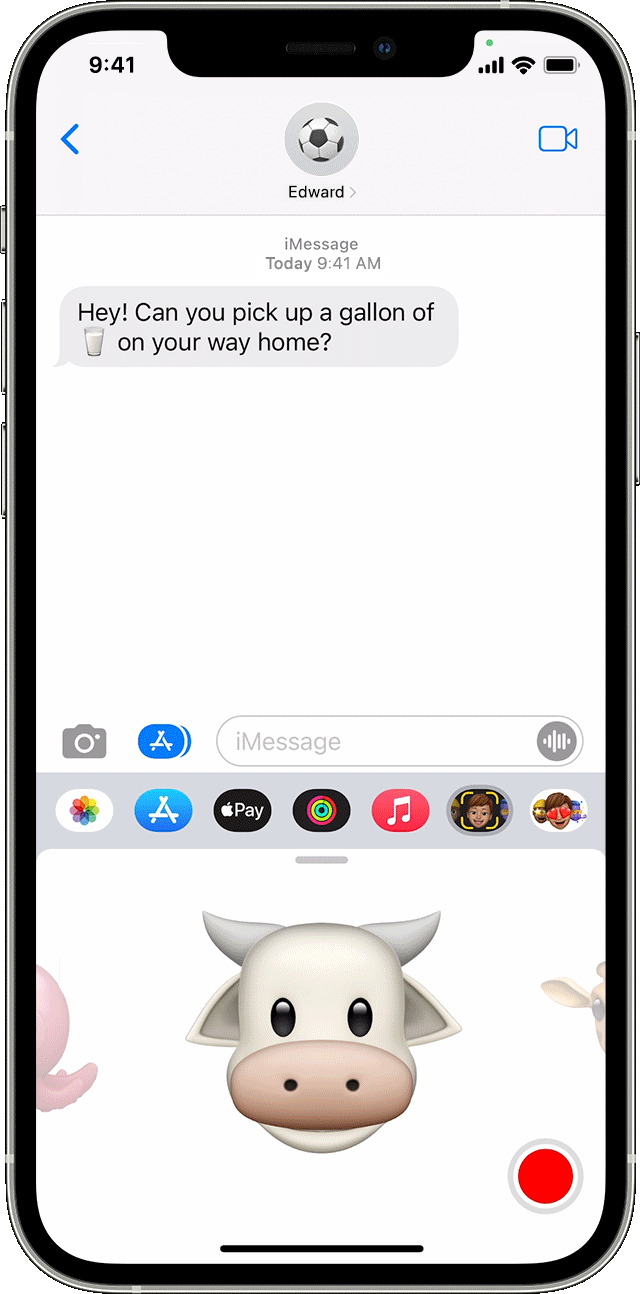
How to use an animated Memoji in Messages
- Make sure that you have a compatible iPhone or iPad Pro.
- Open Messages and tap the Compose button to start a new message. Or go to an existing conversation.
- Tap the Memoji button , then swipe left to pick your Memoji.
- Tap the Record button to record and to stop. You can record for up to 30 seconds. To choose a different Memoji with the same recording, tap another Memoji that you created. To create a Memoji sticker, touch and hold the Memoji and drag it to the message thread. To delete a Memoji, tap the Trash button .
- Tap the Send button .
![]()
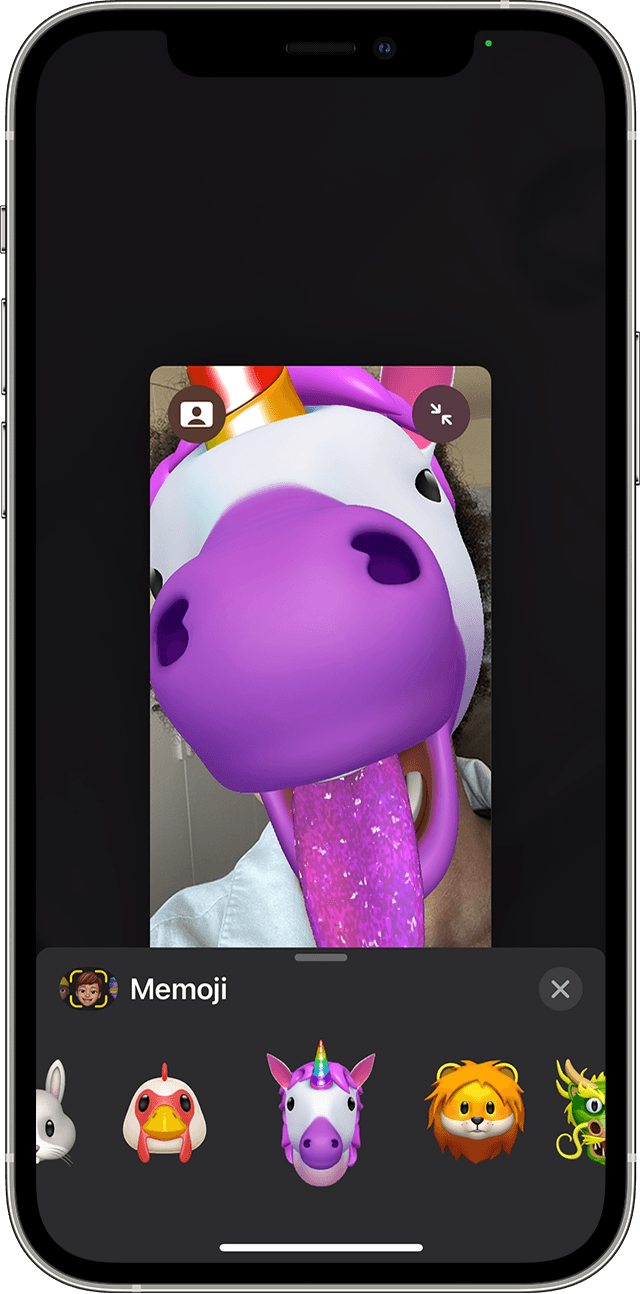
How to use an animated Memoji in FaceTime
- Make sure that you have a compatible iPhone or iPad Pro.
- Open FaceTime and make a call.
- When the call starts, tap the Effects button .
- Tap the Memoji that you want to use.
- Continue your FaceTime call with your customized Memoji. Or tap the Close button to continue without a Memoji or go back to the FaceTime menu.
To change your Memoji or to remove it during a FaceTime call, repeat steps 2-4.
Manage your Memoji
Want to change a Memoji that you already created? You can edit the features, duplicate an existing Memoji with new features, or delete a Memoji.
- Open Messages and tap the Compose button to start a new message. Or go to an existing conversation.
- Tap the Memoji button or Memoji Stickers button , then select the Memoji that you want.
- Tap the More button . Then choose Edit, Duplicate, or Delete.
If you want your Memoji on all of your compatible devices, you need two-factor authentication enabled for your Apple ID, and you need to be signed into iCloud with the same Apple ID on all the devices. You also need to have iCloud Drive turned on. Go to Settings > [Your Name] > iCloud > iCloud Drive.
To use an animated Memoji, you need a compatible iPhone or iPad Pro.
Источник


