- Пишем первое приложение для Android
- Установка необходимых программ и утилит
- Запуск виртуального устройства
- Список устройств
- Создание проекта
- Структура проекта
- Первые строки
- Square.java
- Player.java
- Game.java
- Определение победителя
- WinnerCheckerHorizontal.java
- WinnerCheckerVertical.java
- WinnerCheckerDiagonalLeft.java
- WinnerCheckerDiagonalRight.java
- Видео готового приложения
- Как сделать приложение для Android самостоятельно
- Необходимые инструменты
- Из чего состоит приложение на Android
- Создаём Android-приложение в Android Studio
- Шаг 1
- Шаг 2
- Шаг 3
- Шаг 4
- Build Your First Android App in Java
- 1. Welcome!
- What you must know already
- What you’ll learn
- Use Android Studio and Java to write Android apps
- Note: This version of the codelab requires Android Studio 3.6 or higher.
- 2. Install Android Studio
- Note: This version of the codelab requires Android Studio 3.6 or higher.
- 3. Task: Create your first project
- What you’ll learn
- Step 1: Create a new project
- Step 2: Get your screen set up
- Step 3: Explore the project structure and layout
- Step 4: Create a virtual device (emulator)
- Step 5: Run your app on your new emulator
Пишем первое приложение для Android
В любом деле самое сложное — это начало. Часто бывает тяжело войти в контекст, с чем столкнулся и я, решив разработать свое первое Android-приложение. Настоящая статья для тех, кто хочет начать, но не знает с чего.
Статья затронет весь цикл разработки приложения. Вместе мы напишем простенькую игру “Крестики-Нолики” с одним экраном (в ОС Android это называется Activity).
Отсутствие опыта разработки на языке Java не должно стать препятствием в освоении Android. Так, в примерах не будут использоваться специфичные для Java конструкции (или они будет минимизированы на столько, на сколько это возможно). Если Вы пишете, например, на PHP и знакомы с основополагающими принципами в разработке ПО, эта статья будет вам наиболее полезна. В свою очередь так как, я не являюсь экспертом по разработке на Java, можно предположить, что исходный код не претендует на лейбл “лучшие практики разработки на Java”.
Установка необходимых программ и утилит
Перечислю необходимые инструменты. Их 3:
- JDK — набор для разработки на языке Java;
- Android SDK and AVD Manager — набор утилит для разработки + эмулятор;
- IDE c поддержкой разработки для Android:
- Eclipse + ADT plugin;
- IntelliJ IDEA Community Edition;
- Netbeans + nbandroid plugin;
Утилиты устанавливаются в определенном выше порядке. Ставить все перечисленные IDE смысла нет (разве только если Вы испытываете затруднения с выбором подходящей). Я использую IntelliJ IDEA Community Edition, одну из самых развитых на данный момент IDE для Java.
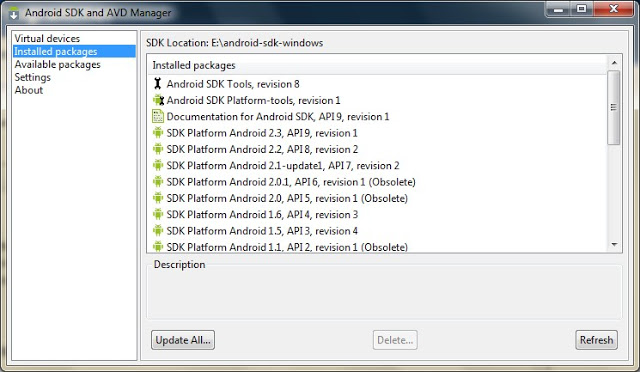
Запуск виртуального устройства
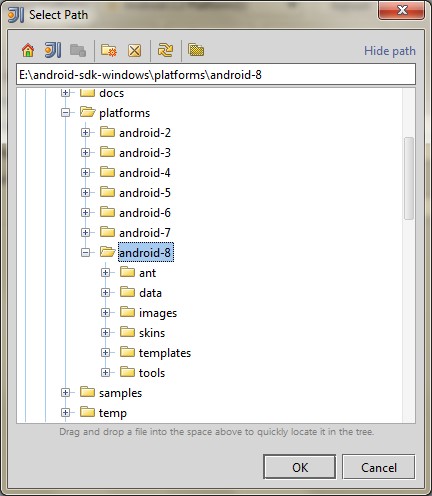
Запустив AVD Manager и установив дополнительные пакеты (SDK различных версий), можно приступить к созданию виртуального устройства с необходимыми параметрами. Разобраться в интерфейсе не должно составить труда.
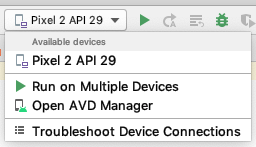
Список устройств
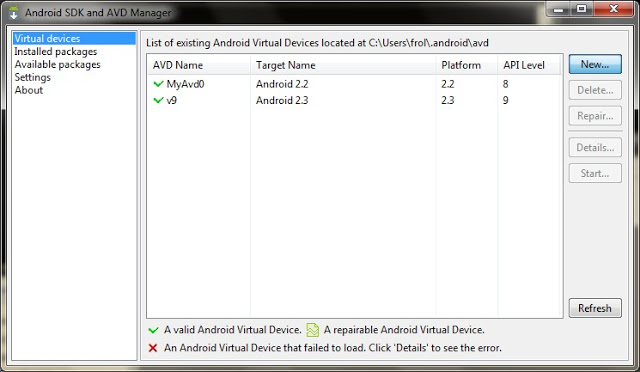
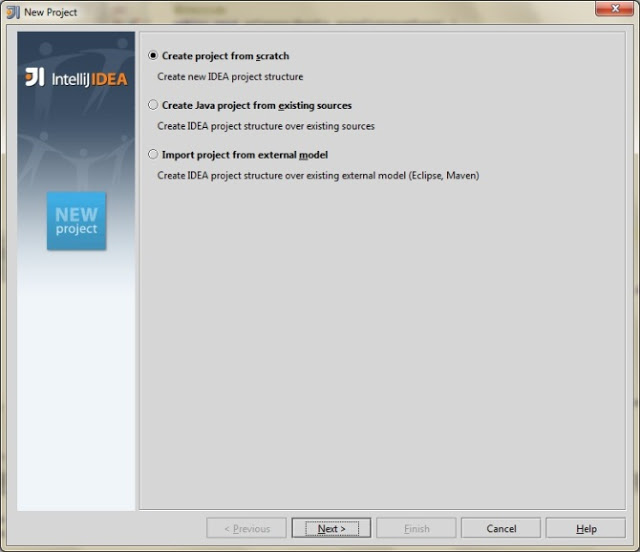
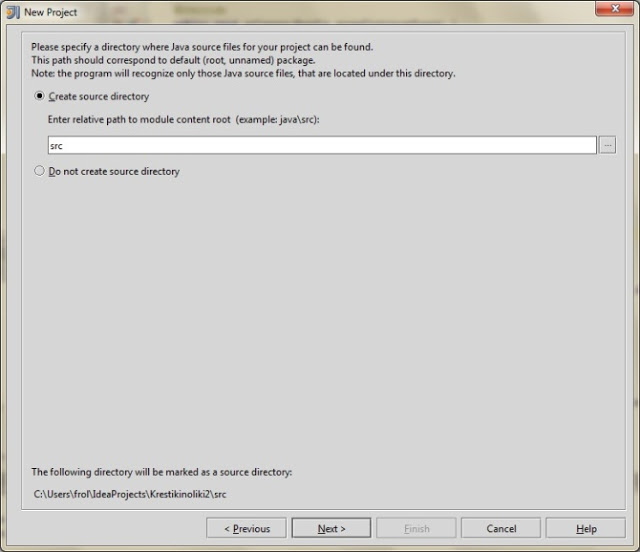
Создание проекта
Мне всегда не терпится приступить к работе, минимизируя подготовительные мероприятия, к которым относится создание проекта в IDE, особенно, когда проект учебный и на продакшн не претендует.
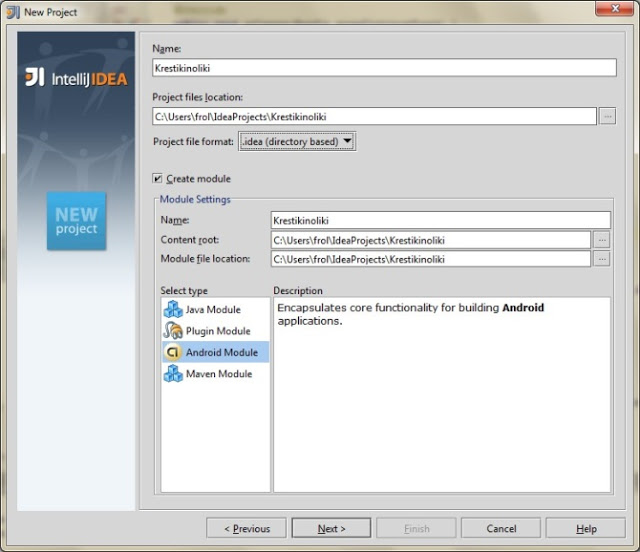
Итак, File->New Project:


По нажатию кнопки F6 проект соберется, откомпилируется и запустится на виртуальном девайсе.
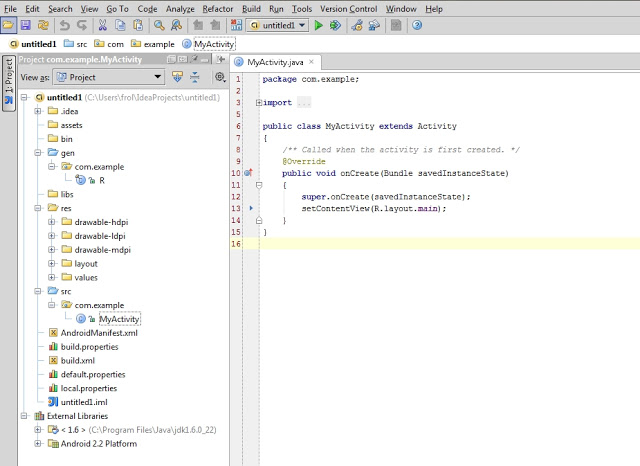
Структура проекта
На предыдущем скриншоте видна структура проекта. Так как в этой статье мы преследуем сугубо практические цели, заострим внимание лишь на тех папках, которые будем использовать в процессе работы. Это следующие каталоги: gen, res и src.
В папке gen находятся файлы, которые генерируются автоматически при сборке проекта. Вручную их менять нельзя.
Папка res предназначена для хранения ресурсов, таких как картинки, тексты (в том числе переводы), значения по-умолчанию, макеты (layouts).
src — это папка в которой будет происходить основная часть работы, ибо тут хранятся файлы с исходными текстами нашей программы.
Первые строки
Как только создается Activity (экран приложения), вызывается метод onCreate(). IDE заполнила его 2 строчками:
Метод setContentView (равносильно this.setContentView) устанавливает xml-макет для текущего экрана. Далее xml-макеты будем называть «layout», а экраны — «Activity». Layout в приложении будет следующий:
Для этого приложения идеально подойдет TableLayout. Id можно присвоить любому ресурсу. В данном случае, TableLayout присвоен При помощи метода findViewById() можно получить доступ к виду:
Теперь необходимо реализовать метод buildGameField(). Для этого требуется сгенерировать поле в виде матрицы. Этим будет заниматься класс Game. Сначала нужно создать класс Square для ячеек и класс Player, объекты которого будут заполнять эти ячейки.
Square.java
Player.java
Все классы нашего приложения находятся в папке src.
Game.java
Инициализация Game в конструкторе KrestikinolikiActivity.
Метод buildGameField() класса KrestikinolikiActivity. Он динамически добавляет строки и колонки в таблицу (игровое поле):
В строке 8 создается объект, реализующий интерфейс View.OnClickListener. Создадим вложенный класс Listener. Он будет виден только из KrestikinolikiActivity.
Осталось реализовать логику игры.
Определение победителя
К. О. подсказывает, что в крестики-нолики выирывает тот, кто выстроет X или O в линию длиной, равной длине поля по-вертикали, или по-горизонтали, или по-диагонали. Первая мысль, которая приходит в голову — это написать методы для каждого случая. Думаю, в этом случае хорошо подойдет паттерн Chain of Responsobility. Определим интерфейс
Так как Game наделен обязанностью выявлять победителя, он реализует этот интерфейс. Настало время создать виртуальных «лайнсменов», каждый из которых будет проверять свою сторону. Все они реализует интерфейс WinnerCheckerInterface.
WinnerCheckerHorizontal.java
WinnerCheckerVertical.java
WinnerCheckerDiagonalLeft.java
WinnerCheckerDiagonalRight.java
Проинициализируем их в конструкторе Game:
Победителя проверяем после каждого хода. Добавим кода в метод onClick() класса Listener
Метод gameOver() реализован в 2-х вариантах:
Для Java, gameOver(Player player) и gameOver() — разные методы. Воспользовавшись Builder’ом Toast.makeText, можно быстро создать и показать уведомление. refresh() обновляет состояние поля:
Готово! Надеюсь, эта статья помогла Вам освоиться в мире разработки под OS Android. Благодарю за внимание!
Видео готового приложения
PS: статья была опубликована по просьбе комментаторов этого поста.
Источник
Как сделать приложение для Android самостоятельно
Платформа Android открытая, поэтому каждый может написать своё приложение и распространять его через каталоги программ. Все инструменты бесплатны.


Язык программирования для мобильной разработки на Android очень простой — это Java. Сейчас Google активно продвигает Kotlin как язык, который сможет заменить Java. Приложения пишут и на C++.
Создание простейшего приложения состоит из нескольких этапов:
- проект в Android Studio;
- создание пользовательского интерфейса;
- добавление активностей, навигации и действий;
- тест-драйв приложения в эмуляторе.
А пока мы описываем азы, студенты курса «Профессия Мобильный разработчик» уже получают деньги за свои приложения.

Пишет про разработку в Skillbox. Работал главным редактором сайта «Хабрахабр», ведет корпоративные блоги.
Необходимые инструменты
Первым делом установите программу Android Studio. Это официальная среда разработки (IDE) для Android, она работает на Windows, macOS и Linux. Хотя при разработке программ для Android можно использовать и другие среды, кроме Android Studio.
Если на компьютере не установлены Android SDK и другие компоненты, то Android Studio автоматически скачает их. Android SDK — это среда программирования, в которую входят библиотеки, исполняемые файлы, скрипты, документация и т.д.
Android SDK компилирует код вместе с любыми данными и ресурсами в файл с расширением .apk. Он содержит всё необходимое для установки приложения на Android-устройство.
Полезно установить и эмулятор Android, чтобы запускать и тестировать приложения. Эмулятор поставляется в комплекте с Android Studio.
Когда все инструменты установлены, можно создать первый проект. Но сначала нужно разобраться с основными понятиями.
Из чего состоит приложение
на Android
Android-приложение состоит из четырёх компонентов. Каждый компонент — это точка входа, через которую система или пользователь может получить доступ.
- Активность (activity) — элементы интерактивного пользовательского интерфейса.
Одна активность задействует другую и передаёт информацию о том, что намерен делать пользователь, через класс Intent (намерения). Активности подобны веб-страницам, а намерения — ссылкам между ними. Запуск приложения — это активность Main. - Сервис (service) — универсальная точка входа для поддержания работы приложения в фоновом режиме.
Этот компонент выполняет длительные операции или работу для удалённых процессов без визуального интерфейса. - Широковещательный приемник (broadcast receiver) транслирует нескольким участникам намерения из приложения.
Теперь попробуем сделать своё приложение для Android.
Создаём Android-приложение
в Android Studio
Шаг 1
Выбираем название приложения, домен компании, путь к проекту и название пакета. Указываем, включить ли поддержку опциональных языков программирования C++ и Kotlin.
Шаг 2
Задаём одну или несколько целевых платформ для сборки. Для этого используется SDK и AVD, менеджер виртуальных устройств Android. Инструмент позволяет устанавливать в SDK пакеты, которые поддерживают несколько версий ОС Android и несколько уровней API (интерфейсов программирования приложений).

Чем ниже версия Android, тем больше устройств, на которых приложение запустится. Чем выше версия, тем богаче функциональность API.
Шаг 3
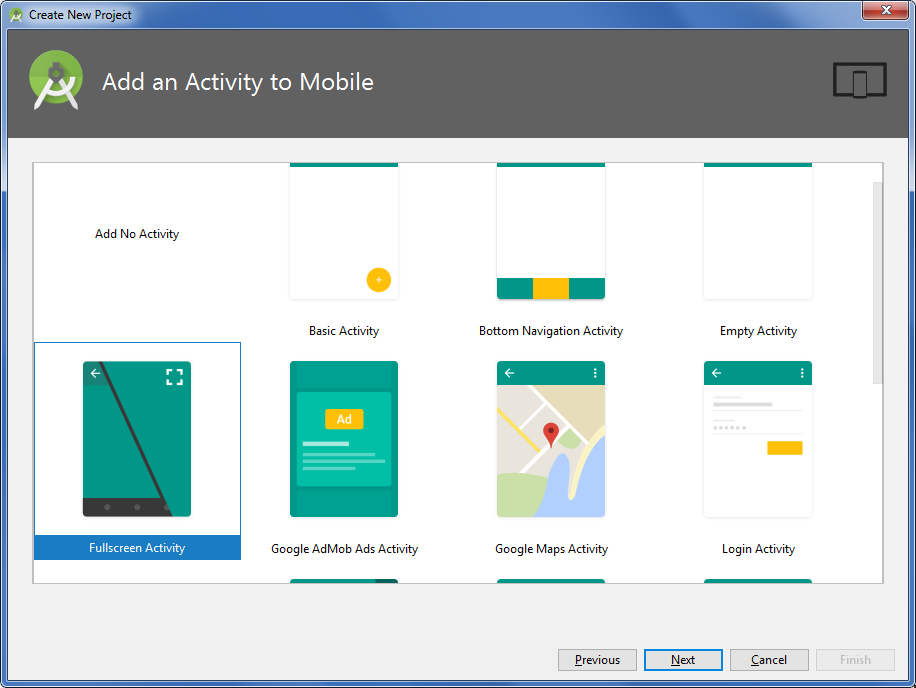
Выбираем основную активность, которая будет запускаться при нажатии на иконку приложения, и даём ей имя.
Шаг 4
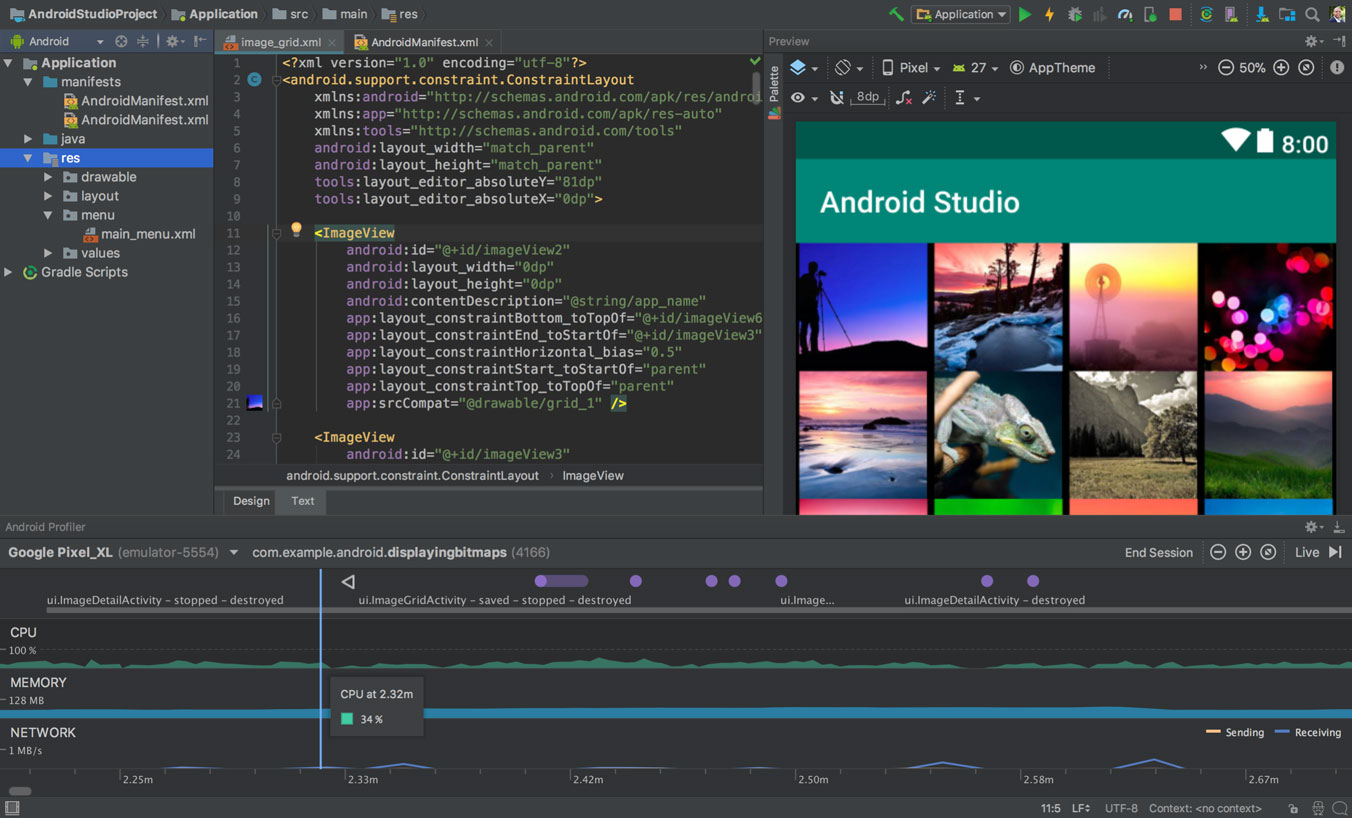
После нескольких минут сборки Android Studio открывает интерфейс IDE. Здесь три основных момента.
Источник
Build Your First Android App in Java
1. Welcome!
In this codelab, you’ll learn how to build and run your first Android app in the Java programming language. (If you’re looking for the Kotlin version of this codelab, you can go here.)
What you must know already
This codelab is written for programmers and assumes that you know either the Java or Kotlin programming language. If you are an experienced programmer and adept at reading code, you will likely be able to follow this codelab, even if you don’t have much experience with Java.
What you’ll learn
- How to use Android Studio to build your app.
- How to run your app on a device or in the emulator.
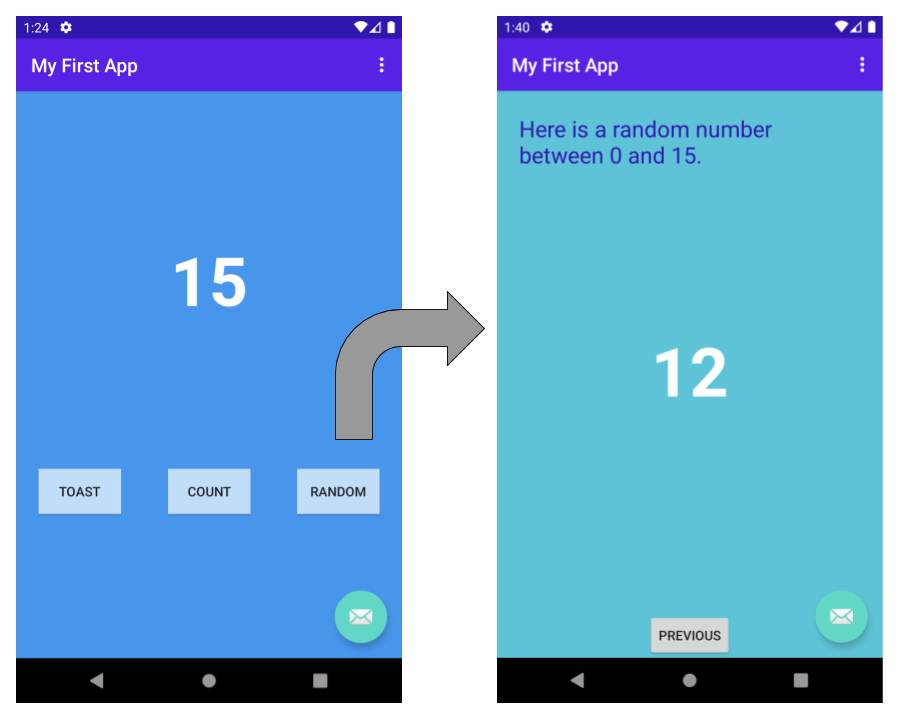
- How to add interactive buttons.
- How to display a second screen when a button is pressed.
Use Android Studio and Java to write Android apps
You write Android apps in the Java programming language using an IDE called Android Studio. Based on JetBrains’ IntelliJ IDEA software, Android Studio is an IDE designed specifically for Android development.
Note: This version of the codelab requires Android Studio 3.6 or higher.
To work through this codelab, you will need a computer that can run Android Studio 3.6 or higher (or already has Android Studio 3.6 or higher installed).
2. Install Android Studio
Note: This version of the codelab requires Android Studio 3.6 or higher.
You can download Android Studio 3.6 from the Android Studio page.
Android Studio provides a complete IDE, including an advanced code editor and app templates. It also contains tools for development, debugging, testing, and performance that make it faster and easier to develop apps. You can use Android Studio to test your apps with a large range of preconfigured emulators, or on your own mobile device. You can also build production apps and publish apps on the Google Play store.
Note: Android Studio is continually being improved. For the latest information on system requirements and installation instructions, see the Android Studio download page.
Android Studio is available for computers running Windows or Linux, and for Macs running macOS. The OpenJDK (Java Development Kit) is bundled with Android Studio.
The installation is similar for all platforms. Any differences are noted below.
- Navigate to the Android Studio download page and follow the instructions to download and install Android Studio.
- Accept the default configurations for all steps, and ensure that all components are selected for installation.
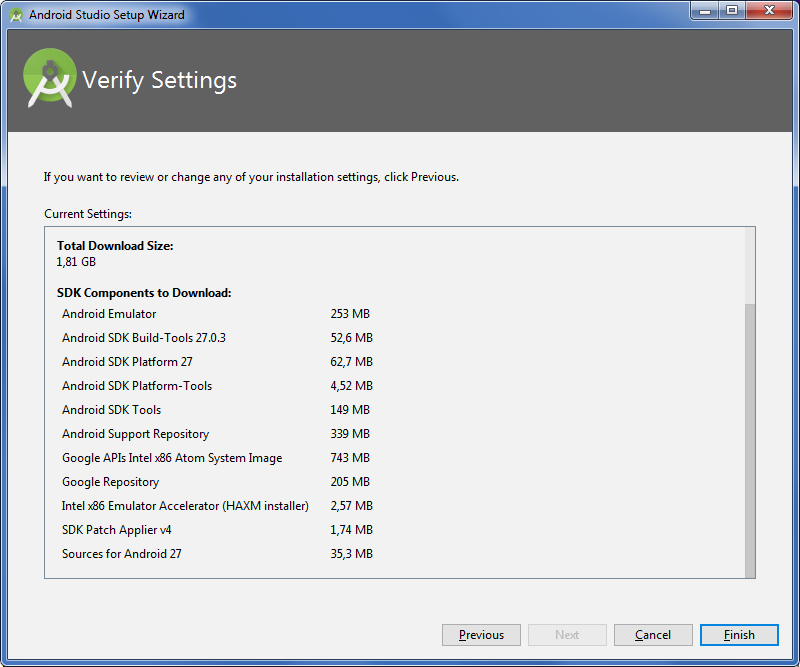
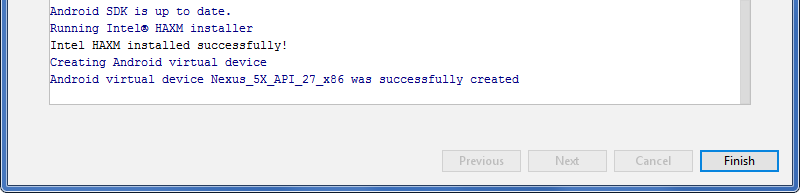
- After the install is complete, the setup wizard downloads and installs additional components, including the Android SDK. Be patient, because this process might take some time, depending on your internet speed.
- When the installation completes, Android Studio starts, and you are ready to create your first project.
Troubleshooting: If you run into problems with your installation, see the Android Studio release notes or Troubleshoot Android Studio.
3. Task: Create your first project
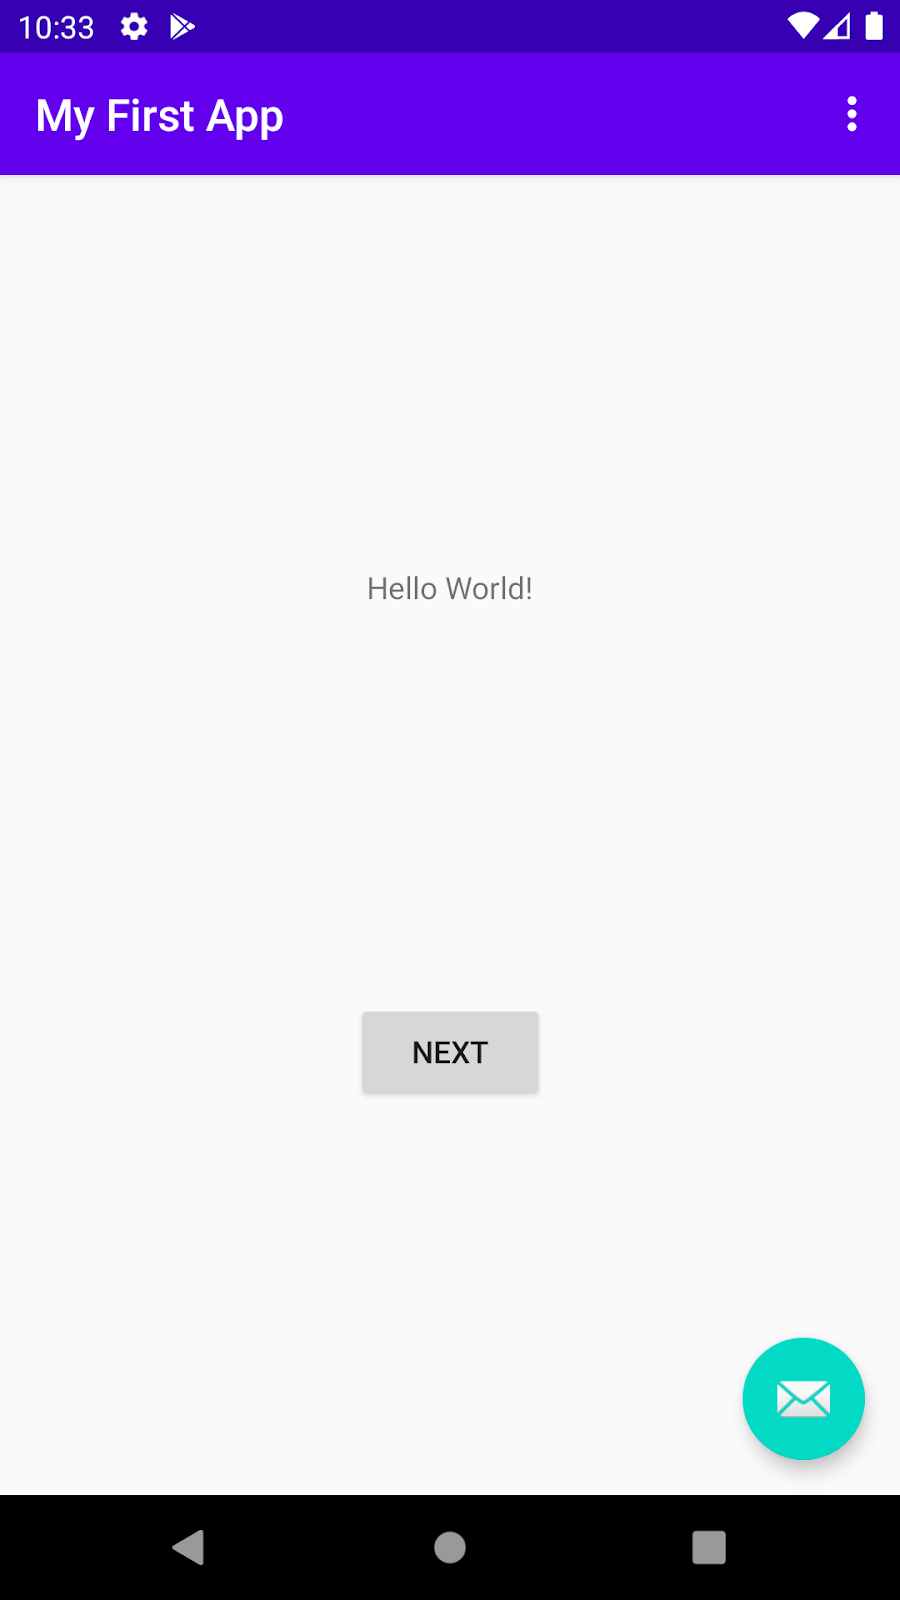
In this step, you will create a new Android project for your first app. This simple app displays the string «Hello World» on the screen of an Android virtual or physical device.
Here’s what the finished app will look like:
What you’ll learn
- How to create a project in Android Studio.
- How to create an emulated Android device.
- How to run your app on the emulator.
- How to run your app on your own physical device, if you have one.
Step 1: Create a new project
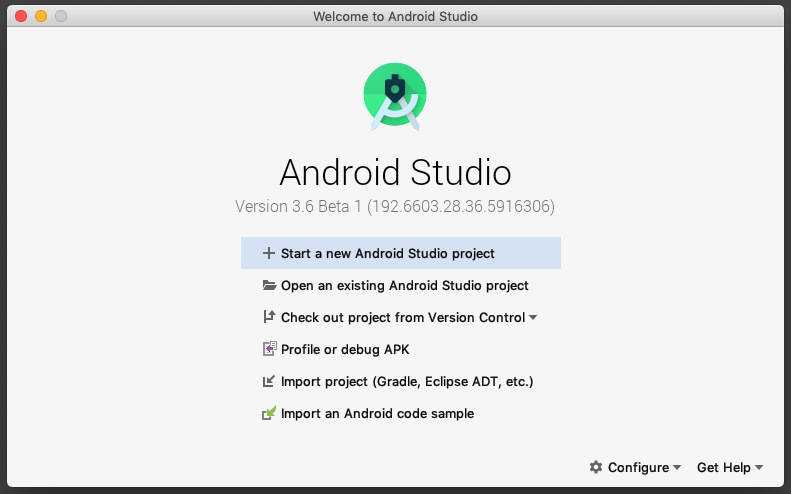
- Open Android Studio.
- In the Welcome to Android Studio dialog, click Start a new Android Studio project.

- Select Basic Activity (not the default). Click Next.
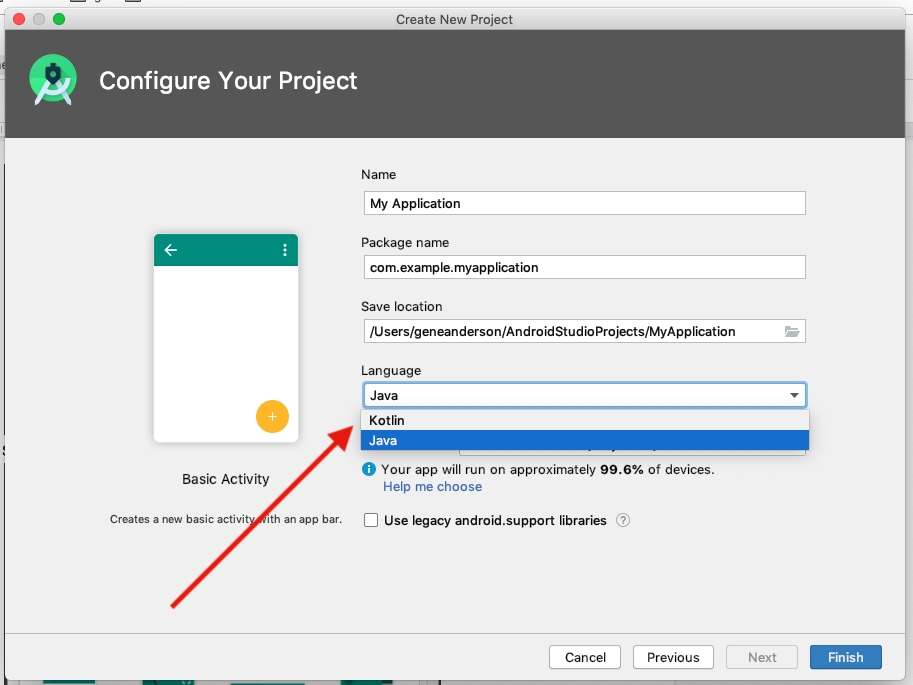
- Give your application a name such as My First App.
- Make sure the Language is set to Java.
- Leave the defaults for the other fields.
- Click Finish.

After these steps, Android Studio:
- Creates a folder for your Android Studio project called MyFirstApp. This is usually in a folder called AndroidStudioProjects below your home directory.
- Builds your project (this may take a few moments). Android Studio uses Gradle as its build system. You can follow the build progress at the bottom of the Android Studio window.
- Opens the code editor showing your project.
Step 2: Get your screen set up
When your project first opens in Android Studio, there may be a lot of windows and panes open. To make it easier to get to know Android Studio, here are some suggestions on how to customize the layout.
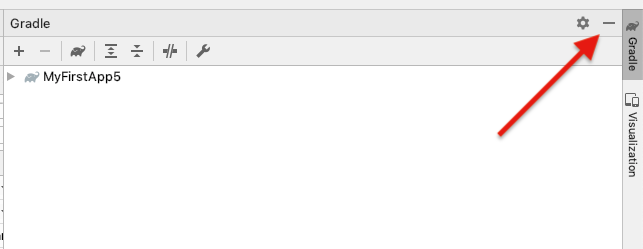
- If there’s a Gradle window open on the right side, click on the minimize button (—) in the upper right corner to hide it.
- Depending on the size of your screen, consider resizing the pane on the left showing the project folders to take up less space.
At this point, your screen should look a bit less cluttered, similar to the screenshot shown below.

Step 3: Explore the project structure and layout
The upper left of the Android Studio window should look similar to the following diagram: 
Based on you selecting the Basic Activity template for your project, Android Studio has set up a number of files for you. You can look at the hierarchy of the files for your app in multiple ways, one is in Project view. Project view shows your files and folders structured in a way that is convenient for working with an Android project. (This does not always match the file hierarchy! To see the file hierarchy, choose the Project files view by clicking (3).)
- Double-click the app (1) folder to expand the hierarchy of app files. (See (1) in the screenshot.)
- If you click Project (2), you can hide or show the Project view. You might need to select View > Tool Windows to see this option.
- The current Project view selection (3) is Project > Android.
In the Project > Android view you see three or four top-level folders below your app folder: manifests, java, java (generated) and res. You may not see java (generated) right away.
- Expand the manifests folder.
This folder contains AndroidManifest.xml . This file describes all the components of your Android app and is read by the Android runtime system when your app is executed. 2. Expand the java folder. All your Java language files are organized here. The java folder contains three subfolders:
com.example.myfirstapp: This folder contains the Java source code files for your app.
com.example.myfirstapp (androidTest): This folder is where you would put your instrumented tests, which are tests that run on an Android device. It starts out with a skeleton test file.
com.example.myfirstapp (test): This folder is where you would put your unit tests. Unit tests don’t need an Android device to run. It starts out with a skeleton unit test file. 3. Expand the res folder. This folder contains all the resources for your app, including images, layout files, strings, icons, and styling. It includes these subfolders:
drawable: All your app’s images will be stored in this folder.
layout: This folder contains the UI layout files for your activities. Currently, your app has one activity that has a layout file called activity_main.xml . It also contains content_main.xml , fragment_first.xml , and fragment_second.xml .
menu: This folder contains XML files describing any menus in your app.
mipmap: This folder contains the launcher icons for your app.
navigation: This folder contains the navigation graph, which tells Android Studio how to navigate between different parts of your application.
values: This folder contains resources, such as strings and colors, used in your app.
Step 4: Create a virtual device (emulator)
In this task, you will use the Android Virtual Device (AVD) manager to create a virtual device (or emulator) that simulates the configuration for a particular type of Android device.
The first step is to create a configuration that describes the virtual device.
- In Android Studio, select Tools >AVD Manager, or click the AVD Manager icon in the toolbar.
- Click +Create Virtual Device. (If you have created a virtual device before, the window shows all of your existing devices and the +Create Virtual Device button is at the bottom.) The Select Hardware window shows a list of pre-configured hardware device definitions.
- Choose a device definition, such as Pixel 2, and click Next. (For this codelab, it really doesn’t matter which device definition you pick).
- In the System Image dialog, from the Recommended tab, choose the latest release. (This does matter.)
- If a Download link is visible next to a latest release, it is not installed yet, and you need to download it first. If necessary, click the link to start the download, and click Next when it’s done. This may take a while depending on your connection speed.

Note: System images can take up a large amount of disk space, so just download what you need.
- In the next dialog box, accept the defaults, and click Finish.
The AVD Manager now shows the virtual device you added.
- If the Your Virtual Devices AVD Manager window is still open, go ahead and close it.
Step 5: Run your app on your new emulator
- In Android Studio, select Run > Run ‘app’ or click the Run icon in the toolbar. The icon will change when your app is already running.
 The icon will change when your app is already running.
If you get a dialog box stating «Instant Run requires that the platform corresponding to your target device (Android N. ) is installed» go ahead and click Install and continue.
- In Run > Select Device, under Available devices, select the virtual device that you just configured. This menu also appears in the toolbar.
The emulator starts and boots just like a physical device. Depending on the speed of your computer, this may take a while. You can look in the small horizontal status bar at the very bottom of Android Studio for messages to see the progress.
Messages that might appear briefly in the status bar
Gradle build running

Waiting for target device to come on line
Источник


