- Android-er
- Thursday, February 21, 2019
- Install JetBrains Toolbox App on Linux, and also Android Studio and IntelliJ IDEA (Java IDE)
- How to Run Android Studio on ANY Device With JetBrains Projector
- The New Toolbox App 1.13 with Android Studio inside!
- TL;DR: the 1.13 update includes support for Android Studio, a new toggle to update all the tools you have installed automatically, a downgrade option, refreshed Settings UI, and bug fixes.
- Android Studio support
- 1.13 also brings the following features
- Установка Android Studio в Ubuntu 20.04
- Системные требования Android Studio:
- Установка Android Studio в Ubuntu
- 1. Установка из snap-пакета
- 2. Установка из центра приложений
- 3. Установка с официального сайта
- 4. Установка в JetBrains Toolbox
- Как удалить Android Studio
- Выводы
Android-er
For Android development, from beginner to beginner.
Thursday, February 21, 2019
Install JetBrains Toolbox App on Linux, and also Android Studio and IntelliJ IDEA (Java IDE)
JetBrains Toolbox App is a lightweight cross-platform companion application for JetBrains’ coding tools, to manage installed tools, download new ones and open recent projects.
System requirement to install Toolbox App for Linux:
64-bit x86, glibc 2.17 (Ubuntu 14.04 or newer). JetBrains Toolbox App is packaged in AppImage and requires FUSE to run.
To check the version of your glibc, it’s a simple method, using ldd command in Terminal:
$ ldd —version
It will show something like this:
ldd (Ubuntu GLIBC 2.27-3ubuntu1) 2.27
To install and set FUSE, follow the steps in AppImage Wiki.
For Ubuntu, enter the commands in Terminal:
$ sudo apt install fuse
$ sudo modprobe fuse
$ sudo groupadd fuse
$ user=»$(whoami)»
$ sudo usermod -a -G fuse $user
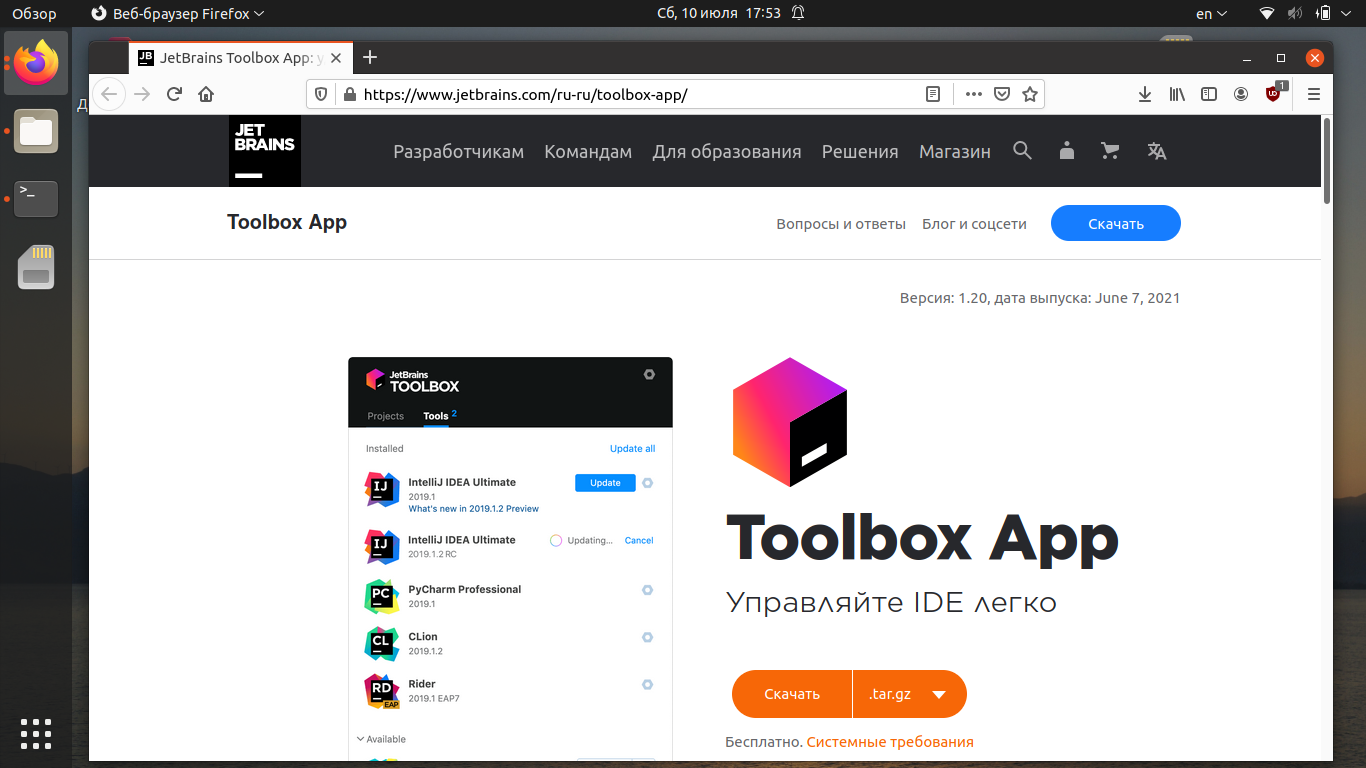
Visit https://www.jetbrains.com/toolbox/app/ to download the, currently it’s version 1.13.
This video show how to Install JetBrains Toolbox App on Linux Mint 19.1
Install Android 3.3.1 on Linux Mint 19.1 with JetBrains Toolbox, Hello World and convert Java to Kotlin.
IntelliJ IDEA (Java IDE) with JetBrains Toolbox.
Источник
How to Run Android Studio on ANY Device With JetBrains Projector

Android development is resource hungry. In fact, even a top of the line MacBook Pro can barely handle a mid to large project. Compiling and running the app takes a whopping 10 to 15 Gb of RAM that just sits there, and that’s without running an emulator! Needless to say if your laptop has only 16 Gb of RAM, good luck doing anything else while developing.
My personal laptop, a 4 year old Razer blade with 16 Gb of RAM, starts FLYING as soon as I open Android Studio on one of my personal projects with only a handful of modules. The fans blow louder than when playing a 3D video game, it’s been driving me nuts.
So I started looking into alternatives. How can I work on my Android projects without my laptop turning into a burning furnace? The answer is of course running the expensive stuff in the cloud.
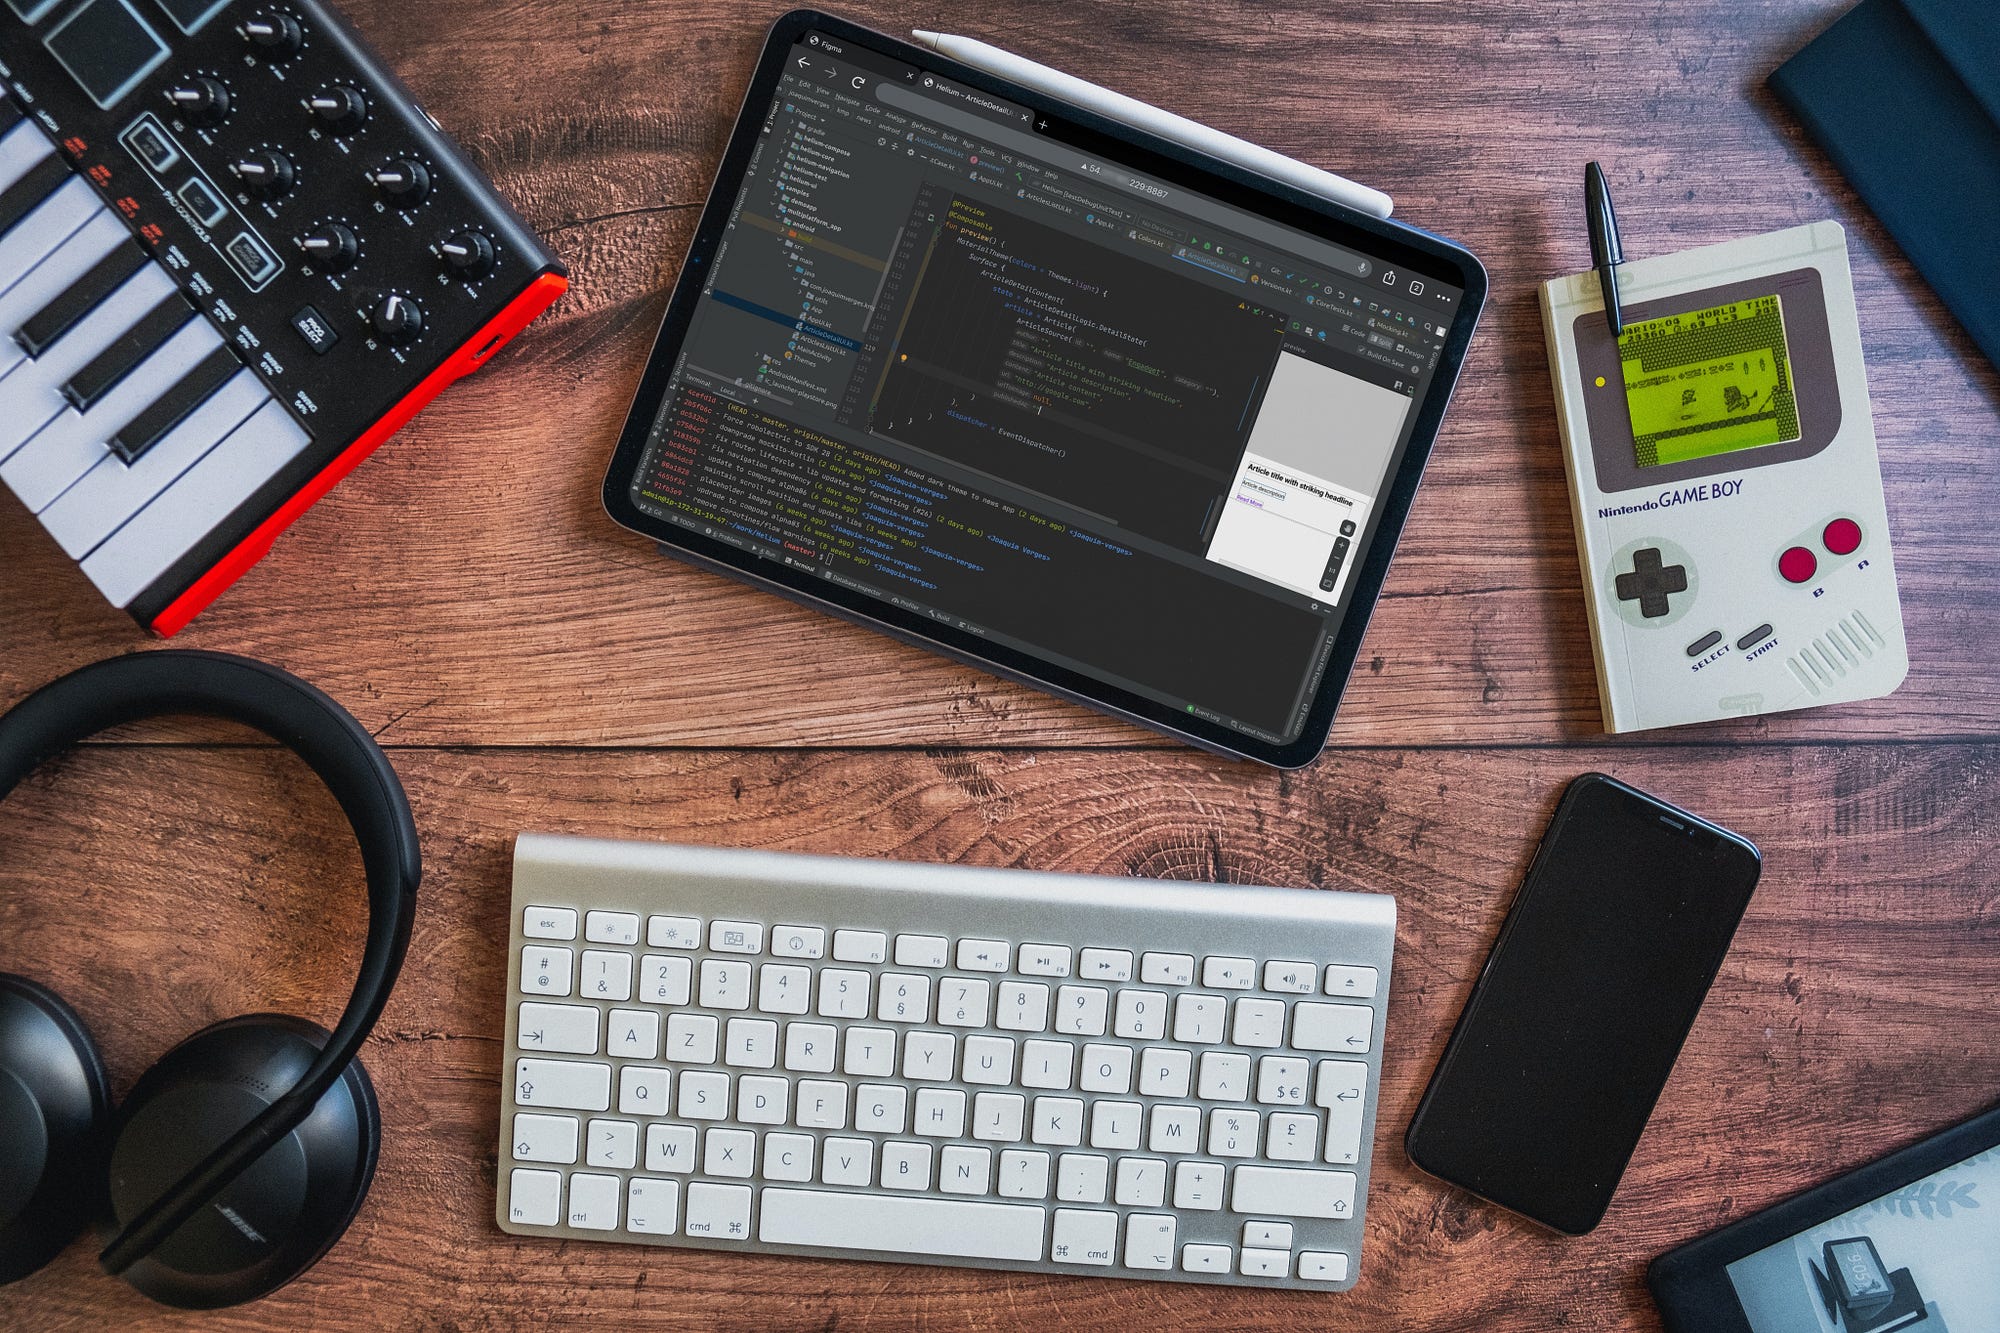
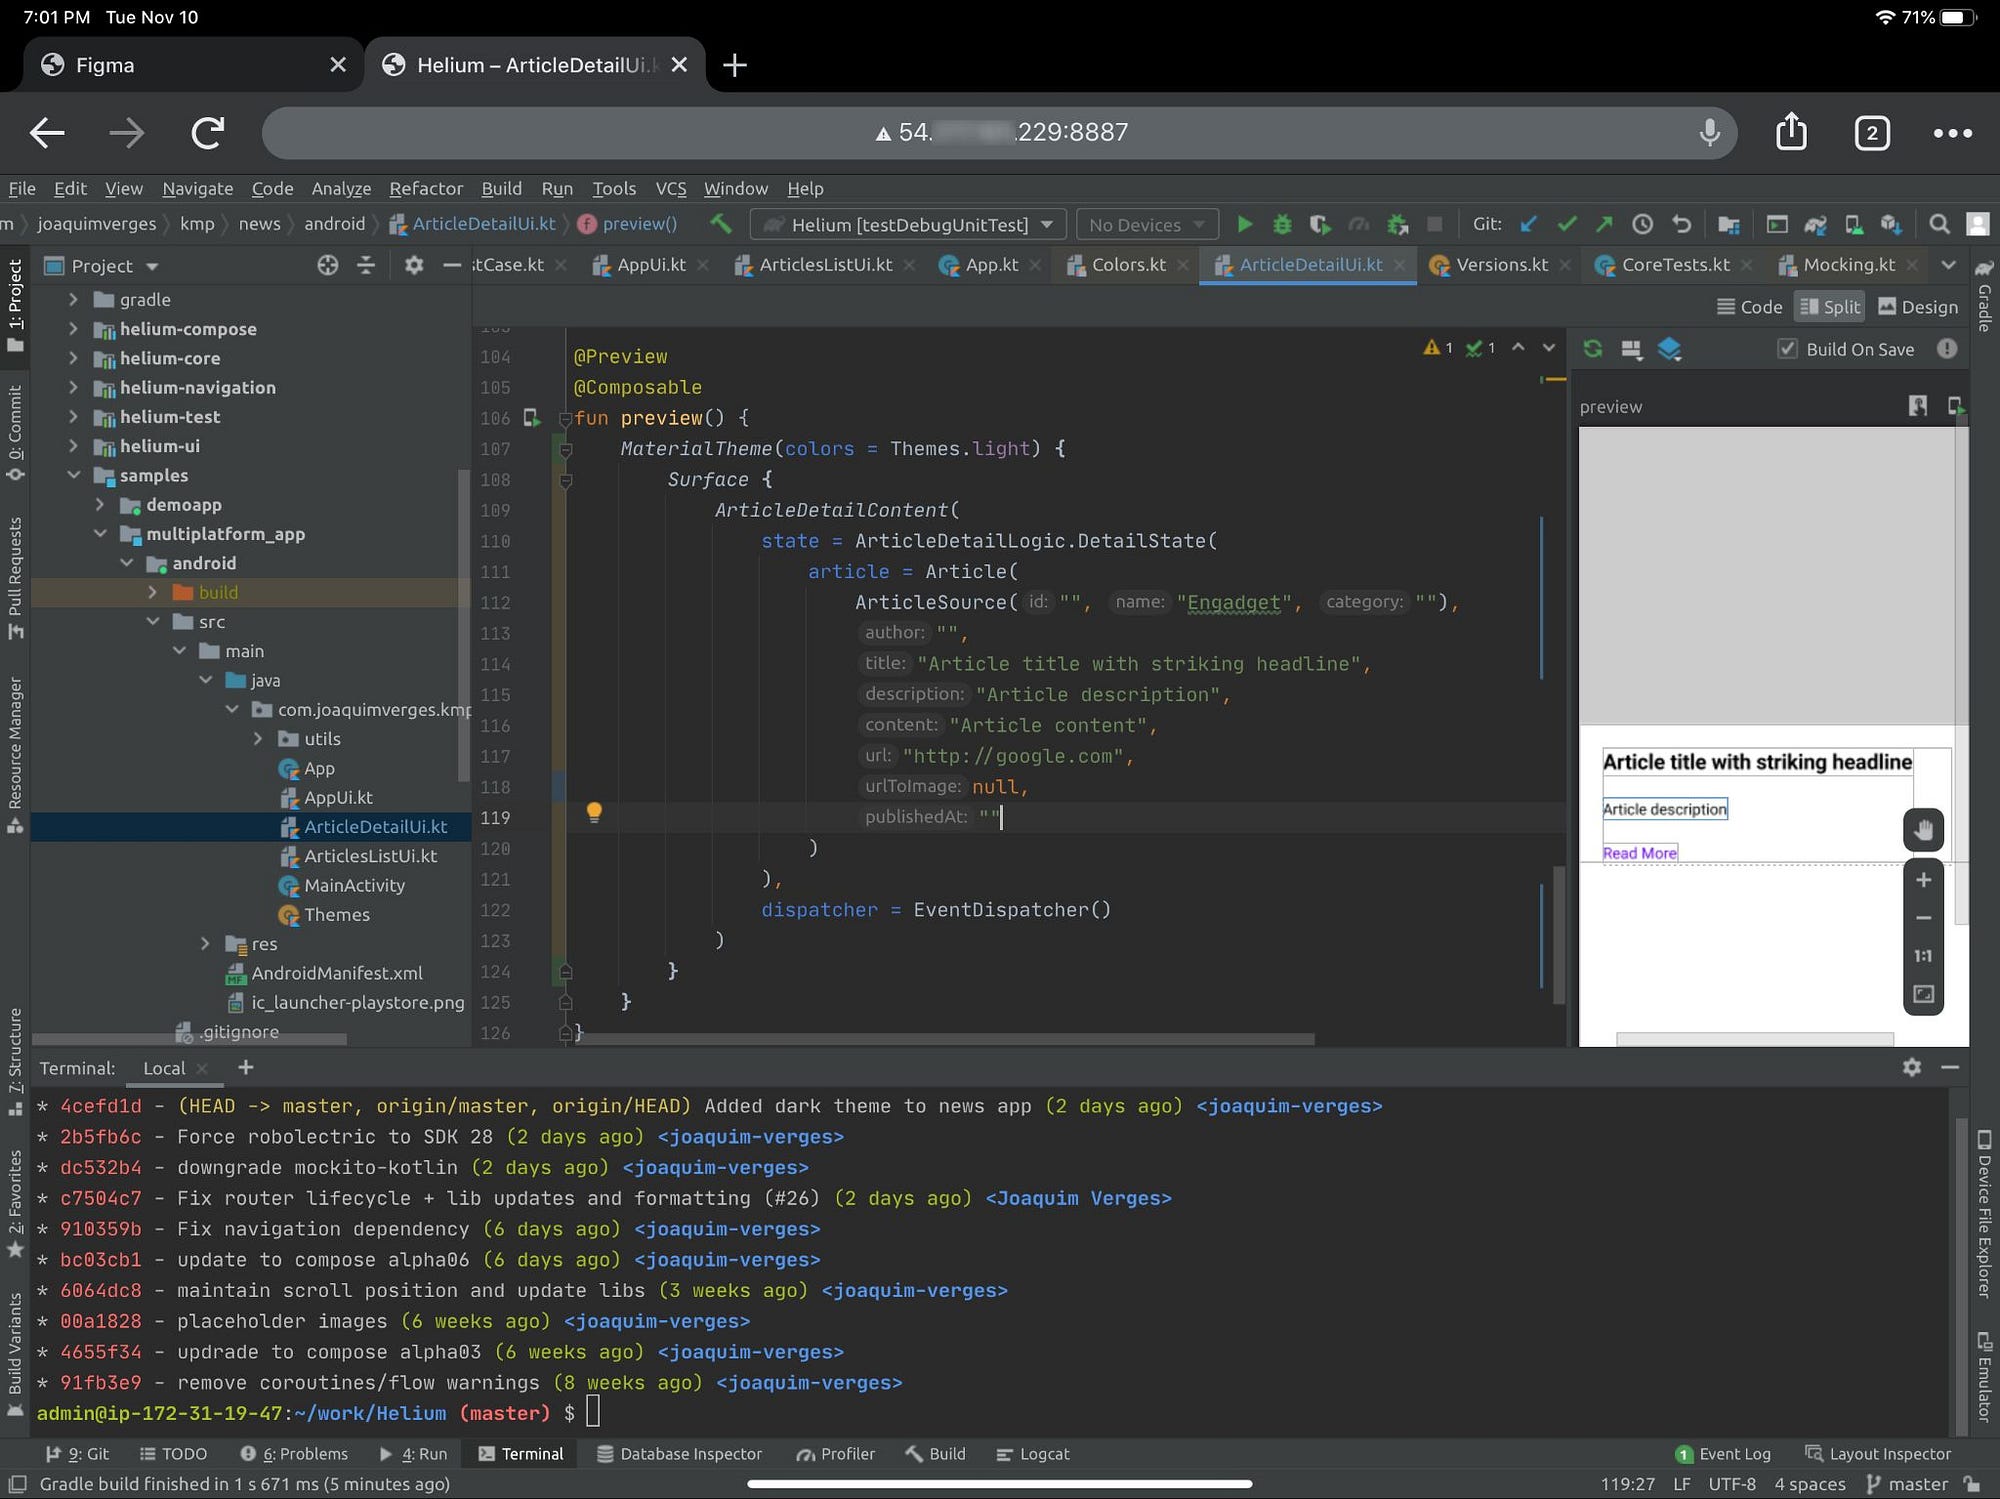
After trying different approaches like Mirakle, with decent success, my good friend Ty Smith told me about an incubator project by JetBrains called Projector. In essence, it allows you to access any JetBrains IDE through your browser with a clever trick. I tried it out, and was blown away. With this approach, you can seamlessly code from any device that can run a browser. In fact, here’s Android Studio “running” on my phone, because why not.

Of course you would never code on a phone, but it proves that the device hardware is irrelevant. If it has a browser, you can use it to code. This changes everything!
Without the constraints of a beefy hardware, I can choose a development machine that is portable, lightweight, and much cheaper! A good choice in my opinion is a decent Chromebook, a MacBook Air, or a Surface Go. I even considered an iPad as an alternative, it works, but definitely not as comfortable as a real laptop. My personal favorite so far is the Pixelbook Go, great keyboard and super lightweight, been really enjoying coding from it.
Where is Android Studio actually running?
You still need a beefy machine either in the cloud on on your local network to do the actual heavy lifting of running the IDE and Gradle builds. Luckily cloud VMs are now a commodity, and you can get one up and running in a matter of minutes via services like Amazon AWS, Google Cloud or Microsoft Azure. I went with AWS, chose an EC2 instance with 8 cores, 32Gb of RAM and 100 Gb of storage. Running the instance costs me around $0.40 / hour, not cheap if you’re running it 24/7, but since I use it only for a few hours a week for my personal projects, it ends up being quite affordable. Even if I used it for 8 hours a day, 5 days a week, it would cost me around $64 / month. Not bad considering I don’t need an expensive laptop anymore.
When I want to work on my projects, I just start my EC2 instance, run Projector on it, then open a Chrome tab and I’m ready to code. No more crazy fans, no more overheating!
How does it work?
The idea behind Projector is simple but rather brilliant. It intercepts drawing commands from the IDE (or any Swing application) with a custom drawing engine (AWT implementation) that instead of rendering things on screen, records each command, serializes them and sends them to a web client. The web client interprets those drawing commands and renders them in a web page. The web client records keyboard and mouse input, and sends it back to the IDE via AWT.
The beauty of this approach is that even with a slow connection, it renders crisp, pixel-perfect fonts and UI, because it understands the underlying software, so it can render fonts in vector format. Input is also very responsive, because the protocol is specialized, and therefore optimized. This is the killer advantage over more generic remote desktop solutions like VNC, which stream pixels directly. Remote desktops solutions usually render blurry fonts and feel unresponsive over slow connections.
The only drawback from this approach is that some IDE keyboard shortcuts conflict with the browser’s own shortcuts. For instance, cmd+w closes the browser tab instead of one of the tabs in the IDE. There is a work around for that though, by adding the page as a desktop shortcut, which opens any website in app mode. With that, everything has been working really well for me, including all my shortcuts. When putting Chrome in full screen, it pretty much feels like the real thing.
Projector is still very early days, but I can’t wait to see how it evolves.
What about deploying apps to a device and debugging?
Since Android Studio runs on a remote server, I thought it wouldn’t be able to just press run on Android Studio and install the app straight on my phone. I was wrong.
Turns out with a simple ssh tunnel (one simple command line instruction) you can “link” adb on your local machine and on the remote server, so it looks like your device is directly connected to the remote server, and appears in the remote Android Studio like usual.
I went a bit further, and setup WiFi debugging between my phone and my laptop, which means I don’t have to deal with any USB cables.
Pressing “run” in my browser triggers a build on my remote server, which then streams the APK via ssh to my laptop and then via WiFi to my device. What a time to be alive.
How do I try this?
Interested in setting this up yourself? I wrote a step by step setup guide on Github.
What device would you code from, now that we’re liberated from these hardware chains? Let me know on Twitter!
Источник
The New Toolbox App 1.13 with Android Studio inside!

TL;DR: the 1.13 update includes support for Android Studio, a new toggle to update all the tools you have installed automatically, a downgrade option, refreshed Settings UI, and bug fixes.
Android Studio support
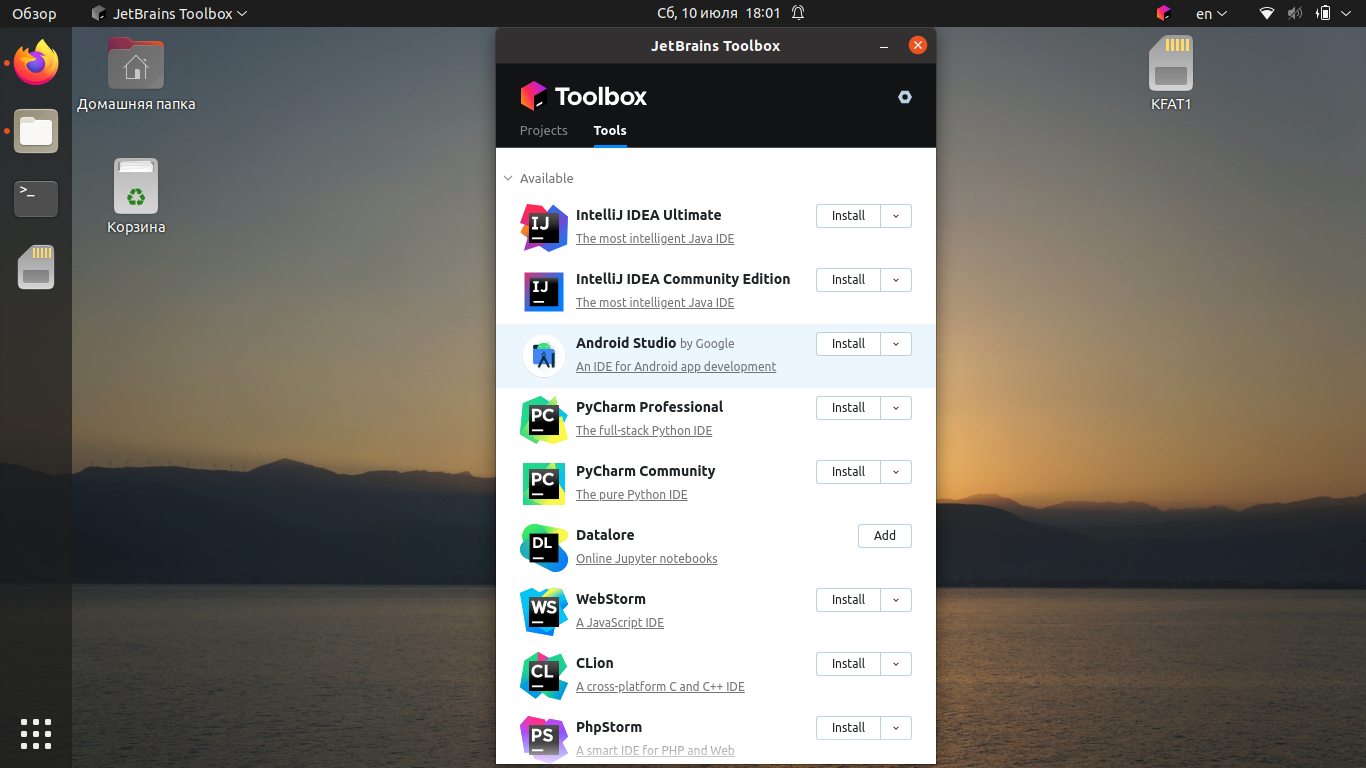
We are excited to announce the new version of Toolbox App, which comes with an eagerly awaited feature as voted for by you – support for Android Studio! It is now possible to install Android Studio as you would any other IDE from Toolbox App, making it possible to manage the installations with ease and keep up-to-date with all the changes coming from Google. While JetBrains Toolbox App is exclusive to JetBrains Products, we have made an exception with the inclusion of Android Studio, due to not only the very high demand as mentioned previously, but also because of the great collaboration we have with Google, and the sharing of a common platform. We’d like to thank everybody on the Android Studio team at Google for making this possible. 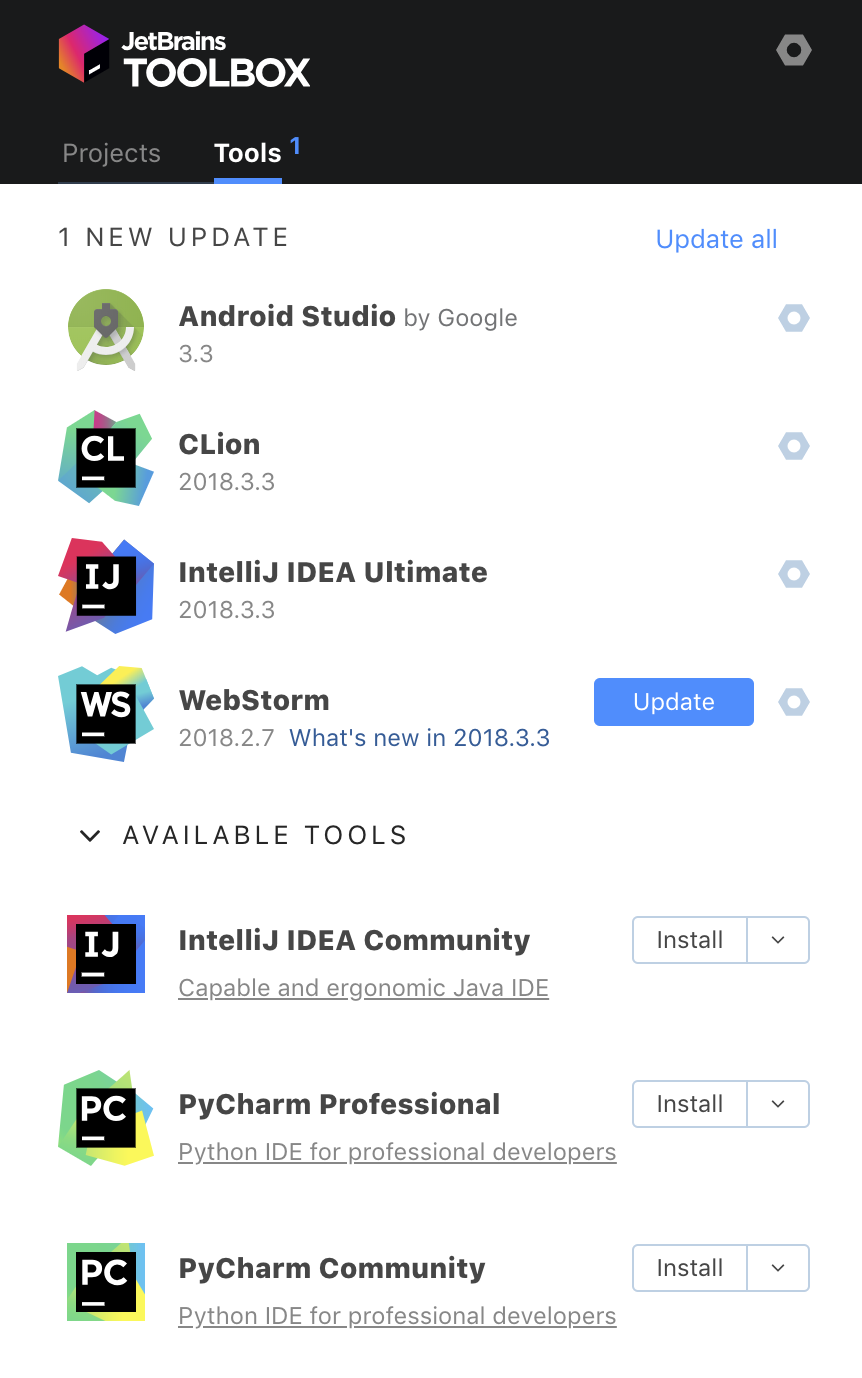
Here are the highlights of the possibilities that come with Android Studio in Toolbox App 1.13:
Go to Android Studio Settings and choose to update to Release or Release and Canary. 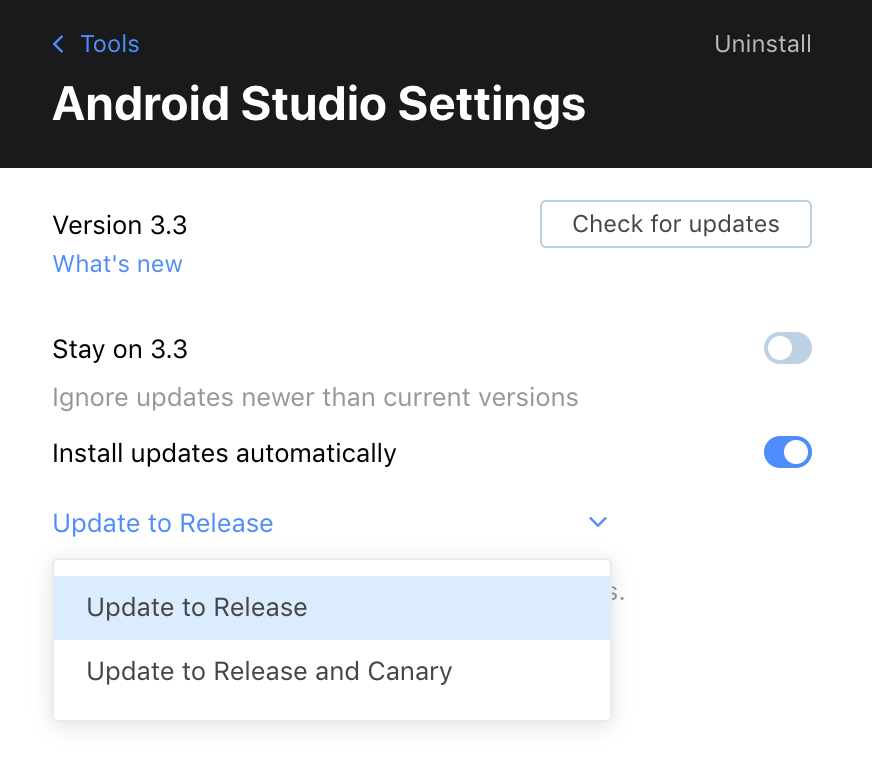
Auto-update
Turn on the auto-update option in Android Studio Settings and make sure you are always working with the newest version.
Roll back
To quickly roll back to the previous version click the Settings icon and push the changes.
What’s new
When a new version comes out you will see the What’s New link near the installed IDE. Click it to read all about the new features and bug fixes being introduced in the version right inside Toolbox App. 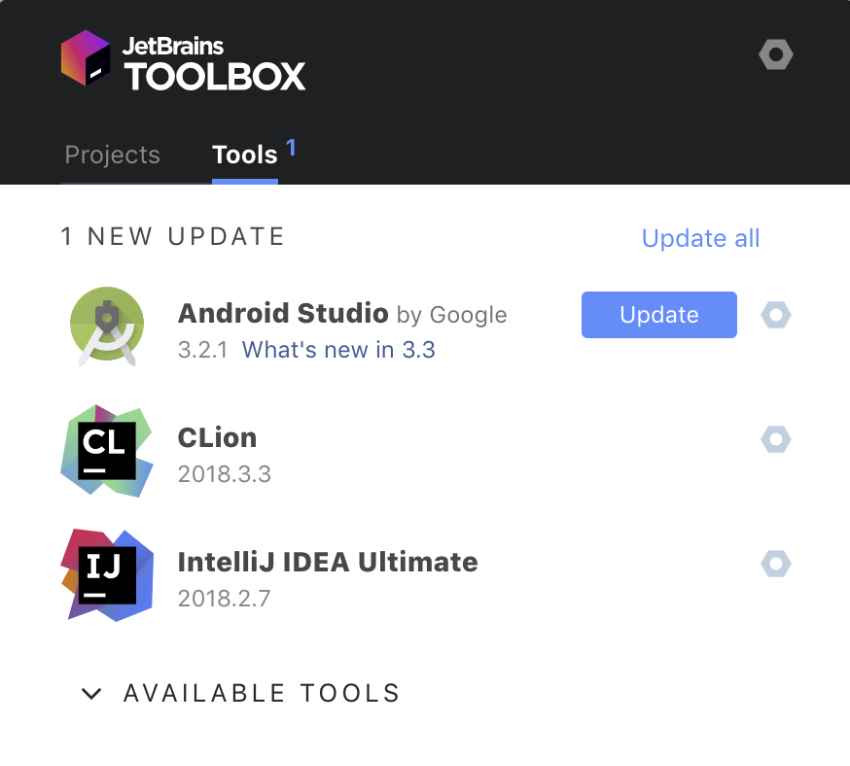
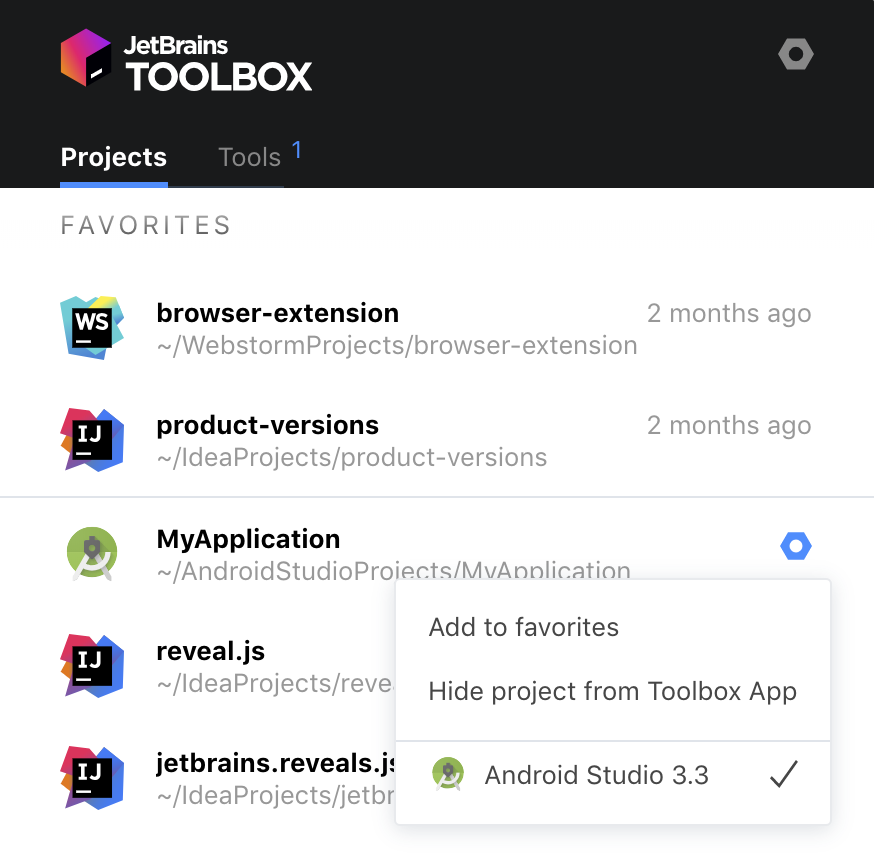
Projects
- Open projects in Android Studio right from the Toolbox App Projects tab.
- Pin your favorite project to the top of the list in the project Settings.
1.13 also brings the following features
Refreshed Settings UI. We have changed the UI around a little by moving the Quit Toolbox App button and Back button up to the header on all Settings pages.
“Update all tools automatically” toggle in Toolbox App Settings. From now on you can automatically update all the tools which are installed with a new toggle in the Toolbox App Settings. 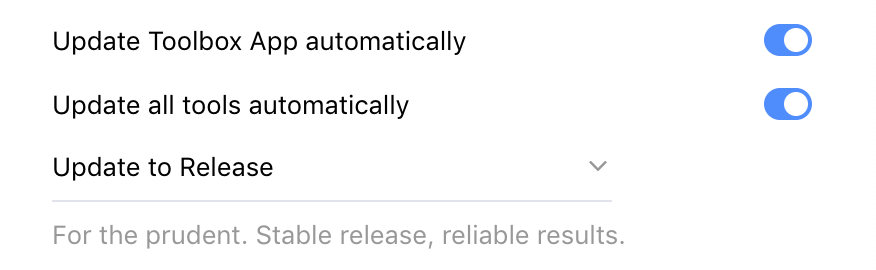
Downgrade action. This new feature allows you to re-download the previous version from the tools server. Unlike the roll back feature it doesn’t require a previous build to be stored on your disk. 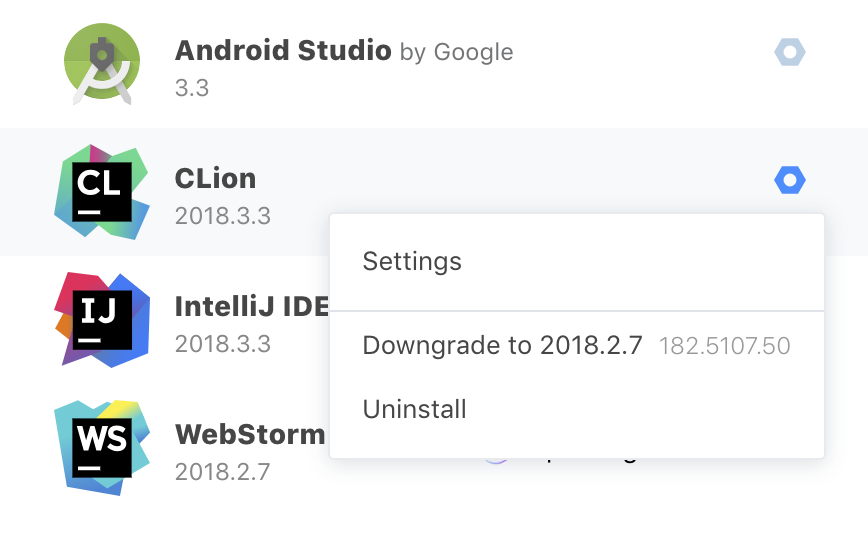
Package size reduction. We have reduced the size of Toolbox App package by up to 25% depending on the OS, especially for those of you who value free space on your disc.
And of course we fixed some bugs:
- The behavior of generated shell scripts on Windows and macOS is improved: they are now started in background and support opening the current directory in the IDE.
- Adding the projects to favorites is now working from the first click.
- In some cases, duplicate notifications were shown when there was an update available. We’ve fixed that.
For more information please check out the release notes.
We want to thank all our users for their feedback and the positive vibes they shared with us. We read every tweet you write and we are delighted when you share your best wishes mentioning @JBToolbox. (No, really, we rejoice like little children!)
And, we want to thank those evaluators who have helped make the Toolbox App releases in 2018 soft and stable. Special thanks go to the following contributors:
Chris (vqrslogin)
Eduard Wirch
Raphael Reitzig
Kirill Rakhman
Victor Turansky
Victor Alenkov
In appreciation of your valuable efforts, we are giving each of you a free 1-year subscription to All Product Pack. You will receive a personal email with details on how to claim your license.
Last year we worked hard to deliver Android Studio in Toolbox App because a lot of you showed us the demand you had for it by voting for this feature. If you have any other requests, please share your ideas with us in the YouTrack issue tracker or on Twitter.
That is about all for now. If you still haven’t tried Toolbox App out yet, what are you waiting for? Download the free Toolbox App and manage your updates with ease!
Your Toolbox App team
And don’t forget to check out the Google Chrome extension and Firefox Add-on for GitHub integration.
Источник
Установка Android Studio в Ubuntu 20.04
Android Studio — это официальная и самая популярная интегрированная среда разработки Android-приложений. Программа разрабатывается корпорацией Google и содержит все необходимые возможности. Среда основана на IntelliJ IDEA, которая написана на Java.
Среди возможностей Android Studio не только написание, сборка и тестирование программ, но и поддержка загрузки их на устройство, интеграция с облаком и многое другое. В этой статье мы рассмотрим, как выполняется установка Android Studio в Ubuntu.
Системные требования Android Studio:
Рекомендованные системные требования:
- Дистрибутив — любой 64 битный дистрибутив с установленной glibc 2.31 или выше и окружением рабочего стола Gnome, KDE или Unity DE.
- Процессор — 64-битный, с поддержкой SSSE3 и Intel VT или AMD V;
- RAM — 8 Гб или больше;
- Свободное место на диске — 8 Гб;
- Разрешение экрана — 1280 x 800;
Установка Android Studio в Ubuntu
Вы можете установить Android Studio и Android SDK несколькими способами: c помощью snap-пакета, с официального сайта, из центра приложений, а также с использованием специального инструмента: JetBrains Toolbox. Каждый из способов имеет свои преимущества, и мы рассмотрим их все.
1. Установка из snap-пакета
Для установки Android Studio с помощью snap-пакета откройте терминал и выполните команду:
sudo snap install android-studio —classic
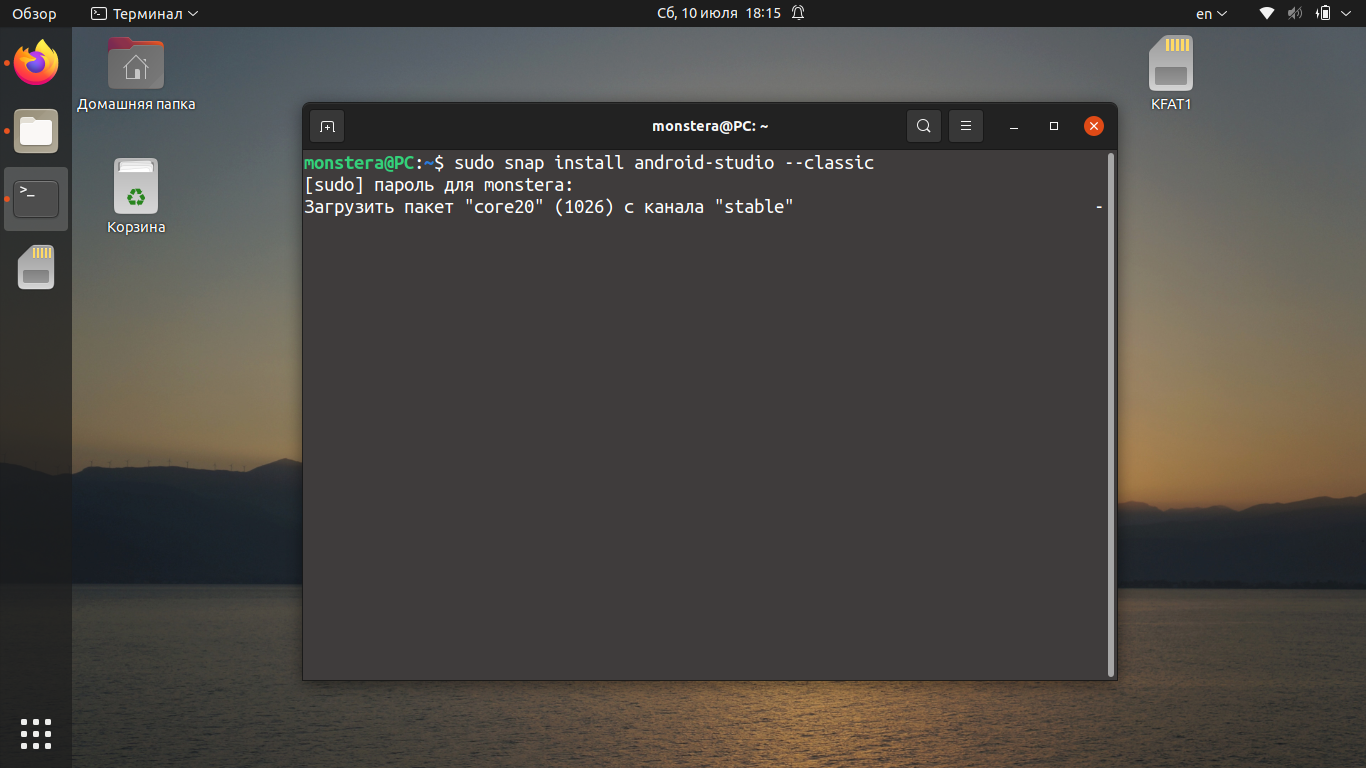
После завершения загрузки пакета программа будет доступна в главном меню.
2. Установка из центра приложений
Запустите центр приложений Ubuntu и введите в поиске название программы:
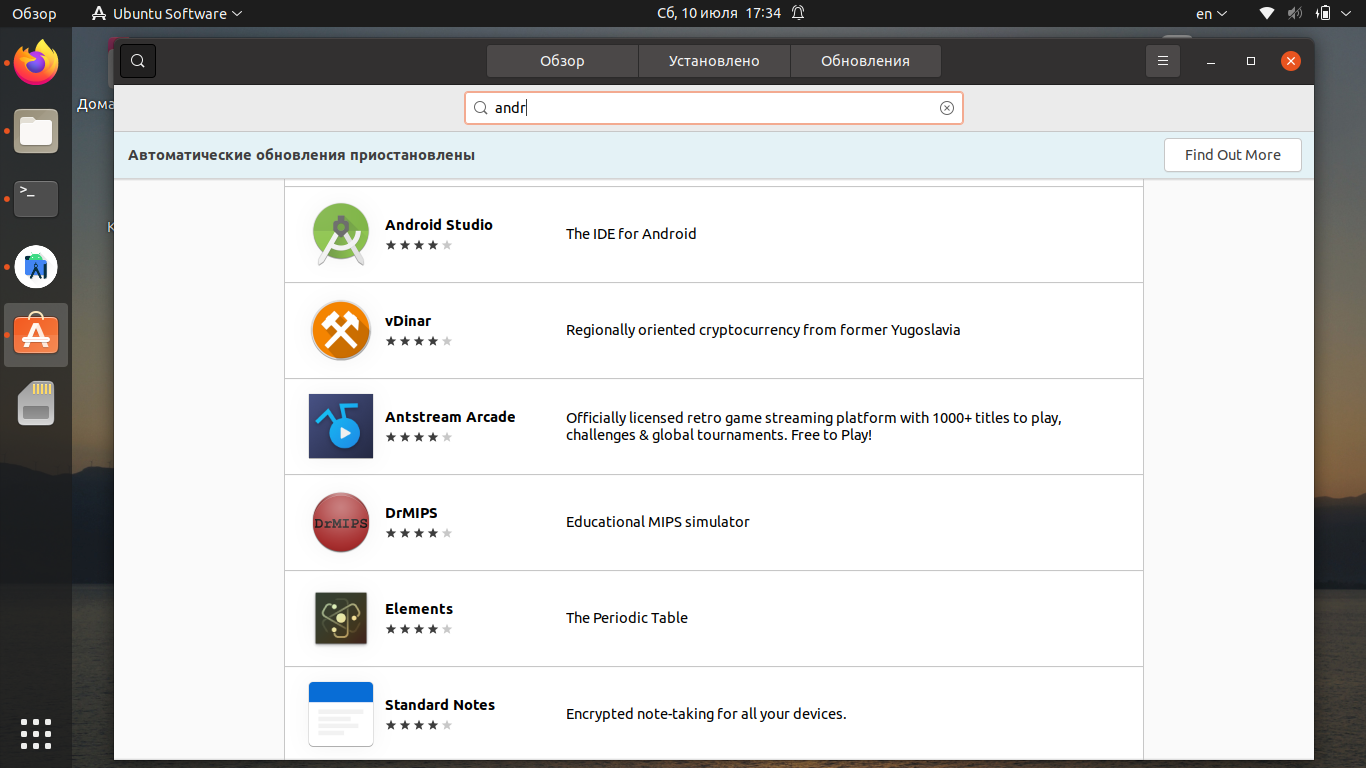
В списке выберите Android Studio и нажмите на кнопку Установить.
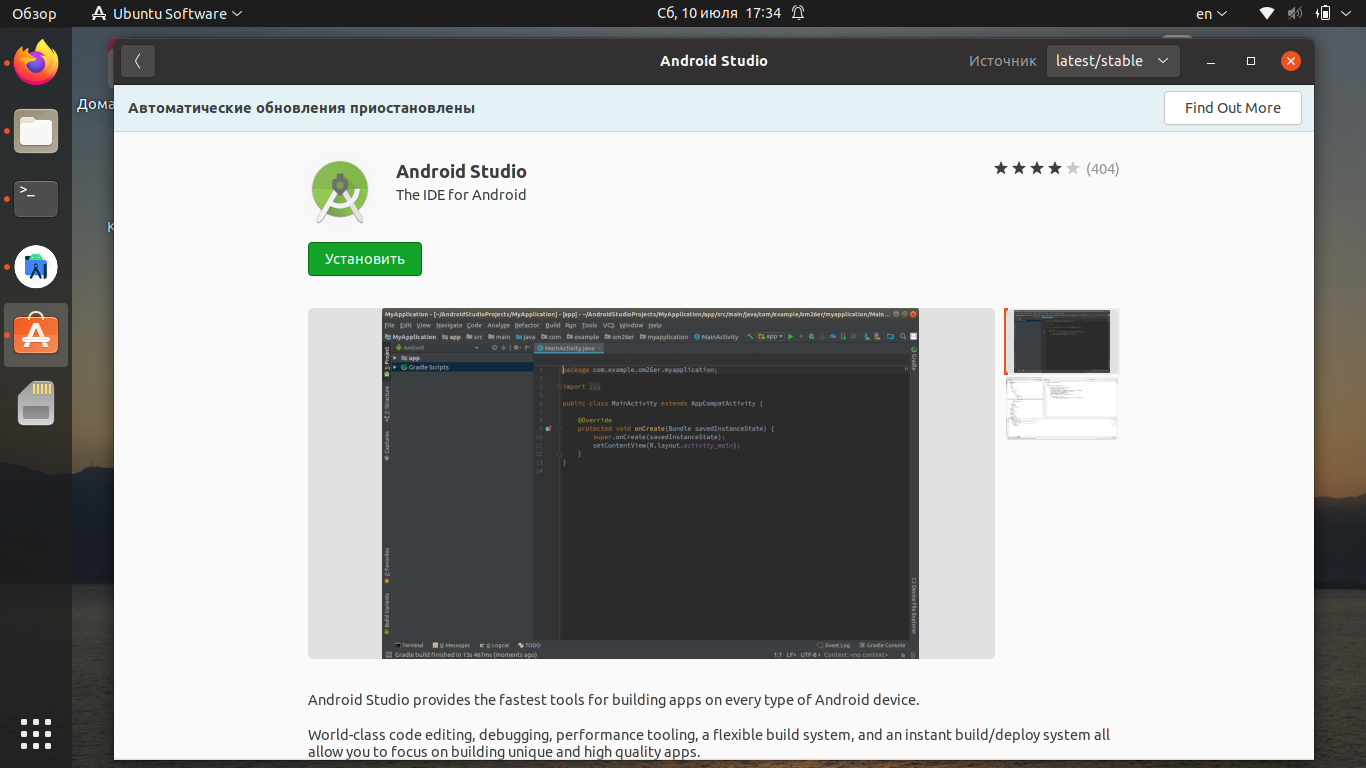
Дождитесь, пока инсталляция будет завершена.
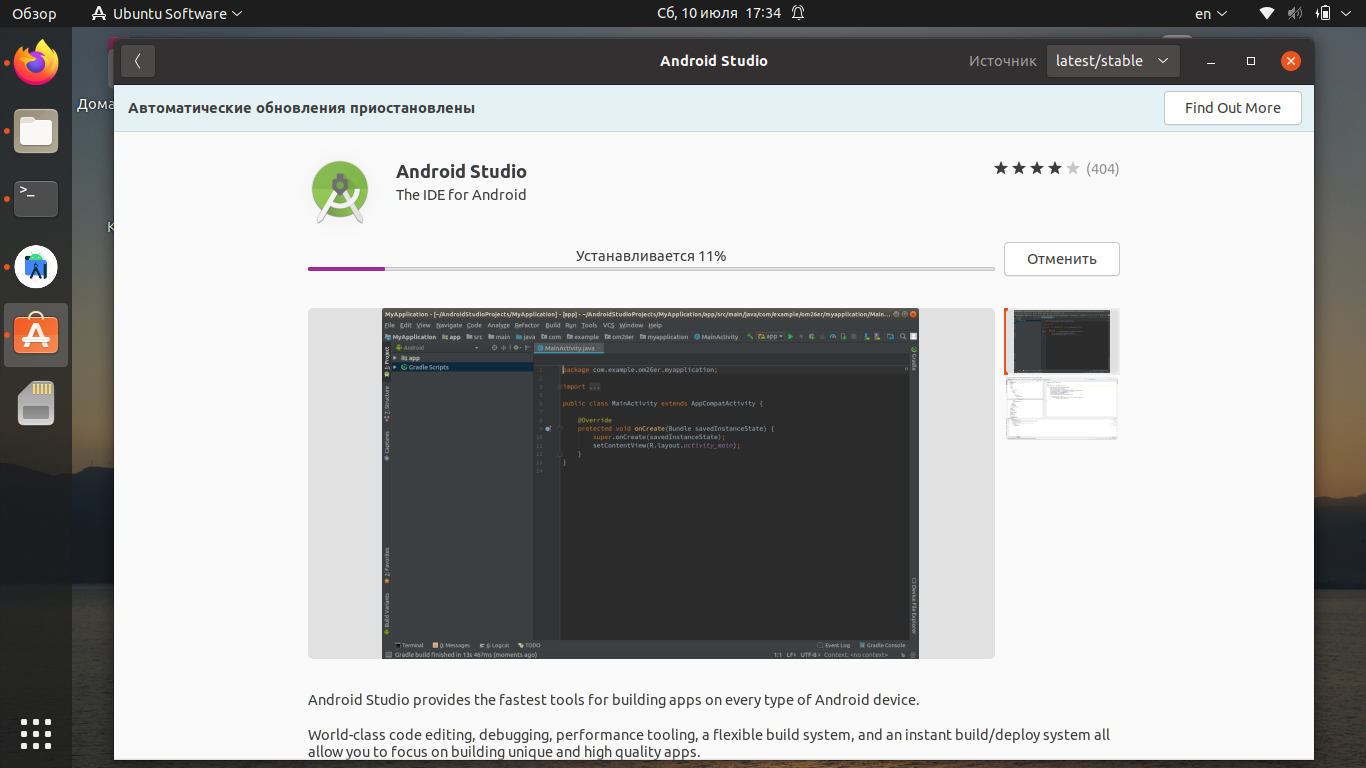
Процесс установки может занять до 30 минут (зависит от скорости вашего интернет-соединения). По окончании загрузки вы сможете запустить приложение.
3. Установка с официального сайта
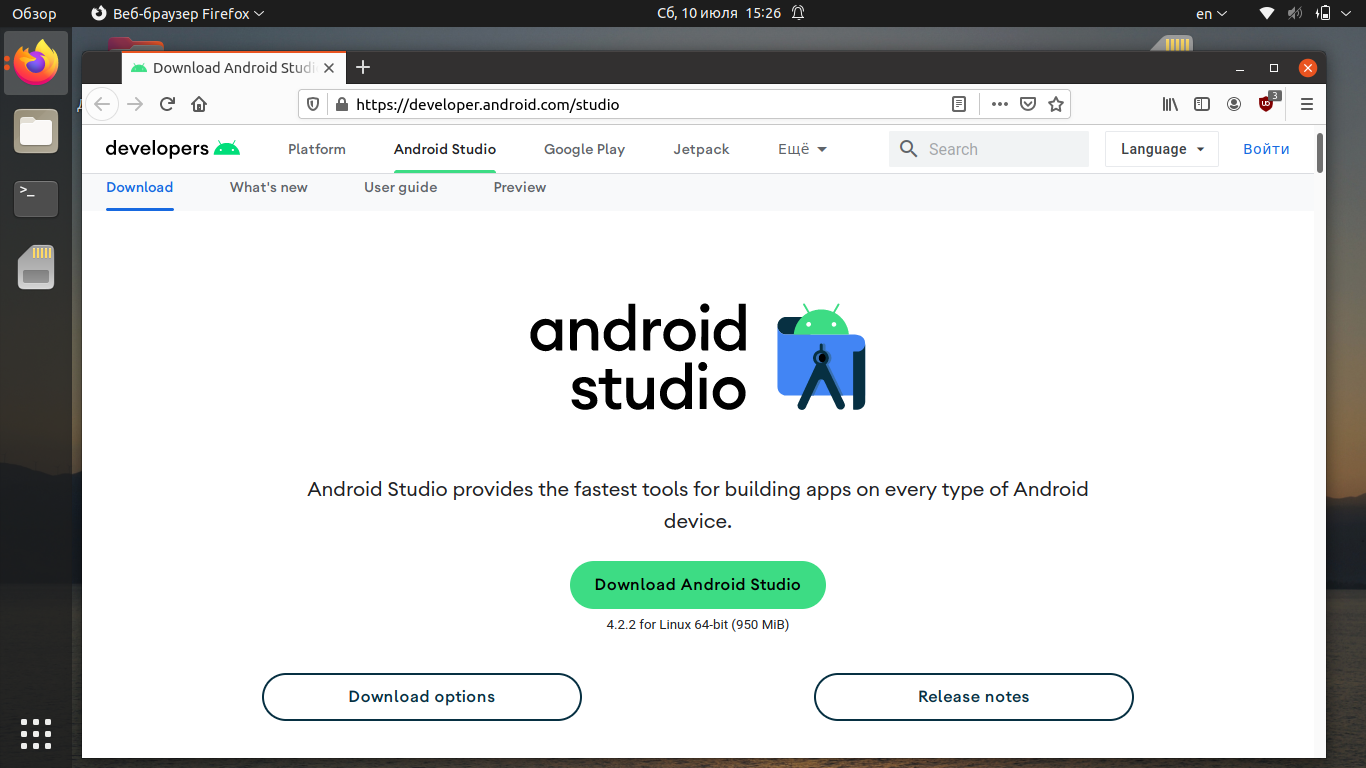
Прежде всего, вам необходимо загрузить установщик с официального сайта разработчиков. Перейдите на сайт и нажмите Download Android Studio.
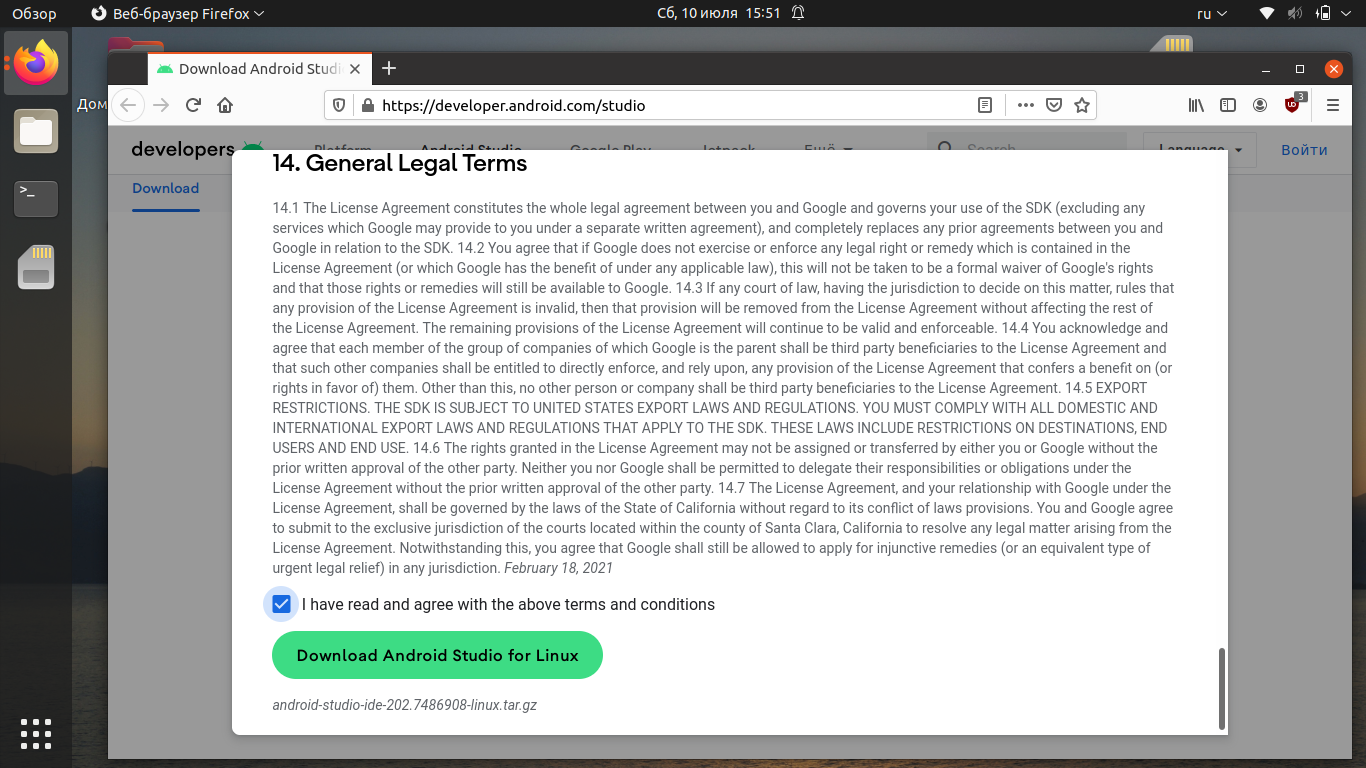
Ознакомьтесь с лицензионным соглашением, активируйте чекбокс и нажмите кнопку Download Android Studio for Linux.
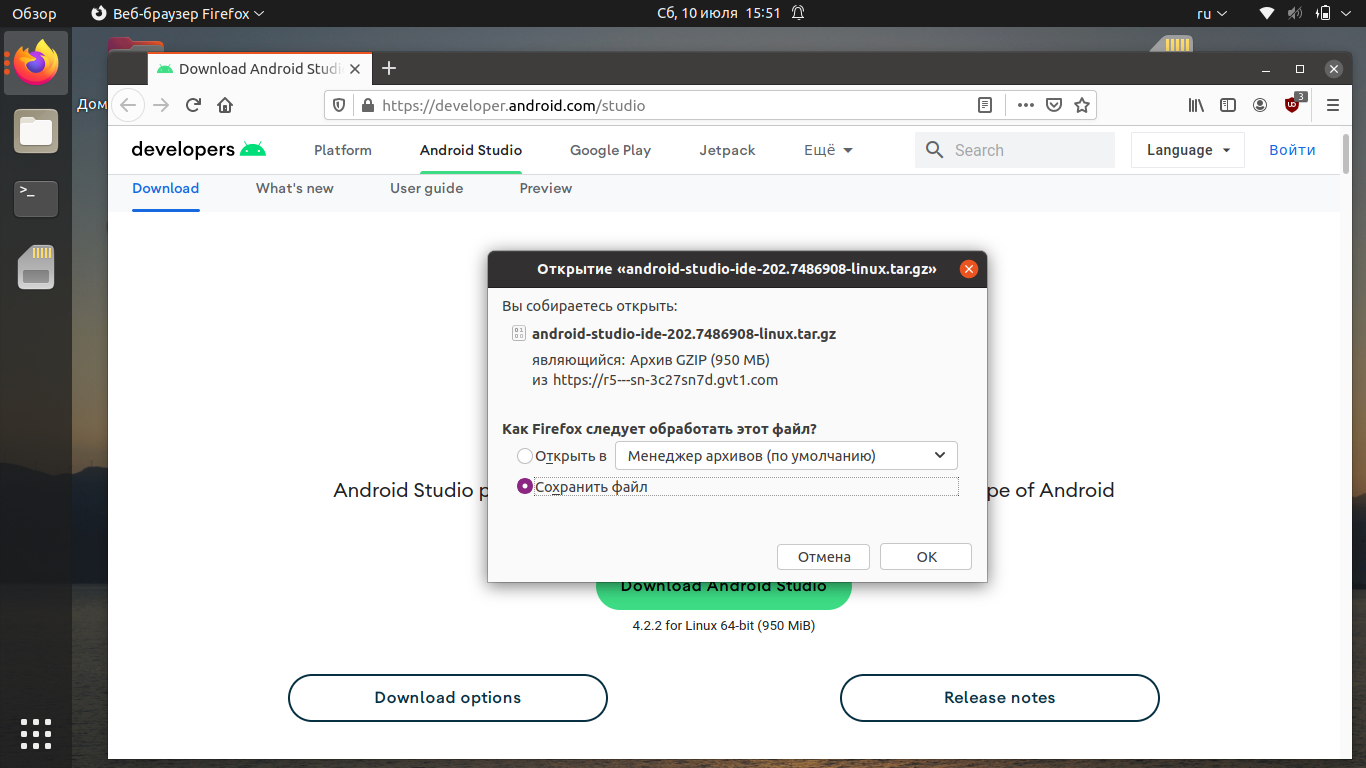
Выберите Сохранить файл и нажмите ОК.
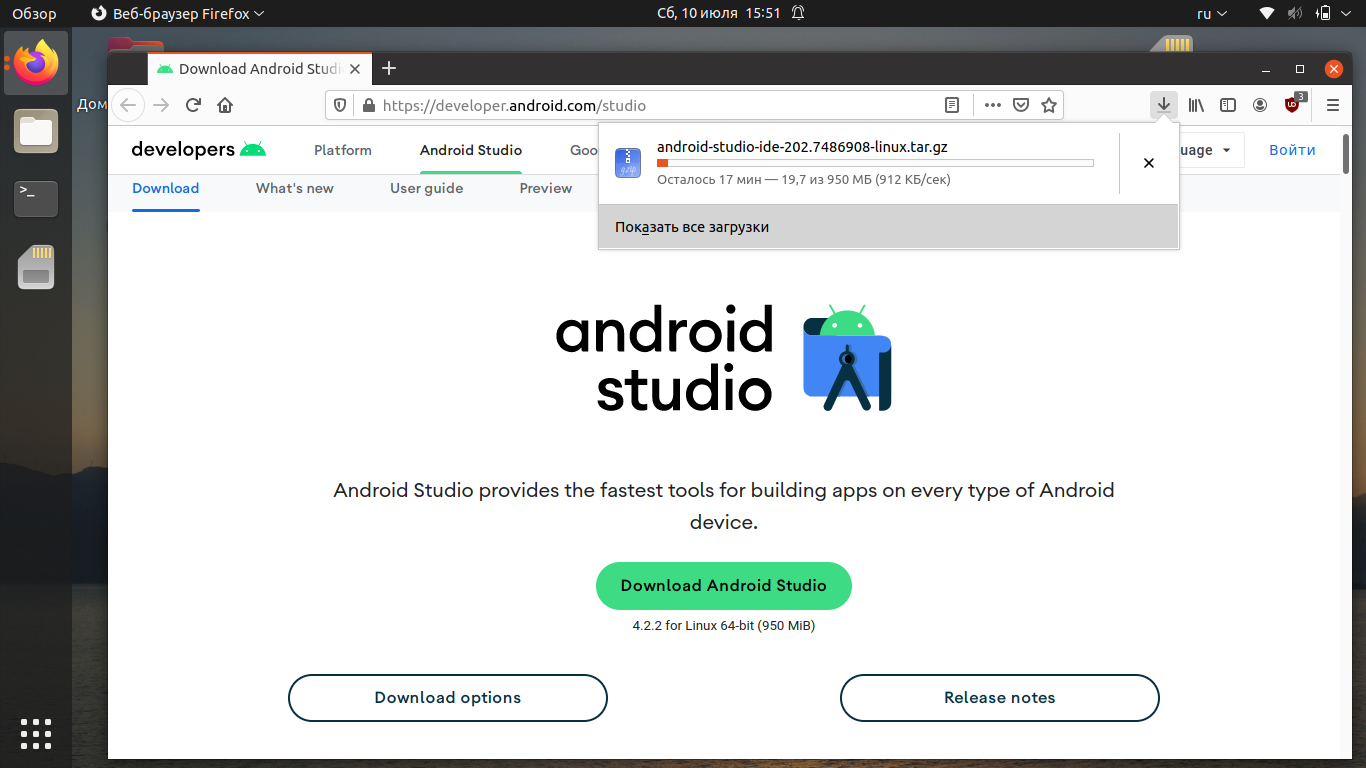
Дождитесь завершения скачивания.
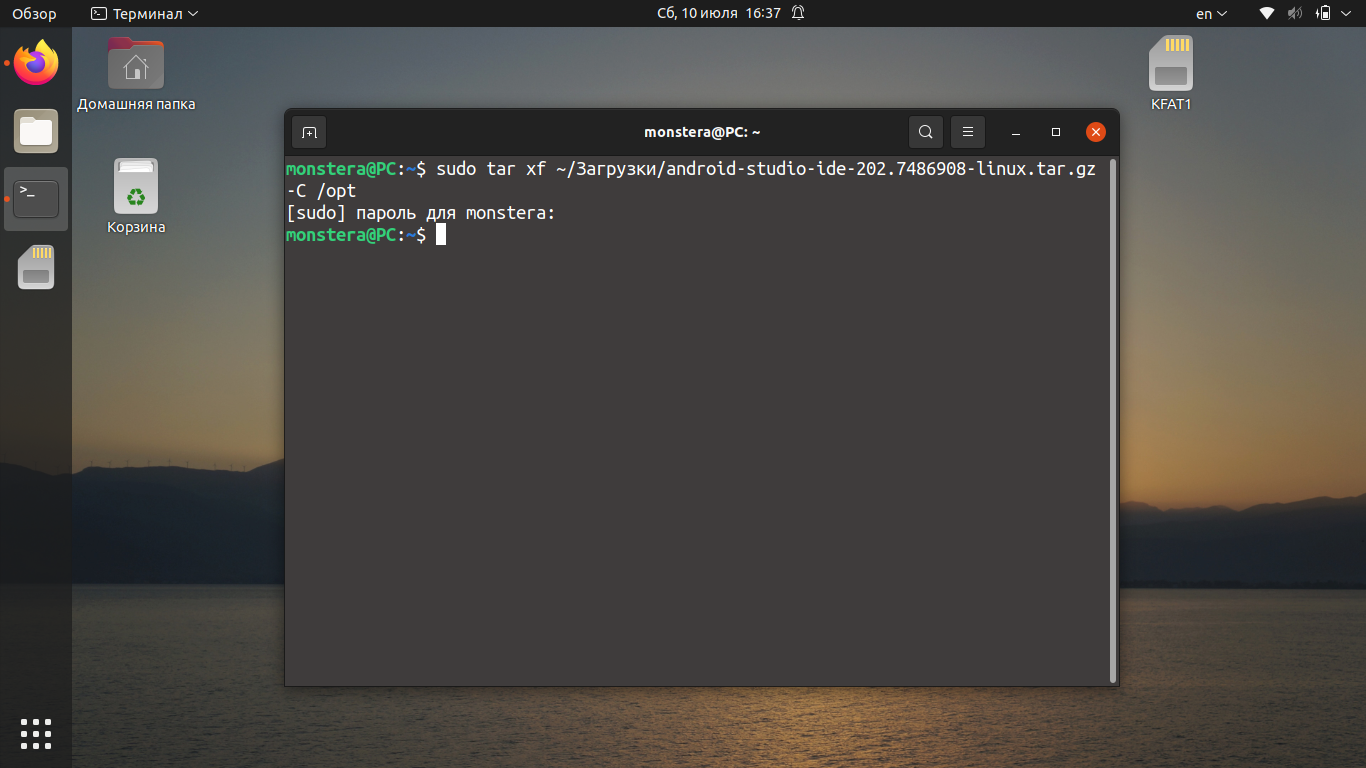
Когда файл будет загружен, перейдите в папку с загрузками и распакуйте содержимое архива в /opt. Для этого используйте команду вида (укажите скачанную вами версию приложения вместо 202.7486908):
/Загрузки/android-studio-ide-202.7486908-linux.tar.gz -C /opt
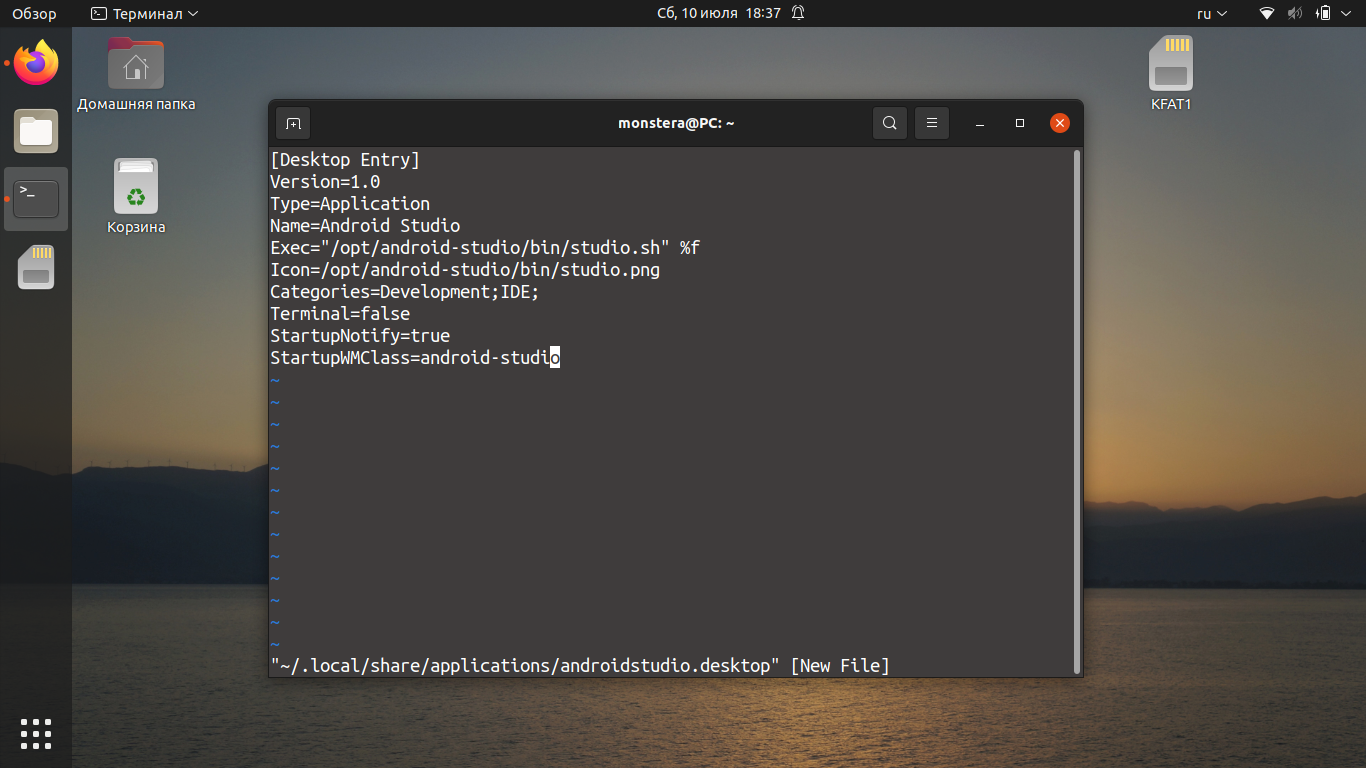
Чтобы добавить ярлык в меню приложений, создайте файл androidstudio.desktop командой:
Добавьте в файл следующий текст и сохраните его:
[Desktop Entry]
Version=1.0
Type=Application
Name=Android Studio
Exec=»/opt/android-studio/bin/studio.sh» %f
Icon=/opt/android-studio/bin/studio.png
Categories=Development;IDE;
Terminal=false
StartupNotify=true
StartupWMClass=android-studio
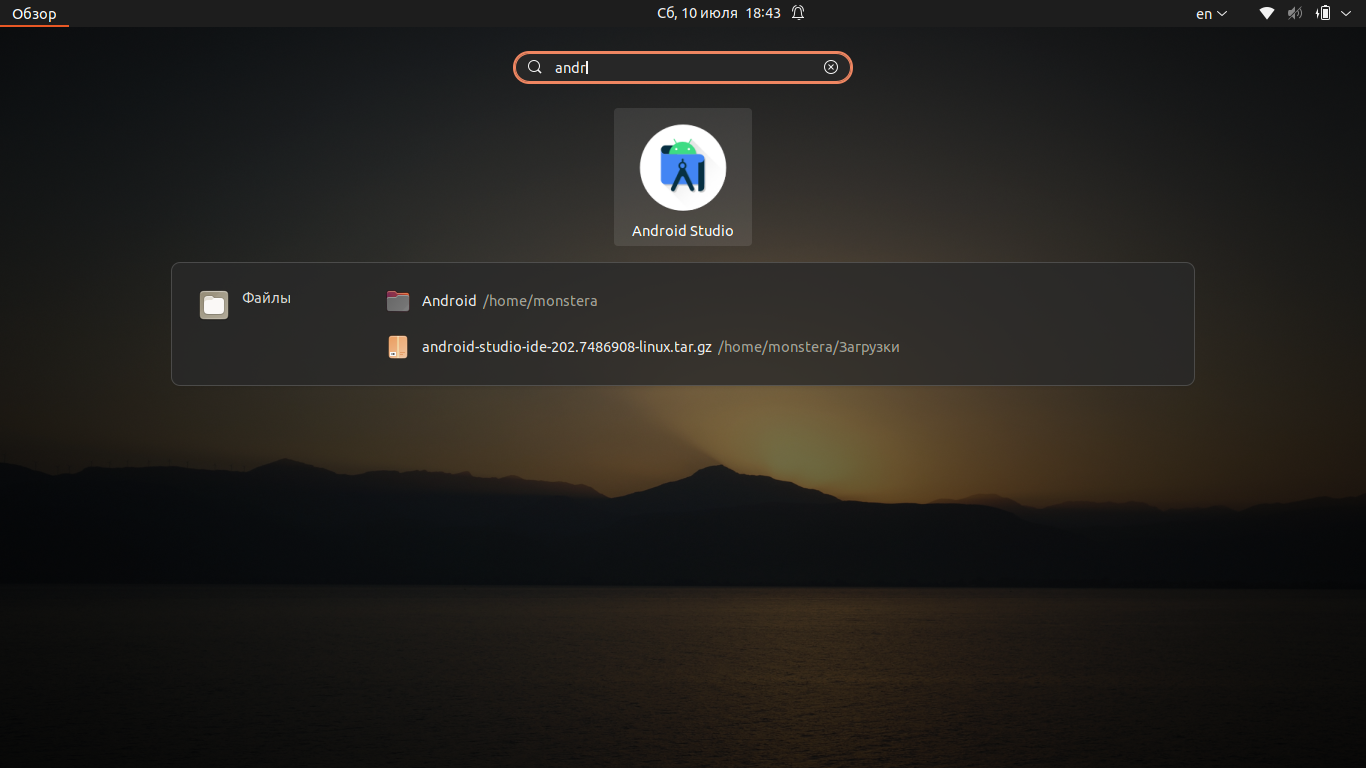
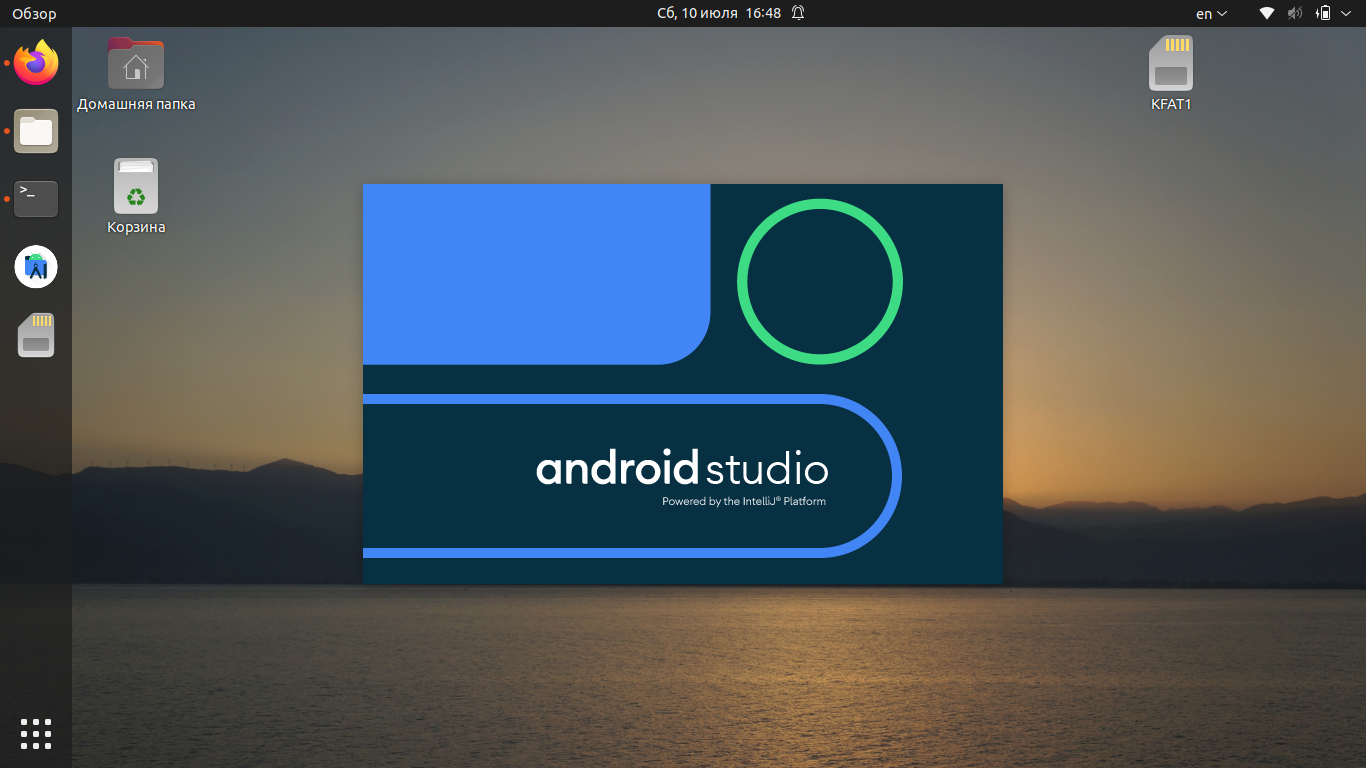
После этого установка будет завершена, и вы можете запустить среду разработки из главного меню:
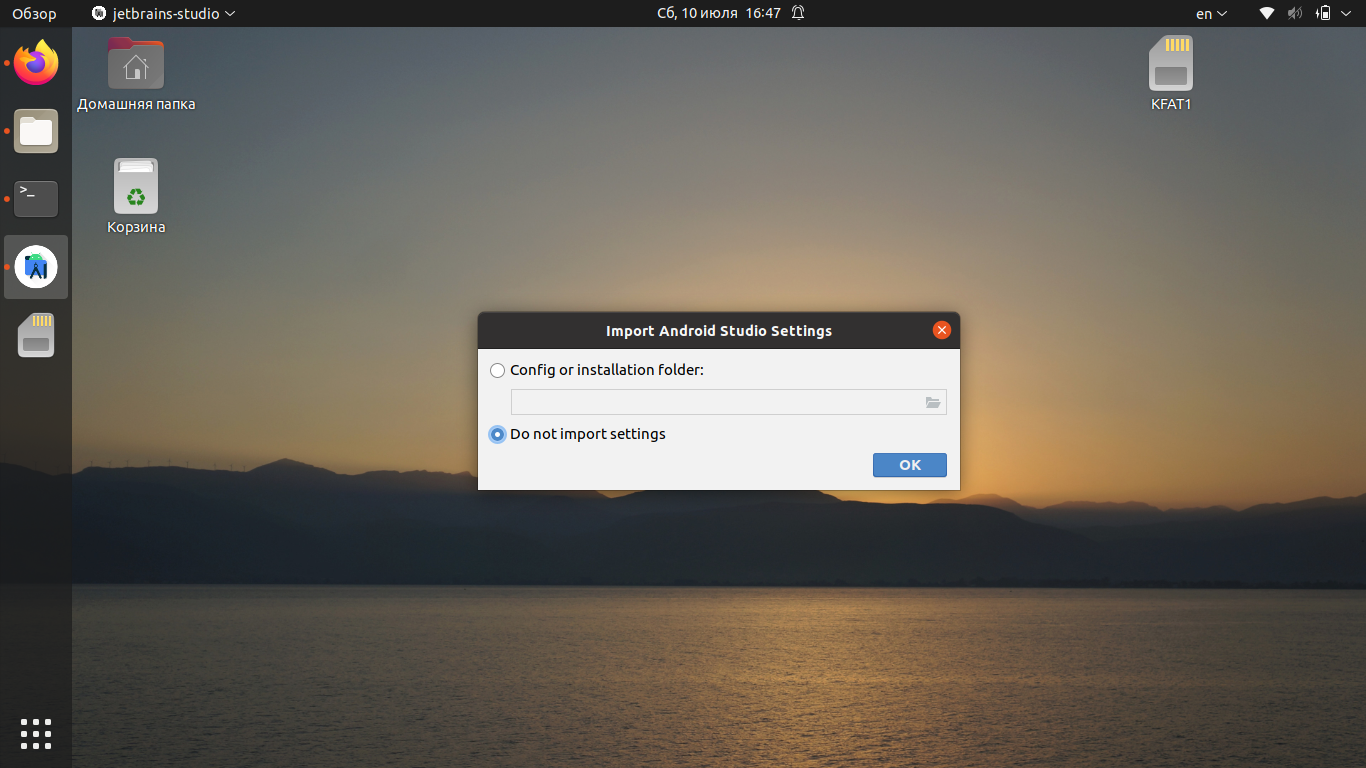
Но окончательная установка Android Studio ещё не завершена — программа должна скачать все необходимые компоненты и настройки. Если вы работали с Android Studio ранее, в следующем окне вы можете скопировать свои настройки. Если нет, — выберите Do not import settings и нажмите ОК.
Потребуется некоторое время, чтобы программа могла загрузить нужные компоненты и настроить систему.
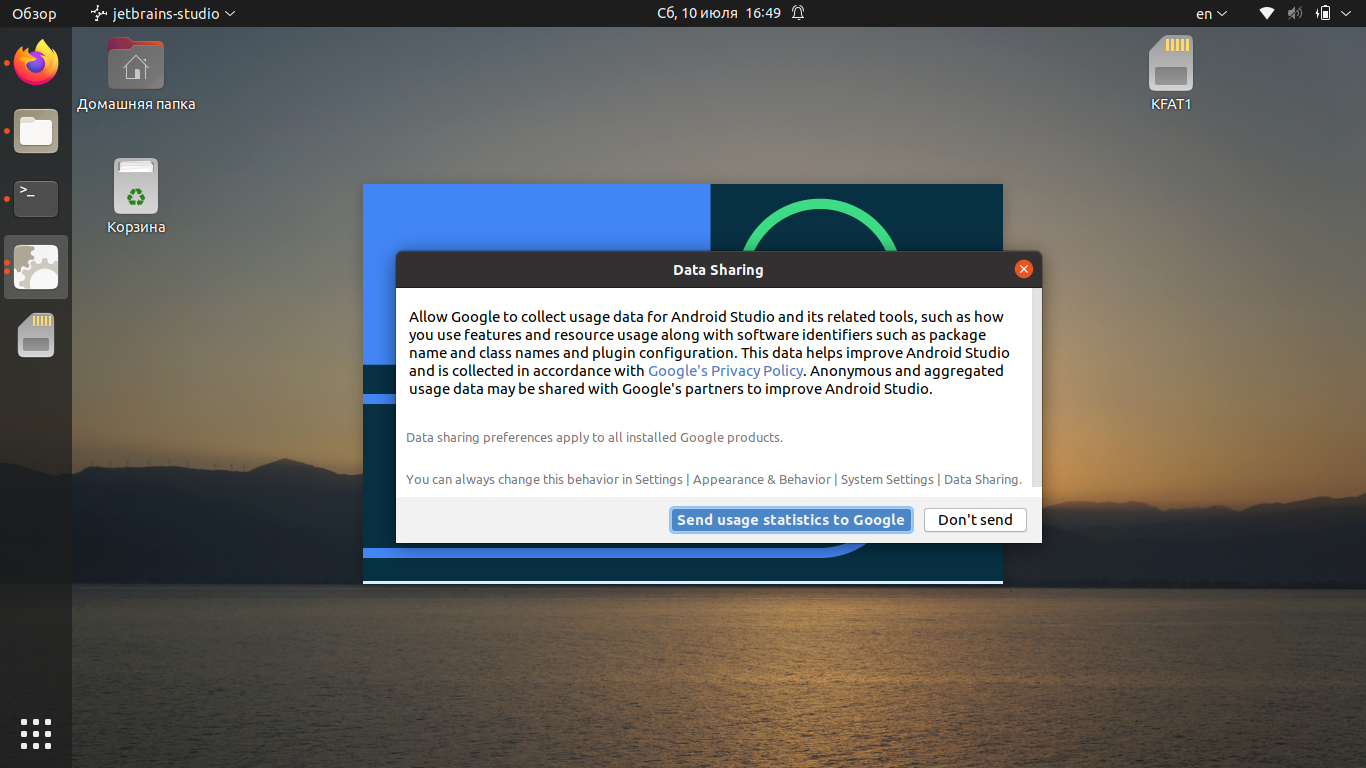
Приложение спросит, нужно ли отправлять статистику в Google. Эти данные могут использоваться для улучшения следующих версий Android Studio. Определитесь с выбором, чтобы продолжить установку.
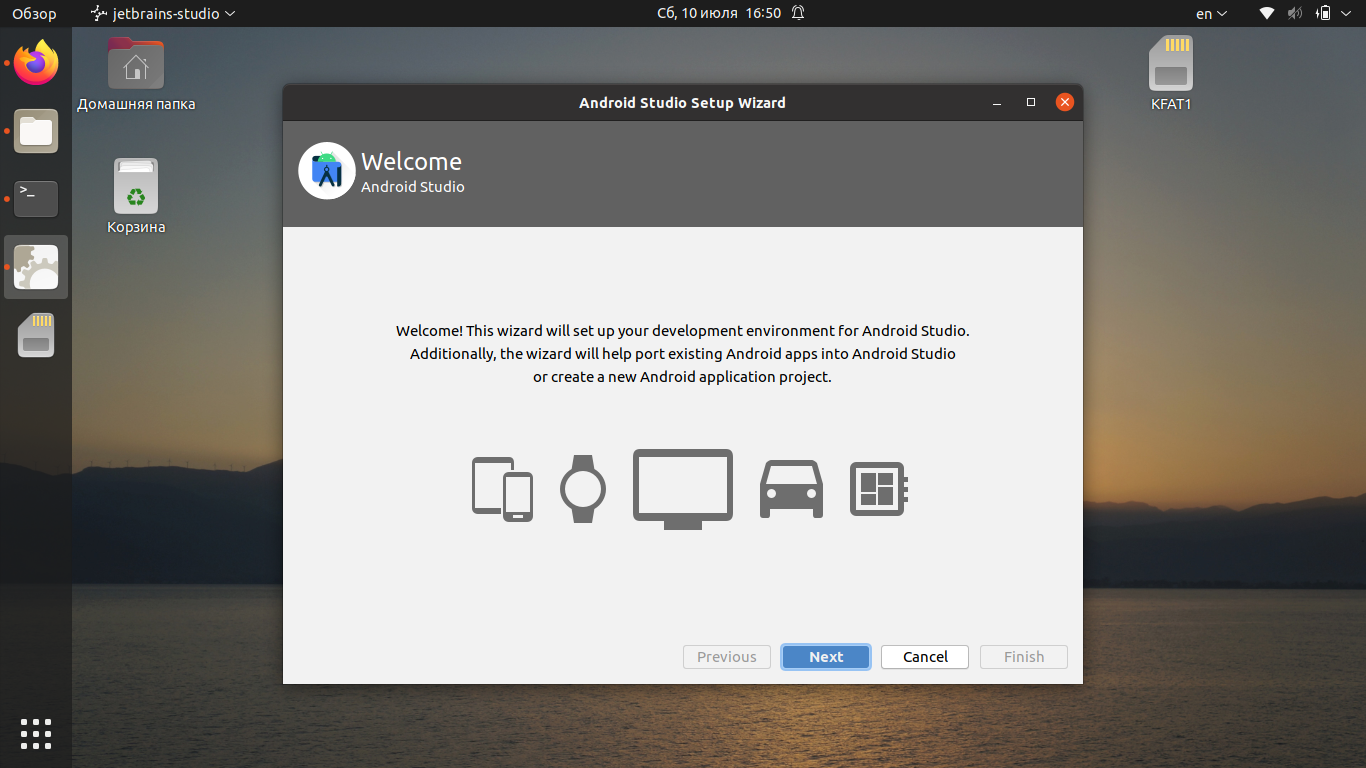
На следующем экране нажмите кнопку Next:
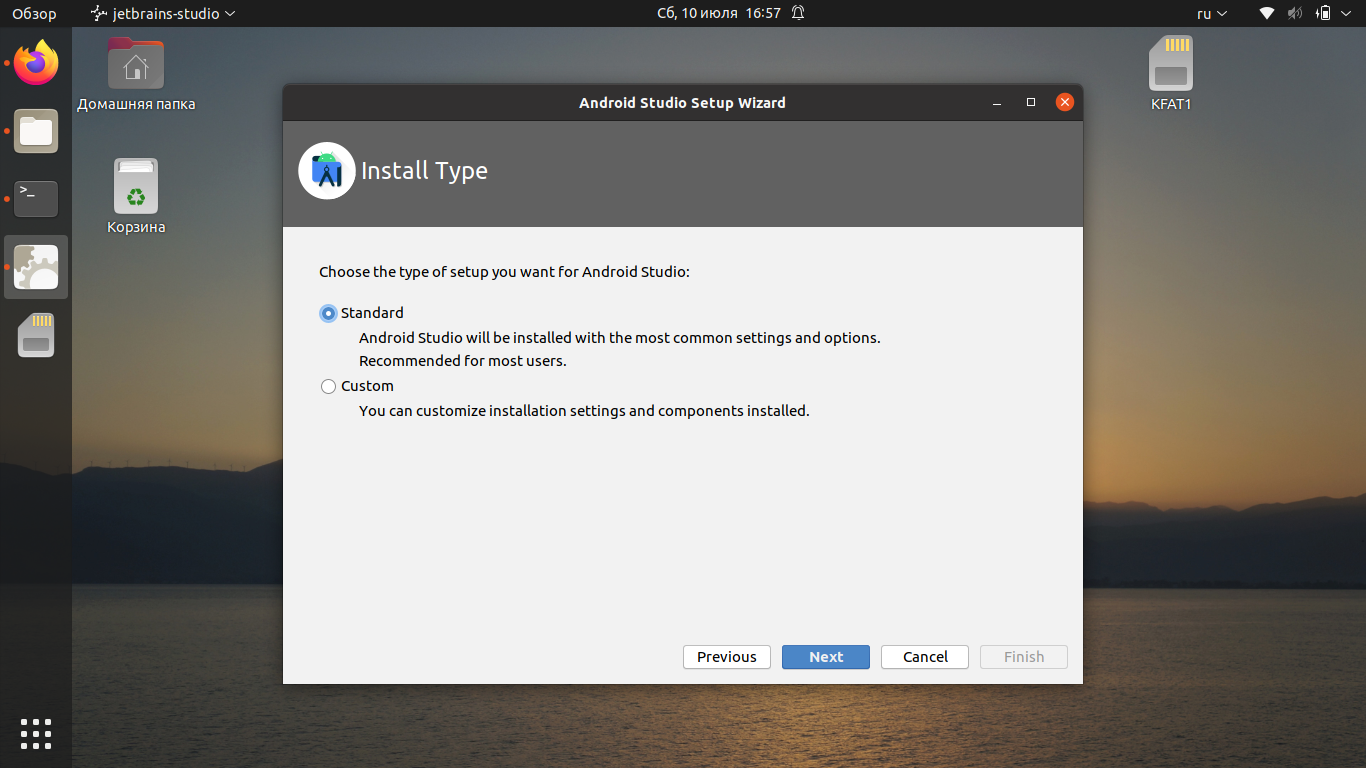
После этого вы сможете выбрать между стандартной автоматической инсталляцией и ручной. Второй способ позволяет выбрать для установки отдельные компоненты.
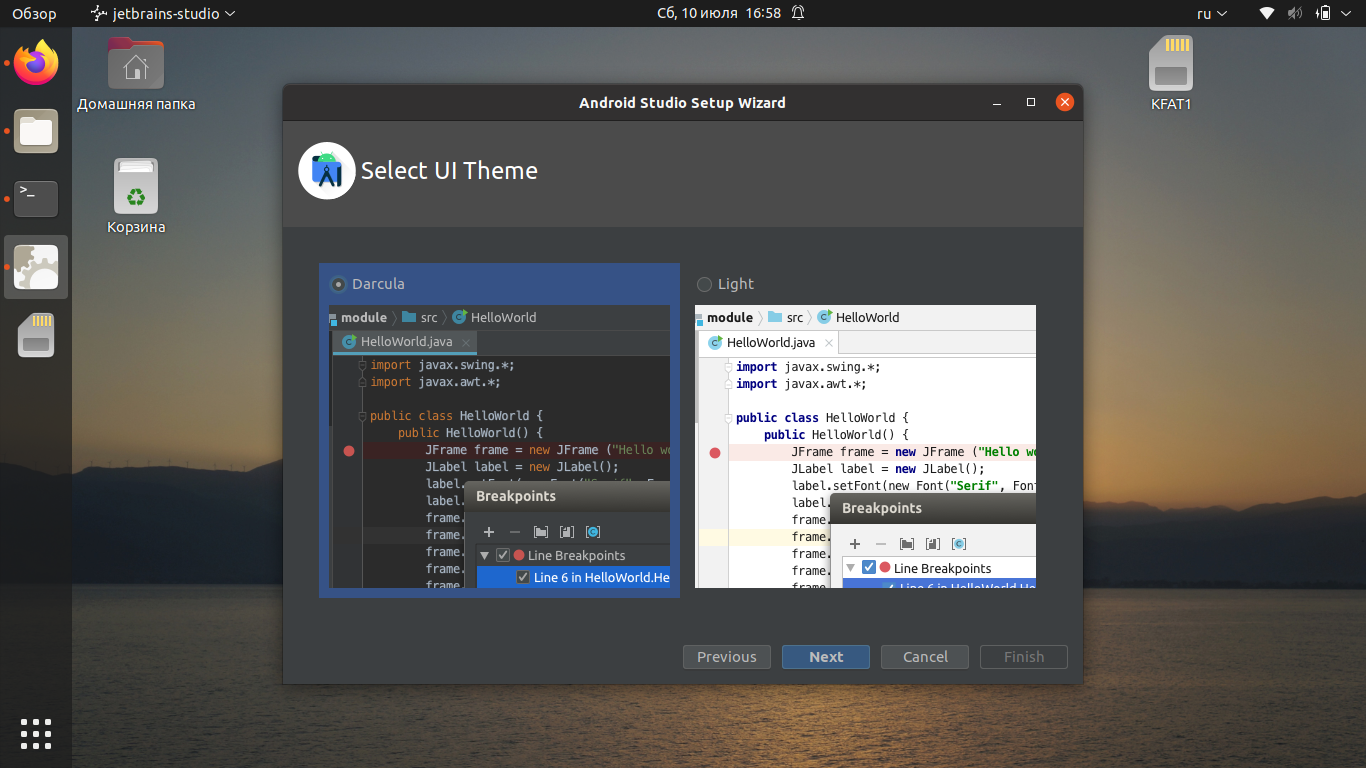
Выберите предпочитаемую тему оформления:
Ознакомьтесь со списком компонентов и их расположением:

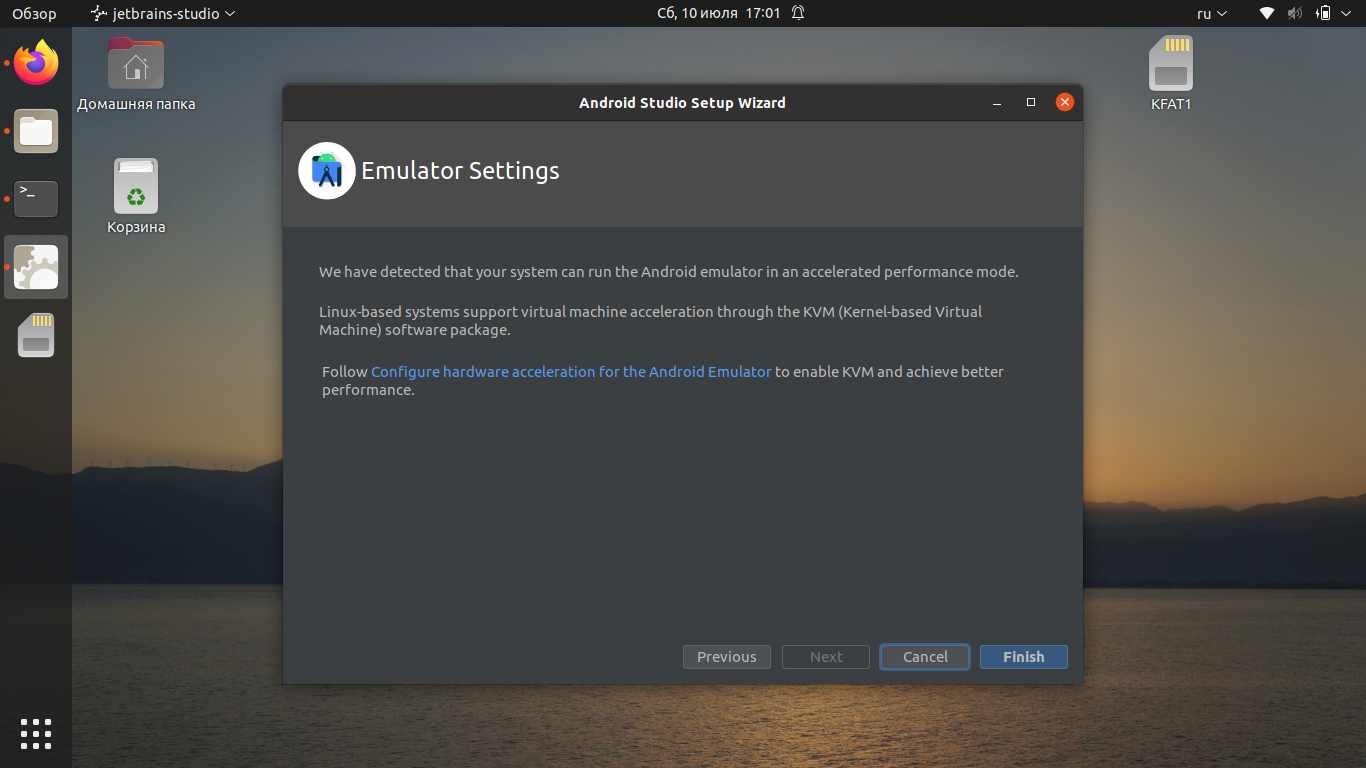
Приложение отобразит уведомление о том, можете ли вы использовать эмуляторы на своём компьютере (зависит от аппаратной составляющей).
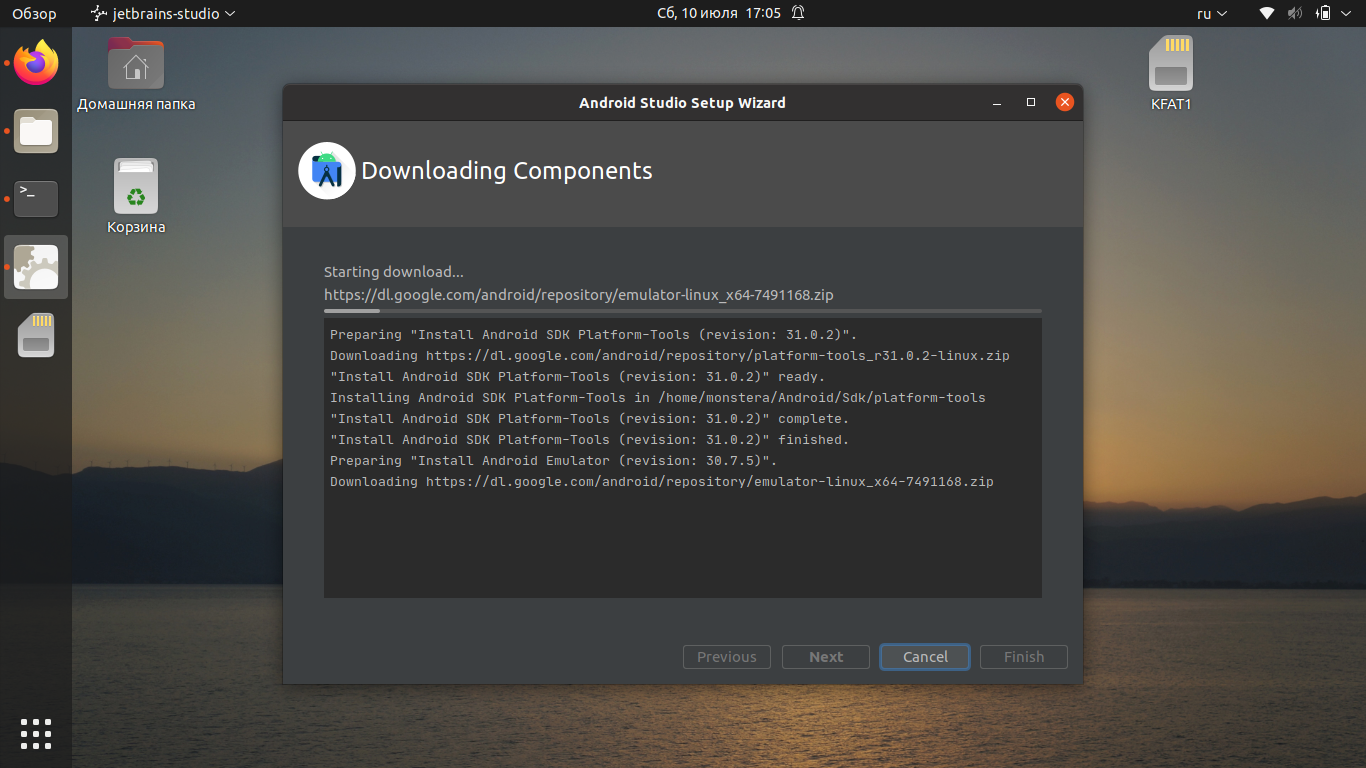
Далее начнётся загрузка, которая может занять довольно много времени, скорость зависит от вашего интернет соединения:
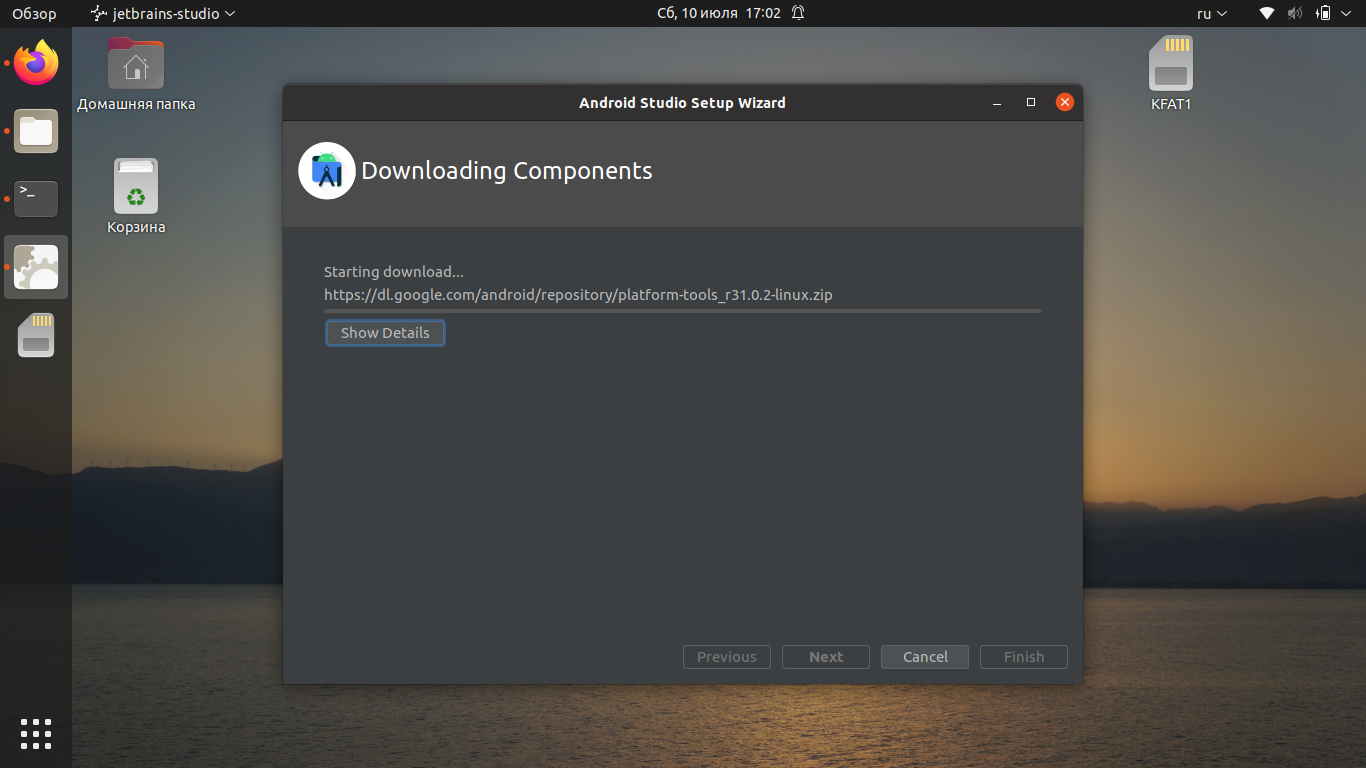
Можно нажать кнопку Show Details, чтобы наблюдать очерёдность установки компонентов:
Когда загрузка завершится, вы можете нажать Finish и перейти к созданию нового проекта.
4. Установка в JetBrains Toolbox
JetBrains Toolbox — это официальный инструмент для установки и пакетного обновления Android Studio и других продуктов JetBrains. Загрузить JetBrains Toolbox можно с официального сайта разработчиков.
После этого перейдите в директорию, куда был скачан архив. Например, если это папка Загрузки, выполните команду:
Распакуйте скачанный архив. Имя файла актуально на момент написания статьи, но в будущем версия может отличаться:
tar -xzvf jetbrains-toolbox-1.20.8804.tar.gz
Перейдите в созданную директорию:
Чтобы запустить менеджер пакетов, введите команду:
После запуска Toolbox найдите Android Studio в списке и нажмите кнопку Install:
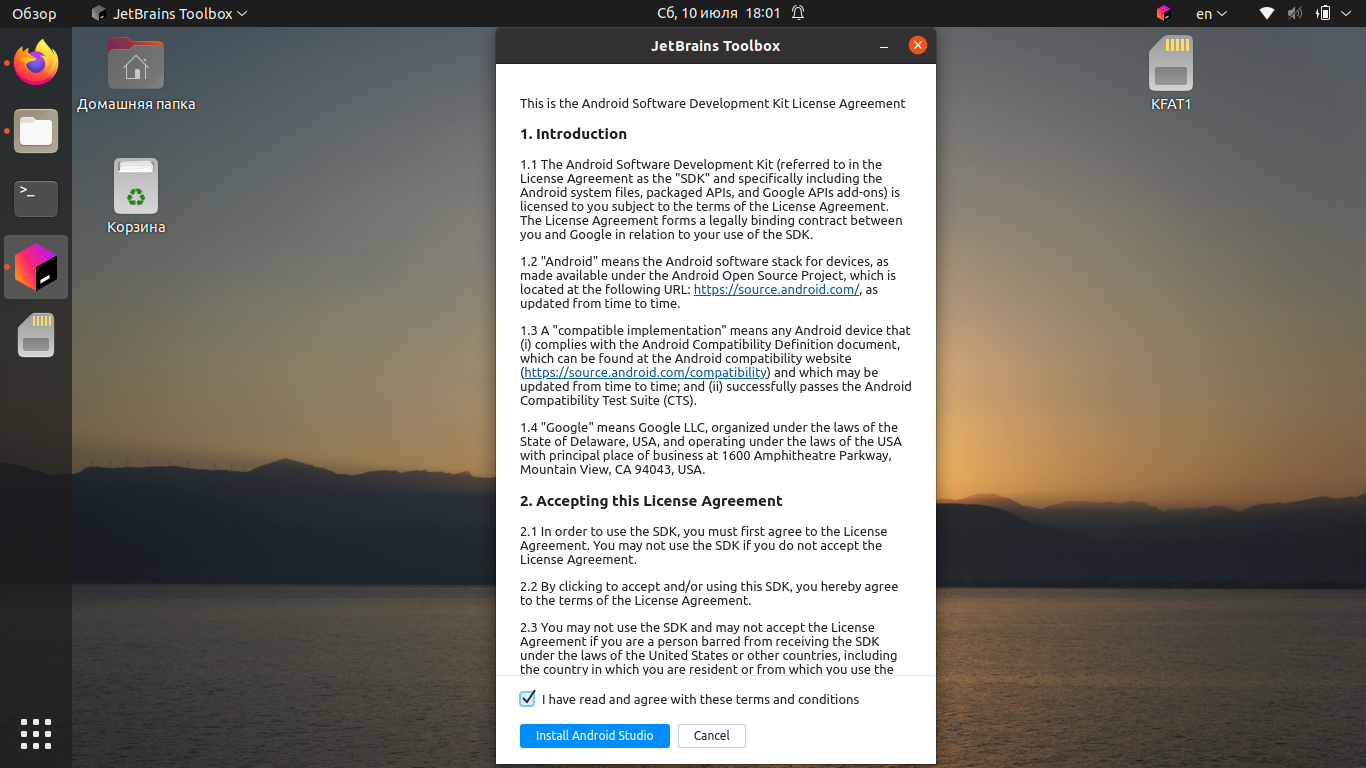
Подтвердите, что вы прочитали и принимаете лицензионное соглашение, после чего нажмите кнопку Install Android Studio.
Дождитесь, пока программа установится на ваш компьютер. После установки её можно будет запустить из главного меню Toolbox.

Как удалить Android Studio
Если вы устанавливали Android Studio с использованием snap-пакета или через центр приложений Ubuntu, её можно удалить командой:
sudo snap remove android-studio
Если же среда разработки была загружена с официального сайта, достаточно удалить распакованную папку вручную или с помощью команды в терминале:
sudo rm -Rf /opt/android-studio
Программа, установленная с помощью JetBrains Toolbox, удаляется с использованием этого инструмента. Перейдите в Toolbox, нажмите на значок шестерёнки рядом с Android Studio и выберите Delete.
Выводы
В этой статье мы рассмотрели, как выполняется установка Android Studio в Ubuntu 20.04 различными способами. Можете выбрать тот способ установки, который лучше всего подходит именно для вас. Если остались вопросы, задавайте их в комментариях.
Источник


