- Jetpack Compose — как легко построить UI на Android
- Преимущества Jetpack Compose
- Подключение к проекту
- Compose
- Versions
- Declaring dependencies
- Groovy
- Kotlin
- Feedback
- Jetpack Compose Navigation
- 1. Introduction
- What you’ll need
- Navigating with Compose
- What you’ll do
- What you’ll learn
- 2. Setup
- 3. Migrate to Navigation
- Add the Navigation dependency
- Set up the NavController
- Prepare routes for destinations
- Overview
- Preparation
- Fully integrate navigation bar state changes
- Migrate RallyScreen to Navigation
- Enable clicks on OverviewScreen
- 4. Navigating with arguments
- Navigate to SingleAccountBody
- 5. Enable deep link support
- Add the intent filter
- React to the deep link
- Test the deep link using adb
- 6. Extract finished NavHost
- 7. Testing Navigation in Compose
- Prepare the test class
- Write your first test
- Navigating in tests
- Test via UI and test rule
- Test via UI and navController
- Test via navController
- 8. Congratulations
- What’s next?
- Reference docs
Jetpack Compose — как легко построить UI на Android

В июле этого года вместе с Android Studio Arctic Fox вышла одна из долгожданных библиотек — Jetpack Compose. Она позволяет создавать пользовательский интерфейс в декларативном стиле и обещает быть революцией в построении UI.
Разбираемся, так ли это на самом деле, какие у библиотеки преимущества и недостатки. Подробности — в статье.
Преимущества Jetpack Compose
Jetpack Compose — это набор инструментов для разработки UI в Android-приложении. Он призван ускорить и упростить разработку пользовательского интерфейса, избавить от лишнего кода и соединить модель реактивного программирования с лаконичностью Kotlin.
Сразу с места в карьер — какие есть преимущества у библиотеки:
1. Меньше кода. Jetpack Compose позволяет писать меньше кода, а значит разработчик может больше фокусироваться на проблеме, с меньшим количеством тестов и дебага, а значит и багов.
2. Интуитивно понятный. Compose использует декларативный API — разработчику нужно лишь сказать, что сделать, а все остальное ляжет на плечи библиотеки.
3. Удобство внедрения. Compose совместим с любым существующим кодом. Например, можно вызвать Compose-код из вьюх (view) и, наоборот, вьюхи из Compose. Многие библиотеки вроде Jetpack Navigation, ViewModel и Coroutines уже адаптированы под Compose, что позволяет сравнительно быстро внедрить его в свой код. Кроме того, Android Studio Arctic Fox поддерживает превью создаваемых вьюх.
4. Имеет обширный инструментарий. Jetpack Compose позволяет создавать красивые приложения с прямым доступом к Android Platform API и build-in поддержкой Material Design, тёмной темы, анимаций и других крутых штук.
Далее пройдёмся по основным аспектам библиотеки и посмотрим, как сильно повышается производительность приложения.
Подключение к проекту
Чтобы подключить Jetpack Compose к проекту, необходимо указать некоторые строки кода в своем build.gradle.
В рутовом объявим переменную с версией Compose:
Здесь мы указываем, что в проекте будем использовать Jetpack Compose и объявляем необходимые зависимости (подробнее про зависимости можно почитать в официальном гайде).
Дальше всё просто. В активити (activity) объявлем Composable-функцию, строим иерархию вьюх с указанием необходимых атрибутов и смотрим результат.
Пройдемся по коду. Я написал две реализации вёрсток различной сложности:
1. Простая реализация
Добавляет TextView в вёрстку с текстом с конкатенацией Hello и аргумента, переданного в Greeting.
Важно отметить, что имена Composable-функций начинаются с заглавной буквы. Это соглашение по наименованию функций, поэтому если писать со строчной, то студия будет подсвечивать неверный нейминг.
2. Более сложная реализация
Этот вариант представляет собой скролящийся экран, который содержит изображение, текст и кнопку. Рассмотрим некоторые особенности:
Необходимо объявить Scroll State. Только не обычный, а тот, который позволяет сохранять состояние скролла сквозь рекомпозицию — rememberScrollState().
Column представляет собой ViewGroup с вертикальным расположением элементов.
Modifier позволяет управлять атрибутами, добавлять декорации и поведение к вьюхам.
Остальное интуитивно понятно. И это как раз одна из ключевых особенностей Jetpack Compose — даже если вы не использовали библиотеку ранее, то всё равно с ней разберётесь.
Добавить вьюхи в активити можно через extension setContent <>, например:
В общем-то, создание UI выглядит действительно просто. Теперь определим, насколько сильно оптимизируется приложение и как быстро пользователь увидит окончательный экран.
Для тестирования воспользуемся библиотекой Jetpack Benchmark, о которой, кстати, тоже рассказывали в отдельной статье. Код теста выглядит так:
Протестируем три версии установки вьюхи в активити:
При передаче ресурса в setContentView.
При передаче вьюхи в setContentView.
Итоги тестирования можно посмотреть в таблице: левый столбец — название теста, правый — время на выполнение:
Источник
Compose
Compose is combination of 7 Maven Group Ids within androidx . Each Group contains a targeted subset of functionality, each with it’s own set of release notes.
This table explains the groups and links to each set of release notes.
| Group | Description |
|---|---|
| compose.animation | Build animations in their Jetpack Compose applications to enrich the user experience. |
| compose.compiler | Transform @Composable functions and enable optimizations with a Kotlin compiler plugin. |
| compose.foundation | Write Jetpack Compose applications with ready to use building blocks and extend foundation to build your own design system pieces. |
| compose.material | Build Jetpack Compose UIs with ready to use Material Design Components. This is the higher level entry point of Compose, designed to provide components that match those described at www.material.io. |
| compose.material3 | Build Jetpack Compose UIs with Material Design 3 Components, the next evolution of Material Design. Material 3 includes updated theming and components and Material You personalization features like dynamic color, and is designed to be cohesive with the new Android 12 visual style and system UI. |
| compose.runtime | Fundamental building blocks of Compose’s programming model and state management, and core runtime for the Compose Compiler Plugin to target. |
| compose.ui | Fundamental components of compose UI needed to interact with the device, including layout, drawing, and input. |
Versions
This table lists the current versions of each group.
| Maven Group ID | Latest Update | Current Stable Release | Next Release Candidate | Beta Release | Alpha Release |
|---|---|---|---|---|---|
| compose.animation | December 1, 2021 | 1.0.5 | — | 1.1.0-beta04 | — |
| compose.compiler | December 1, 2021 | 1.0.5 | — | 1.1.0-beta04 | — |
| compose.foundation | December 1, 2021 | 1.0.5 | — | 1.1.0-beta04 | — |
| compose.material | December 1, 2021 | 1.0.5 | — | 1.1.0-beta04 | — |
| compose.material3 | December 1, 2021 | — | — | — | 1.0.0-alpha02 |
| compose.runtime | December 1, 2021 | 1.0.5 | — | 1.1.0-beta04 | — |
| compose.ui | December 1, 2021 | 1.0.5 | — | 1.1.0-beta04 | — |
Declaring dependencies
To add a dependency on Compose, you must add the Google Maven repository to your project. Read Google’s Maven repository for more information.
Add the dependencies for the artifacts you need in the build.gradle file for your app or module:
Groovy
Kotlin
For more information about dependencies, see Add build dependencies.
Feedback
Your feedback helps make Jetpack better. Let us know if you discover new issues or have ideas for improving this library. Please take a look at the existing issues in this library before you create a new one. You can add your vote to an existing issue by clicking the star button.
See the Issue Tracker documentation for more information.
Content and code samples on this page are subject to the licenses described in the Content License. Java is a registered trademark of Oracle and/or its affiliates.
Источник
Jetpack Compose Navigation
1. Introduction
Last Updated: 2021-03-17
What you’ll need
- The latest Android Studio Arctic Fox
- Knowledge of Kotlin
- Basic understanding of Compose (such as the @Composable annotation)
- Consider taking the Jetpack Compose basics codelab before this codelab
Navigating with Compose
Navigation is a Jetpack library that enables navigating from one destination within your app to another, along specific routes. The Navigation library also provides a specific artifact to enable consistent and idiomatic navigation within screens built with Jetpack Compose. This artifact ( navigation-compose ) is the focal point of this codelab.
What you’ll do
You’re going to use the Rally Material study as the base for this codelab. You’ll migrate the existing navigation code to use the Jetpack Navigation component to navigate between screens in Jetpack Compose.
What you’ll learn
- Basics of using Jetpack Navigation with Jetpack Compose
- Navigating between composables
- Navigating with required and optional arguments
- Navigating using deep links
- Integrating a TabBar into your navigation hierarchy
- Testing navigation
2. Setup
You can follow along this codelab on your machine.
To follow along on your own, clone the starting point for the codelab.
Alternatively, you can download two zip files:
Now that you’ve downloaded the code, open the NavigationCodelab project in Android Studio. You’re now ready to get started.
The compose-codelabs repo contains starter code for all codelabs in the pathway.
For this codelab, use the NavigationCodelab project.
 NavigationCodelab — Project that contains the start and finished code for this codelab
 NavigationCodelab — Project that contains the start and finished code for this codelab
The project is built in multiple git branches:
- main – the starter code for this project, you will make changes to this to complete the codelab
- end – contains the solution to this codelab
3. Migrate to Navigation
Rally is an existing app which initially doesn’t use Navigation. The migration follows several steps:
- Add the Navigation dependency
- Set up the NavController and NavHost
- Prepare routes for destinations
- Replace the original destination mechanism with navigation routes
Add the Navigation dependency
Open the app’s build file, found at app/build.gradle . In the dependencies section, add the navigation-compose dependency.
Now, sync the project and you’re ready to start using Navigation in Compose.
Set up the NavController
The NavController is the central component when using Navigation in Compose; it keeps track of back stack entries, moves the stack forward, enables back stack manipulation, and navigating between screen states. Because NavController is central to navigation it has to be created first in order to navigate to destinations.
Within Compose you’re working with a NavHostController , which is a subclass of NavController . Obtain a NavController by using the rememberNavController() function; this creates and remembers a NavController which survives configuration changes (using rememberSavable ). The NavController is associated with a single NavHost composable. The NavHost links the NavController with a navigation graph where composable destinations are specified.
For this codelab, obtain and store your NavController within RallyApp . It is the root composable for the entire application. You can find it in RallyActivity.kt .
Prepare routes for destinations
Overview
Rally App has three screens:
- Overview — Overview of all financial transactions and alerts
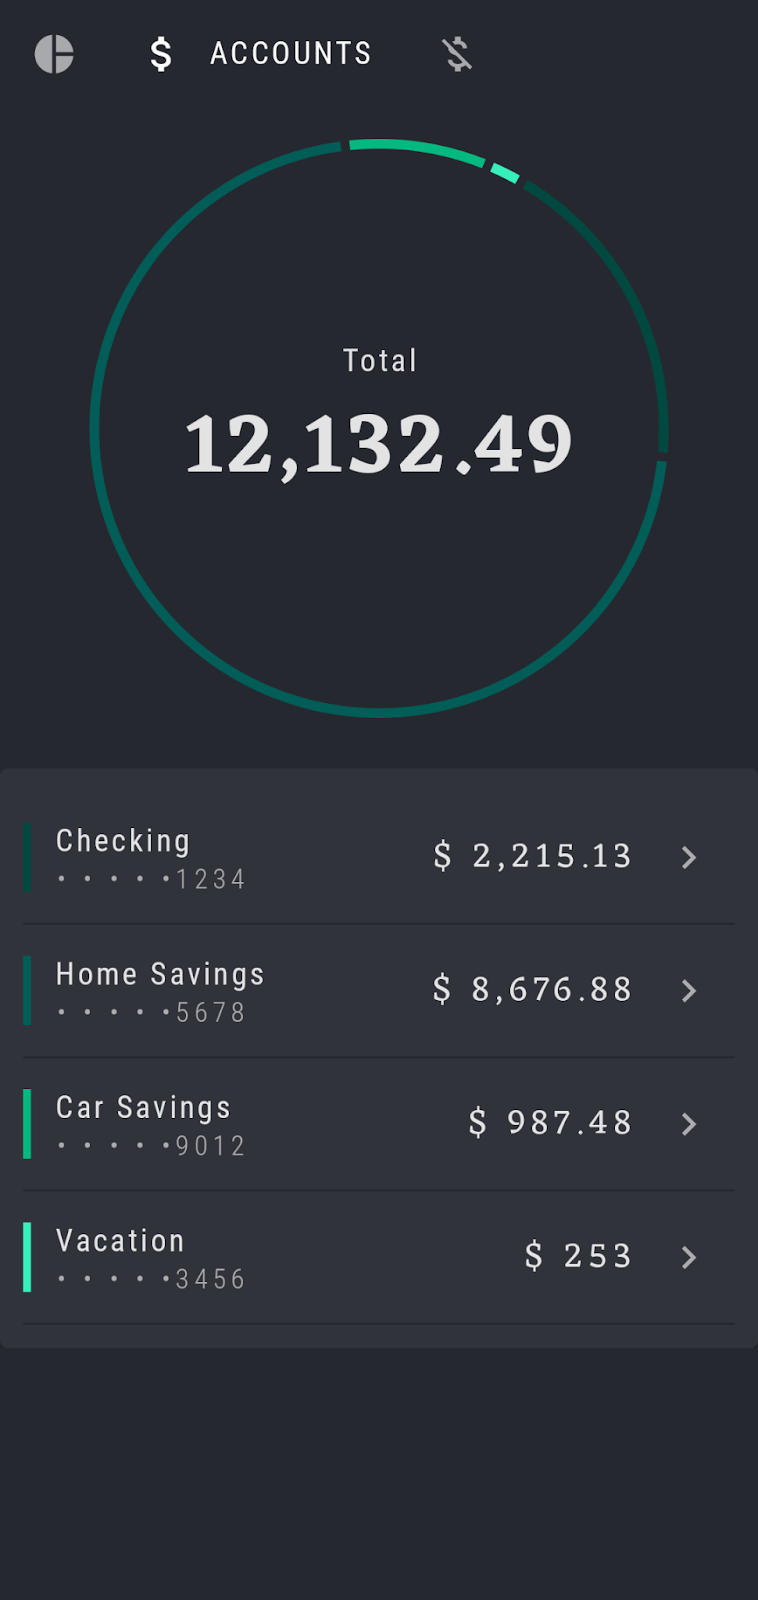
- Accounts — Insights into existing accounts
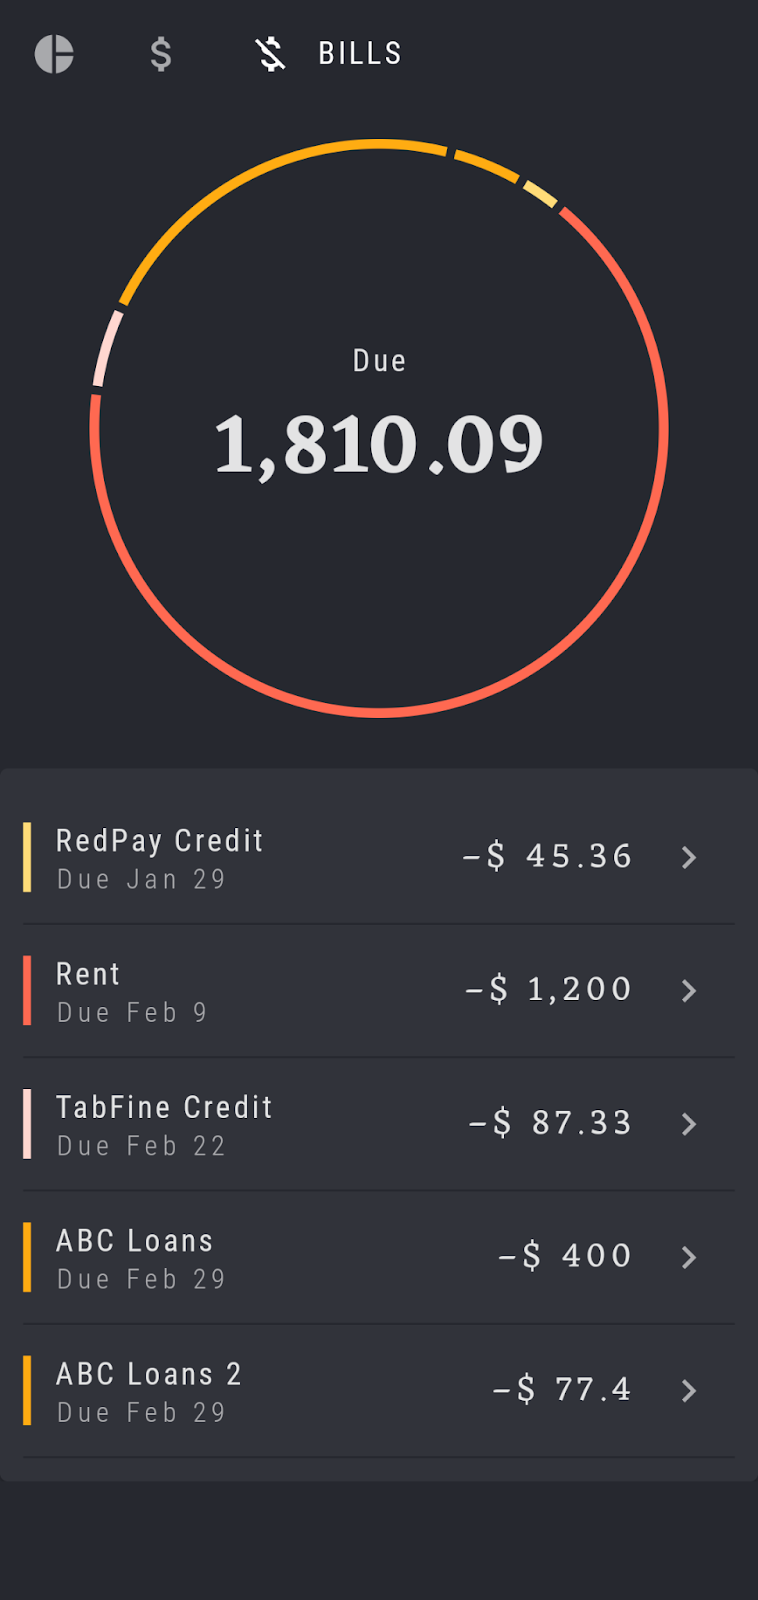
- Bills — Scheduled expenses
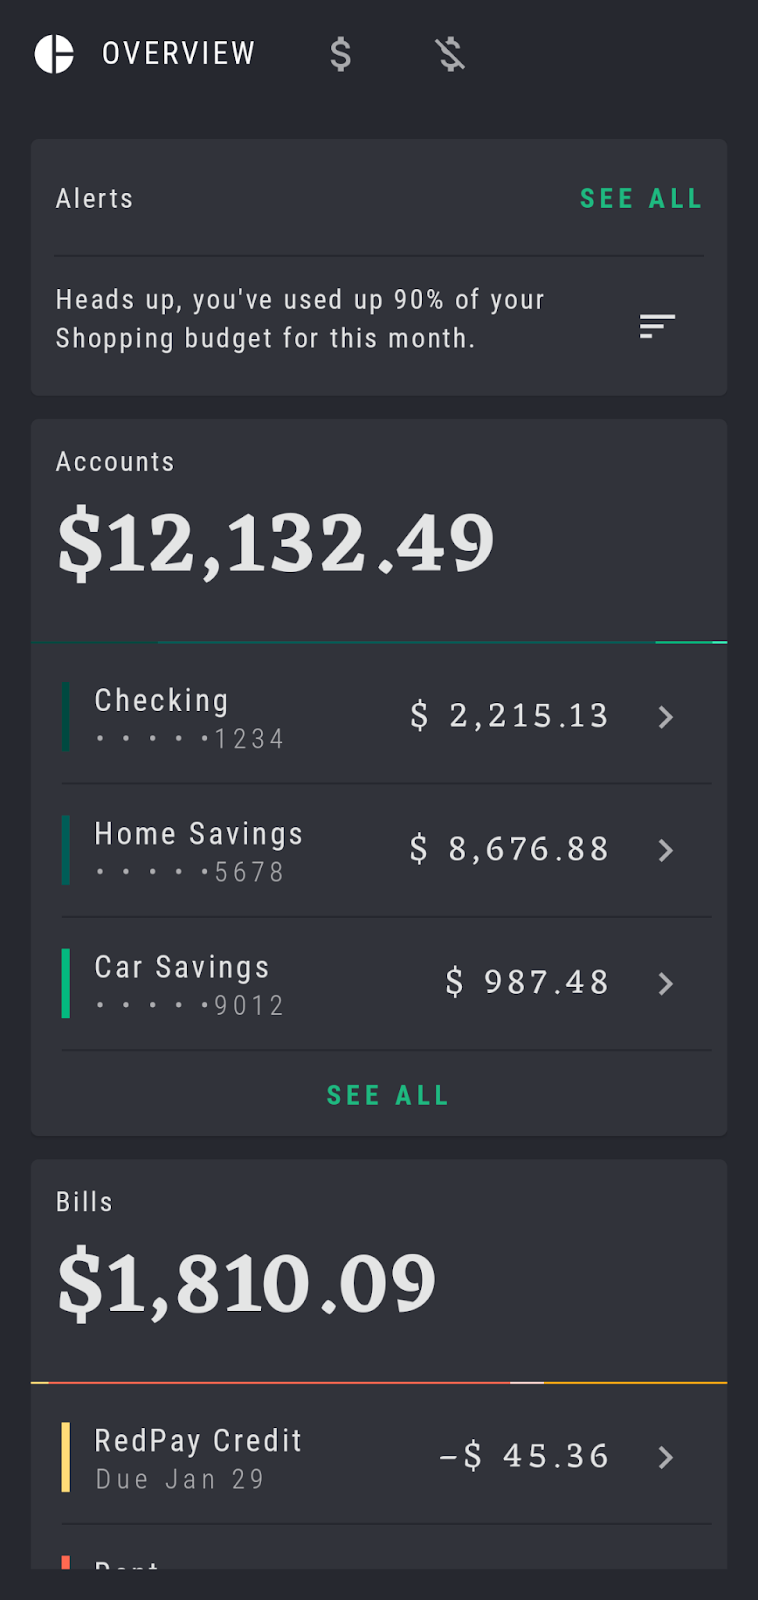
All three screens are built using composables. Take a look at RallyScreen.kt . The three screens are declared in this file. You will later map these screens to navigation destinations, with Overview as the start destination. You will also move the composables away from RallyScreen and into a NavHost . For now, you can leave RallyScreen untouched.
When using Navigation within Compose, routes are represented as strings. You can think of these strings as being similar to URLs or deep links. In this codelab we’ll use the name property of each RallyScreen item as the route, for example, RallyScreen.Overview.name .
Preparation
Go back to the RallyApp composable in RallyActivity.kt and replace Box containing the screen’s contents with a newly created NavHost . Pass in the navController we created in the previous step. The NavHost also needs a startDestination . Set it to RallyScreen.Overview.name . Also, create a Modifier to pass the padding into the NavHost .
Now we can define our nav graph. The destinations that the NavHost can navigate to are ready to accept destinations. We do this using a NavGraphBuilder , which is provided to the last parameter of NavHost; a lambda for defining your graph. As this parameter expects a function you can declare destinations in a trailing lambda. The Navigation Compose artifact provides the NavGraphBuilder.composable extension function. Use it to define navigation destinations in your graph.
For now, we’ll temporarily set a Text with the screen’s name as content of the composable. In the following step we’ll use the existing composables.
Now remove the currentScreen.content call from the Scaffold and run the app; you will see the name of your start destination and the tabs above.
You should end up with a NavHost similar to this one:
The NavHost now can replace the Box within Scaffold . Pass the Modifier into NavHost to keep the innerPadding intact.
At this point the top bar is not yet wired up, so clicking on the tabs won’t change the displayed composable. In the next step you’ll take care of this.
Fully integrate navigation bar state changes
In this step you’ll wire up the RallyTabRow and will get to delete the current manual navigation code. After you have finished this step, the navigation component will completely take care of routing.
Note: To make your code testable, we recommend not passing around the navController. In this codelab, you will be providing callbacks to enable navigating from a single point of responsibility.
Still in RallyActivity , you’ll find that the RallyTabRow composable has a callback when a tab has been clicked, called onTabSelected . Update the selection code to use navController for navigating to the selected screen.
This is all that’s necessary to navigate to a screen via the TabRow using navigation:
With this change, currentScreen will no longer be updated. This means that expanding and collapsing of selected items won’t work. To re-enable this behavior, the currentScreen property needs to be updated as well. Luckily Navigation holds on to the back stack for you and can provide you with the current back stack entry as a State . With this State you can react to changes to the back stack. You can even query the current back stack entry for its route.
To finish migrating the TabRow screen selection to Navigation, update currentScreen to use the navigation backstack like this.
At this point, when you run the app you’re able to switch between screens using the tabs but all that’s shown is the screen’s name. Before the screen can be displayed, RallyScreen needs to be migrated to navigation.
Migrate RallyScreen to Navigation
After you have completed this step, the composable will be completely decoupled from RallyScreen enum and moved into the NavHost . RallyScreen will only exist to provide an icon and title for the screen.
Open RallyScreen.kt. Move each screen’s implementation of body into the corresponding composables within your NavHost in RallyApp .
At this point you can safely remove the content function and body parameter and its usages from RallyScreen which will leave you with this code:
Run the app again. You’ll see the original three screens and can navigate between them through the TabRow.
Note: With the above changes, back navigation is now supported through the Navigation Component. Switching between the screens and then pressing the back button will result in popping the stack and bringing you to the previous destination.
Enable clicks on OverviewScreen
In this codelab, click events on OverviewBody were initially ignored. This means that the «SEE ALL» button was clickable, but did not go anywhere.
OverviewBody can accept several functions as callbacks to click events. Let’s implement onClickSeeAllAccounts and onClickSeeAllBills to navigate to relevant destinations.
To enable navigation when the «see all» button is clicked, use the navController and navigate to either the Accounts or Bills screen. Open RallyActivity.kt , find OverviewBody within NavHost and add the navigation calls.
Now it has become possible to easily change the behavior of click events for OverviewBody . Keeping the navController at the top level of your navigation hierarchy and not passing it directly into OverviewBody makes it easy to preview or test OverviewBody in isolation, without having to rely on an actual navController being present when doing so.
4. Navigating with arguments
Let’s add some new functionality to Rally! We’ll add an Accounts screen which shows details of an individual account when a row is clicked.
A navigation argument makes the route dynamic. Navigation arguments are a very powerful tool to make routing behavior dynamic by passing one or more arguments into a route and adjusting argument types or default values.
Note: A named argument is provided inside routes in curly braces like this
In RallyActivity add a new destination to the graph by adding a new composable to the existing NavHost with the argument Accounts/
The body of each composable destination receives a parameter (which we haven’t used so far) of the current NavBackStackEntry which models the route and arguments of the current destination. We can use arguments to retrieve the argument i.e. the name of the selected account, and look this up in UserData and pass it into the SingleAccountBody composable.
You also could provide a default value to use if the argument has not been provided. We’ll skip that because it’s not necessary here.
Your code should now look like this:
Navigate to SingleAccountBody
Now that the composable is set up with the argument, you can navigate to it, using the navController like this: navController.navigate(«$
Add this function to the onAccountClick parameter of OverviewBody ‘s declaration in NavHost and to onAccountClick of AccountsBody .
To keep things reusable you could create a private helper function like below.
When you run the app at this point, you’re able to click on each account and will be taken into a screen, displaying data for the given account.
5. Enable deep link support
In addition to arguments you can also use deep links to expose destinations in your app to third party apps. In this section you’ll add a new deep link to the route created in the previous section, enabling deep links from outside your app to individual accounts directly by name.
Add the intent filter
To start, add the deep link to the AndroidManifest.xml . You need to create a new intent filter for RallyActivity with the action VIEW and categories BROWSABLE and DEFAULT .
Then, using the data tag, add a scheme , host and pathPrefix .
This codelab will use rally://accounts/
You don’t need to declare the «name» argument in the AndroidManifest. It will be parsed as an argument by Navigation.
React to the deep link
Now you can react to the incoming intent from within RallyActivity .
The composable you created earlier to accept arguments can also accept the newly created deep link.
Add a list of deepLinks using the navDeepLink function. Pass the uriPattern and provide the matching uri for the intent-filter above. Pass the created deep link into the composable, using the deepLinks parameter.
Test the deep link using adb
Now your app is ready to handle deep links. To test that it behaves correctly, install a current version of Rally on an emulator or device, open a command line and execute the following command:
This will take you directly into the checking account and works for all account names in the app.
6. Extract finished NavHost
Now your NavHost is complete. You can extract it from the RallyApp composable to its own function and call it RallyNavHost . This is the one and only composable you should work directly with the navController . By not creating the navController within RallyNavHost , you can still use it to make tab selection, which is part of the higher structure, within RallyApp .
Also, make sure to replace the original call site with RallyNavHost(navController) to keep things working as intended.
7. Testing Navigation in Compose
Note: This codelab does not teach the Compose testing basics. To learn these, visit the Compose Testing docs or codelab. To learn more about advanced testing of navigation code, such as using the TestNavHostController , visit the Test Navigation guide.
From the beginning of this codelab we made sure not to pass the navController directly into any composables, but instead you passed callbacks as parameters. This means that all your composables are individually testable. But you also can test the entire NavHost , and that’s what this step is all about. To test individual Composable functions, make sure to check out the Testing in Jetpack Compose codelab.
Prepare the test class
Your NavHost can be tested in isolation from the Activity itself.
As this test still will run on an Android device you’ll need to create your test file in the androidTest directory under /app/src/androidTest/java/com/example/compose/rally .
Do this and name it RallyNavHostTest .
And then, to use the compose testing APIs, create the compose test rule like below.
Now you’re set to write an actual test.
Write your first test
Create a test function, which has to be public and annotated with @Test . In that function, you have to set the content that you want to test. Do this, using composeTestRule ‘s setContent . It takes a Composable parameter and enables you to write Compose code, as if you were in a regular app. Set up the RallyNavHost like you did in RallyActivity .
If you copied above code, the fail() call will ensure that your test fails until there is an actual assertion made. It serves as a reminder to finish implementing the test.
Note: To check that your NavHost is working correctly, the hierarchy will have to be composed first. This means that your assertions will have to be written outside of the setContent function.
You can verify that the correct screen is displayed using content description. In this codelab, content descriptions for «Accounts Screen» and «Overview Screen» are provided for you to use for test verification. Create a lateinit property in the test class itself, so you can use it in future tests as well.
For an easy start, check that the OverviewScreen is displayed.
Remove the fail() call, run the test again, and it passes. Rightfully so.
In each of the following tests, RallyNavHost will be set up the same way. So you can extract this into a function annotated with @Before to keep your code clean.
Navigating in tests
You can test your navigation implementation in multiple ways, by performing clicks on the UI elements that should lead to a new destination or by calling navigate with the corresponding route name.
Test via UI and test rule
As you want to test your app’s implementation, clicks on the UI are preferable. Write a test to click on the «All Accounts» button that leads to the «Accounts Screen» and verify that the right screen is displayed.
Test via UI and navController
You also can use the navController to check your assertions. To do this perform a click on the UI and then, compare the current route to the one you expect, using backstackEntry.value?.destination?.route .
Test via navController
A third option is to call navController.navigate directly — there’s one caveat here. Calls to navController.navigate need to be made on the UI thread. You can achieve this by using Coroutines with the Main thread dispatcher. And since the call needs to happen before you can make an assertion about a new state, it needs to be wrapped in a runBlocking call.
With this you can navigate around the app and assert that the route takes you where you expect it to.
To learn more about testing in Compose, check out the codelab linked in the «What’s next?» section of the following step.
8. Congratulations
Congratulations, you’ve successfully completed this codelab!
You added Navigation to the Rally app and now know the key concepts of using navigation in Jetpack Compose. You learned how to create a nav graph of composable destinations, add arguments to routes, add deep links, and test your implementation in multiple ways.
What’s next?
Check out some of these codelabs.
Reference docs
Except as otherwise noted, the content of this page is licensed under the Creative Commons Attribution 4.0 License, and code samples are licensed under the Apache 2.0 License. For details, see the Google Developers Site Policies. Java is a registered trademark of Oracle and/or its affiliates.
Источник


